Introduction
Is your precious data scattered across spreadsheets and text files, causing analysis headaches? Welcome to the wonderful world of relational databases, where MySQL reigns supreme! MySQL, the open-source relational database management system (RDBMS), has emerged as a favored option for developers worldwide. This open-source powerhouse helps you easily organize, manage, and retrieve your data.
If you’re rocking Ubuntu and itching to leverage the power of MySQL, fret no more! This beginner-friendly guide will equip you with the knowledge to install MySQL like a pro, transforming your Ubuntu system into a data management champion. We’ll break down the process into clear steps, using simple language and avoiding any confusing technical jargon. So, grab your metaphorical shovel because it’s time to ditch the data chaos and build a structured paradise!
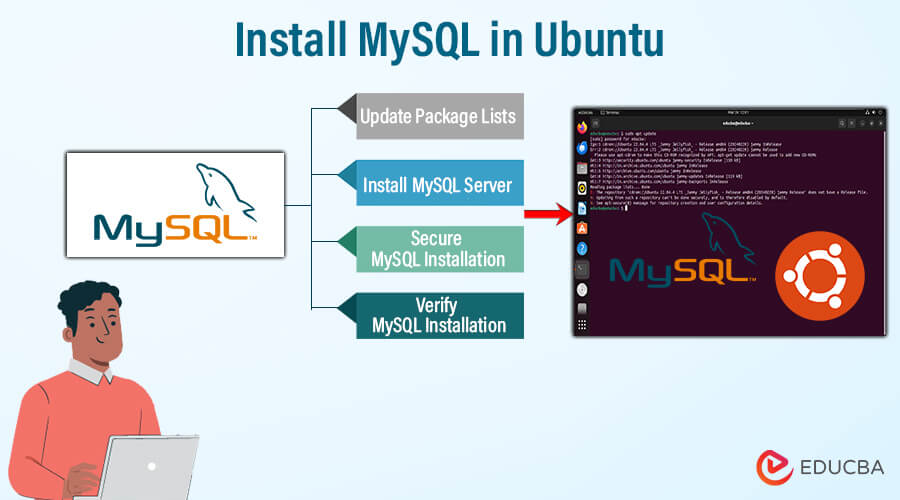
Table of Contents
Prerequisites
Before we begin with the installation of MySQL on your Ubuntu system, make sure you have the following prerequisites in place:
Ubuntu System
You should have a running instance of Ubuntu installed on your server or local machine. Various Ubuntu versions, including 18.04 LTS, 20.04 LTS, and newer releases, allow for easy MySQL installation.
Terminal Access
Ensure you have access to your Ubuntu system’s terminal or command-line interface. Follow the command-line instructions to install and configure MySQL.
Step-by-Step Installation
Now that we have ensured the prerequisites are met let’s proceed with the step-by-step installation of MySQL on your Ubuntu system.
Update Package Lists
Before installing MySQL, updating the package lists on your Ubuntu system is good practice to ensure you’re installing the latest software versions. Open your terminal and run the following command:
sudo apt update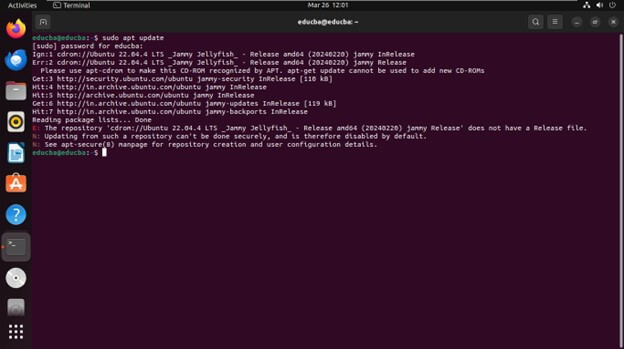
This command will update the packages that are available from the Ubuntu repositories.
Install MySQL Server
With the package lists updated, you can now install the MySQL server package. Run the following command in your terminal:
sudo apt install mysql-server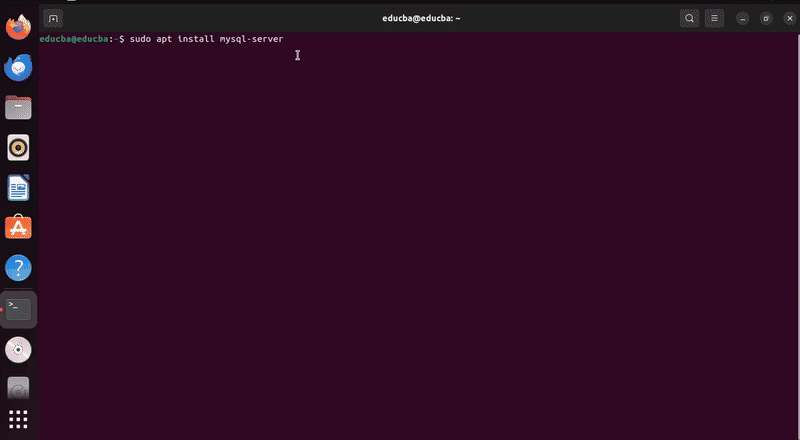
During installation, you need to type ‘Y’ and press Enter to confirm the installation.
Secure MySQL Installation
Once you have installed the MySQL server, MySQL recommends running a security script to secure your installation. A script will prompt you to set a root password, remove insecure default settings, and perform other security-related tasks. Execute the below command and follow the on-screen instructions:
Step 1: Setting a root password
When setting up MySQL, you must set a password for the root user. This password is necessary whenever you log in as the root user or perform administrative tasks.
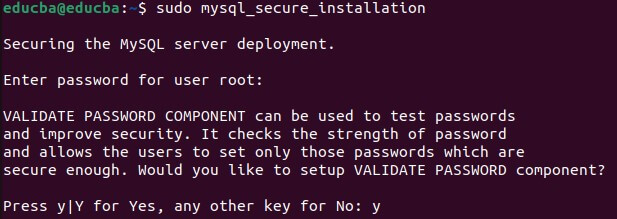
Press Y to proceed.

After pressing Y, you will have three options for selecting a password complexity.
- Low:
- Requirement: Length >= 8
- Description: This policy requires passwords to be at least eight characters long. While it sets a minimum length requirement, it does not enforce additional complexity rules beyond length.
- Medium:
- Requirement: Length >= 8, numeric, mixed case, and special characters
- Description: This policy imposes stricter requirements than the LOW policy. Passwords must still be at least eight characters long but must include at least one numeric character, one uppercase letter, one lowercase letter, and one special character. This ensures a higher level of complexity and security.
- Strong:
- Requirement: Length >= 8, numeric, mixed case, special characters, and dictionary file
- Description: The STRONG policy is the most stringent of the three. It requires passwords to meet the same criteria as the MEDIUM policy which is a minimum length of 8 characters, including numeric, mixed case, and special characters. Additionally, it introduces the use of a dictionary file. This means that passwords must not contain common dictionary words or easily guessable phrases, further enhancing security by preventing dictionary-based attacks.
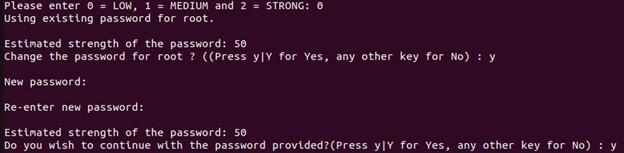
We select 0 for Low and change the root password.
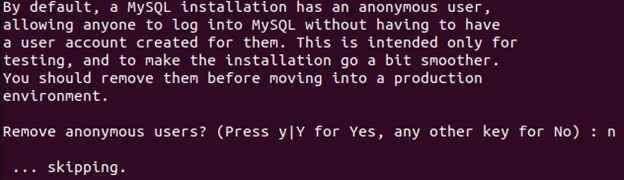
Step 2: Remove anonymous users
By default, during installation, MySQL creates accounts that allow users to connect to the server without providing a username or password. These are known as anonymous users.
Leaving anonymous users enabled poses a significant security risk. Anyone with access to your server’s network could connect to the MySQL database and view, modify, or delete its content.
Step 3: Disallowing remote root login
Disabling remote root login reduces the risk of unauthorized access to your MySQL server.
The root user in MySQL has full administrative privileges over the database server. By default, MySQL allows root users to connect from any machine (remotely) using the appropriate password. This can be convenient for managing servers from different locations but also introduces a security risk.

Step 4: Removing the test database
MySQL installations include the test database for demonstration purposes. You’ll have the option to remove the test database and its associated privileges. The test database is unnecessary in a production environment.

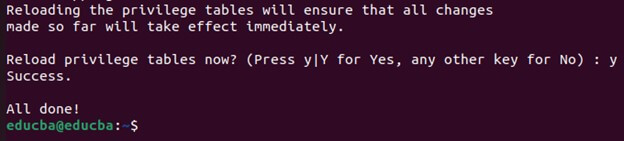
Step 5: Reloading privilege tables
The server’s behavior does not immediately reflect changes to user accounts or their privileges. For faster access, the server relies on cached copies of the privilege tables. You must reload the privilege tables to ensure the server uses the updated information.
Verify MySQL Installation
Once the installation and security setup are complete, you can verify that MySQL is running correctly on your Ubuntu system. Run the following command to check the status of the MySQL service:
sudo systemctl status mysql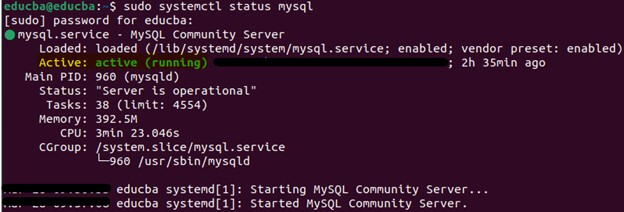
Or, you can also use the below command:
mysqld --version
Additional Configuration
Remote Access
Remote access allows clients from other systems to connect to your MySQL server. By default, MySQL is configured only to accept connections from the local host. Follow these steps to enable remote access:
sudo nano /etc/mysql/mysql.conf.d/mysqld.cnf
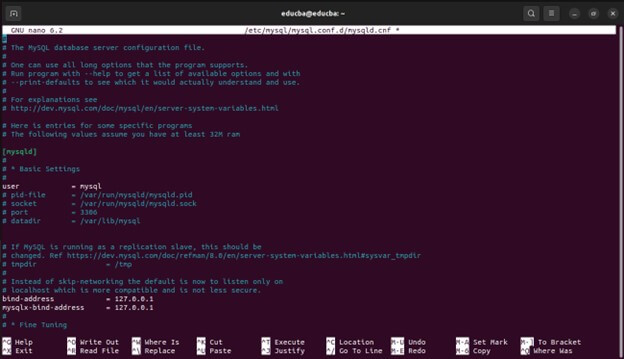
Locate the line that starts with bind-address
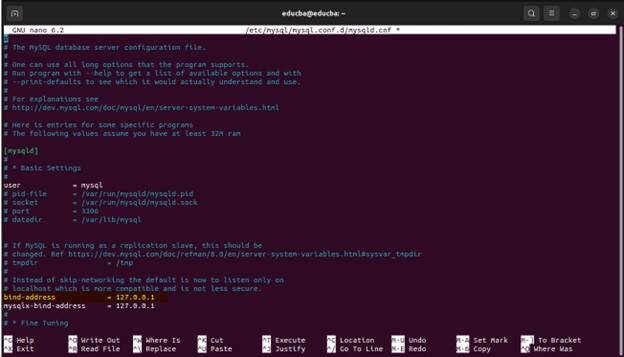
comment it out or replace localhost with the server’s IP address:

Save and close the file.
Restart the MySQL service for the modifications to take effect:
sudo systemctl restart mysqlOptionally, create MySQL users and grant appropriate privileges for remote access.
Now, clients from remote systems should be able to connect to your MySQL server.
Firewall Configuration
If you have a firewall enabled on your Ubuntu system, you’ll need to configure it to allow MySQL traffic. By default, MySQL communicates via port 3306. Follow these steps to enable MySQL traffic through the firewall:
Check if the UFW (Uncomplicated Firewall) is enabled:
sudo ufw status
If UFW is not enabled, you can skip this step. If it’s enabled, allow MySQL traffic:
sudo ufw allow mysqlReload the firewall to apply the changes
sudo ufw reloadVerify the changes
sudo ufw statusIt ensures that the firewall protects your MySQL server.
Using MySQL
Basic Commands
- Logging into MySQL: To log into MySQL from the terminal, use the following command:
mysql -u root -p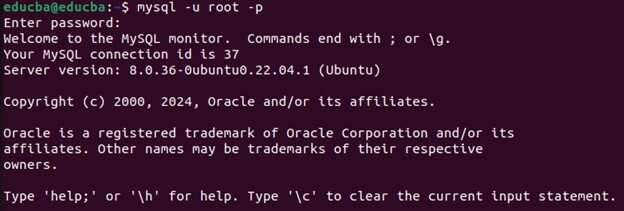
- Displaying Databases: Once logged in, you can display the list of databases with:
SHOW DATABASES;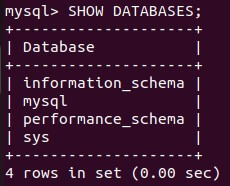
- Selecting a Database: To select a specific database for use, run
USE database_name;
- Creating a Database: To establish a new database, use:
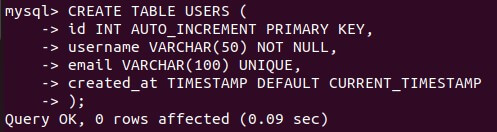
CREATE DATABASE database_name;![]()
CREATE TABLE users (
    id INT AUTO_INCREMENT PRIMARY KEY,
    username VARCHAR(50) NOT NULL,
    email VARCHAR(100) UNIQUE,
    created_at TIMESTAMP DEFAULT CURRENT_TIMESTAMP
);
- Querying Data: To retrieve data from a table, use:
SELECT *
FROM USERS![]()
- Updating Data: To update existing data in a table, use:
UPDATE USERS
SET email= ‘[email protected]’
WHERE username = ‘john_doe’
- Deleting Data: To delete data from a table, use:
DELETE FROM users
WHERE username = 'john_doe';![]()
Management Tools
1. phpMyAdmin
phpMyAdmin is a web-based administration tool for managing MySQL databases. It provides an intuitive interface for executing SQL queries managing databases, tables, and users. To install phpMyAdmin on Ubuntu, you can use:
sudo apt install phpmyadmin
2. MySQL Workbench
MySQL Workbench is a cross-platform visual database design tool that integrates MySQL database development, administration, design, and maintenance. It offers features like SQL development, database modeling, server administration, and data migration. You can download MySQL Workbench from the official MySQL website and install it on your Ubuntu system, or you can download it from the Ubuntu Software app.
Conclusion
You can easily install MySQL, a flexible and reliable open-source relational database management system, on Ubuntu. Ubuntu’s user-friendly interface and robust security features provide an ideal environment for hosting MySQL databases. You can have MySQL up and running on your Ubuntu system quickly. So, whether setting up a small-scale web application or managing enterprise-level data, MySQL on Ubuntu is a great choice to ensure seamless performance and stability.
Frequently Asked Questions (FAQs)
Q1. Do I need sudo privileges to install MySQL on Ubuntu?
Answer: Yes, sudo privileges are required to install packages and perform system-level configurations on Ubuntu. Make sure you have sudo privileges before proceeding with the installation.
Q2. Is it necessary to update package lists before installing MySQL?
Answer: Before installing MySQL, we recommend updating the package lists, which can be done by using the command “sudo apt update.” It is to ensure you install the latest versions of the packages available in the Ubuntu repositories.
Q3. How do I uninstall MySQL from Ubuntu?
Answer: To uninstall MySQL from Ubuntu, you can use the sudo apt remove MySQL-server command to remove the MySQL server package. Additionally, you can use sudo apt purge MySQL-server to remove MySQL and its configuration files.
Q4. Can I use Docker to install MySQL on Ubuntu?
Answer: Yes, you can use Docker to install and run MySQL in a containerized environment on Ubuntu. Docker provides a convenient way to deploy MySQL instances with isolation and portability.
Recommended Articles
We hope that this EDUCBA information on “Install MySQL in Ubuntu” was beneficial to you. You can view EDUCBA’s recommended articles for more information,
