Updated May 9, 2023
How to Install MySQL on Windows?
The following article presents instructions for installing MySQL, an open-source relational database system that stores and manages data. Michael Widenius and his team developed it, and Oracle Corporation maintains it. Businesses and individuals across the world widely use MySQL.
Steps To Install MySQL on Windows (Guide)
The steps to install MySQL are as follows:
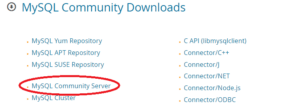
Step 1: To download and install MySQL on your local system, visit: https://dev.mysql.com/downloads/. Once the page opens, click on ‘MySQL Community Server.’
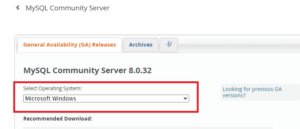
Step 2: On the next page, under the ‘Generally Available(GA) Releases’ section, select the ‘Operating System‘ from the dropdown menu. Microsoft Windows will always be the default option.
Step 3: Scroll down and click ‘Go to Download Page,’ as highlighted in the image below. Please do not download from the ‘Other Downloads’ section that is available below.
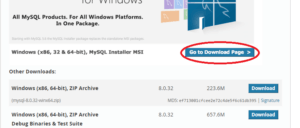
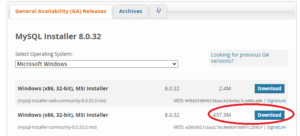
Step 4: It will redirect to another page, and one must click on the second option, i.e., Windows (X86, 32-bit) and MSI Installer (437.3 MB). The first option (2.4 MB) should be avoided, as it is a web-based installer.
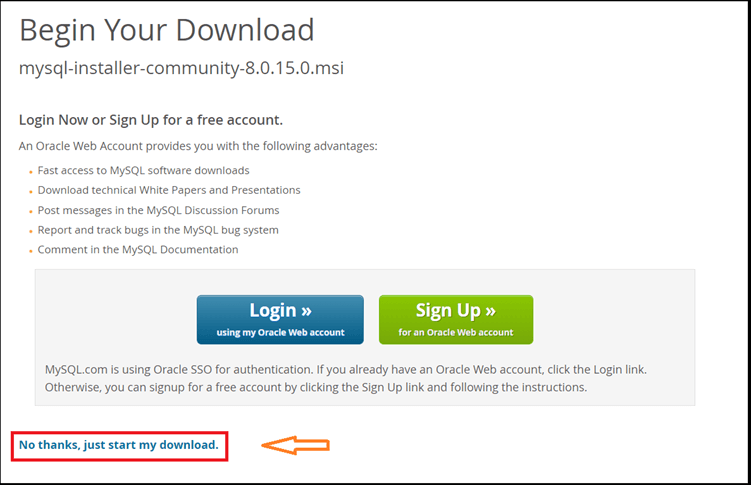
Step 5: It will again redirect to another page with three options.
- One can click on Login’ if one has an Oracle account.’
- Alternatively, one can click the ‘Sign Up’ option and fill in the necessary details.
- Below both, a third option will allow downloading without any registration. Click on ‘No thanks, just start my download,’ and the downloading process will resume soon.
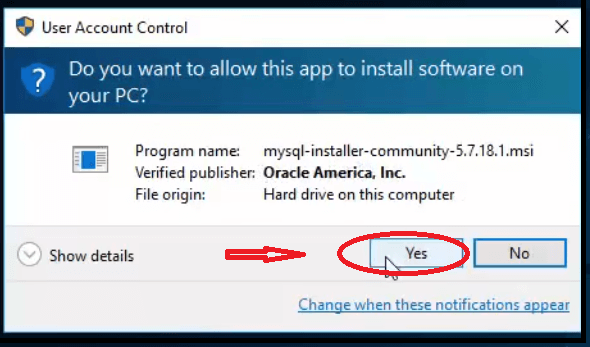
Step 6: Once the download is complete, click on the file. A pop-up will appear, and one must click ‘Yes’ to begin the installation process.
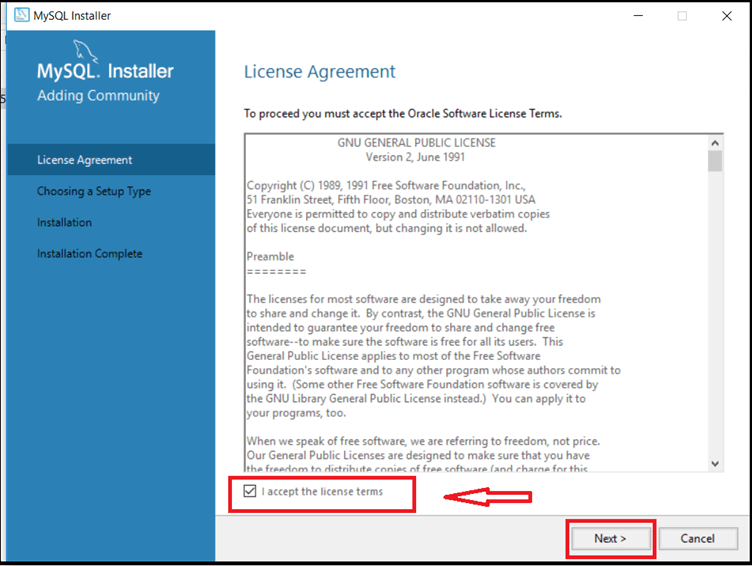
Step 7: The installer will present the ‘License Agreement.’ Tick the ‘I accept the license terms’ box and proceed by clicking on ‘Next.’
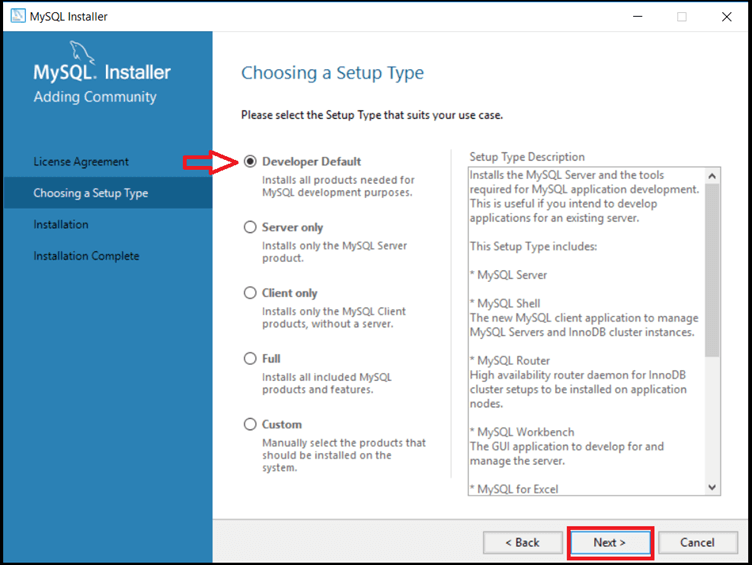
Step 8: Select the ‘Developer Default’ option and click the ‘Next’ button, as shown below.
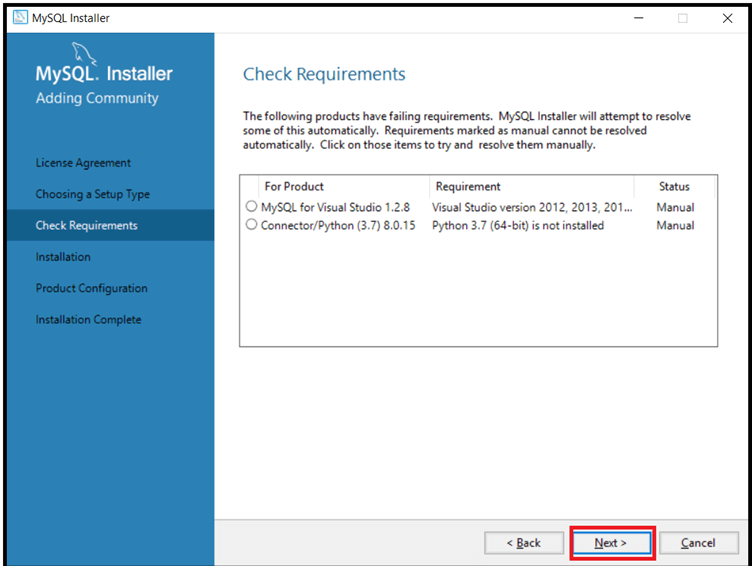
Step 9: Click the Next button in the ‘Check Requirements’ window.
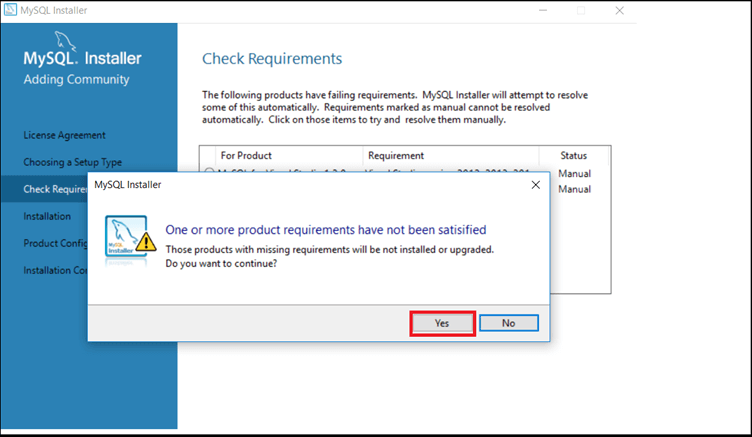
Step 10: A warning message will appear, but one must click ‘Yes’ and proceed.
Step 11: Now click on the ‘Execute’ button.
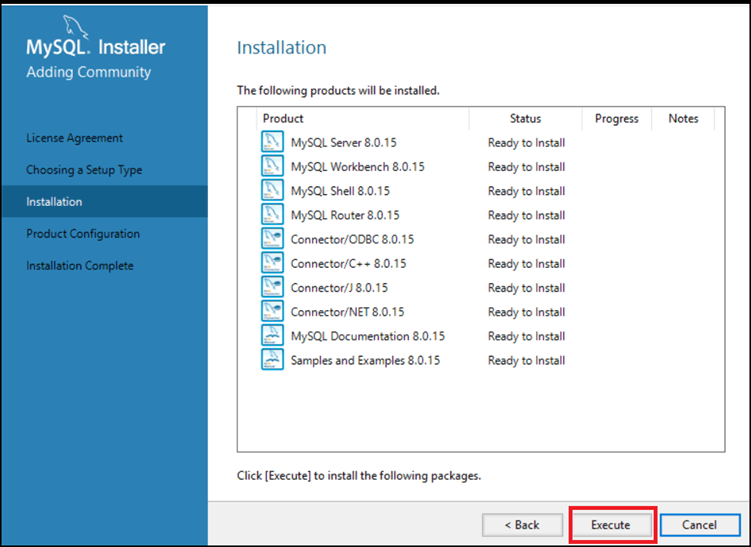
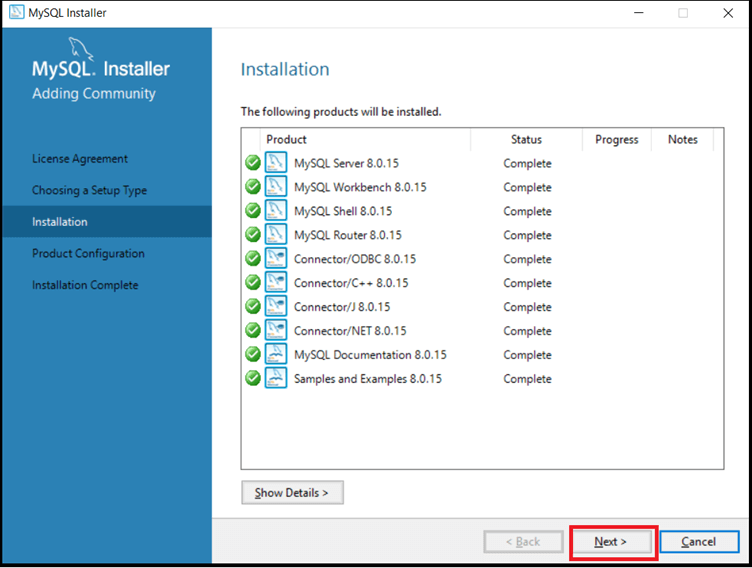
Step 12: Executing all of the above products will take some time. Keep checking the status, and once completed, click on the ‘Next’ button.
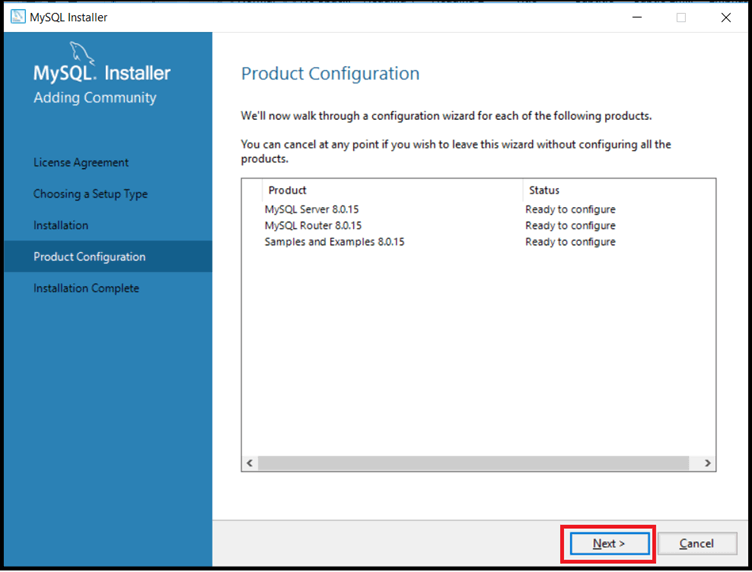
Step 13: Click ‘Next’ in the ‘Product Configuration’ window again.
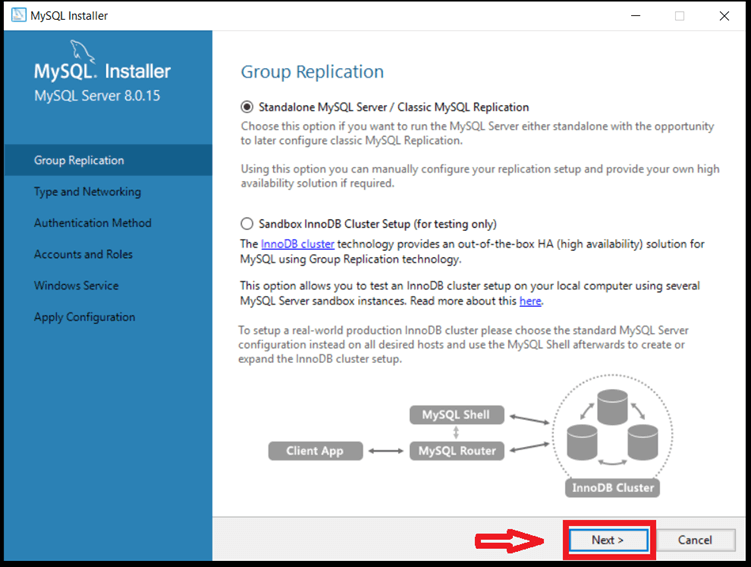
Step 14: In the Group Replication window, click on the ‘Standalone MySQL Server/Classic MySQL Replication.’ Proceed to click on the ‘Next’ button.
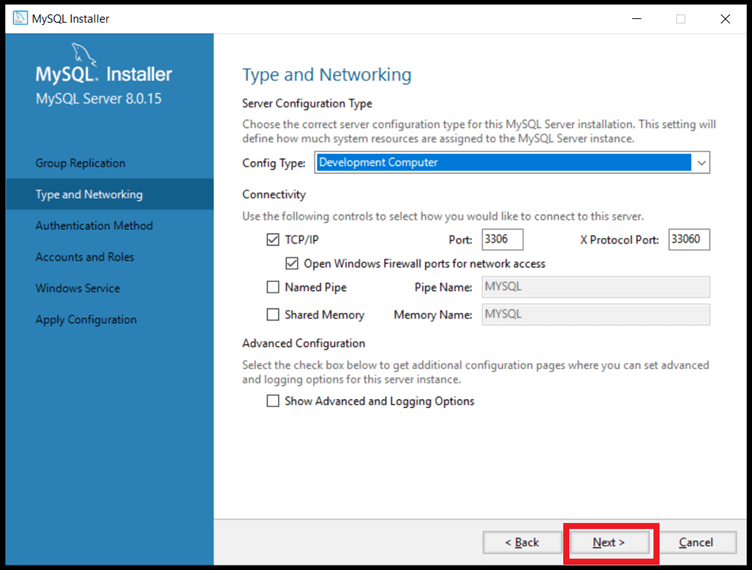
Step 15: Click ‘Next’ in the ‘Type and Networking’ window. Do not make any changes therein.
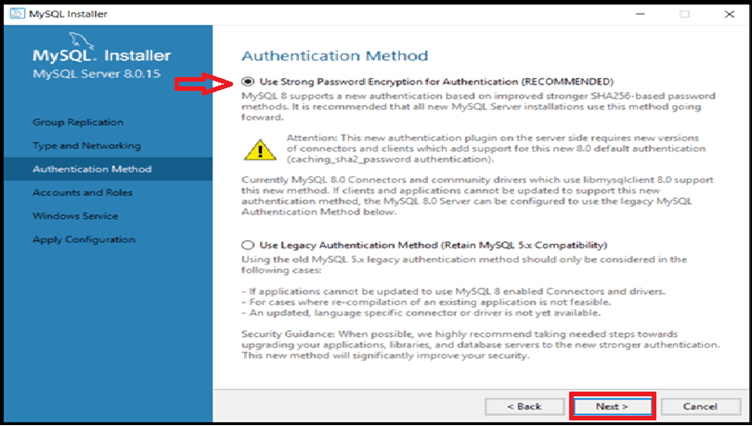
Step 16: In the ‘Authentication Method’ window, select the ‘Use Strong Password Encryption for Authentication’ option and proceed to click on the ‘Next’ button.
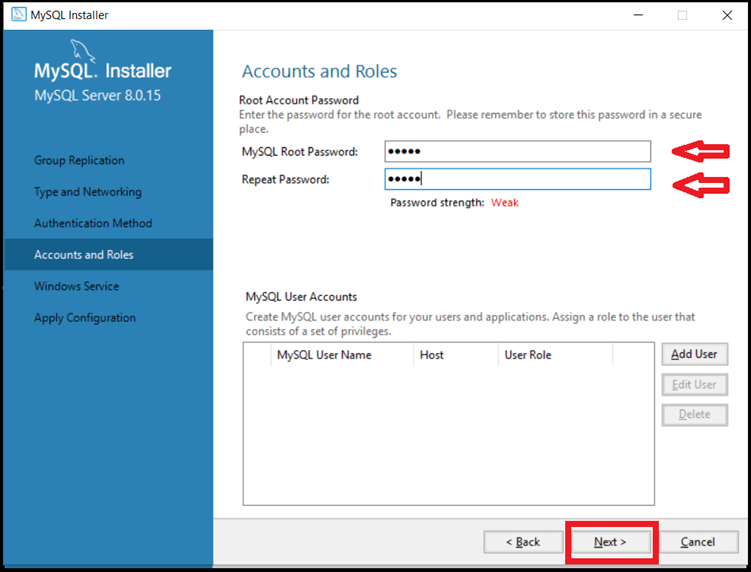
Step 17: Next, type the ‘MySQL Root Password’ and repeat it. The password will be required when opening MySQL. Click on the ‘Next’ button after that.
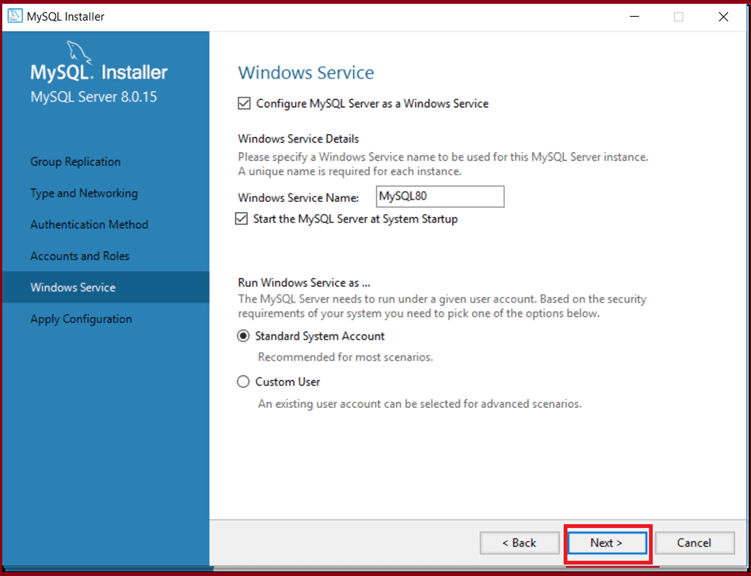
Step 18: Again, click on the ‘Next’ button.
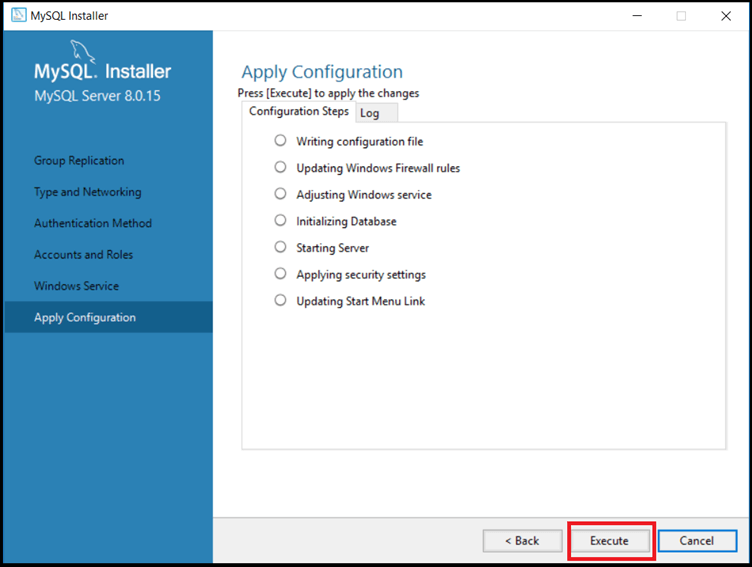
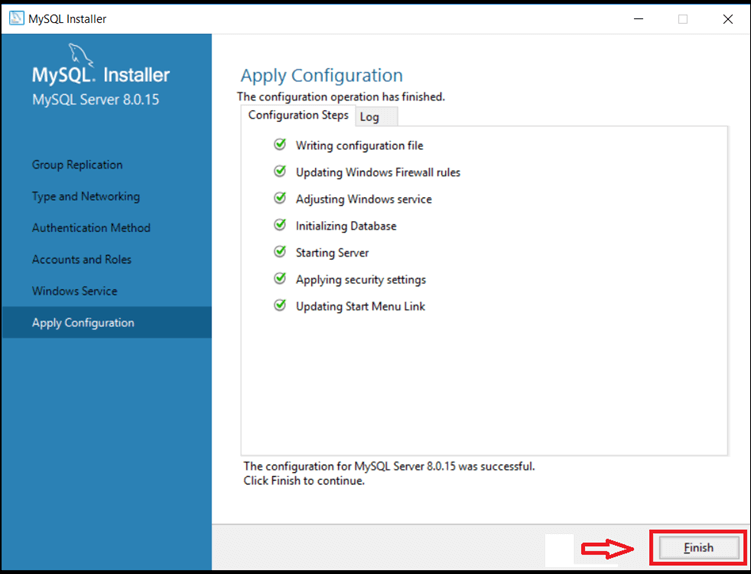
Step 19: The ‘Apply Configuration’ window will appear. Click on the ‘Execute’ button.
Step 20: Now, click on the ‘Finish’ button.
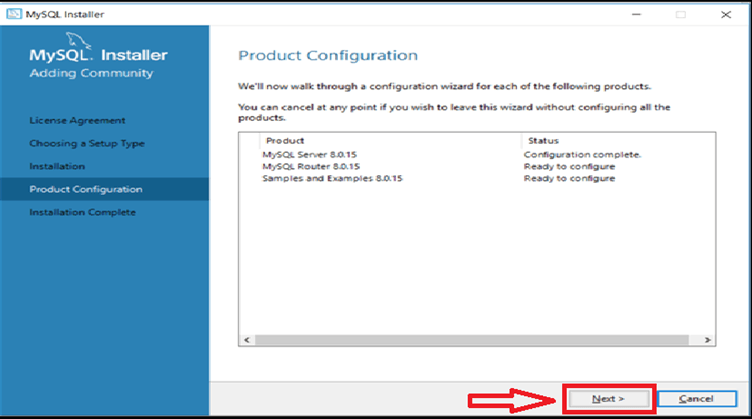
Step 21: The ‘Product Configuration’ page will appear. Click on the ‘Next’ button.
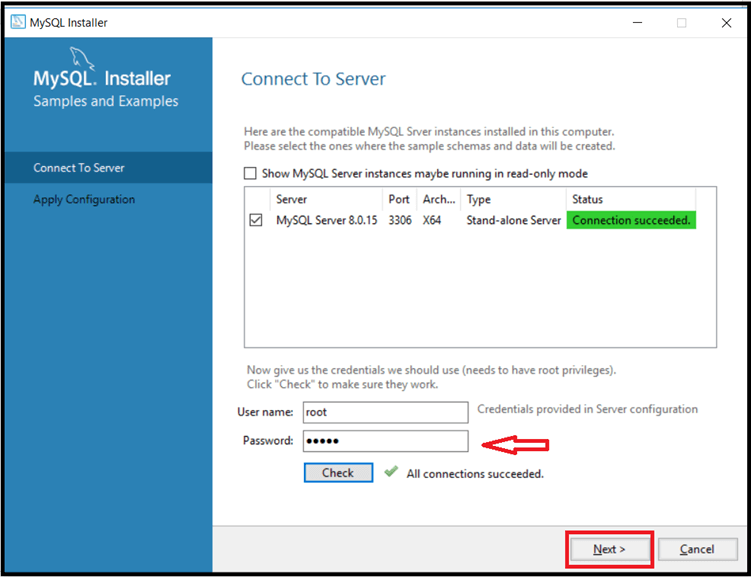
Step 22: In the next window, keep the ‘User name’ as “root” by default. Type the ‘Password’ which you had set earlier. When clicked on ‘Check,’ it will test whether the server is connected and whether the installation has been completed successfully. Proceed to click on ‘Next.’
Step 23: Some systems require more steps to configure other installations supporting MySQL. In that case, click on the ‘Next’ and ‘Execute’ buttons; to avoid making any changes. Some systems will automatically configure settings. Finally, click on the ‘Finish’ button.
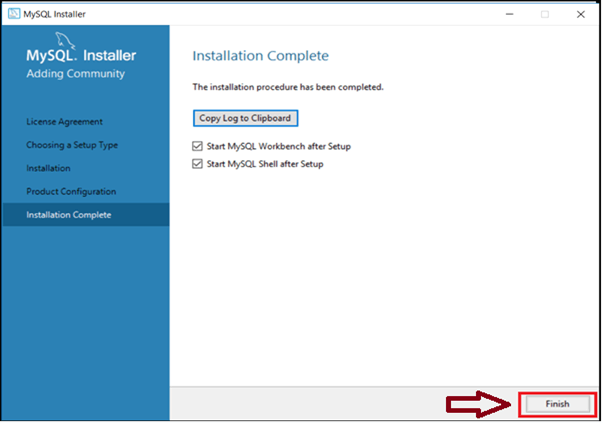
Step 24: The MYSQL shell and MySQL Workbench will open once the installation is complete. Please close both and restart your system.

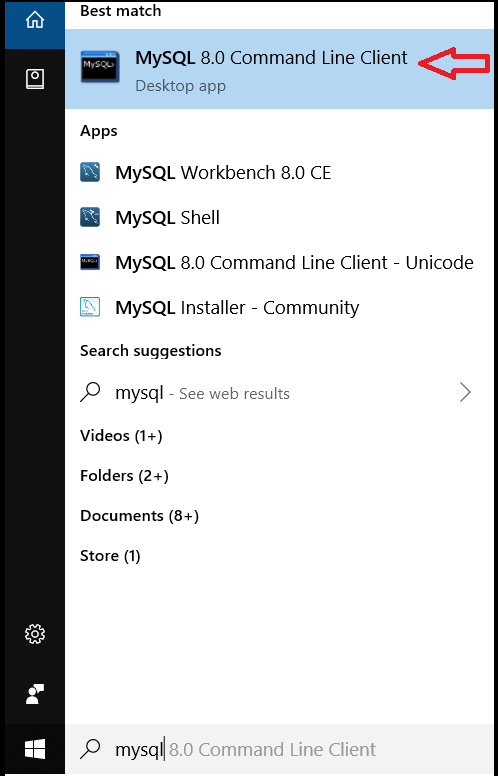
Step 25: Go to the ‘Start’ menu and search for ‘MySQL.’ Multiple files related to MySQL will appear but look for only ‘MY SQL Command Line Client‘ and ‘MySQL Workbench.’ Both options have their respective versions (in the image below, it is 8.0). It may differ from user to user and version to version, but the steps would be the same. Click on ‘MY SQL Command Line Client’ shown below:
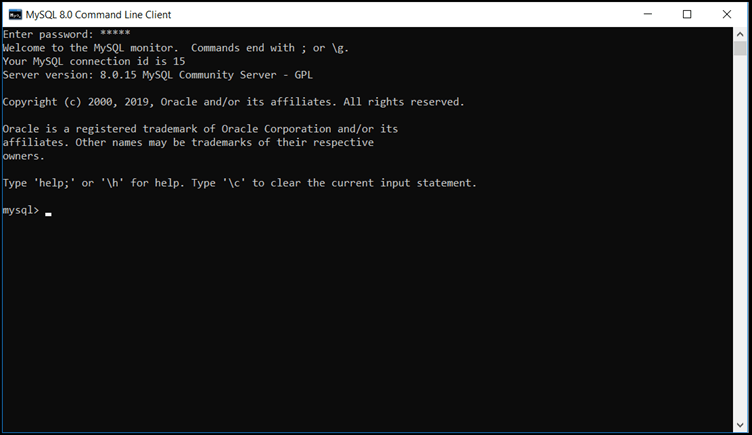
Step 26: It will initiate the ‘MySQL Command Prompt’ and ask for the ‘Root Password’ (entered during the installation). Type the password and press ‘enter.’ After authentication, it will start with ‘mysql>‘ as shown below.
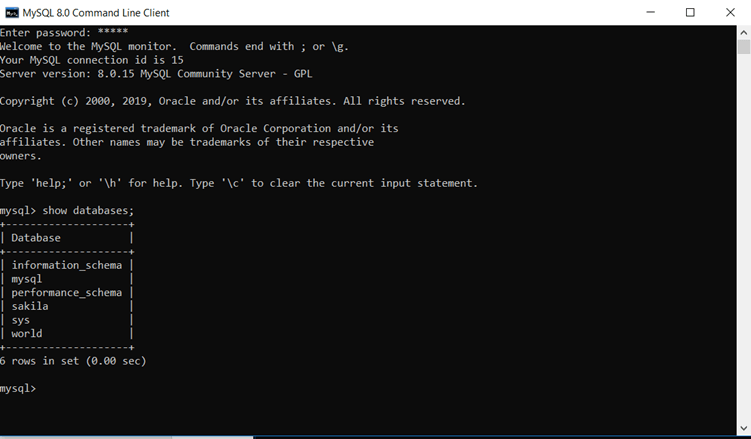
Step 27: Check whether MySQL works and how many databases it contains.
Upon typing the ‘show databases’ command:
- It will show all available databases in MySQL, as displayed below. This indicates everything is working fine.
- It will show, here, that it has six databases available, i.e., information_Schema, mysql.
Step 28: To close MySQL, please type the ‘exit’ command, as shown below.

Recommended Articles
We hope that this EDUCBA information on “Install MySQL” was beneficial to you. You can view EDUCBA’s recommended articles for more information.
