Introduction to Loft in AutoCAD
Auto Cad is 2d and 3d drawing computer-aided software which Autodesk developed. We have a different type of command in this software for making our drawing work easy. The loft is one of the commands through which we can make a curved 3d shape by guiding 2d shape with this command; you will understand it throughout this article. Here in this article, we will understand this command and look at its different parameters through which we can use it on any 2d shape to make 3d curved shape. So let us start our discussion.
How to Use Loft in AutoCAD?
We can understand Loft in AutoCAD in a few simple steps in a very exciting manner, but before starting our learning in this software. Let us look at the working screen of this software so that there will be no problem during our learning throughout this article.
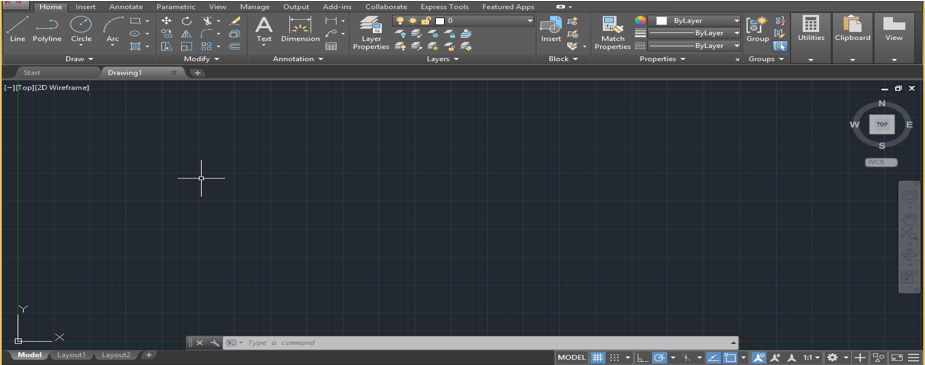
Step 1: At the top of the working screen there is a ribbon of different tabs which have a different type of commands for making our work easy such as Home, Insert, Annotate and many others, below this, we have working window area in which you can see your current drawing or work, this working window also has a navigation cube through which you can see your drawing from different view option such as Top view, Front view, and side view, below this window we have some navigation tools for handling different type of tool during our work.
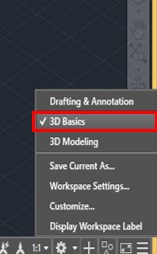
Step 2: Now go to the bottom right end of this software and make the ‘3D Basics’ option ‘On’ from the list of workspace settings.
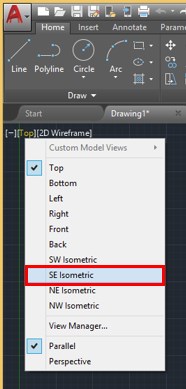
Step 3: Now go to the top left corner on the working window, then click on the Top option in the bracket and choose the southeast view option that is the SE Isometric option from the list.
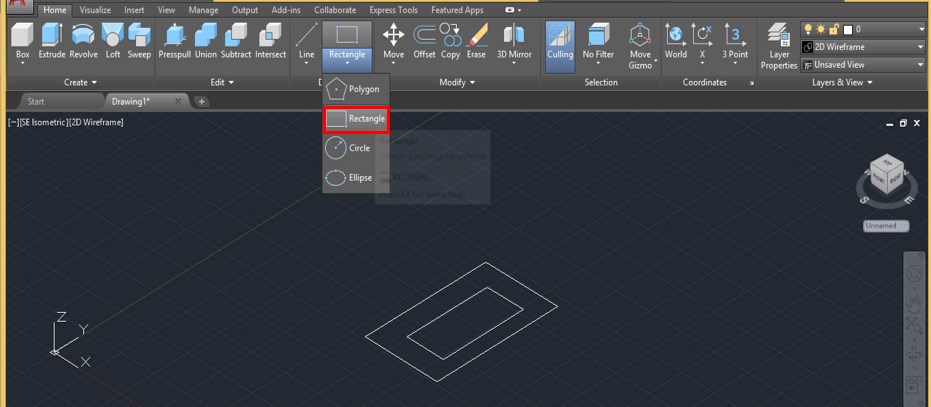
Step 4: Now, take the Rectangle command from the Draw menu of the Home tab by click on it and draw two rectangles of different dimensions like this.
Step 5: Or you can type REC from the keyboard and press the ‘Enter’ button of the keyboard for having rectangle command, then draw these two rectangles.
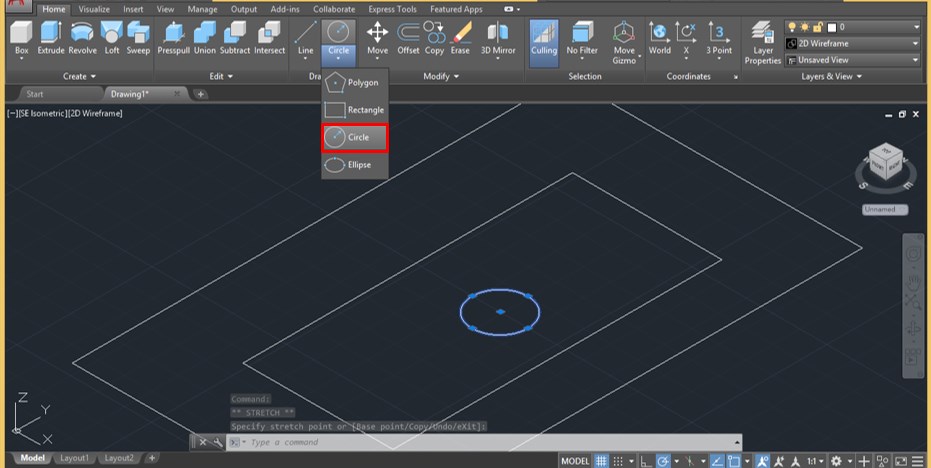
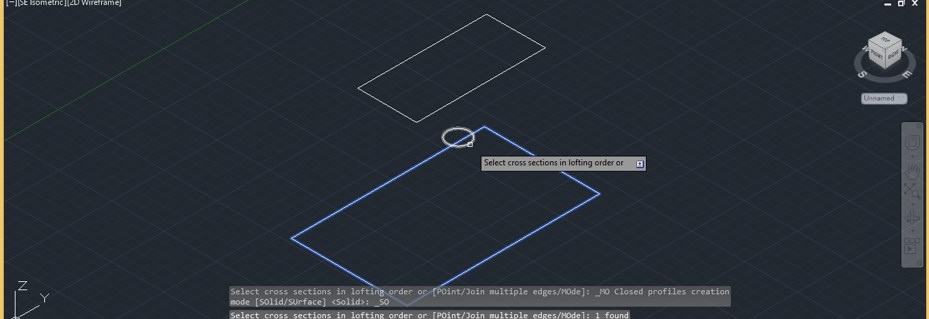
Step 6: Now, let us have a circle command. For the circle, the command goes to the Draw menu of the Home tab and click on the icon of circle command with the mouse button, then draw a circle of any radius at the center of these two rectangles like this.
Step 7: Or you can press the C key on the keyboard, then press the enter key for having circle command, then draw this circle.
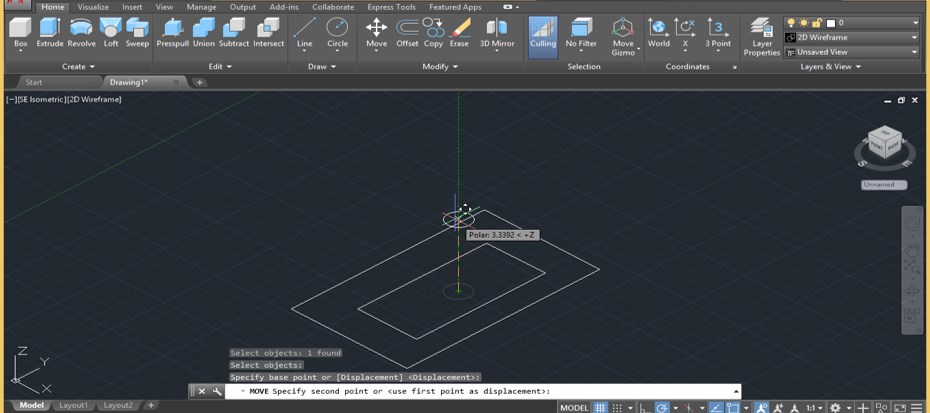
Step 8: Now, take the Move command from the Modify menu of the Home tab by click on it.
Step 9: Now, this command will ask you to select the object you want to move to select this circle by clicking on it and pressing the enter button on the keyboard.
Step 10: Now specify the point around which you want to move this circle. I will click on the center point of this circle and drag it in an upward direction at some height for moving it like this.
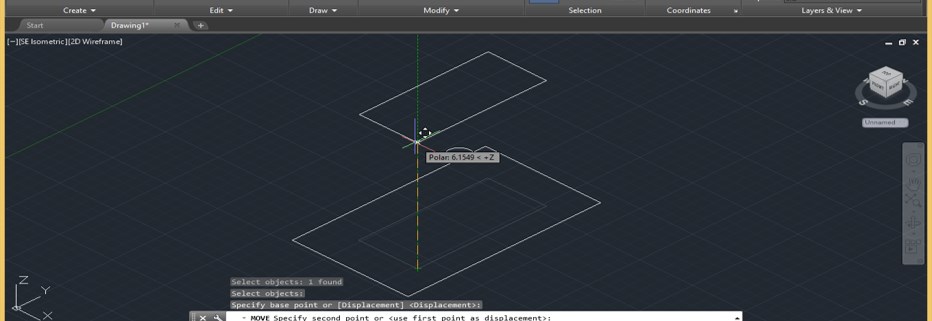
Step 11: Again, press the ‘Enter’ button of the keyboard to repeat the Move command and then select the inner rectangle by click on it then press enter button of the keyboard. Now drag it in an upward direction at the height above to circle like this.
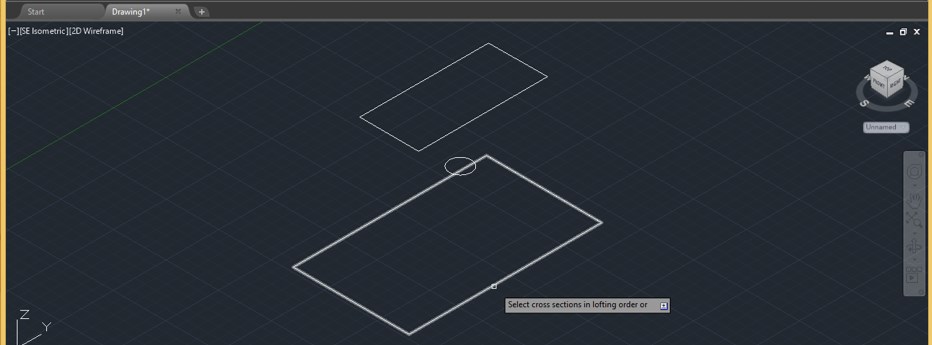
Step 12: Now go to the ‘Create’ menu of the Home tab and click on the icon of the Loft command.
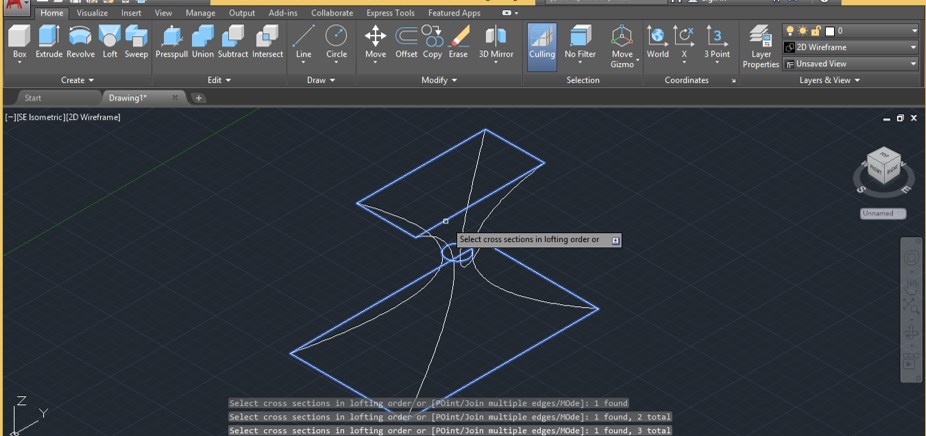
Step 13: Now select these shapes one by one in sequence.
Step 14: I will select the bottom rectangle first and then circle, then the upper rectangle.
Step 15: Once you select them in sequence Loft command will make a 3d shape like this. This is a Wireframe view of this object.
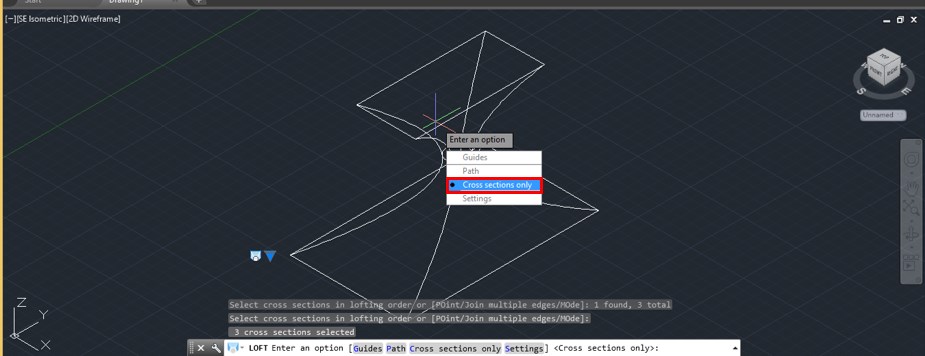
Step 16: Now press the ‘Enter’ button on the keyboard. Once you press the ‘Enter’ button, a list of loft command will open. Choose the ‘Cross Only option’ from the list. It means you want to apply the loft command in the cross-section of this object.
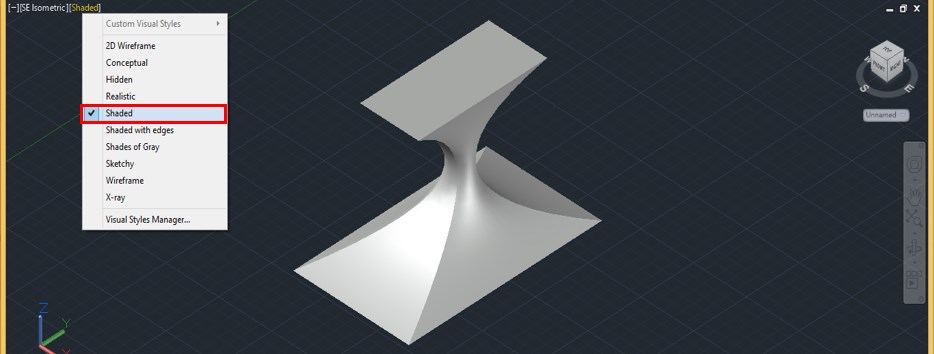
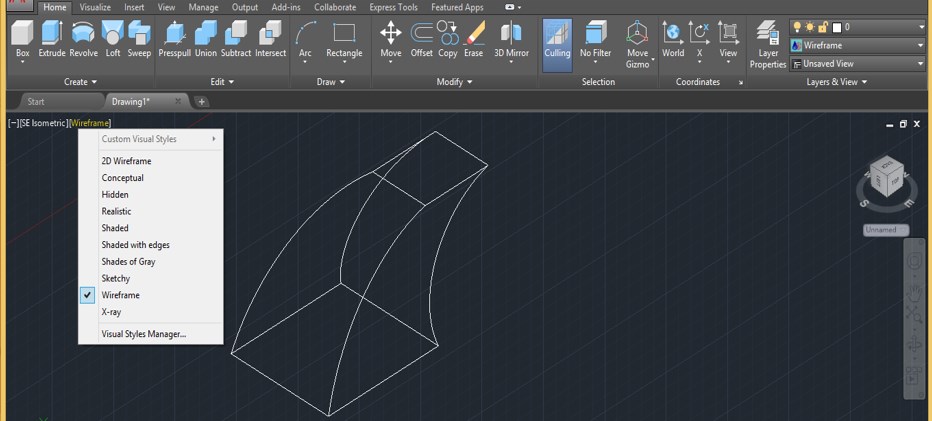
Step 17: Now click on the 2d Wireframe option and select the Shaded option from the list for seeing the Shaded view of this object like this.
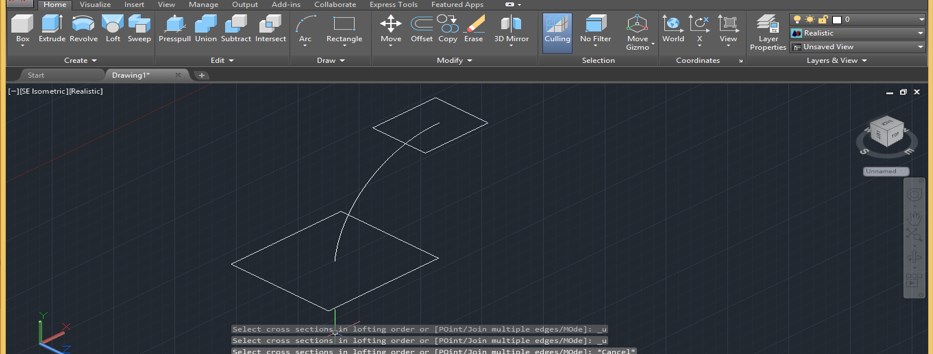
Step 18: Now I have taken this type of drawing, we will apply the Loft command to this drawing.
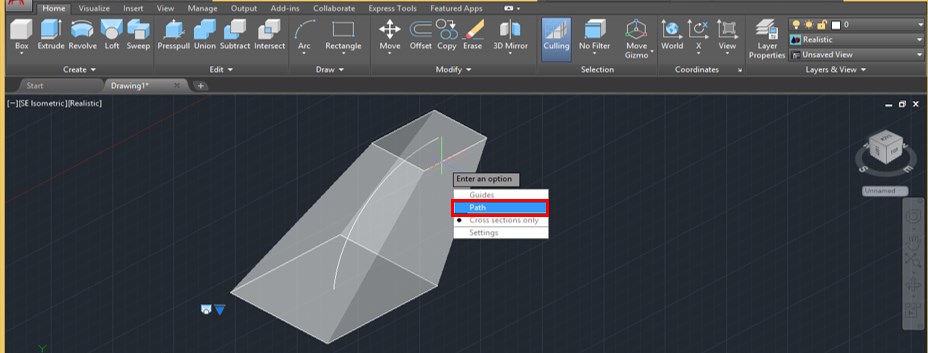
Step 19: Take the Loft command and select the bottom rectangle, then the upper rectangle in sequence. Now press the ‘Enter’ button on the keyboard. Now click on the Path option of an opened list of loft command, then press enter button of the keyboard.
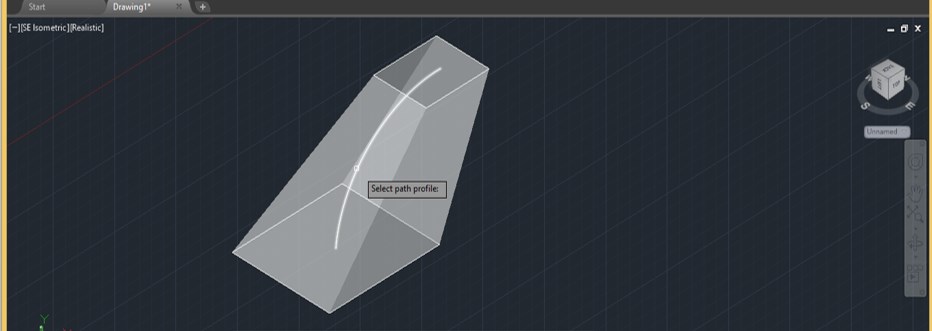
Step 20: Once you press the ‘Enter’ button of the keyboard, it will ask you to specify the path around which you want to apply the loft command, so I will click on this arc because I want loft around this arc.
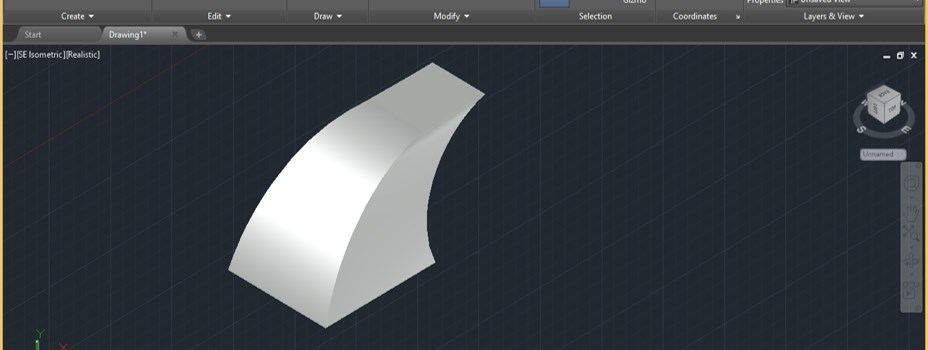
Step 21: Once you click on this, arc loft will make this type of 3d shape.
Step 22: You can see the wireframe view of this object.
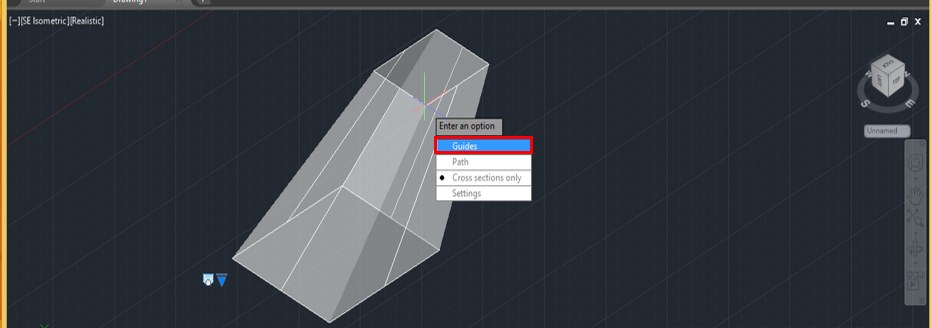
Step 23: Now again, take loft command and select bottom rectangle then upper rectangle, then press enter button of the keyboard. Now click on the Guides option of the opened list.
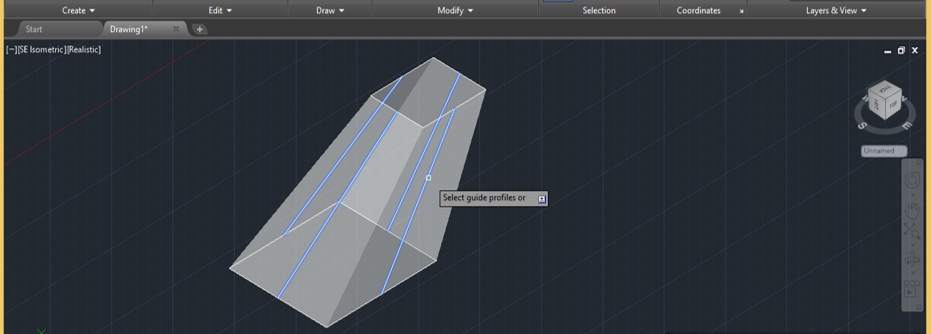
Step 24: Now, select these lines one by one with a mouse cursor because I want to guide loft command to work around these lines.
Step 25: Once you make click on these lines loft command will make a shape like this.
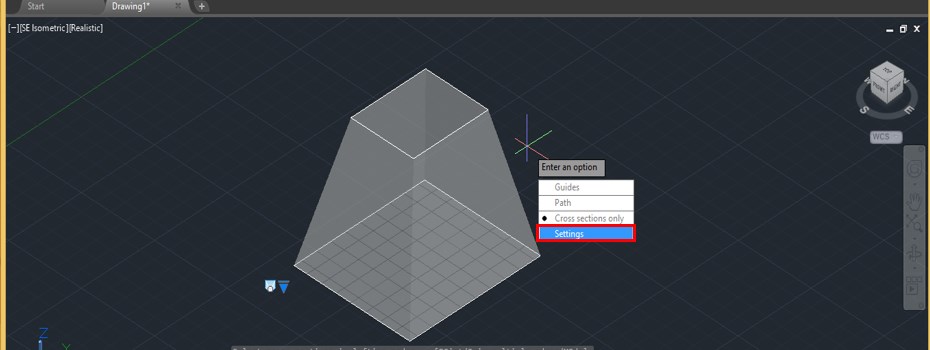
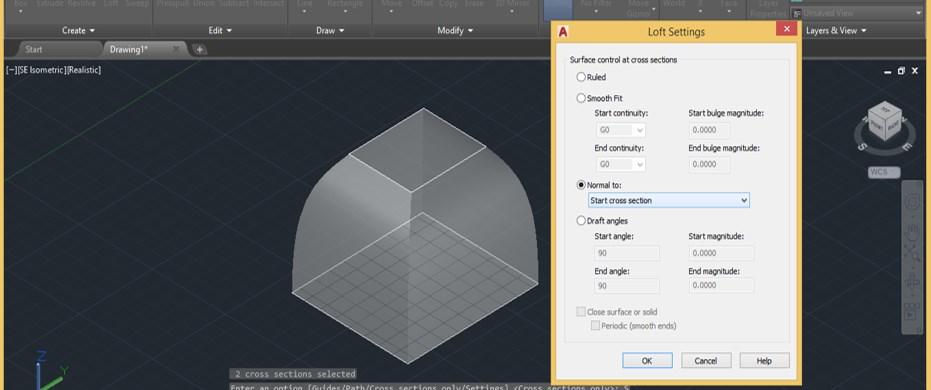
Step 26: Now, let us take a look at the settings option of this loft command. Take a Loft command and select shape as we did in previous, then press the ‘Enter’ button of the keyboard, then click on the Settings option of the opened list.
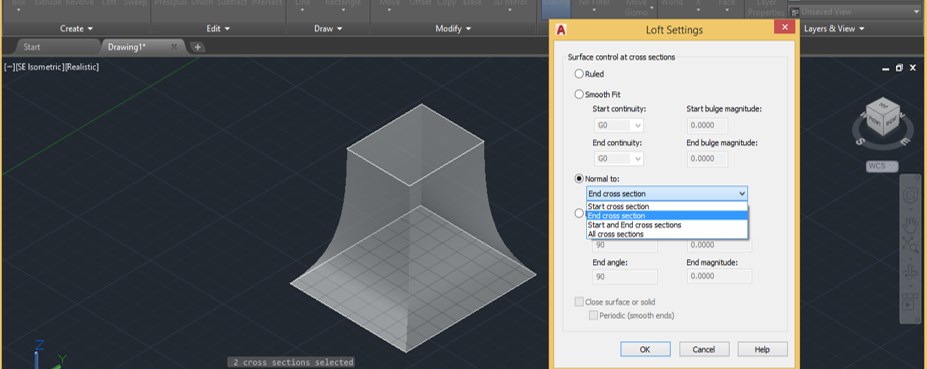
Step 27: Now, a Loft settings box will be open. Here in the ‘Normal to’ option, we have some sub-option; if I select the ‘Start cross-sections’ option, then our loft shape will look like this.
Step 28: You can see the variation by selecting these options one by one.
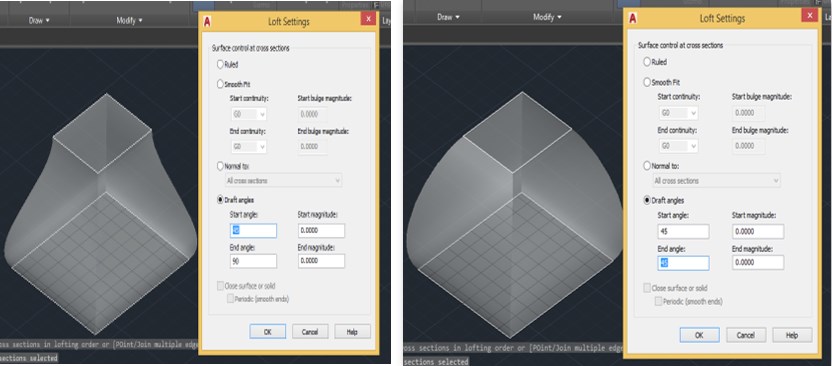
Step 29: You can change the Draft angles from the Draft Angle option and can see the changes.
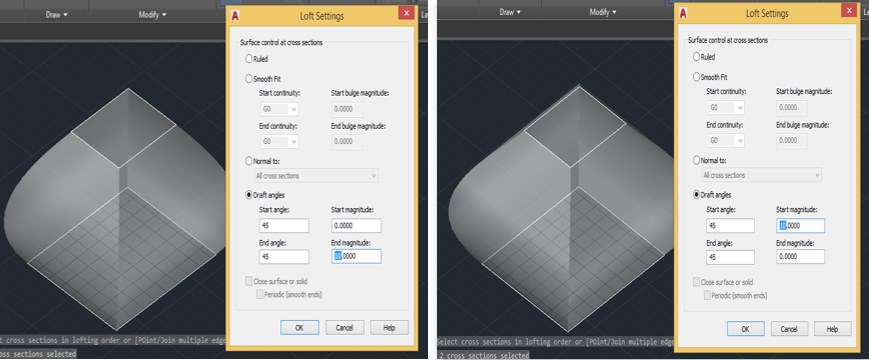
Step 30: You can also change the Magnitude value of Draft for seeing the change in this shape.
In this way, you can use the Loft command in this software for getting your desired shape in your Auto Cad drawing work.
Conclusion
Now, after going through this article, you can understand ‘what is Loft command in Auto Cad software’ and ‘how you can handle the parameters of this loft command’ for getting the best result in your Auto Cad drawing. You can make good use of this command in your work after practicing on it.
Recommended Articles
This is a guide to Loft in AutoCAD. Here we discuss the introduction and how to create Loft in AutoCAD in an easy, step-by-step manner. You can also go through our other related articles to learn more –

