
Introduction to SketchUp AutoCAD
Auto Cad is 2d and 3d computer-aided designing software that we use for a different type of branch of engineering. We use it for mechanical engineering, civil engineering, electrical engineering, and some others. In architectural work, we use it for making a layout plan of the floor also. If we talk about Sketchup software, then it is software in which we make a 3d model of different type of layouts. Here in this article, we will discuss how we can import an Auto Cad file in SketchUp software and make a 3d model of that file. So let us start our discussion about this topic and get knowledge about it.
How to Import AutoCAD file in SketchUp?
We can use an auto cad file in Sketchup software very easily and make a 3d model of that file. Making 3d modeling in Sketchup software is very easy. If you want to use Sketchup software for learning purpose, then you can directly use it on the website without downloading it, but if you want to have it on your computer, then download it from its official website and enjoy it in your work.
Step 1: So let us now start our learning about the steps of importing Auto Cad file in SketchUp software.
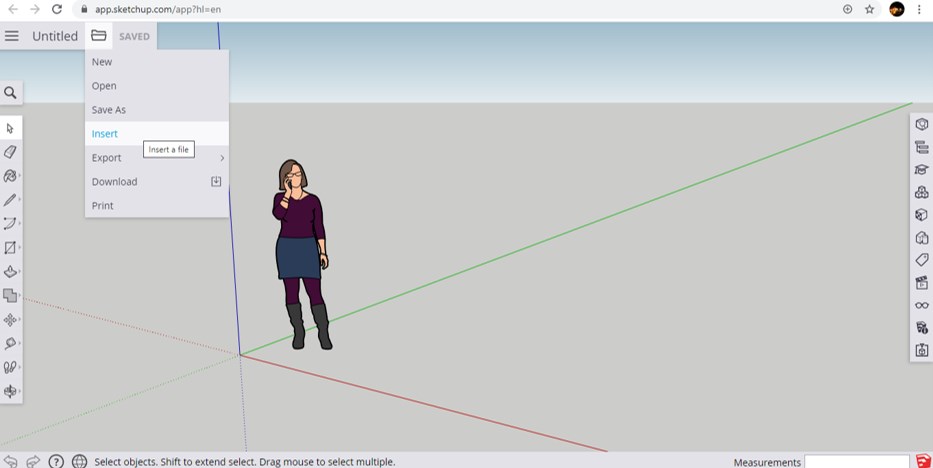
Step 2: For importing an auto cad file in SketchUp software, go to this folder icon and click on it with the mouse button. Once you click on this folder icon, a drop-down list will be open. Click on the Insert option of this list for importing the file in this software.
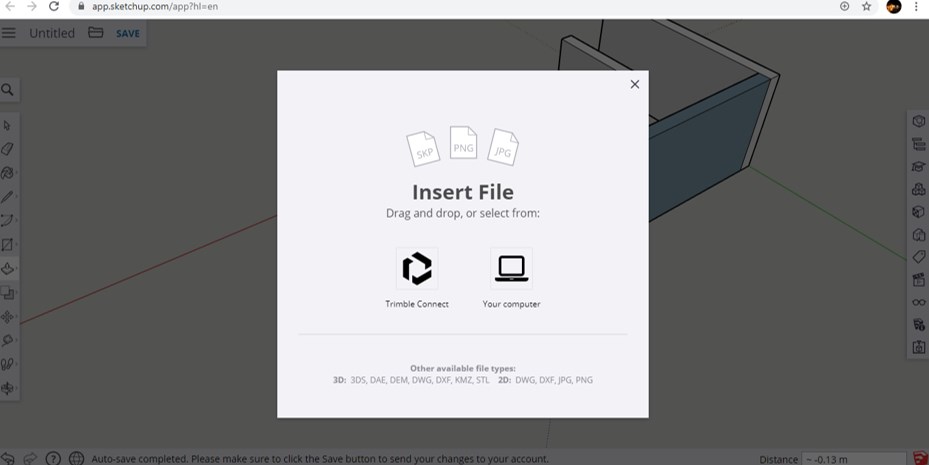
Step 3: Once you click on the Insert option, this type of Insert dialog box will again open. Here choose the ‘Your Computer’ option by click on it for importing any file from your personal computer.
Step 4: Now, a dialog box will be open when you click on the Computer icon to choose the auto cad file you want to import into this software. Now go to that folder of your personal computer where you have saved your auto cad file, then select it by click on it. Now click on the Open button of this dialog box for.

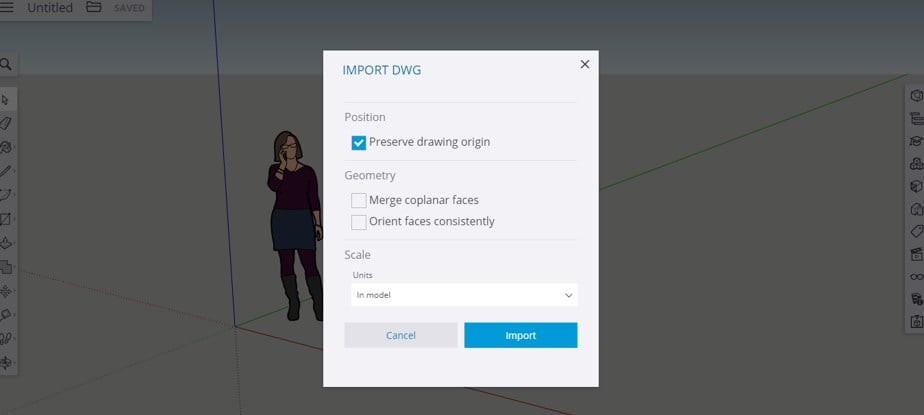
Step 5: Now, it will show you some importing parameters. Make a tick mark ‘On’ in the ‘Preserve drawing origin’ option for specifying the origin point of your drawing in this software and then click on the Import button for importing your auto cad file in SketchUp software.
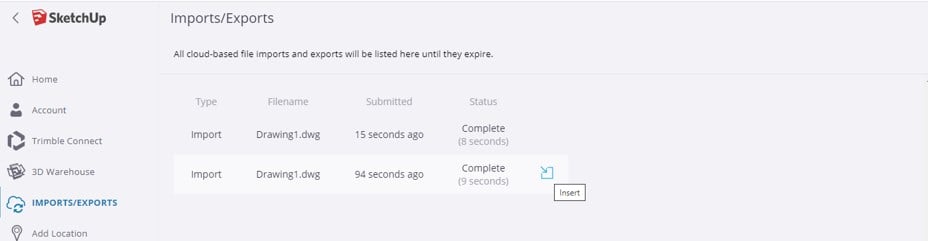
Step 6: It will take some time to convert your file acceptable to this software and then converts your auto cad file into that format that can be accessible in SketchUp, then saves it into the Import/Export tab of SketchUp software. Now click move your mouse cursor on the Insert icon of your desired file and click on it for having it in this software.
Step 7: Now, your auto cad file will come into the working screen of SketchUp software. Now place it at your desired place.
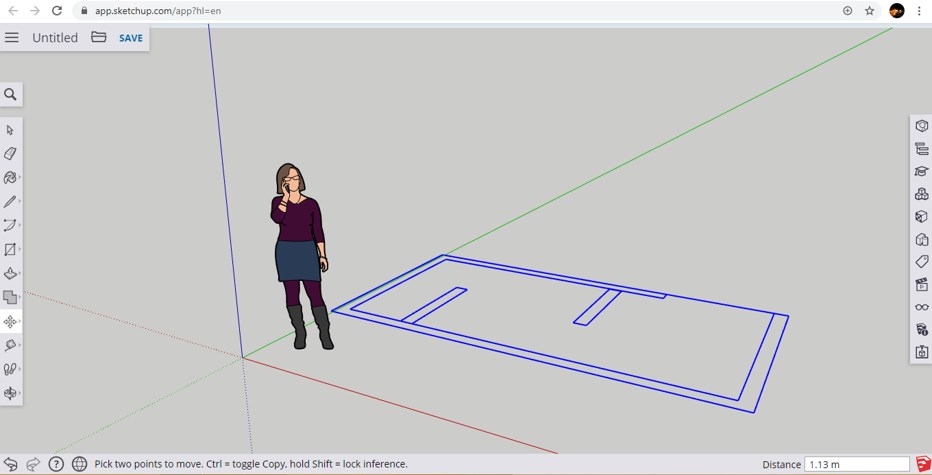
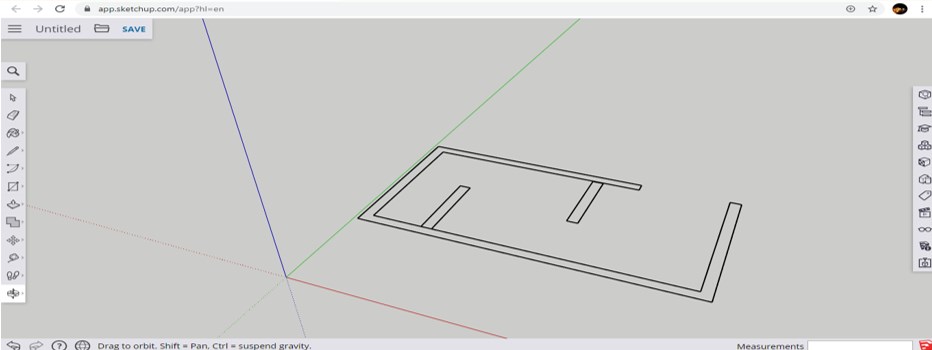
Step 8: You can change the view of your layout by holding the scroll button of the mouse and move the mouse cursor for a rotating view.
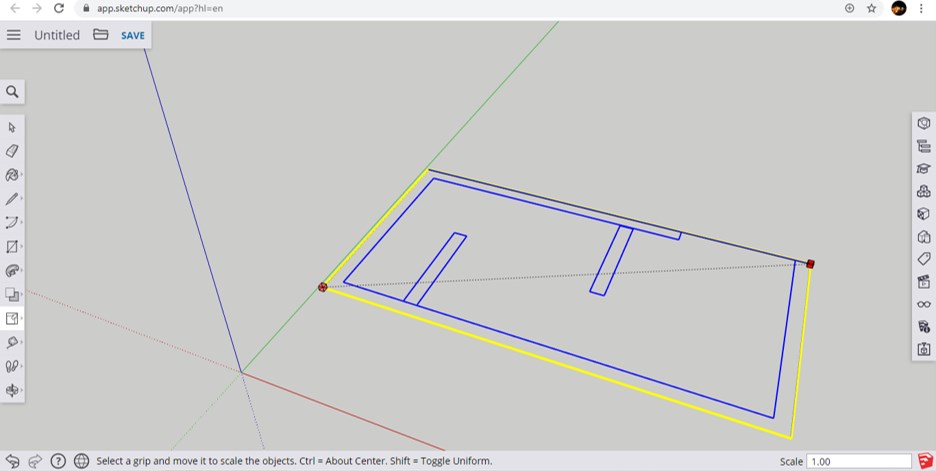
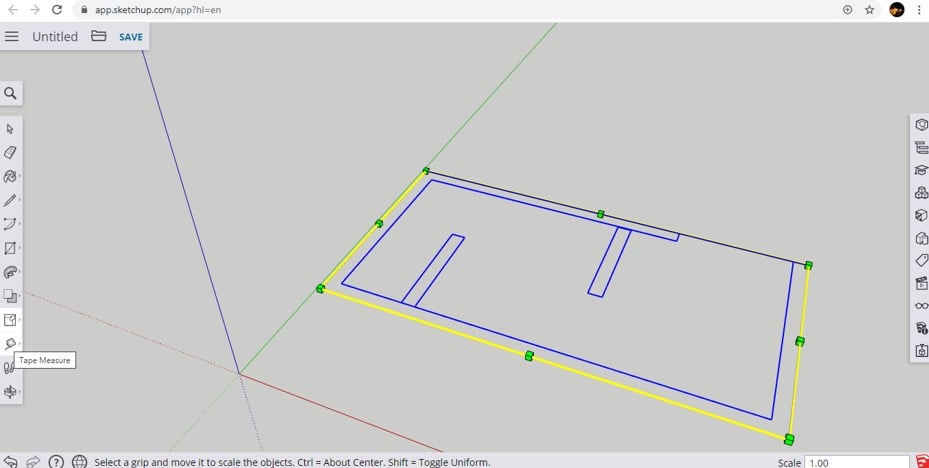
Step 9: You can scale your layout according to your requirement by using the scale command of this software. Take the scale command from the left side tool panel by click on it and then make click on your drawing at a particular point from which you want to scale it.
Step 10: You can measure the dimensions of your layout by using the Tape Measure command of this software which you can find in the left side tool panel section.
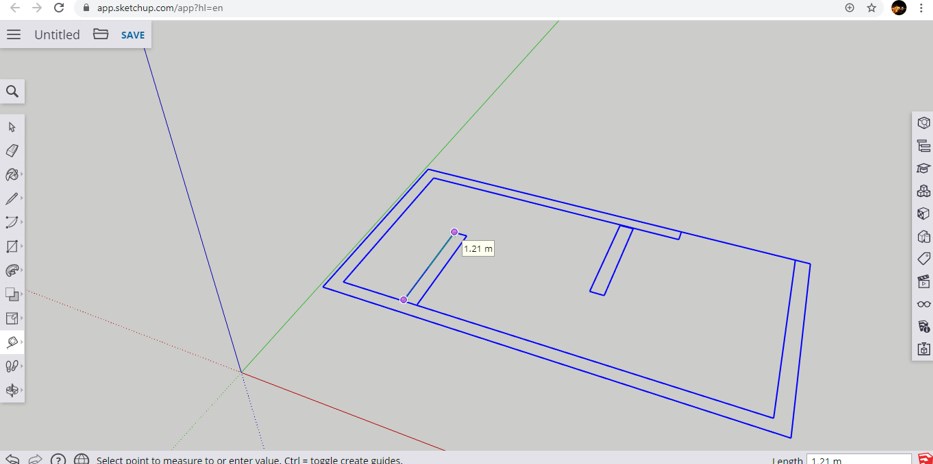
Step 11: Take the Tape Measure command by click on it, then click on starting point from where you want to start your measurement, then drag it up to where you want to measure it then it will show you the dimension of your measurement, like this.
Step 12: You can use Press/Pull command for making walls of this layout for making a 3d model of it. By Press/Pull command, you can extrude the wall in an upward direction or in the downward direction by dragging the mouse cursor in an upward or downward direction according to your requirement. So take Press/Pull command from the list of tools of the Tool panel by click on it.
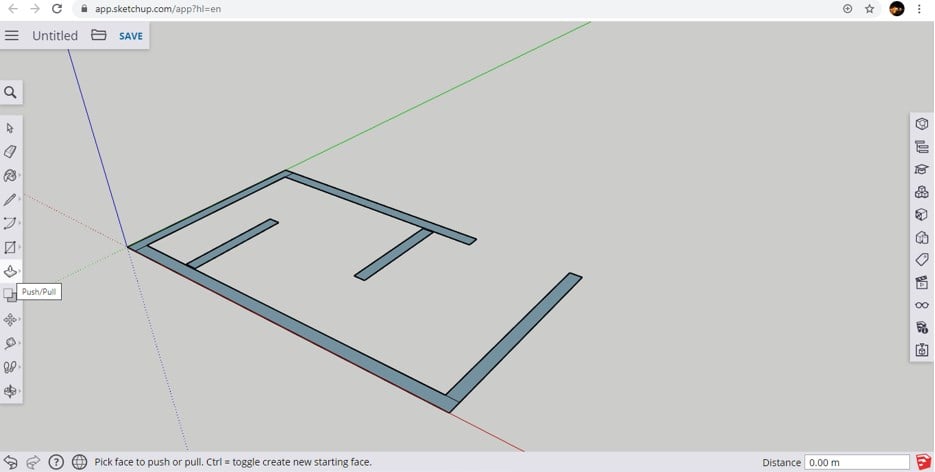
Step 13: Now, take the mouse cursor of this command at the boundary of the rectangle which you want to convert in the wall. When you take the cursor at the boundary, it will fill with a dotted pattern like this.
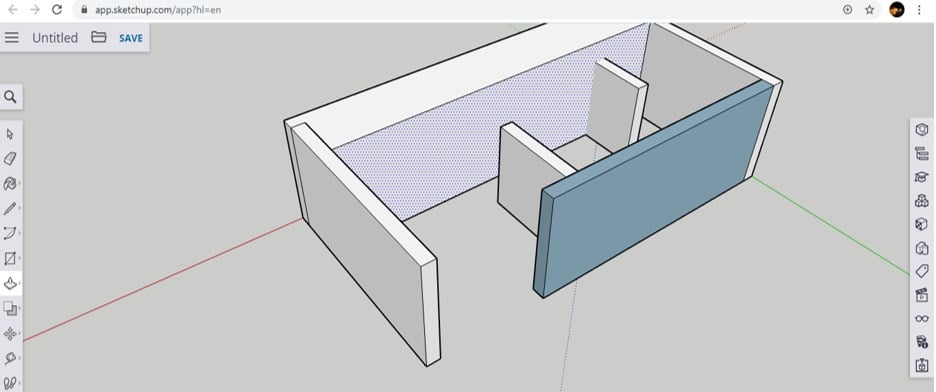
Step 14: Now, you can drag the mouse cursor in an upward direction and make all of your desired height. By applying this command on all walls, you can make this type of 3d model.
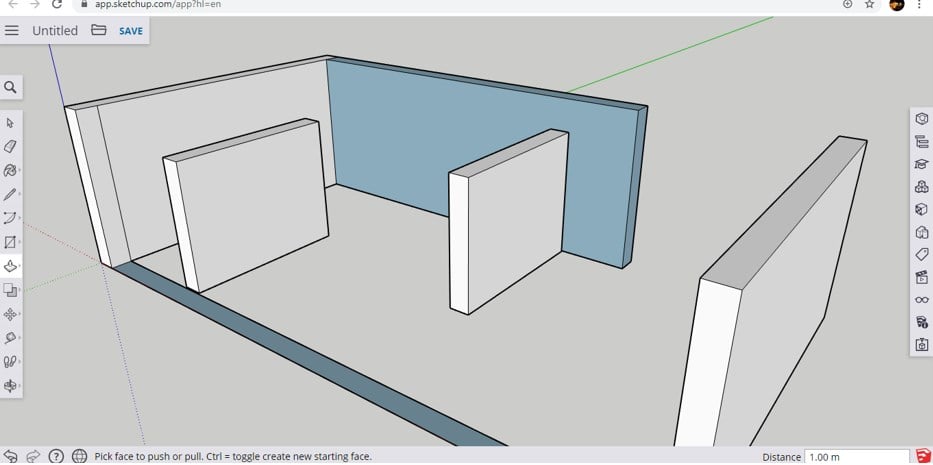
Step 15: Change the view of this 3d model by holding the scroll button of a mouse, then rotate it and again take the press/pull command and extrude this wall also.
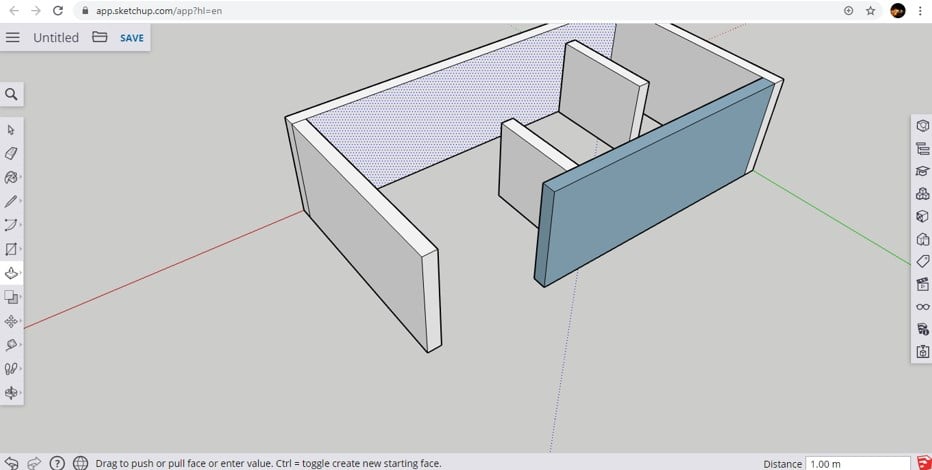
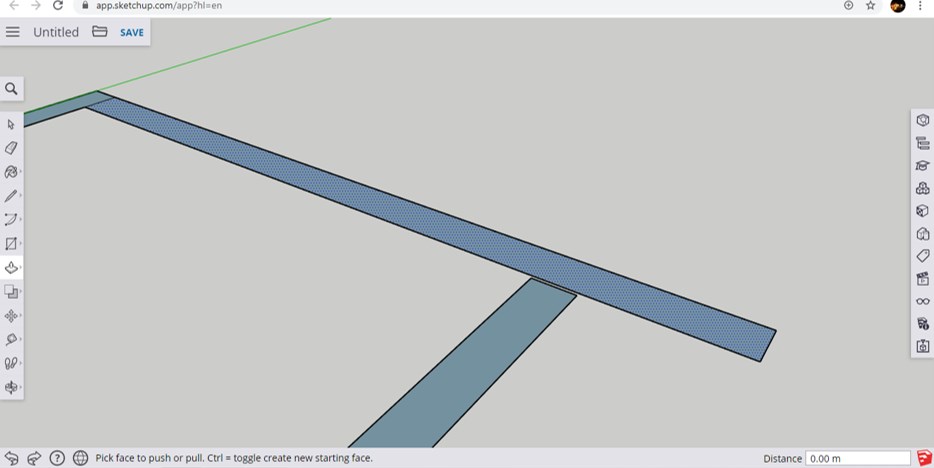
Step 16: You can also increase the thickness of the wall by this press/pull command. For increase, thickness selects the wall face which thickness you want to increase and drag it in the forwarding direction, then enter your desired value of thickness and thickness will change like this.
In this way, you can use Sketchup for making 3d model from 2d drawing of auto cad and handling parameters of it.
Conclusion
Now, after this article, you can understand how to import an auto cad file in Sketchup and use it for making 3d model of that drawing. You can manipulate 2d drawing more and more in SketchUp for making 3d modeling by using different commands and features of this software.
Recommended Articles
This is a guide to SketchUp AutoCAD. Here we discuss the Introduction, how to use SketchUp AutoCAD using different commands and features of this software. You can also go through our other related articles to learn more –
