Updated September 12, 2023

Introduction to Template in AutoCAD
As we all know, AutoCAD is a computer adding design and drafting software developed by Autodesk. It is used in various fields like construction, manufacturing, researching, etc. Many versions of this software are available based on the character of the work. AutoCAD helps users to draw 2D as well as 3D drawings of the product or project. As a design engineer or design professional, our main aim is to make our work easier and time-effective. For this, we try many ways to reduce the toughness of our work. Template in AutoCAD is one of such features which help us to reduce our work and to save time. Before starting a new design project, we have to change many settings on the drawing page like units, sizes, dimension styles, layers, etc. It is not easy and practical to do the settings every time you start a new drawing.
To overcome this task, you can use templates in AutoCAD with all the settings you want to have in a particular project. Once you set this drawing template with all your custom settings, you can save it and use it any time for your drawings. Templates are saved with DWT extension, and after when you save your work in a template file, it gets saved in DWG extension.
Today we are going to discuss creating your own custom settings and save them as the template file.
How to Create Template in AutoCAD
Below are the different steps to Create a Template in AutoCAD:
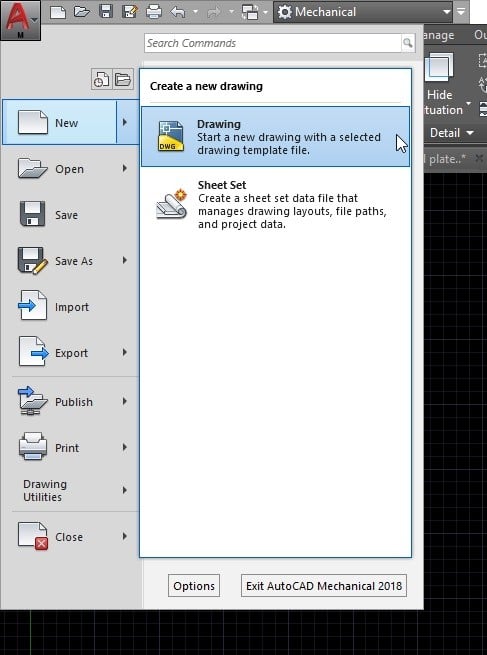
Step 1: The first step for creating a custom template is to open the AutoCAD software and select the new drawing option, as shown in the image below. It is the same for all the different types of AutoCAD software like mechanical, MEP, electrical, etc.
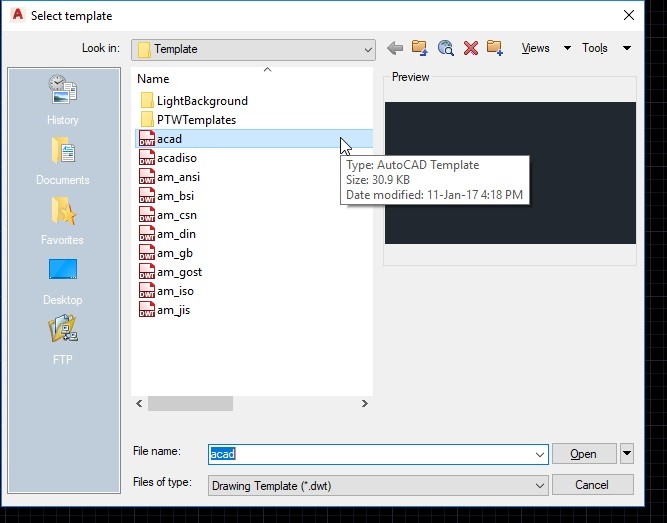
Step 2: After selecting the drawing option, another page showing different saved templates will be opened on your screen. From the various files given, select the acad template as shown in the above image and click open. This is the place where our saved templates are located. After saving your custom template, you can open it from this location itself.
Step 3: After this, a new drawing page will be opened in your software. This is the template in which you can set your custom settings. Change whatever settings you want to have in your project. You can set preferences or dimensions in the drawing; you can edit the title block, erase or add drawing elements, update dimension style, etc. After updating all your setting, you need to save the template file.
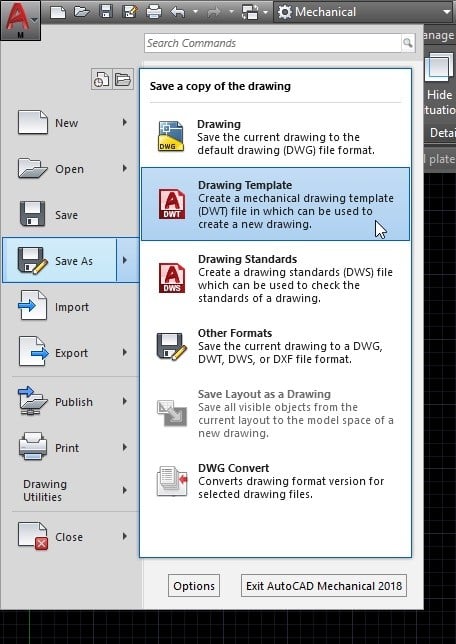
Step 4: To save the Templates in AutoCAD, you need to click the ‘A’ symbol at the top left corner of the page. Then click save as option and save a copy of the drawing as Drawing Template. Check the above-given image for your reference.
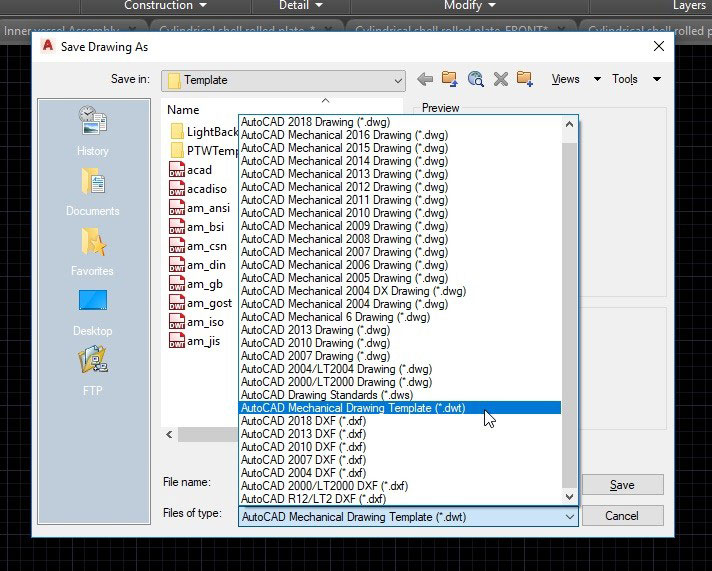
Step 5: While saving the template file, select the ‘.dwt’ extension from the drop-down menu. You can see many other extensions, including ‘.dwg’, in the drop-down list. As you know, .dwt is the file extension for drawing templates.
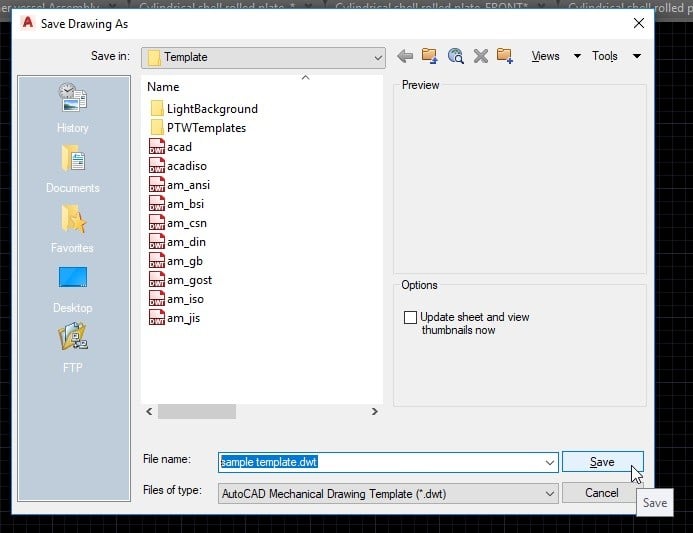
Step 6: After selecting the extension, give a name for your file. You can give any name you like. Then save the template as shown in the above image.
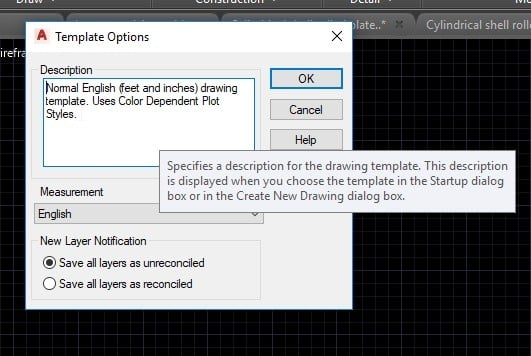
Step 7: When you click the save button, a dialogue box will be opened. This allows you to add a description for your template. In the template option, the dialog box adds a brief description of the settings you added to the template, as given in the above image. This helps you to overview each template in AutoCAD before a project.
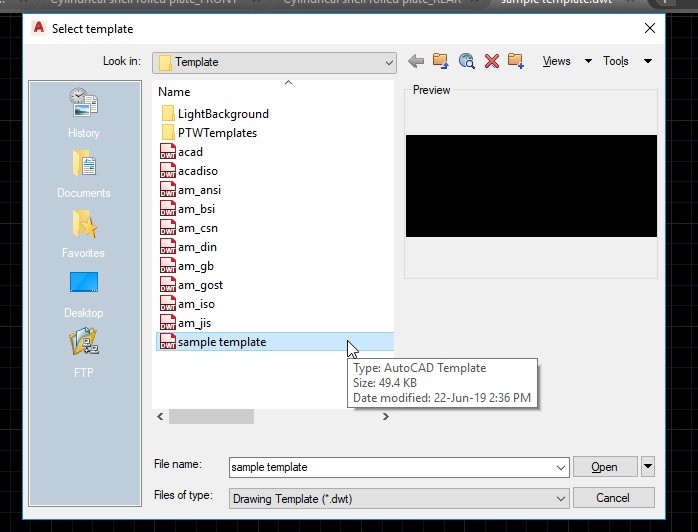
Step 8: Once you save a Templates in AutoCAD, it will be available in the template folder, and when you open a new drawing, you can select your newly made template. As shown in the image above, your template will be visible at the end of another template list. Select your template and click open to start drawing using your custom template.
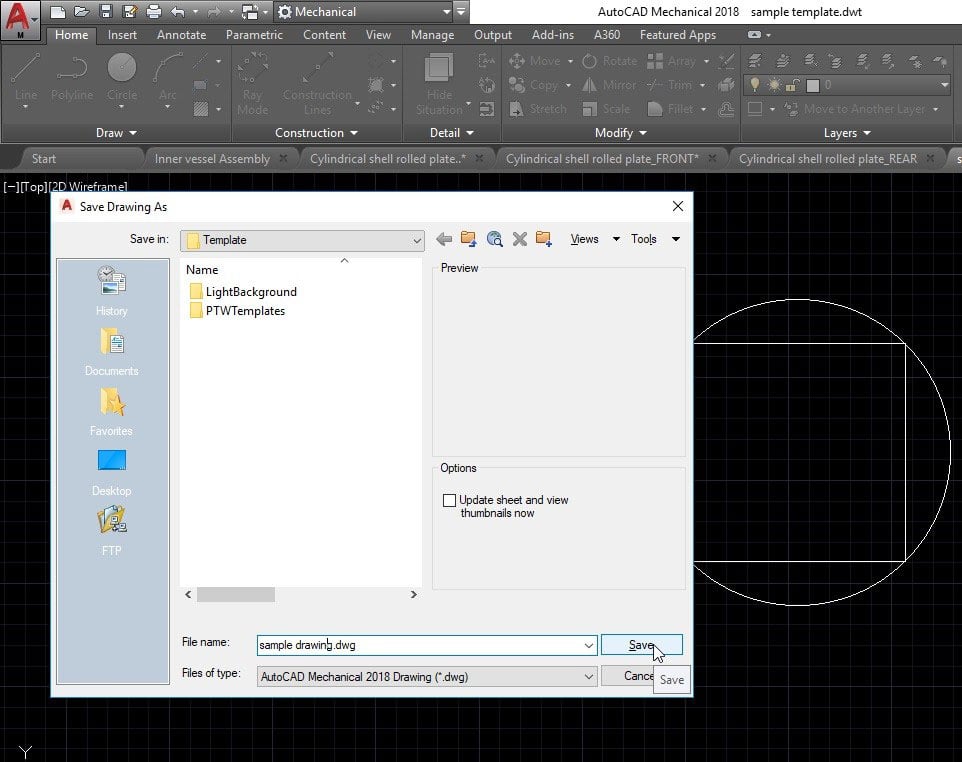
Step 9: After opening your template, you can draw whatever you want in your template file. And after completing your work, you can save it using the .dwg extension. So it will be saved as an acad drawing file instead of a template. As shown in the above image, click save as and in the dialog box select the .dwg extension from the drop-down list and click save.
Conclusion
Templates in AutoCAD is a baseline for your work. It helps you to easily create a future drawing without initial settings. Using templates reduces work time, reduces the chance to make mistakes in settings and makes uniformity to every work in a single project. It is always best to create templates since it serves you for your current work to the future works. We can set units, drafting settings, layers and their properties, scales, dimension styles, text styles, plot settings, etc., in our template.
From this article, you got the idea of how important is a template in AutoCAD, and you studied how to create, edit and save a custom template. Try this in your projects, and it will make your work more easy and effective.
Recommended Articles
This has been a guide to Templates in AutoCAD. Here we discussed its concept and step by step process to create Templates in AutoCAD. You may also look at the following articles to learn more –
