Introduction to Offset in AutoCAD
AutoCAD is a 2d and 3d computer-aided designing software that most widely used by the engineering professional for their engineering drawing work. We have a different type of commands in this software which helps us in our drawing work. Offset is one of the 2d commands through which we can make a number of copies of any 2d shape at some distance in its parallel direction for saving our time in making of drawing of that 2d shape again and again. In this article, we will discuss all major parameters of this command and also learn about steps through which we can use this command in our drawing work for making any 2d shape. So let us start our discussion about this topic.
How to Use Offset command in AutoCAD?
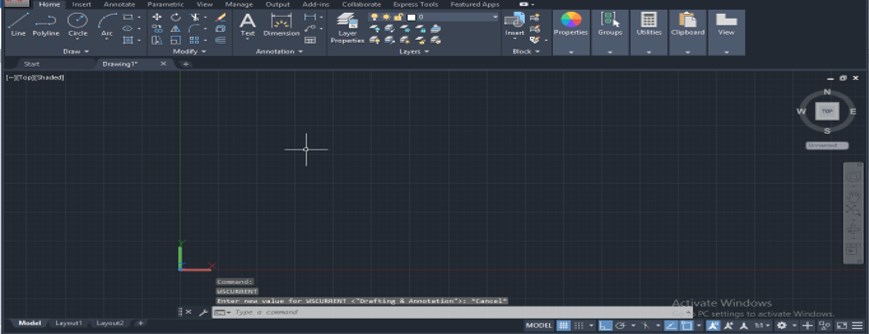
We can use the offset command in few simple steps and understand it by example in this software, but before starting, let us look at the working screen of this software to better understand this topic throughout this article.
Step 1: At the top of the working screen, there is a ribbon which has some tabs for handling different commands and their parameters in this software such as Home, view, inset, annotation and some others; below this ribbon, we have a working window in which we can see our current working, below this working window we have some navigation commands for handling our drawing work.
Step 2: You can find the Offset command in this software from the Modify menu of the Home tab of this software with this type of icon. So click on this icon for having this command active.

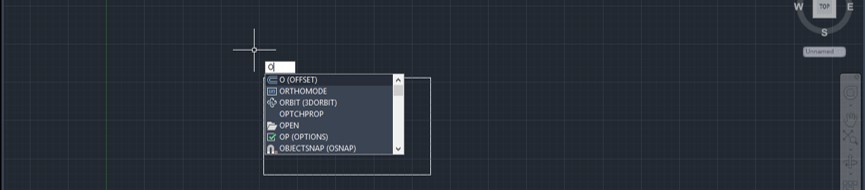
Step 3: Or you can type the O button from the keyboard, then press the enter button of a keyboard for having this command active.
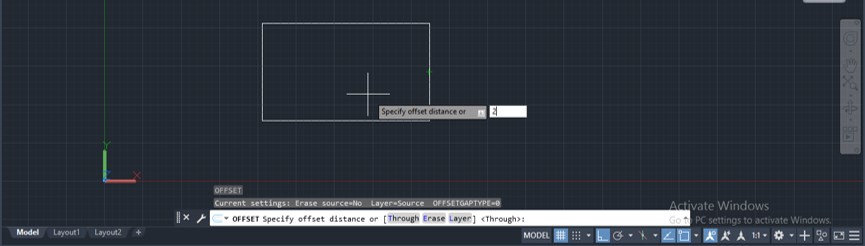
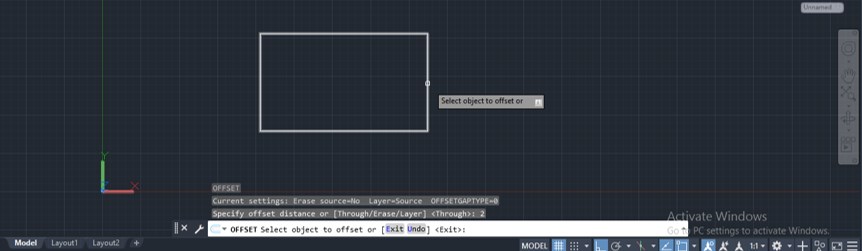
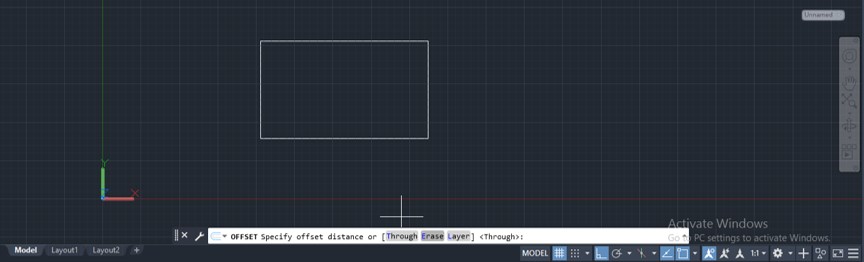
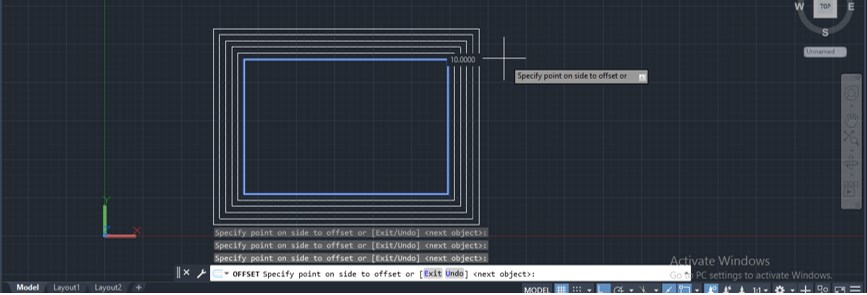
Step 4: Now, let us draw a rectangle with a rectangle command for learning offset command in it. You can use the offset command on any type of 2d shape. Now take offset command by anyone of two options which we discuss above. Now this command will ask you to give offset distance that means give the value of distance at which you want to make a new copy of this rectangle shape. I will give 2 as my offset distance, then press enter button of the keyboard.
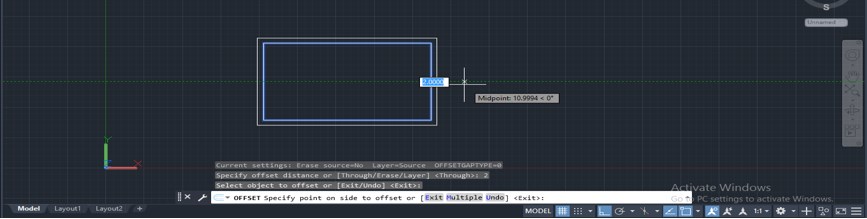
Step 5: Now, it will ask you to select the object on which you want to use this offset command with your given offset distance. I will select this rectangle as my offset object then press enter button of the keyboard.
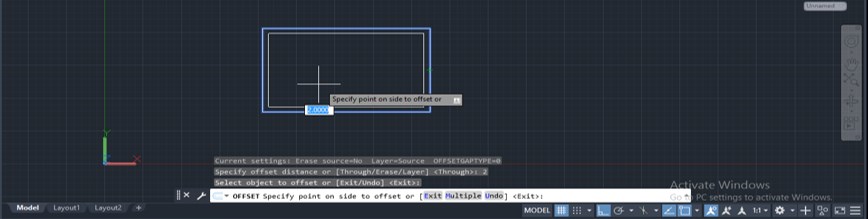
Step 6: Now, you can offset this shape by dragging the mouse cursor in your desired direction. For example, if you want to offset this shape in the inner direction of it, then drag your mouse cursor inside of this rectangle and make a click. Your shape will offset in inside of this shape at your given offset distance.
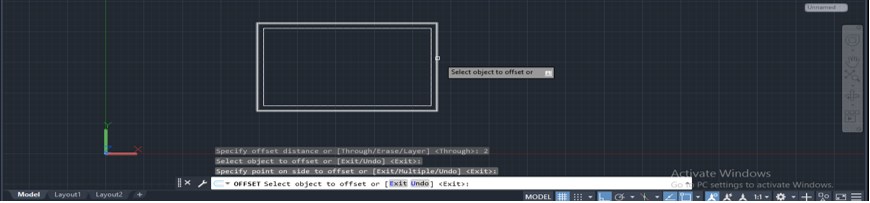
Step 7: Or if you want to offset it in the outer direction of this rectangle, then for the outer direction, drag your mouse cursor outside of this rectangle and click. Your shape will offset in outside of this shape at your given offset distance.
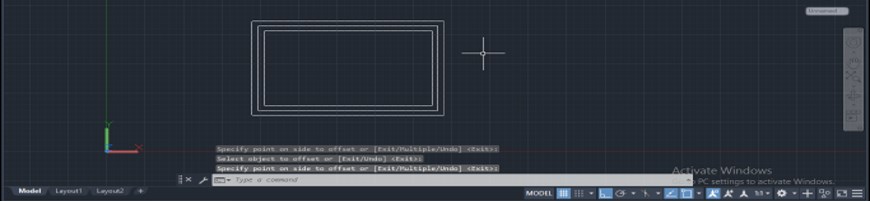
Step 8: Now, you can again offset it; just select the object with the same command the press enter button of the keyboard.
Step 9: Then, make a click at your desired side of this rectangle for making another offset. You can make a number of offset with one command. I will again click outside this rectangle.
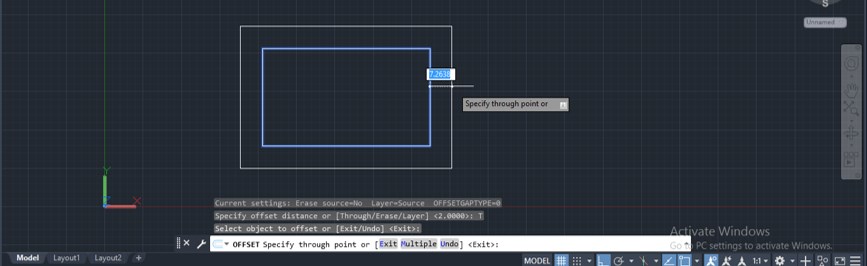
Step 10: Now, let us discuss different options of this command one by one. You can see some option for using this offset command in the parameter section of this command. Here click on the ‘Through’ option of this command, or you can press the T button from the keyboard the press enter button of the keyboard for this option of offset command.

Step 11: Now, it will ask you to select the object then press the enter key.

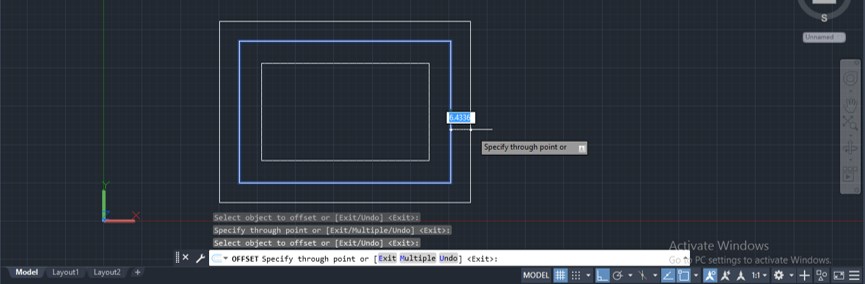
Step 12: Now, it will not ask you to give offset distance. This time you can offset a copy of this rectangle free hand at any distance.
Step 13: Now again select an object, press enters the keyboard’s button, and make another copy with the same method.
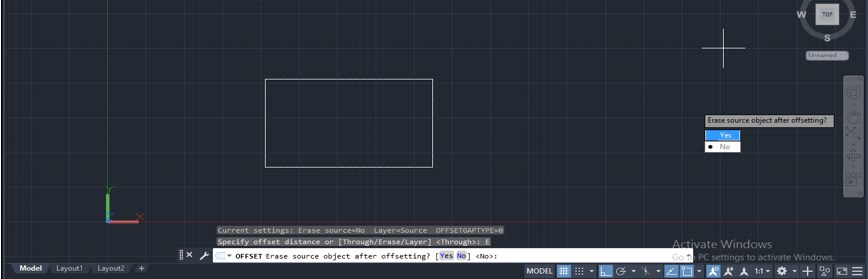
Step 14: The next option is ‘Erase’, so click on Erase option of this command, or you can press the E button from the keyboard then press enter button of a keyboard for this option of offset command.
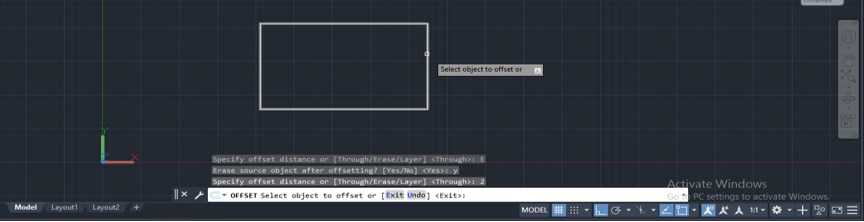
Step 15: Now, it will ask you whether you want to erase the original shape after offsetting it or not. I will choose the yes option.
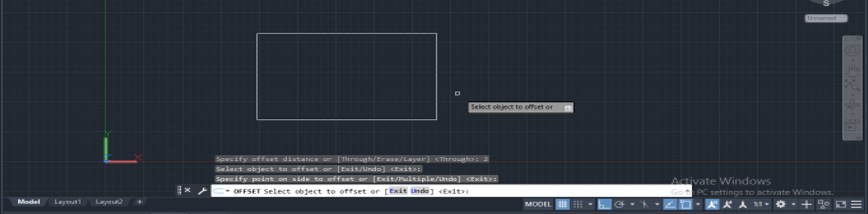
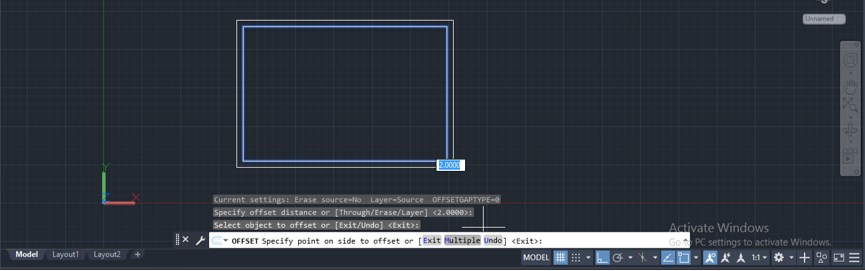
Step 16: Now, it will ask you to give offset distance. I will enter 2 as offset distance, then press enter button of the keyboard.
Step 17: Now select the object which you want to offset the press enter button of the keyboard. I will select this rectangle by click on it with the mouse button.
Step 18: Now drag the mouse cursor in the direction in which you want to offset this object. I will drag the mouse cursor outside this rectangle and make a click; then, it will offset your object at your given offset distance and remove the original object from your drawing.
Step 19: Now next option of this command is the Multiple options. So take the offset command of this software again and enter the value offset distance, then press enter button of the keyboard. Now select the object which you want to offset. Now you will see some option here in the parameters box of this command; choose Multiple options from here by click on it your you can press the M button from the keyboard then press enter button of the keyboard.
Step 20: And now, you can make multiple copies of this rectangle without selecting the rectangle again and again, then press the Esc button from the keyboard for exiting from this offset command.
Conclusion
Now, after this article, you can easily understand what is Offset in AutoCAD and how you can handle its parameters for getting the best result in your drawing work of auto cad. You can have good command on a different type of 2d command of this software after practicing on them.
Recommended Articles
This is a guide to Offset in AutoCAD. Here we discuss an introduction, how to use Offset in AutoCAD in a step by step manner. You can also go through our other related articles to learn more –
