Updated March 16, 2023
Introduction to Install TestNG
TestNG is an automation framework where NG is an abbreviation for ‘Next Generation’. TestNG helps generate an organized report that can let the tester easily understand which test cases are passed, failed, or skipped. It is a tool inspired by Junit and NUnit. The design of TestNG is such that it helps in integrating classes in an easier way. The developer has the ability to write more flexible and powerful test cases. It provides functionalities like easy annotations, grouping, sequencing, and parameterizing. The benefits of Install TestNG are the ability to create HTML reports for execution. The annotations also make the tasks easier. In addition to this, the groups help in grouping and prioritizing easily. It is also possible to test parallelly and generate logs. Data can be parameterized easily. Let us have a look at the steps of installing TestNG.
Step by Step Installation of TestNG
Before installing TestNG, we must make sure that Selenium IDE is already present with an active internet connection.
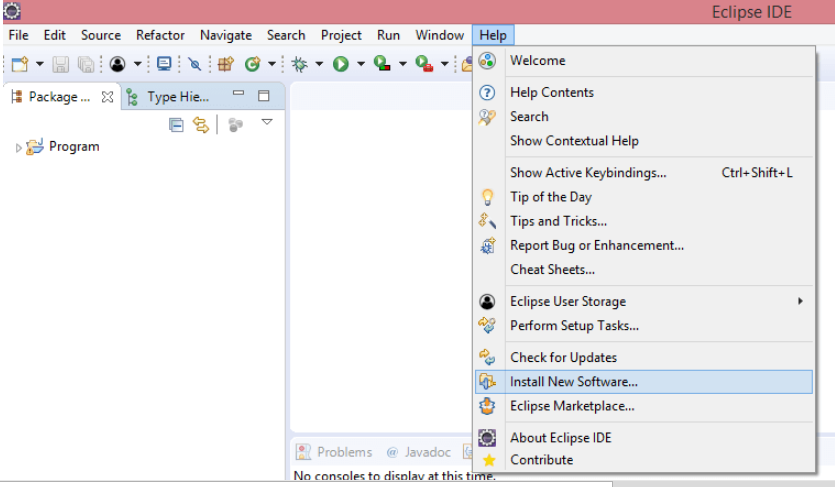
Step 1: Go to Eclipse, and on top of the menu bar, go to the Help tab and then click on ‘Install New Software.
Step 2: A new window will open, which will have the ‘Work with:’ field. Here enter the URL: (http://beust.com/eclipse/) and then click on Add button.
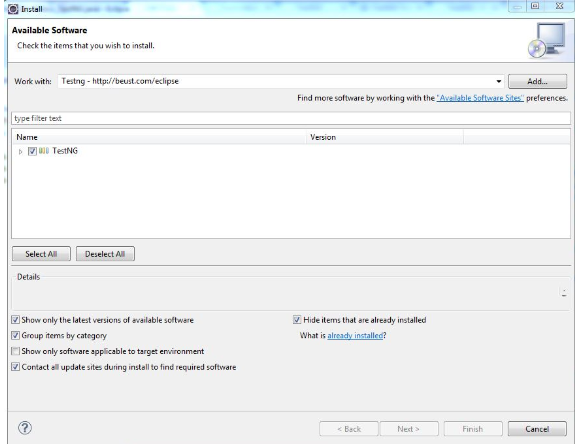
Step 3: Once this link is added, it will be displayed, and you can enter the name as ’TestNG.’
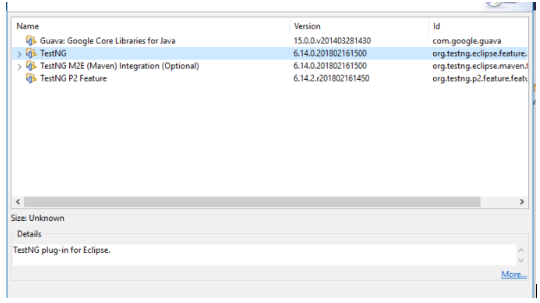
Step 4: Once this is done, you will be displayed the software available on the mentioned URL. Select the checkbox which mentions TestNG and clicks on the ‘Next button.
Step 5: After this, the requirement and dependencies will be checked before the installation is started. If all these requirements are good, then it will prompt you to install the software before continuing with TestNG. In most cases, it will be successfully installed.
Step 6: Once this step completes, it will ask to review the installation process. If you find everything to be OK, then you can continue by clicking on ‘Next’.
Step 7: To get the license, click on ‘I accept the terms of license agreement’ and then click on the ‘Finish’ button.
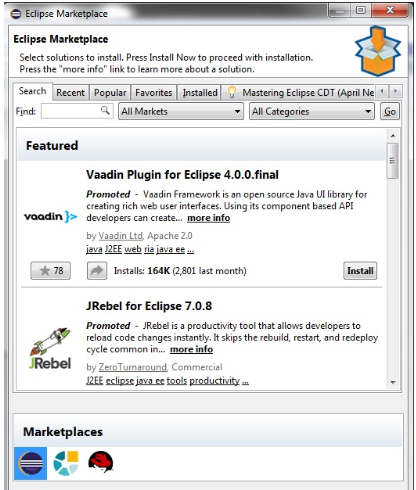
Instead of Using the Web link, you can use ‘Eclipse Marketplace’ to get TestNG
Follow the below steps to complete the installation by using this method.
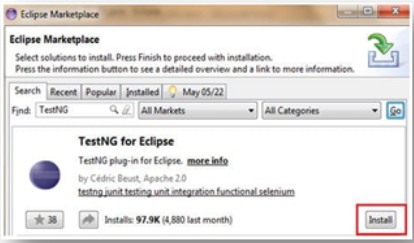
Step 1: Launch Eclipse and click on the menu bar -> Help. Click on the Eclipse Marketplace option.
Step 2: In the Eclipse Marketplace, search for TestNG and click on the search button.
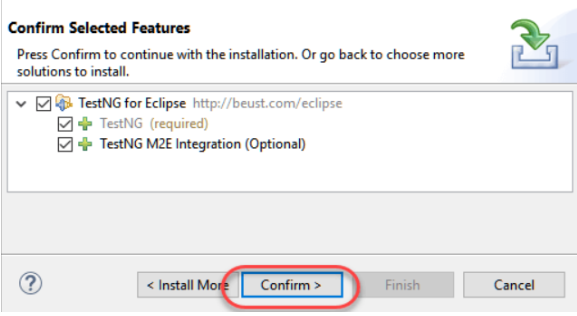
Step 3: In the results, you will get TestNG. Click on Install.
A new window appears for feature selection. You need not make any changes here and click on the confirm button.
Step 4: By clicking on the Next button, the next dialog box will be the License Agreement box. Click on ‘I Accept the terms of License Agreement’ and then click on Finish.
Step 5: If there are any warnings, then ignore them and click on OK. After this, wait for the installation to complete.
After this, Eclipse may ask you to restart. You can click on Yes
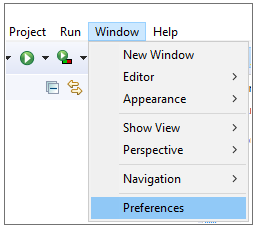
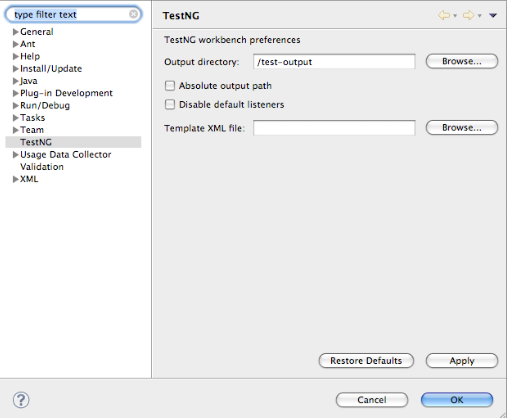
Step 6: Once Eclipse is restarted, verify if TestNG id indeed installed successfully. To check this, you can click on Window -> Preferences. The list that is displayed must include TestNG in the Preferences list.
Another way of checking this is by going to Window -> Show View and then click on ‘Other’.
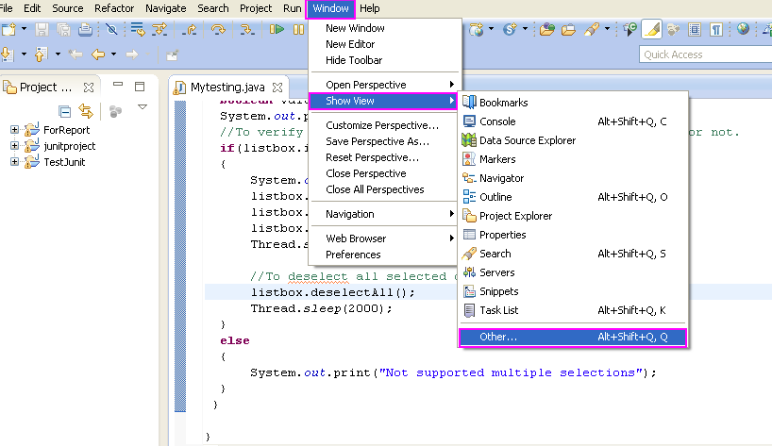
In the Other tab, you will find Java. Expand the Java folder, and you will be able to see if TestNG is installed properly.
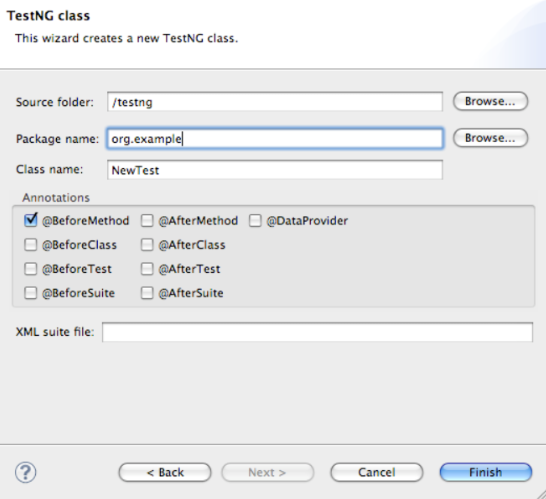
Once the installation is complete, you can create your own TestNG class. To create a new TestNG class, you can go to the select menu as File -> New -> TestNG. If there is a Java file already open, then the Java File that is selected in the Navigator will be displaying all public methods. There will be the option present to select the ones that you need to test. Every method which is chosen on this page will be working as a new TestNG class. If there is no implementation, then the exception will be thrown.
The next step lets you be sure of whether the file is being created or not. It should have a default implementation for configuration methods. Selenium Java Client Driver with TestNG Once this is done, you can also download the Selenium Java Client Driver. Once the download is complete, you can launch the ‘eclipse.exe’. The workspace which is to be selected should take the default location or should take the location given by using the browse option.
Post this Step; you Need to Configure Eclipse IDE with Web Driver.
- You can launch eclipse.exe, and then this file would be located at C:\eclipse\eclipse.exe.
- Once you choose a workspace, you can choose any location of your choice or choose the default location.
- You can create a new project by going to File -> New -> Java Project. You can name this project with any name of your choice. After the project, you can create a New Package. Under this, a new class can be created.
- Then go to this class’s property and click on ‘Java Build Path.
- To get the external libraries, click on Libraries and then click ‘Add External JARs.’
- Navigate to C:\selenium-2.25.0\. All jars present at this location can be taken.
- All files can be imported, and you are ready with all Selenium Libraries to be used with TestNG.
Conclusion
TestNG is a testing framework that supports different parameters. The test configuration is flexible, and it supports a powerful execution model. In addition to this, TestNG supports annotations like @BeforeCLass, @AfterClass, etc., which are very useful in test case execution. It basically tries to cover all testing categories of Unit testing, Functional and Integration testing, etc. It also generates reports in HTML and XML formats. It does not need to extend any class. Even though Selenium is installed, both can execute test cases parallelly. TestNG is thus a framework that covers all testing categories, provides annotations, and allows Selenium to work along with it, providing the best quality output.
Recommended Articles
This has been a guide to Install TestNG.Here we have discussed the step-by-step Installation of TestNG using Weblink and Eclipse Marketplace. You can also go through our other suggested articles to learn more –
