Updated July 1, 2023

Overview of Install Unix
UNIX is a multitasking system designed to run multiple tasks simultaneously, which can be used as a server and workstation. The system provides various features that facilitate using devices as files through a command-line interpretation. Entire UNIX operating system acts as a collection of various useful special programs combined with a special master control program termed as kernel, which handles lower-level tasks that include managing the file system, providing services to start and stop programs, and managing the system’s hardware. In this Article we will learn to Install Unix.
Steps to Install UNIX
Install Red Hat Enterprise Linux 7 64-bit (RHEL).
Step 1: First download VMware Player from http://www.vnware.com

Step 2: Download RHEL from https://developers.redhat.com/products/rhel/download/ site.
Step 3: Downloaded the RHEL 7 DVD ISO and attach it to the VM’s (Virtual Machine) virtual DVD drive.
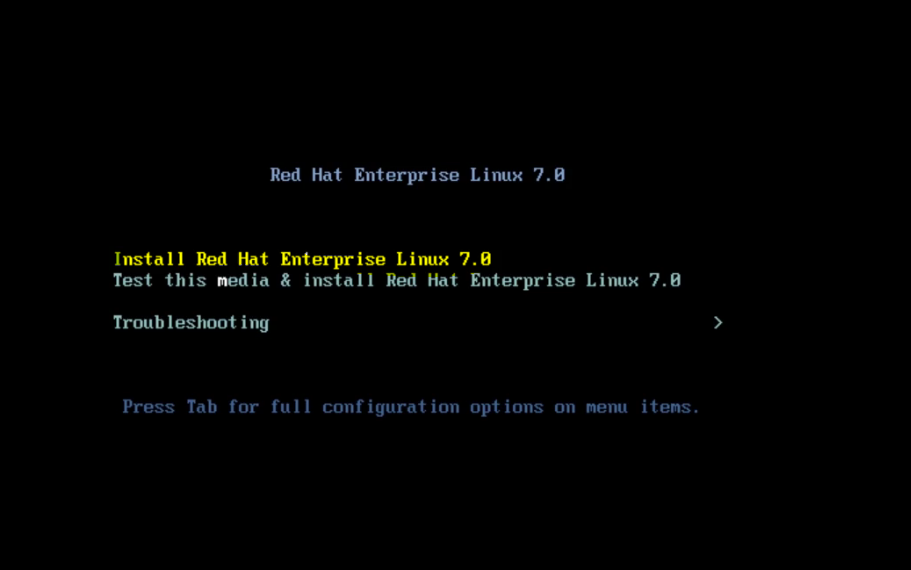
Step 4: Let’s go ahead and power on the VM, and we are given a choice right away.
Step 5: Do we want to Install Red Hat Linux Enterprise 7.0, test this media and then install and troubleshoot it.
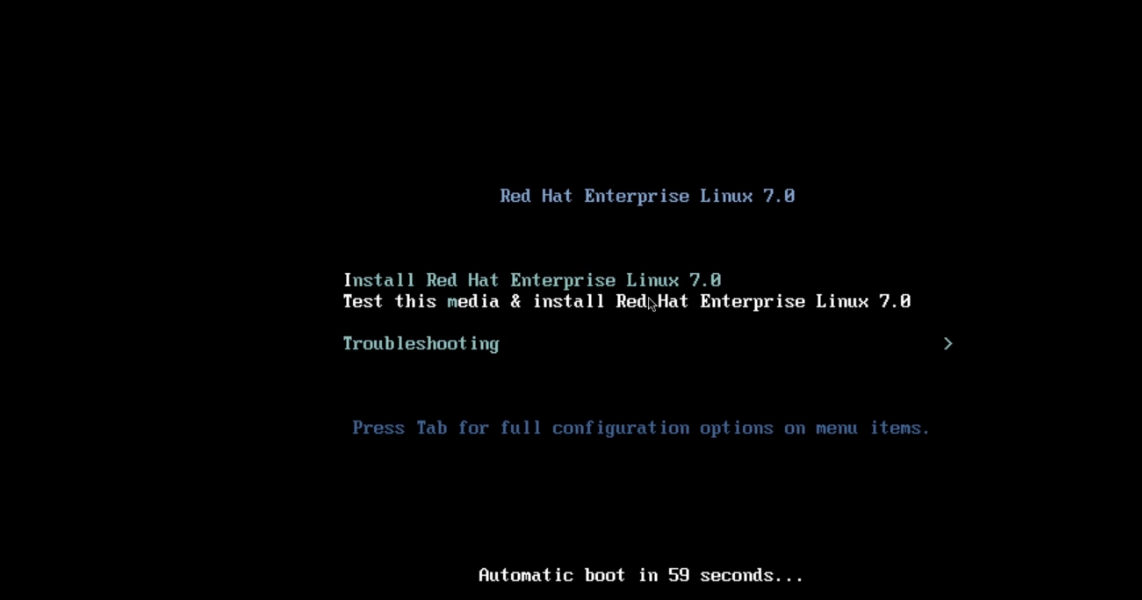
Step 6: If we select install Red Hat Enterprise 7. 0, we will jump right into the graphical Anaconda installer. If we select test this media and install, the system will perform a check of some integrity test of the installation media source.
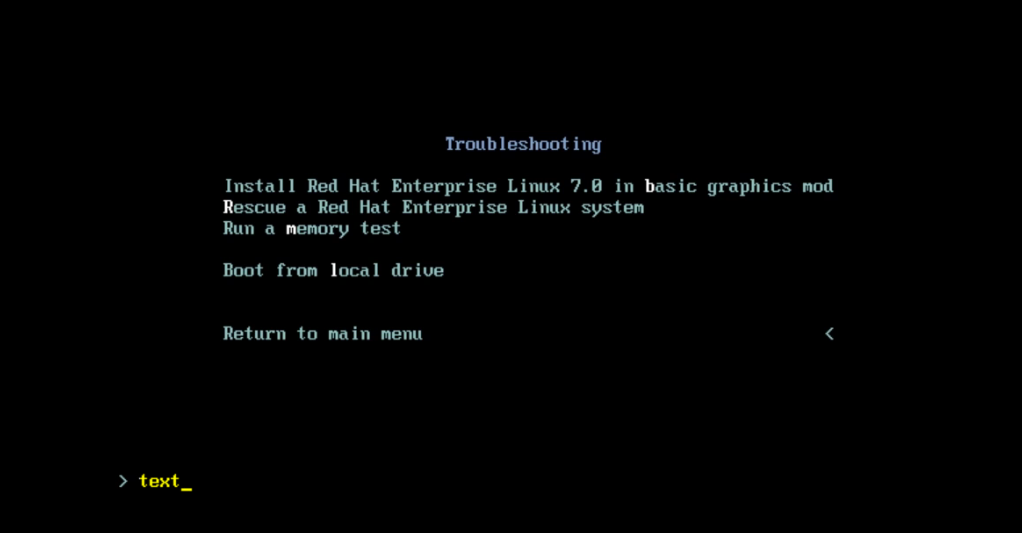
Step 7: If we select Troubleshooting, we could install it in basic graphics mode.
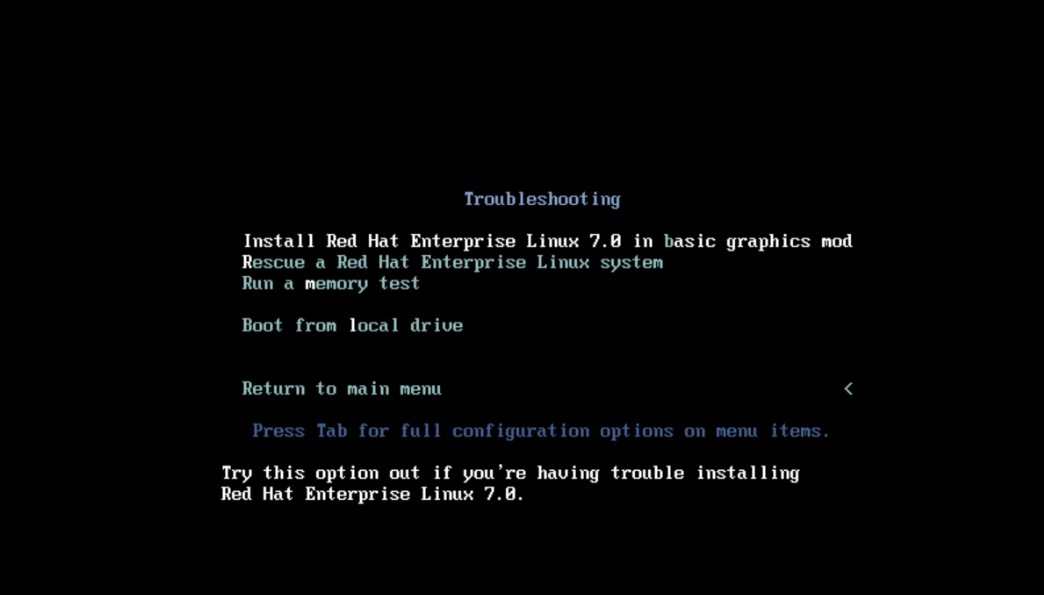
Step 8: If we select boot into Rescue mod.
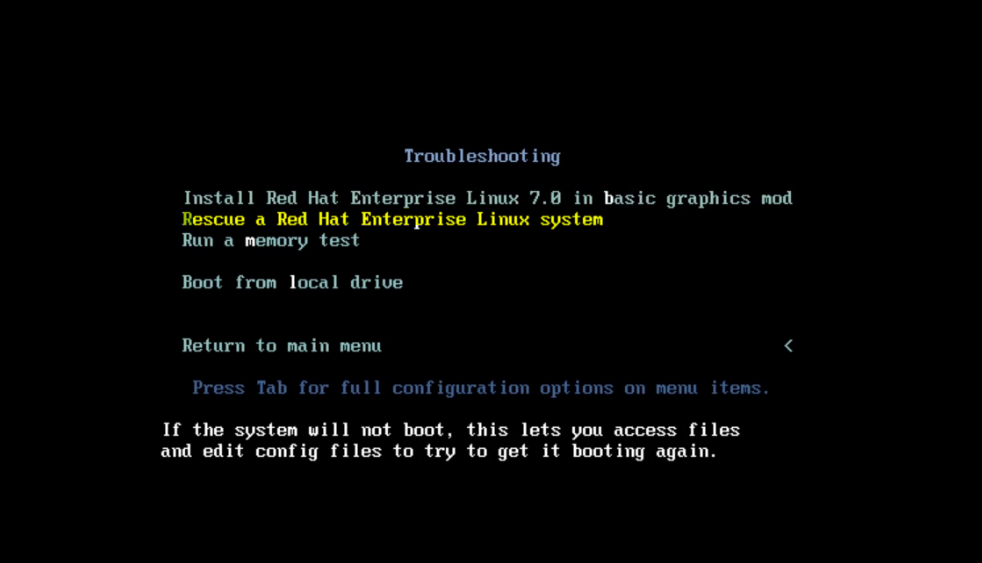
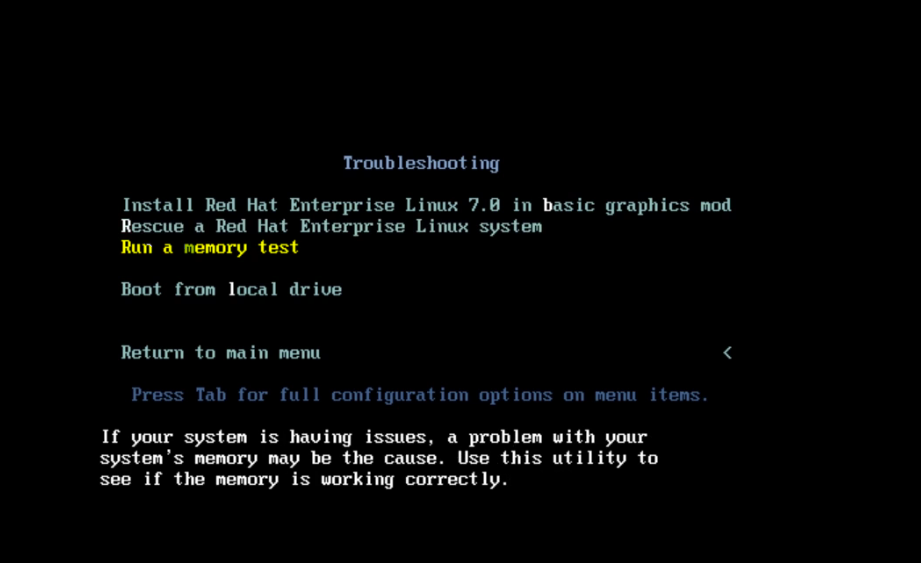
Step 9: Run a memory test.
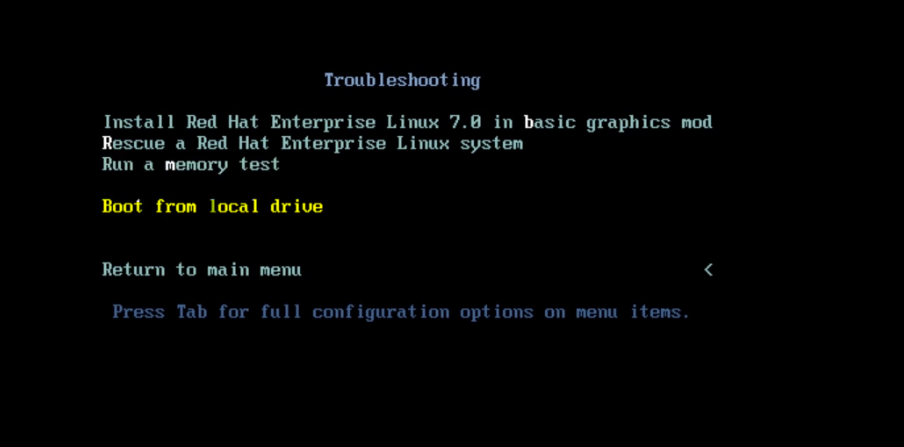
Step 10: Boot from the local drive.
Step 11: Finally, we can hit the tab to enter some advanced boot options.
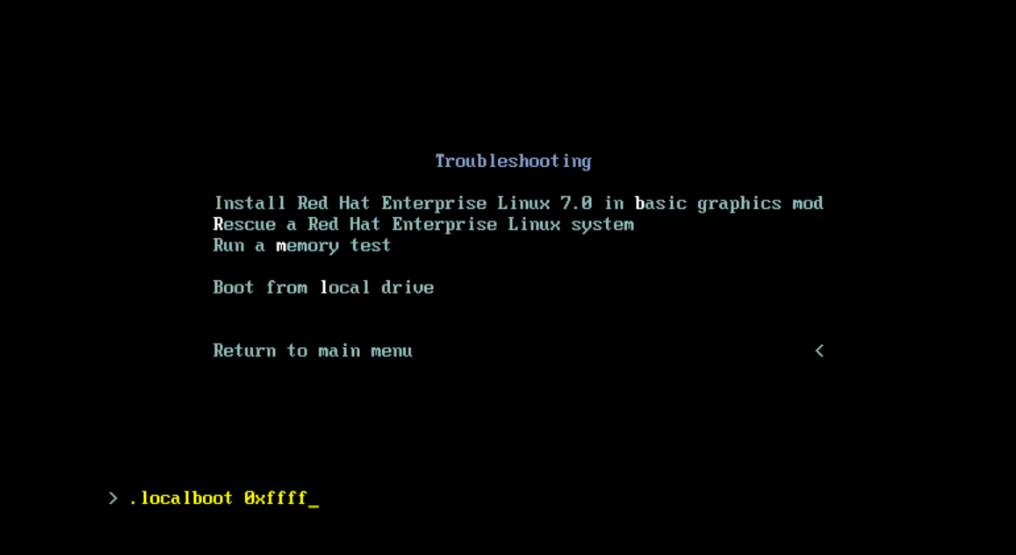
Step 12: We can remove the .localboot 0xffff, and we could type text, and if we hit enter right now, it would boot us into the text-based Anaconda installer.
Step 13: Now let’s go back to the main menu, hit Escape twice, select Install Red Hat Linux Enterprise 7.0, and enter the Anaconda graphical installer.
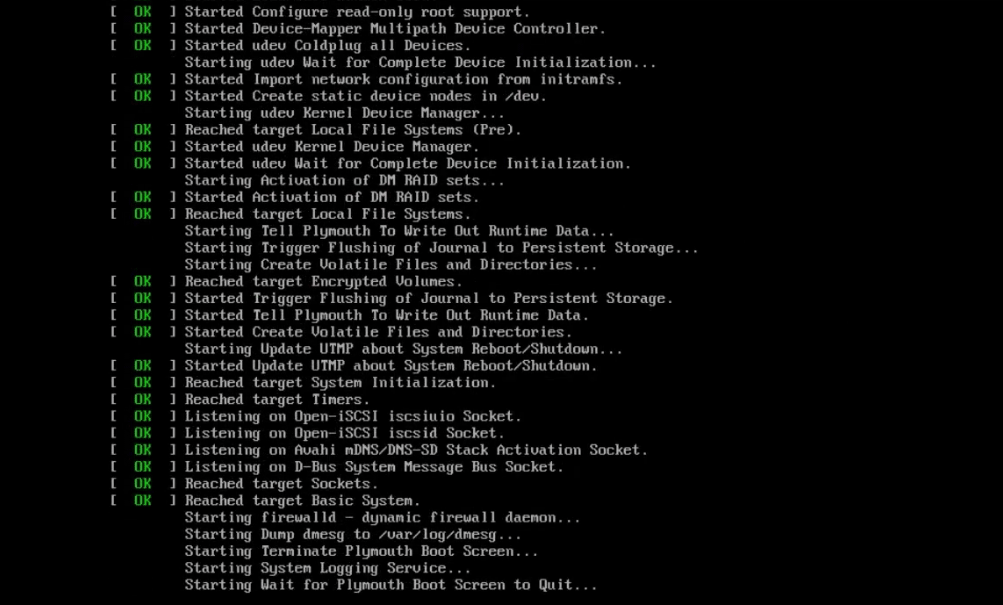
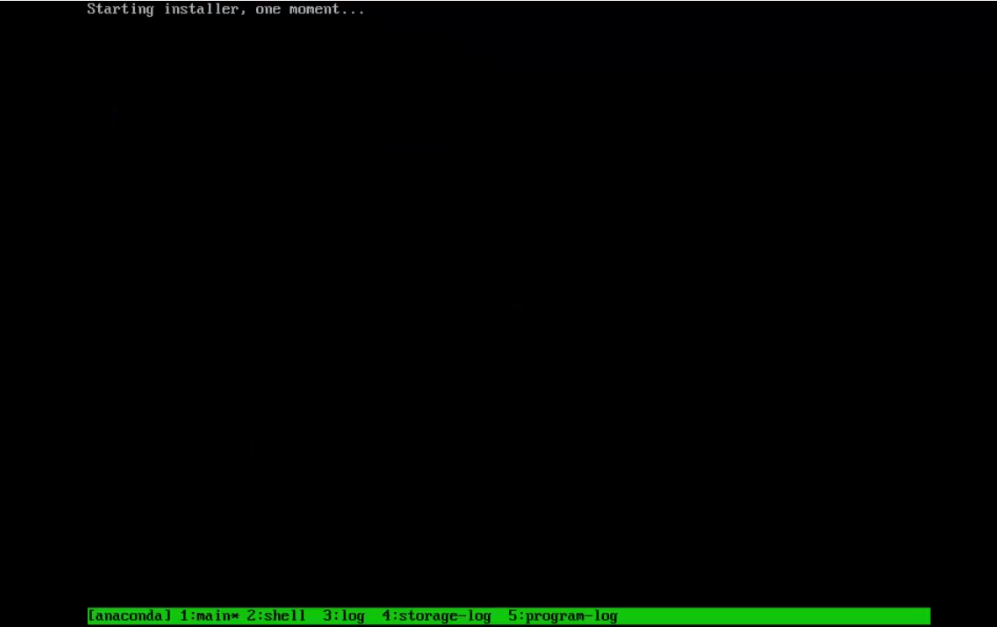
Step 14: A whole bunch of stuff is going to fly by that’s all going to get logged into /temp/syslog.
Step 15: We look at it in a second.
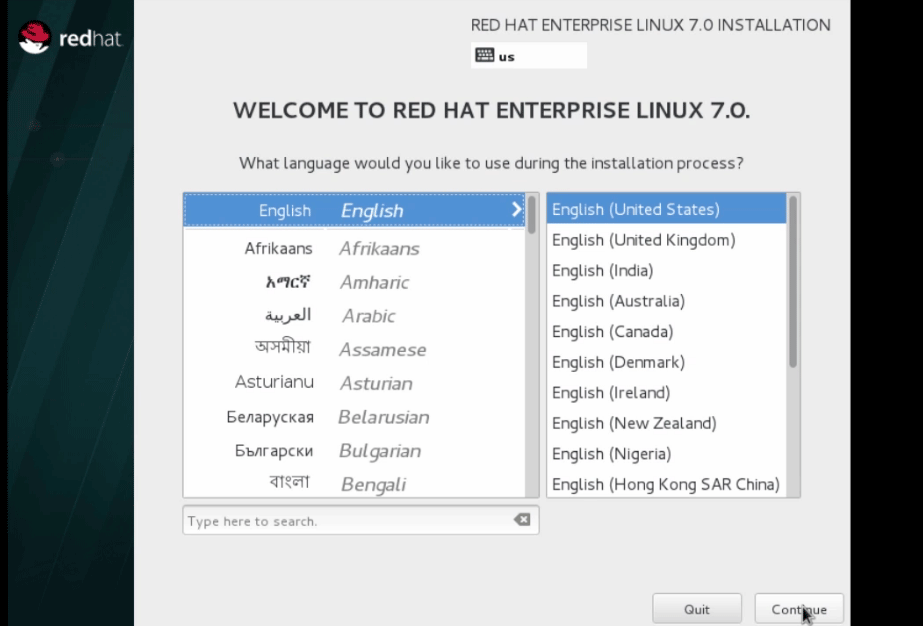
Step 16: So here we are in the graphical installer. Let’s go ahead and select our language.
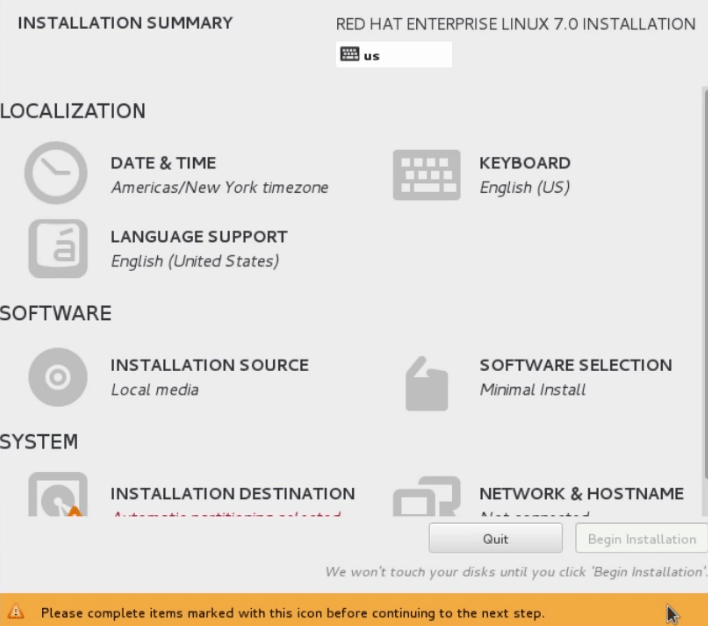
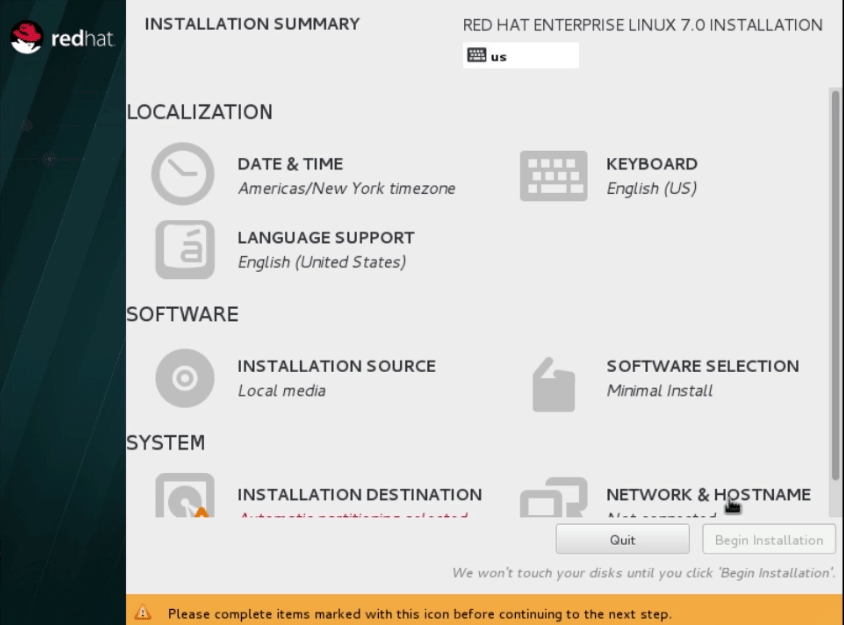
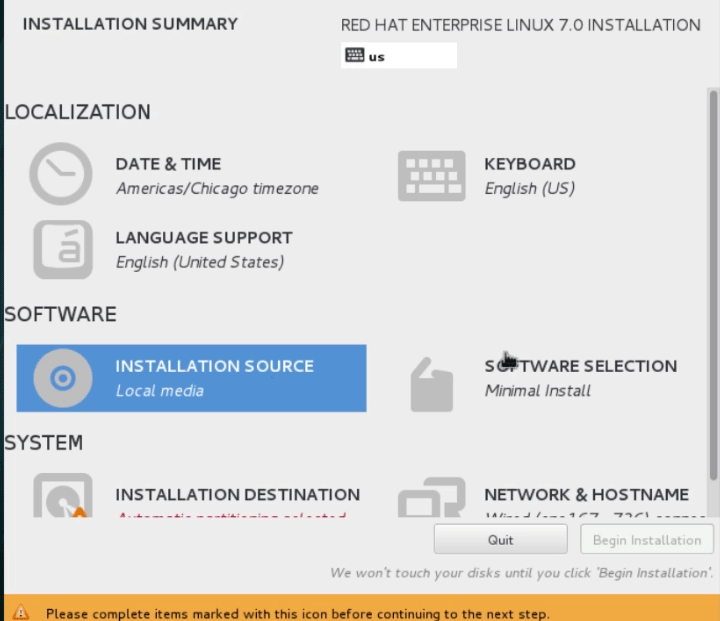
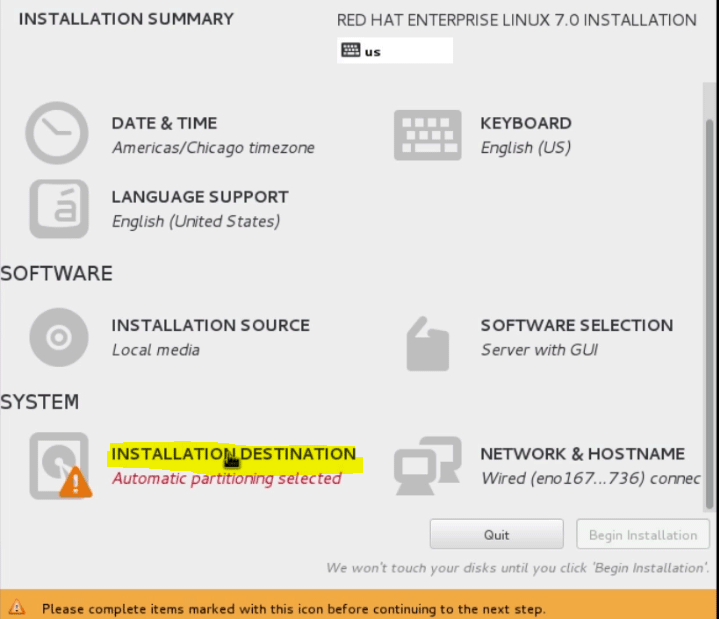
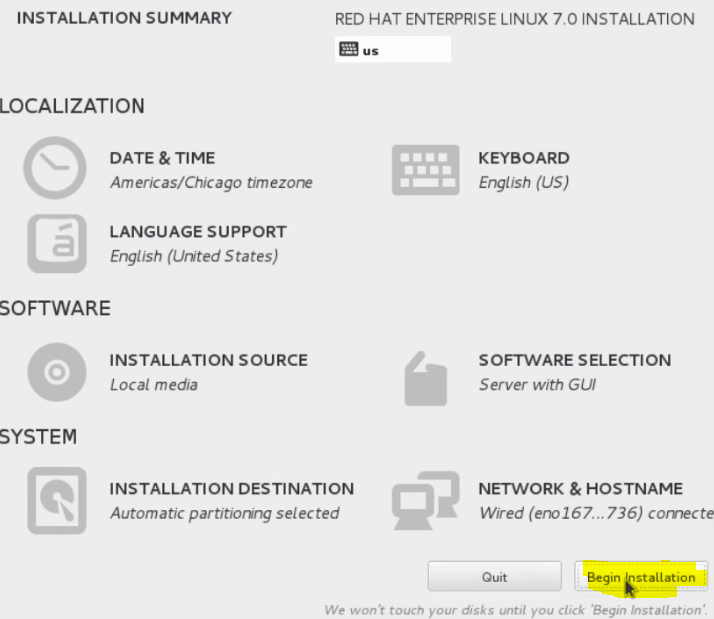
Step 17: Now, we will be presented with the installation summary screen. It’s more like a menu of things we will have configured to install our system.
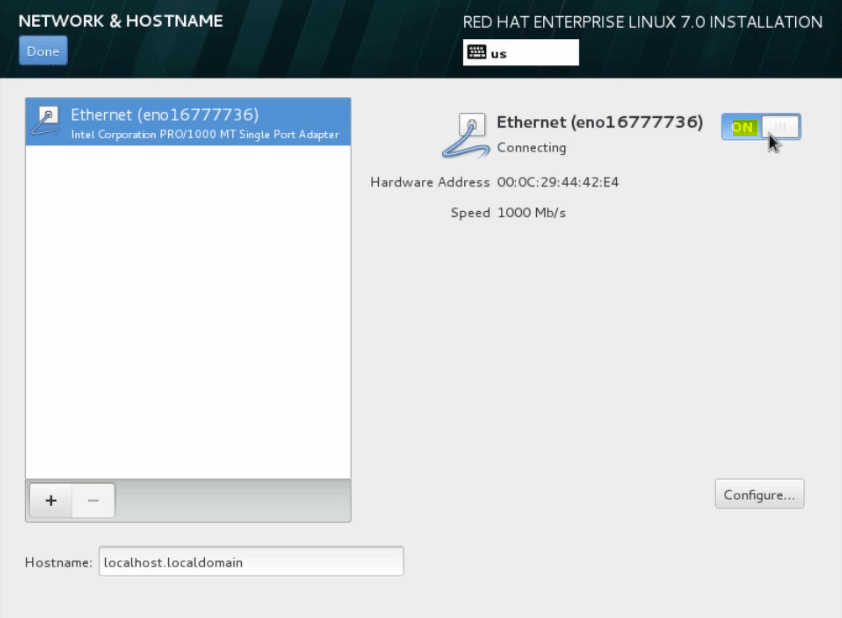
Step 18: Now click on Networking and Host Name.
Step 19: Then, we will start our network connection by sliding the slider into the ON position.
Let us move to the next step of installing the Unix
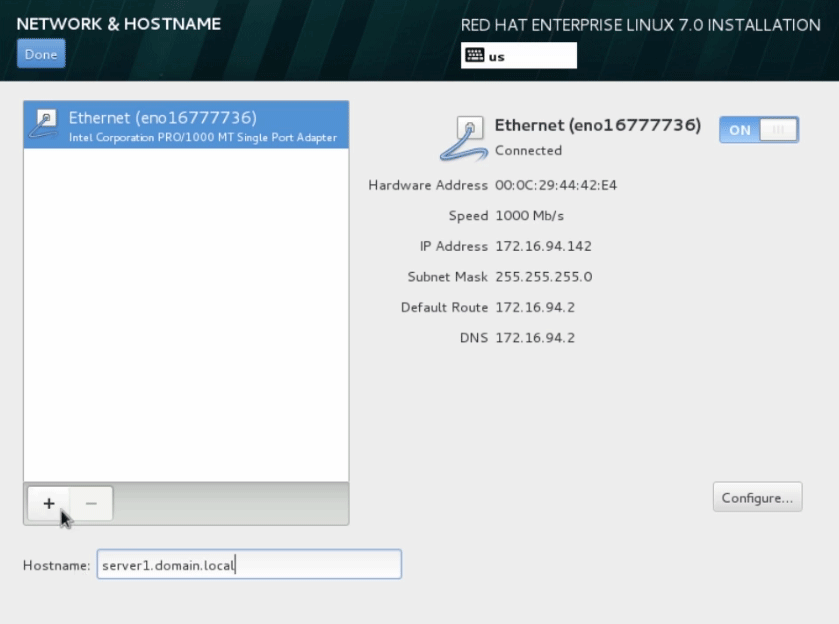
Step 20: It’s going to grab an IP address from DHCP and go ahead and scroll down over here and give this machine a name. So we will go ahead and call it server1.domain.local.
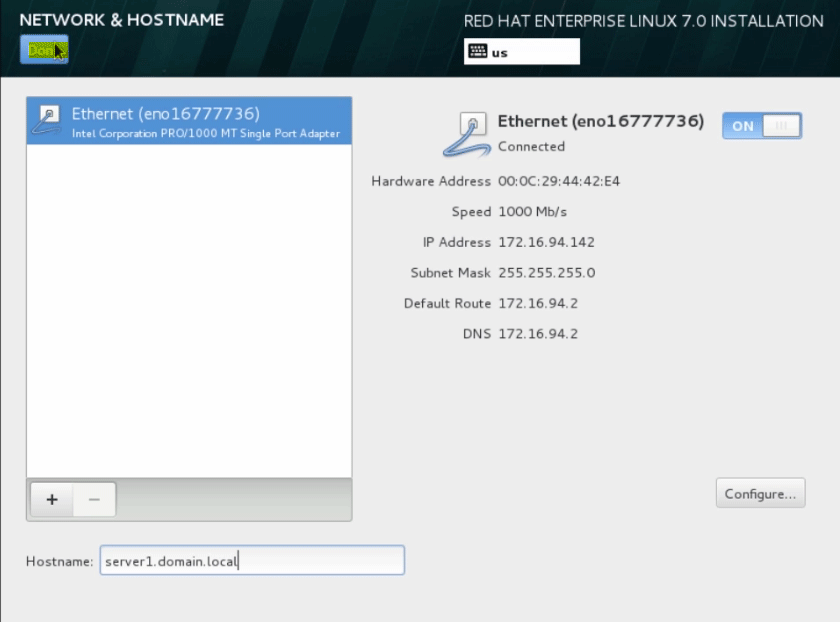
Step 21: Let’s go ahead and move our mouse up here and click done.
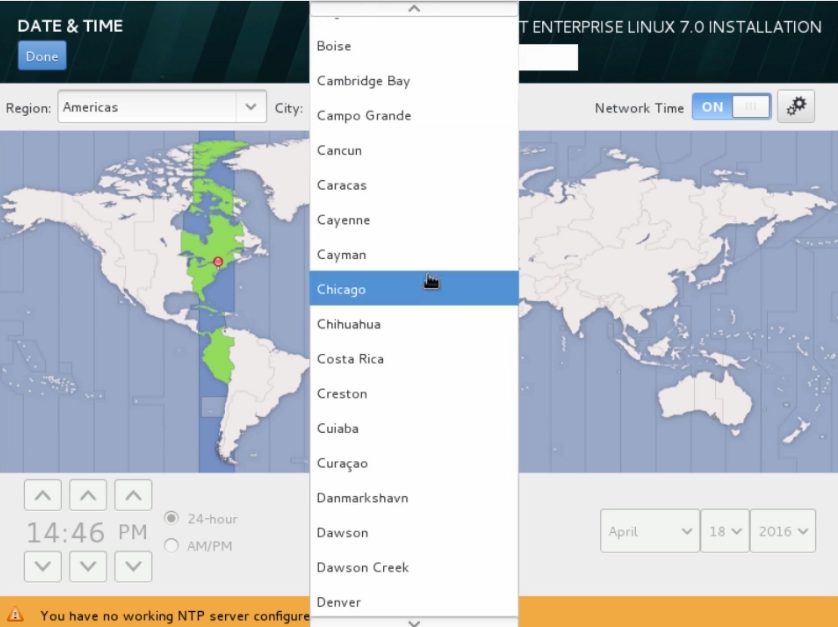
Step 22: Then we will set our date and time.
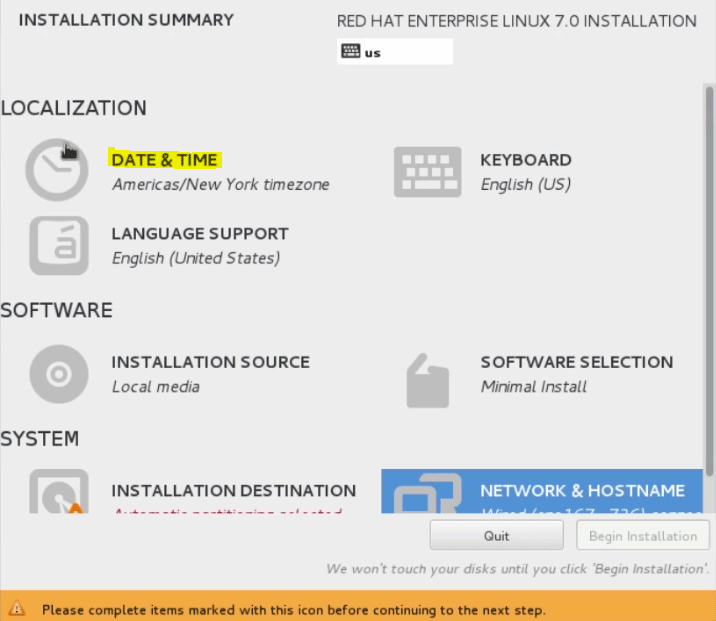
Step 23: So in this section, we could select our time zone. So let’s go ahead and move down to Chicago, where we happen to be right now, and then configure NTP.
 Step 24: Let’s go ahead and click on the gears. The green icon indicates all of the currently configured NTP server and success. So here we can see that all four are working.
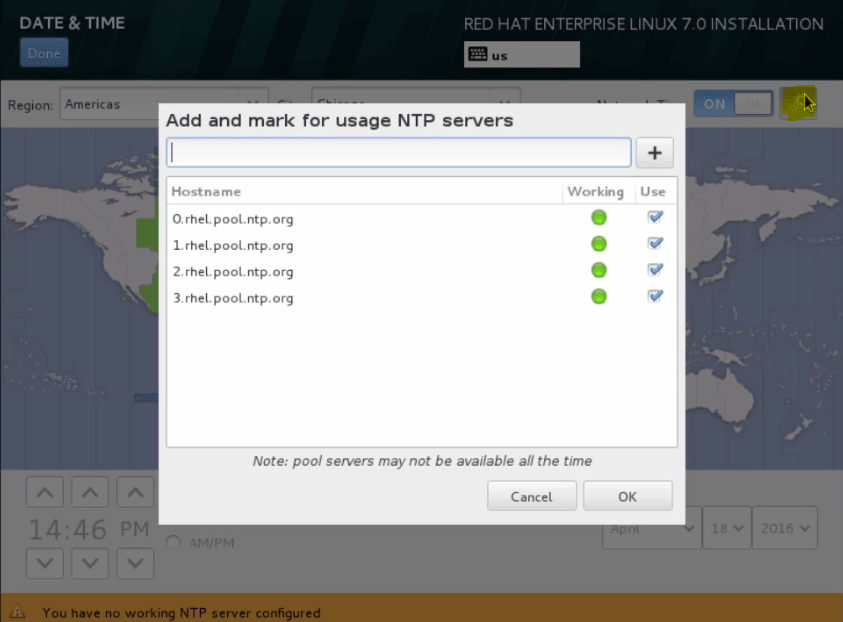
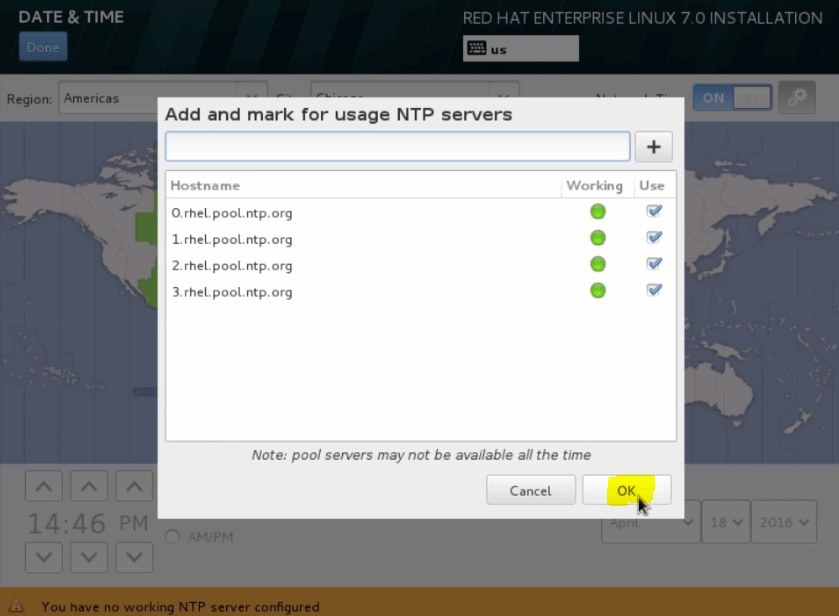
Step 25: So, let’s go ahead and click OK.
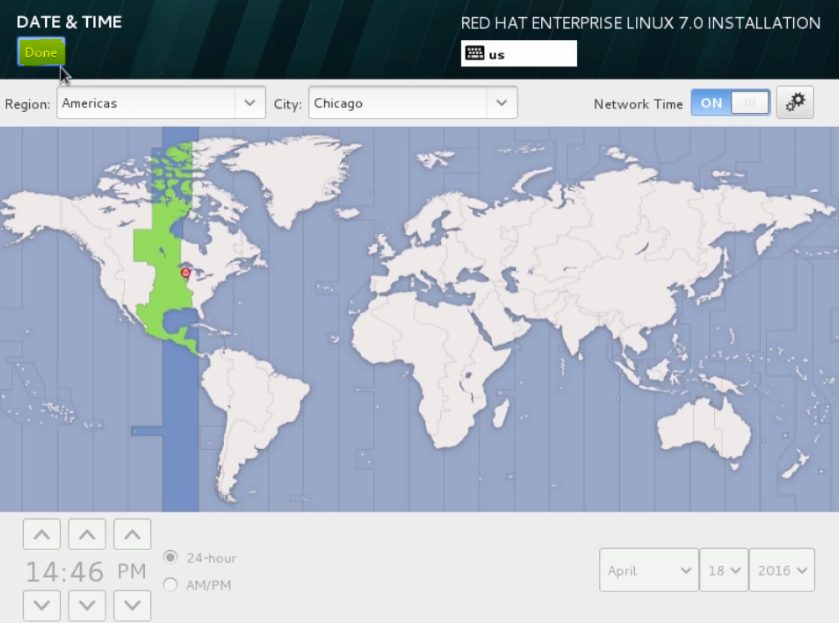
Step 26: Then scroll up here and click done.
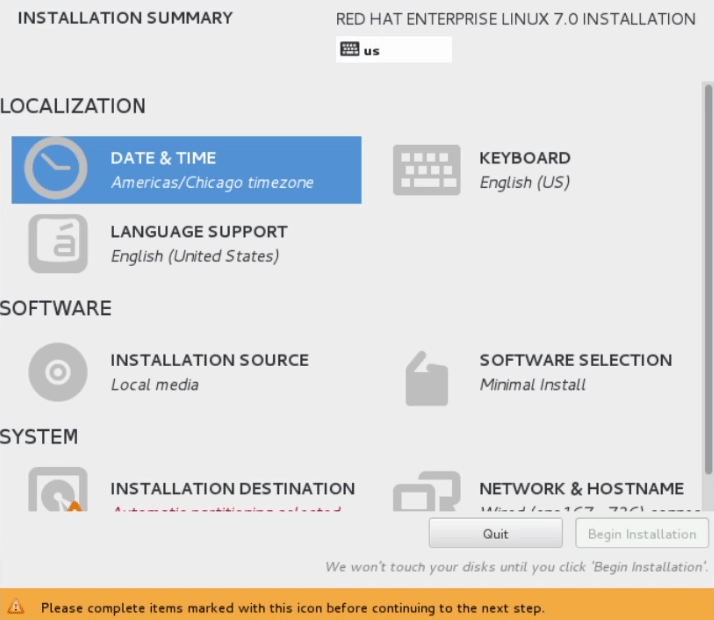
Step 27: So, let’s move on to the software section. Here is where we can set our installation source.
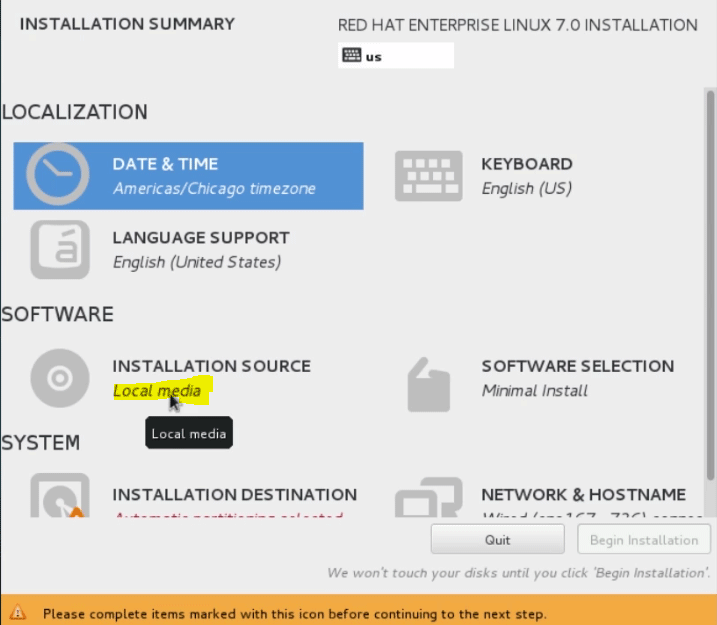
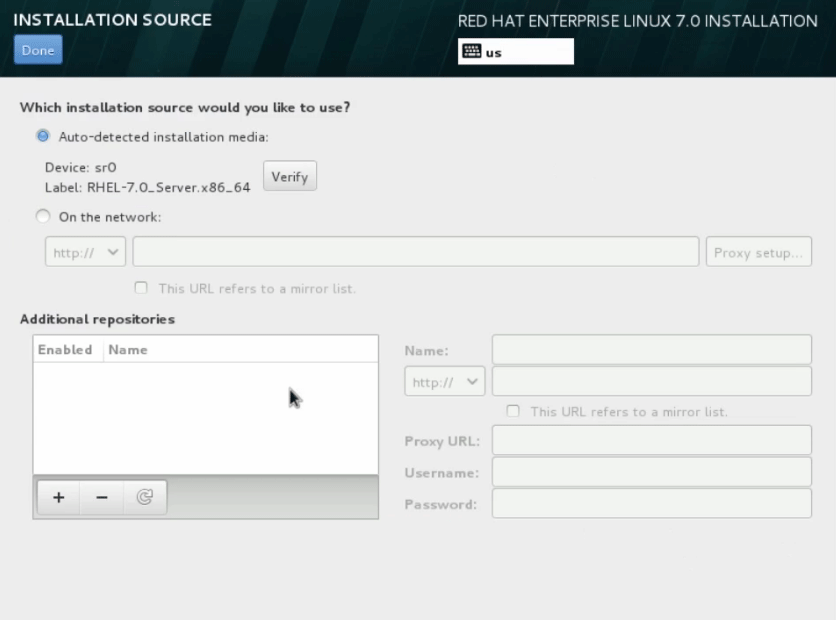
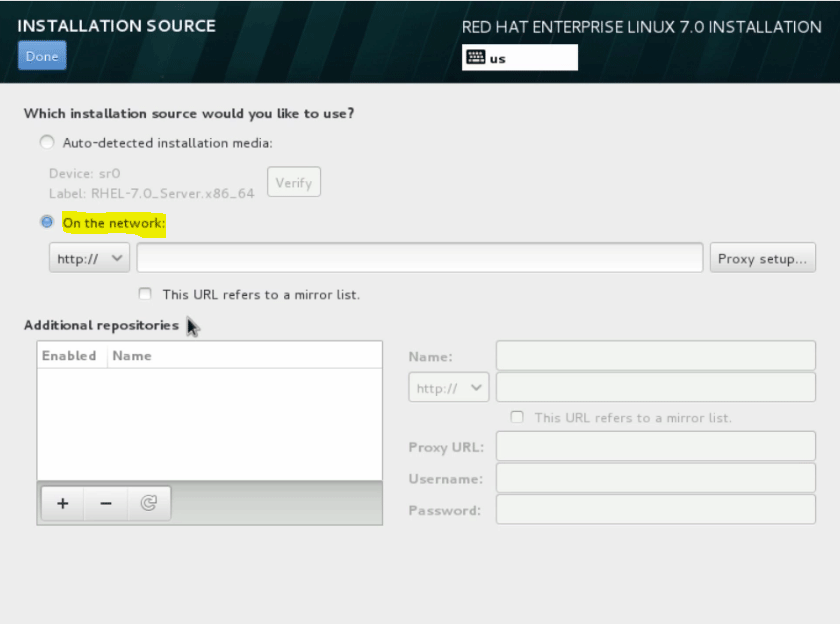
Step 28: We will continue to use the DVD that we booted our system with, but if we want to, we could choose a different installation source.
let us move to the next step of installing the Unix
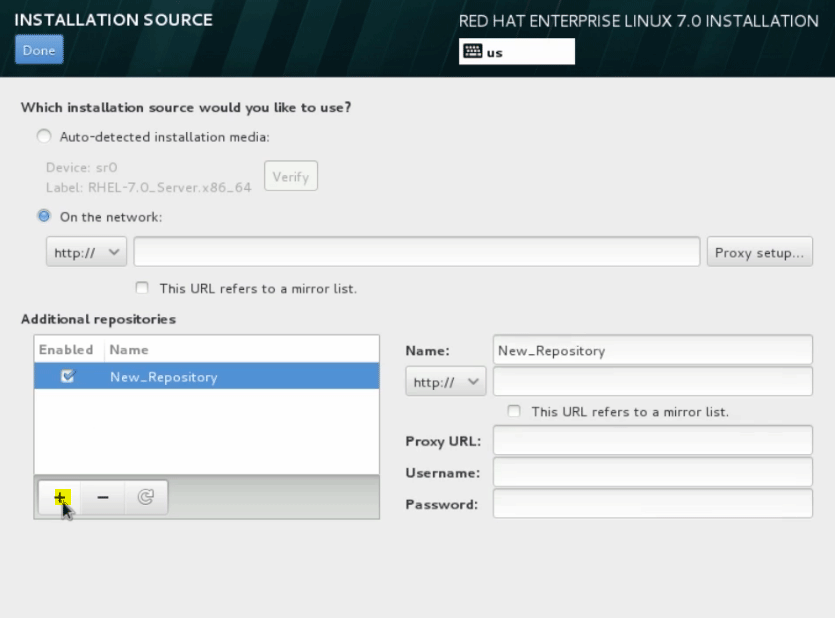
Step 29: For example, if we wanted to use any preferred installation method, we could select On the network.
We would pick HTTP as our protocol. We would go ahead and type in the URL that has our installation source available to us.
Step 30: We could add additional yum repositories if we needed to install additional software.
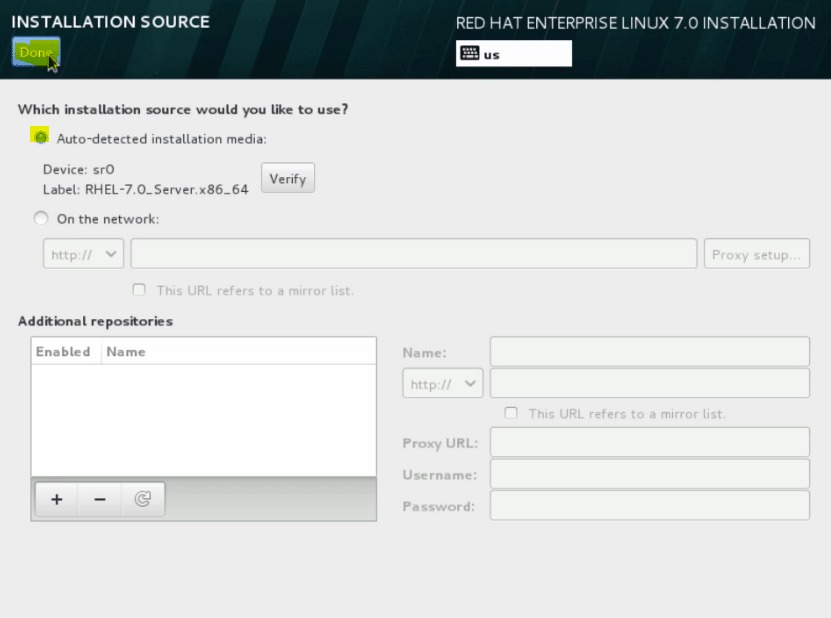
Step 31: Now let’s go ahead and go back to the auto-detected installation media, which is what we booted the system with and click done.

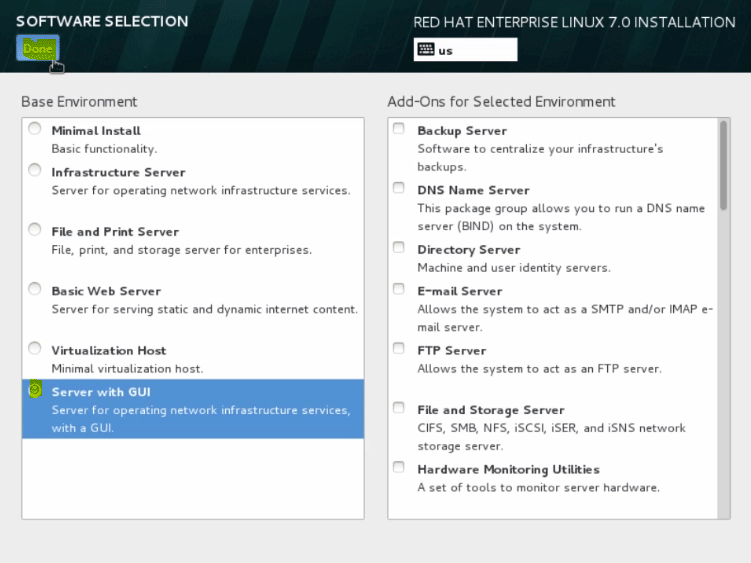
Step 32: Now click on the Software Selection menu, the currently selected installation is a minimal install.
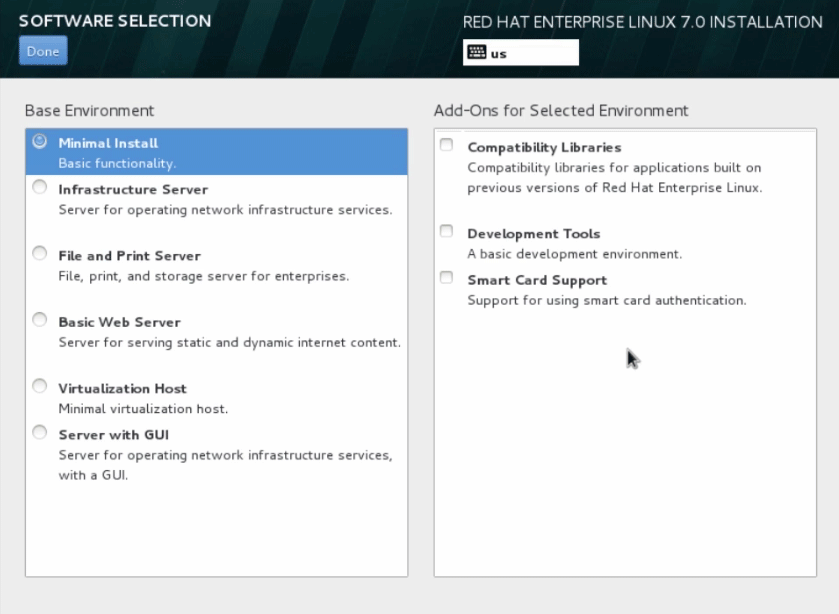
Step 33: As you can see, we have several configuration options available to us. We select Server with GUI and click done.
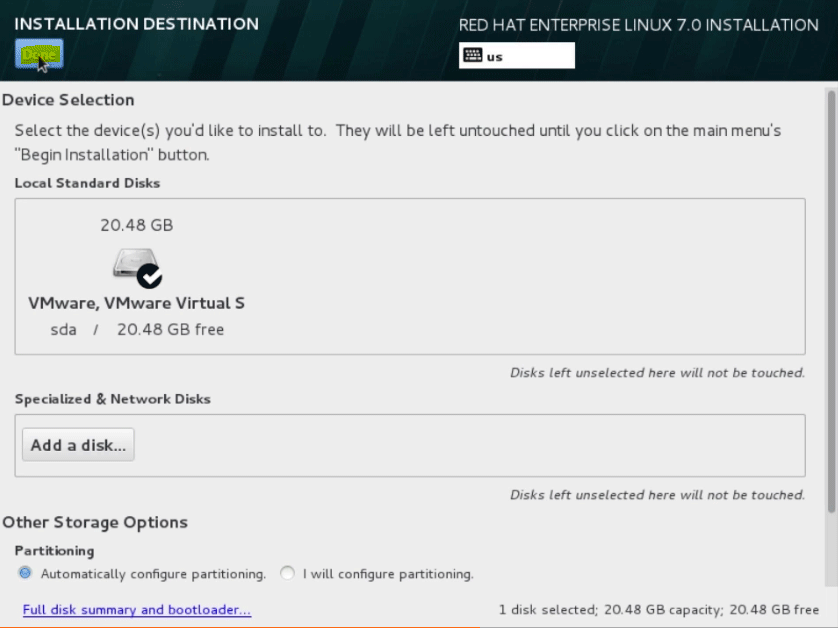
Step 34: We have our installation destination in the system menu.
Step 35: We can choose where we want RHEL to be installed, and we will use our local standard disk.

Step 36: We can click Add a Disk if we want to.
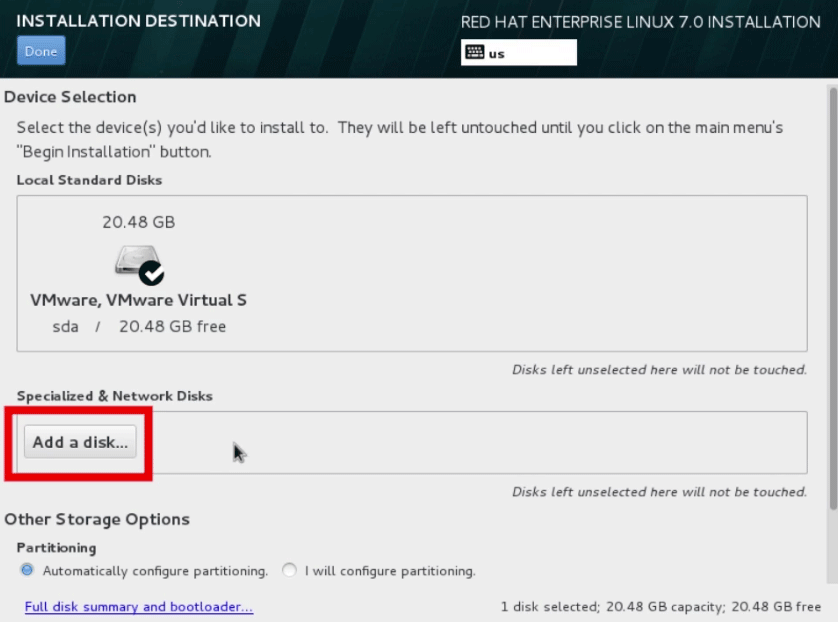
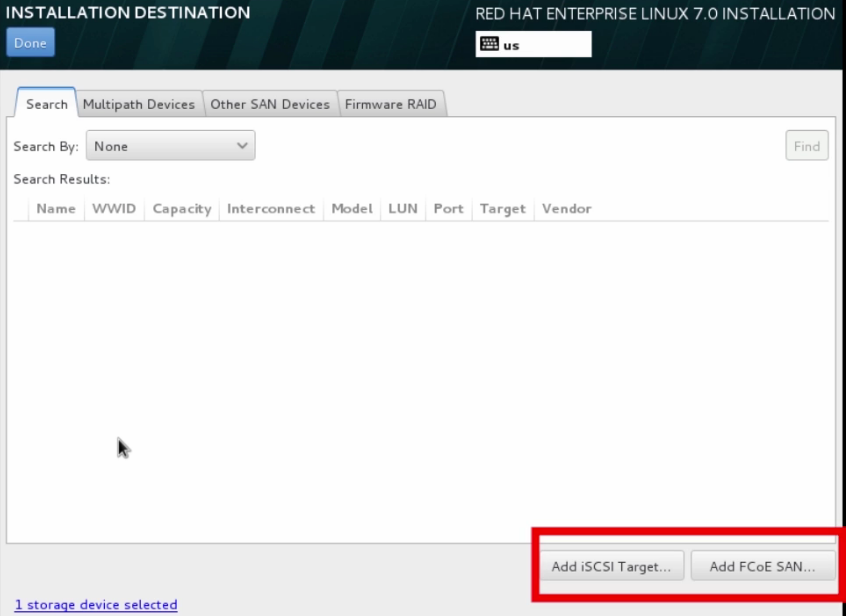
Step 37: Use a more advanced disk configuration system, such as a Fiber Channel Disk or an iSCSI device.
let us move to the next step of installing the Unix
Step 38: So let’s go ahead up here and click done one more time because we will stick with that local standard disk.

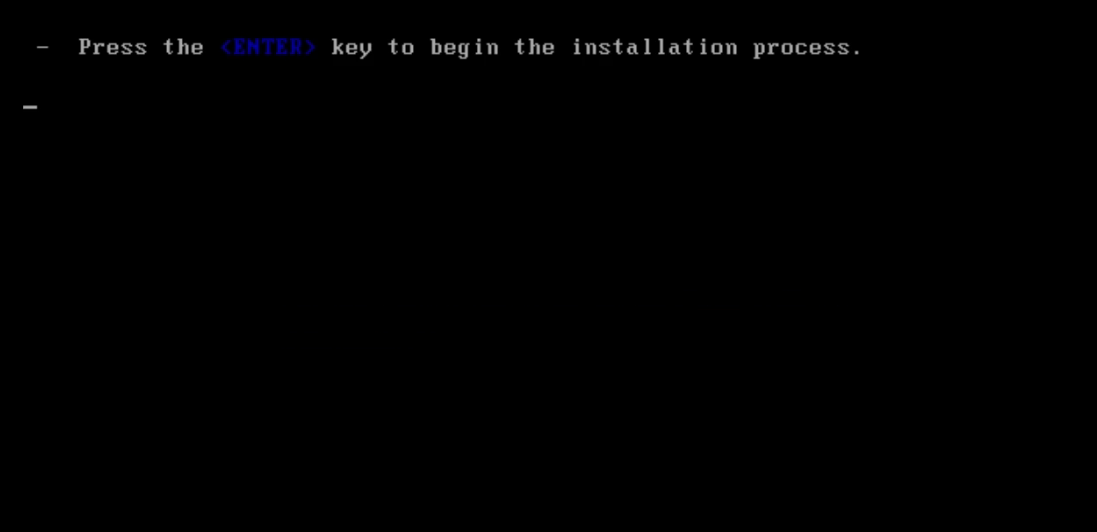
Step 39: Now, let’s go ahead and click on begin the installation.
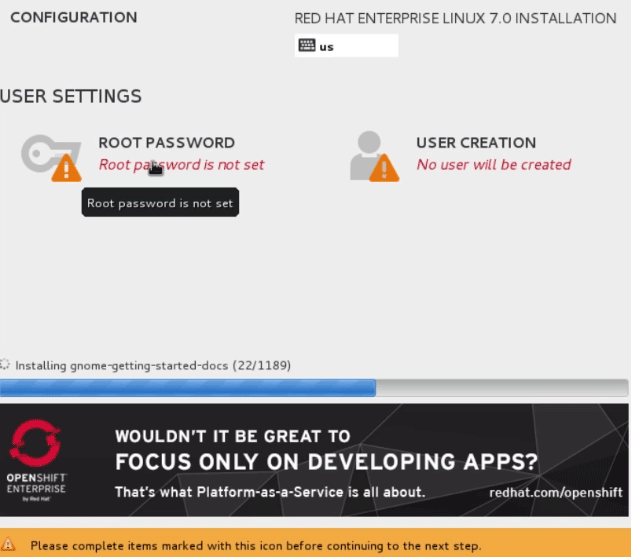
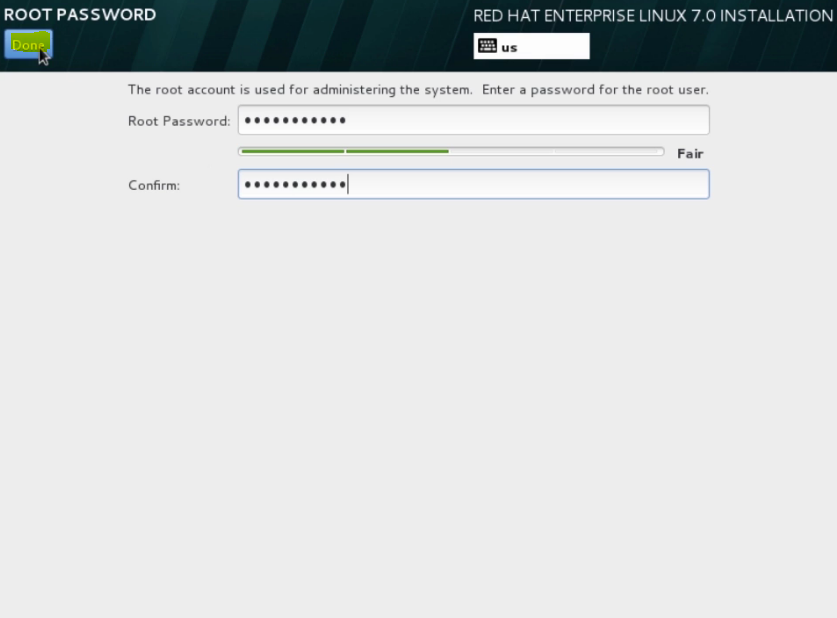
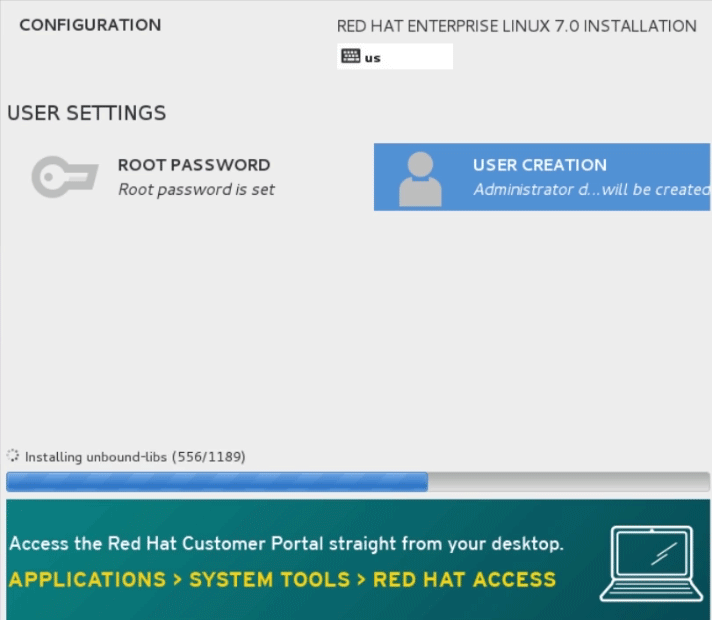
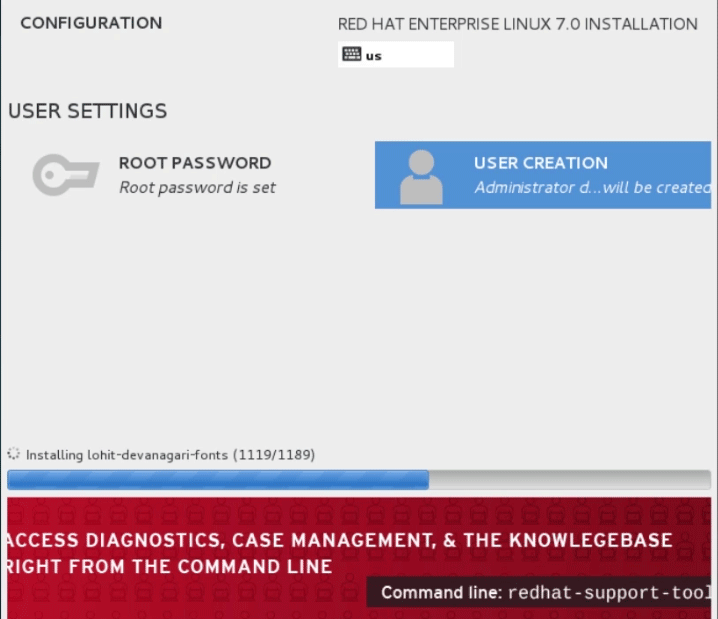
Step 40: Now, in the background, the Anaconda installer will start doing its job installing the system, and we are left with the task of configuring a root password.
The root account is for privileged access to the system and the administrator.
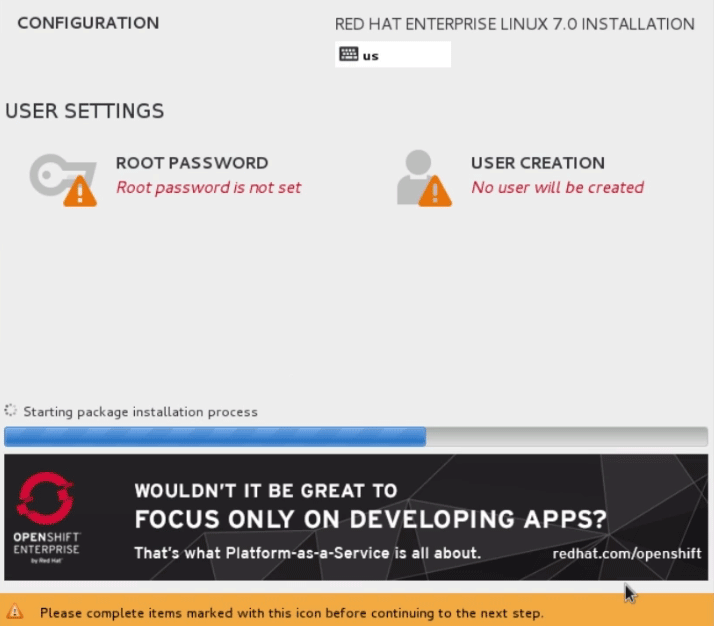
Step 41: Let’s go ahead and configure the root password first. Let’s move our mouse up to here and click the root password.
Step 42: So go ahead and type in a very strong password for this user. When you are finished, go ahead and click done.
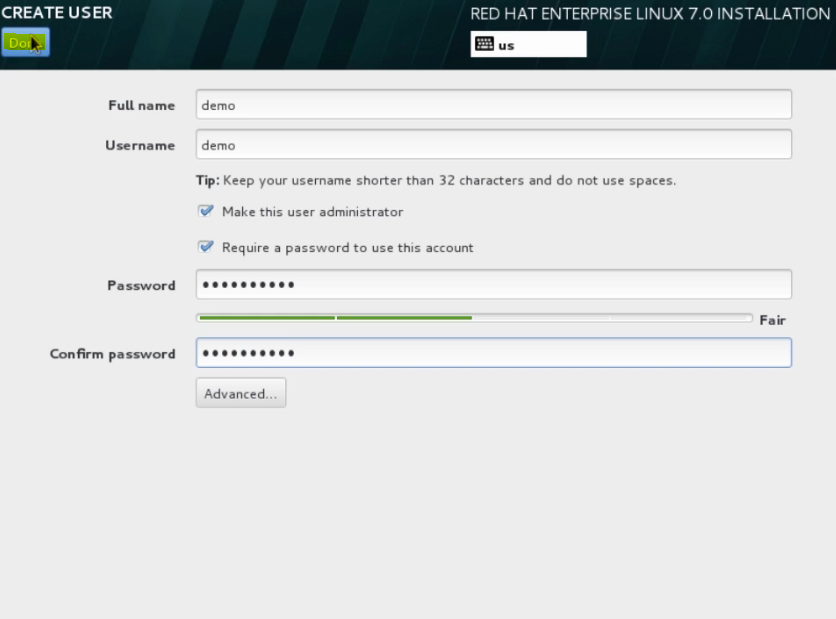
Step 43: Now, let’s go ahead and add that second user for us to use. We click on User Creation.
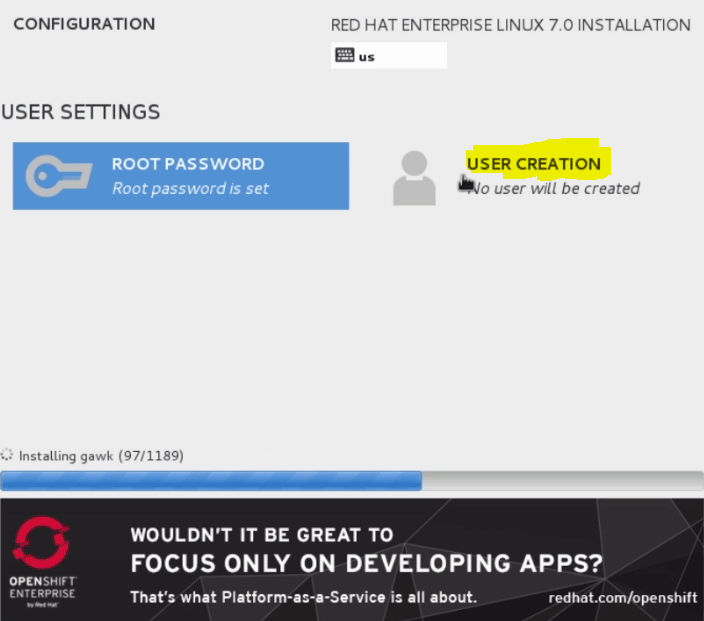
Step 44: We will go ahead and name the user demo, make the user an administrator, and go ahead and type in a strong password. When we are done, let’s go ahead and click done.
Step 45: Now, while anaconda is installing, let’s take this opportunity to review the virtual consoles. Types in Control + Alt + F1, and that’s going to jump us over to the first virtual console. If we were in text mod. This would be our main installation window.
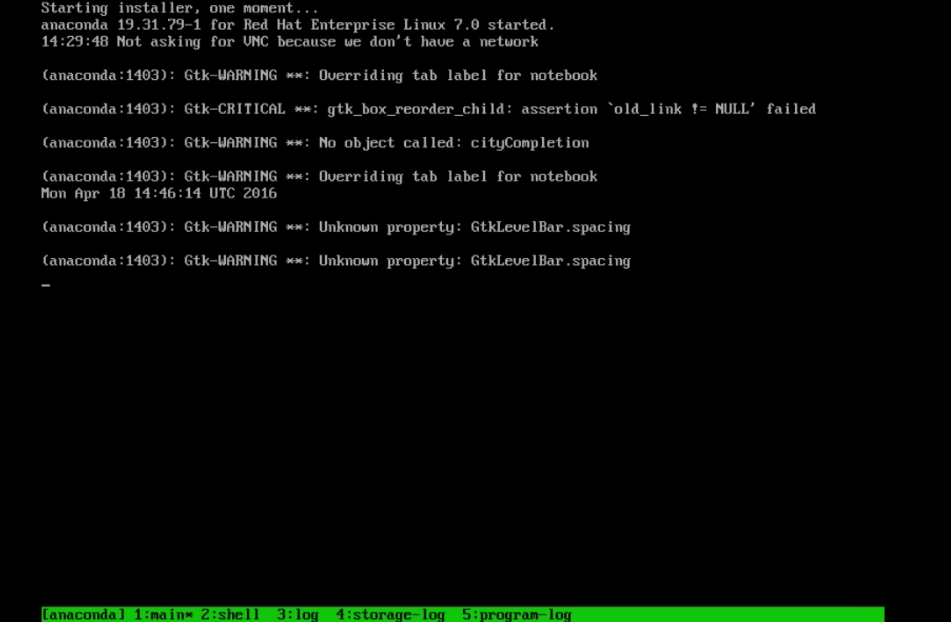
Step 46: We choose to do a graphical installation on virtual console 6. So go ahead and hop back over there with Control + Alt + F6.
Step 47: On virtual console 3, that will be the Anaconda installer log.
let us move to the next step of install the Unix
Step 48: If we move over to virtual console 4, that will be the storage logs for the installation.
Step 49: Finally, virtual console 5 is the program logs.
Step 50: on virtual console 2, that will be our root shell, so from here, we could do anything that we would like that we would normally get at the command line.

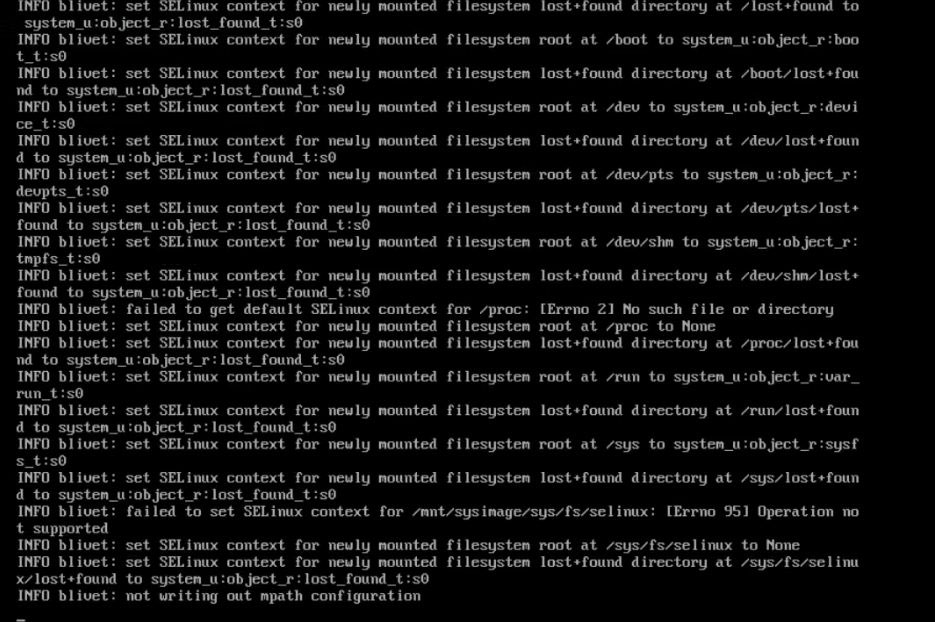
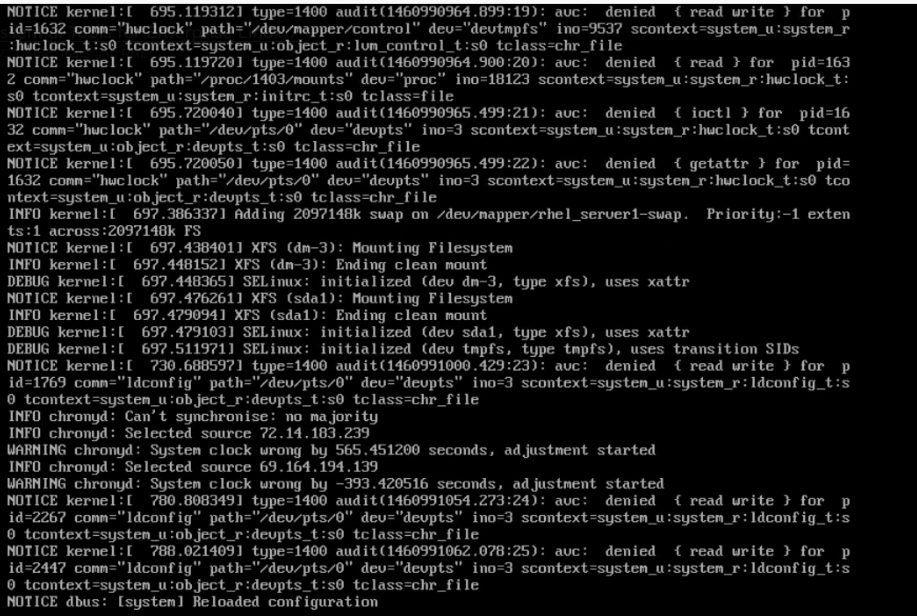
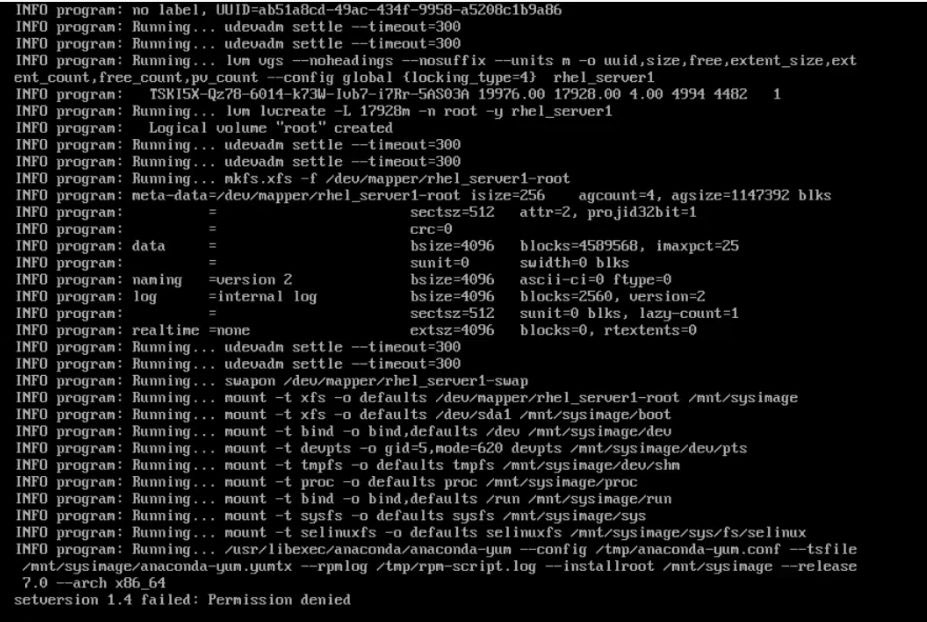
Step 51: So, let’s go ahead and check our installation logs that. Type /tmp to change into that directory.

Step 52: Now, we type the command to list the directory contents of this directory.
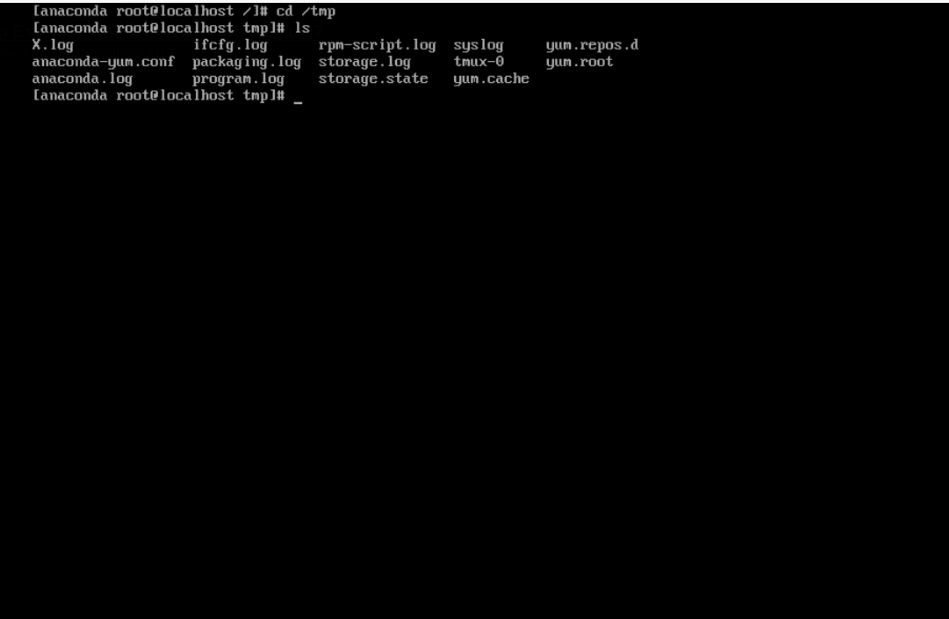
Step 53: now, type more command, it’s read the file and put its contents on the screen. One page at a time. And the type syslog. It’s a file name. we can see the information that’s inside that file.

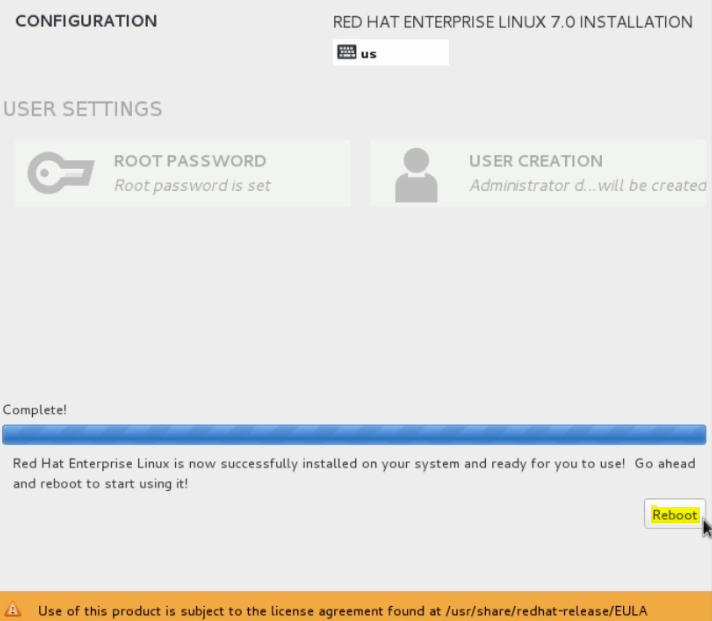
Step 54: So jump back to graphical installation using the command Control + Alt + F6 and finish off our installation.
Step 55: So final tasks are completed, and the system will ask for a reboot, so let’s go ahead and do that. Upon reboot
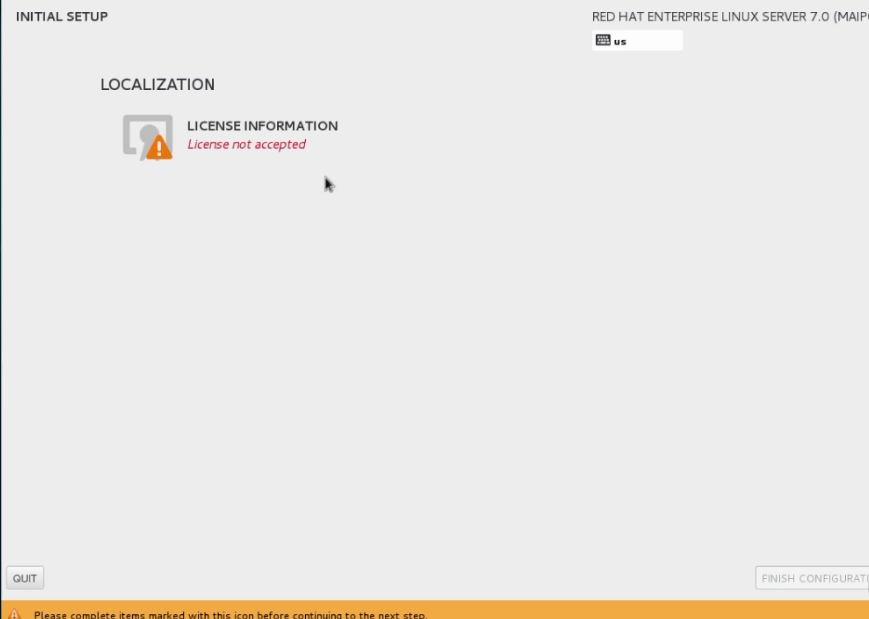
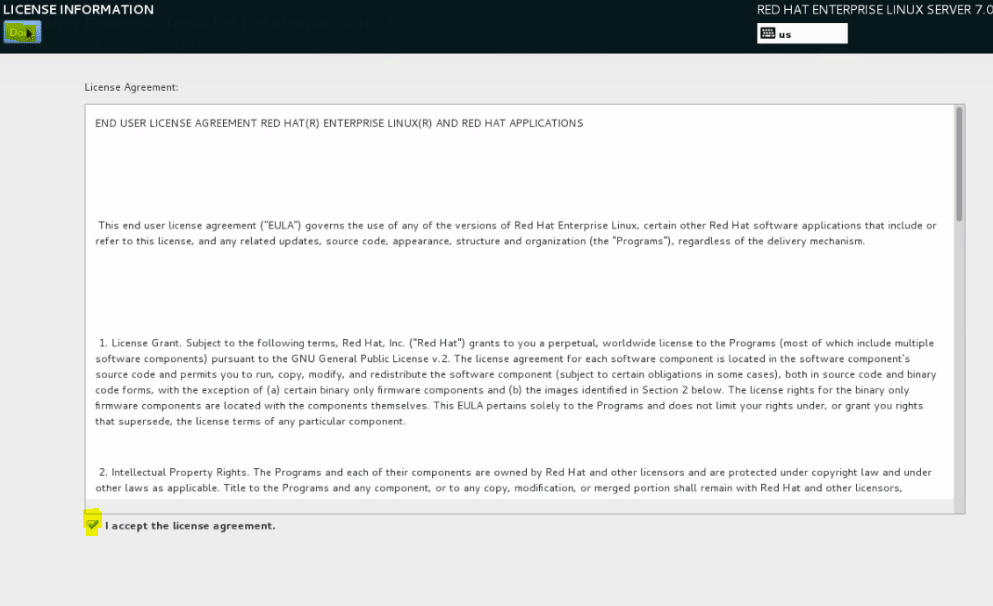
Step 56: let’s go ahead and accept the license agreement.
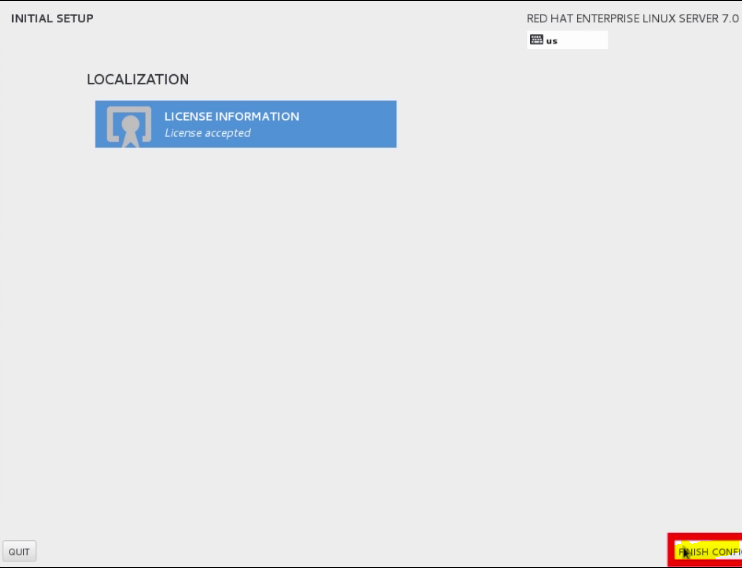
Step 57: Click done
Step 58: go ahead and click finish configuration.
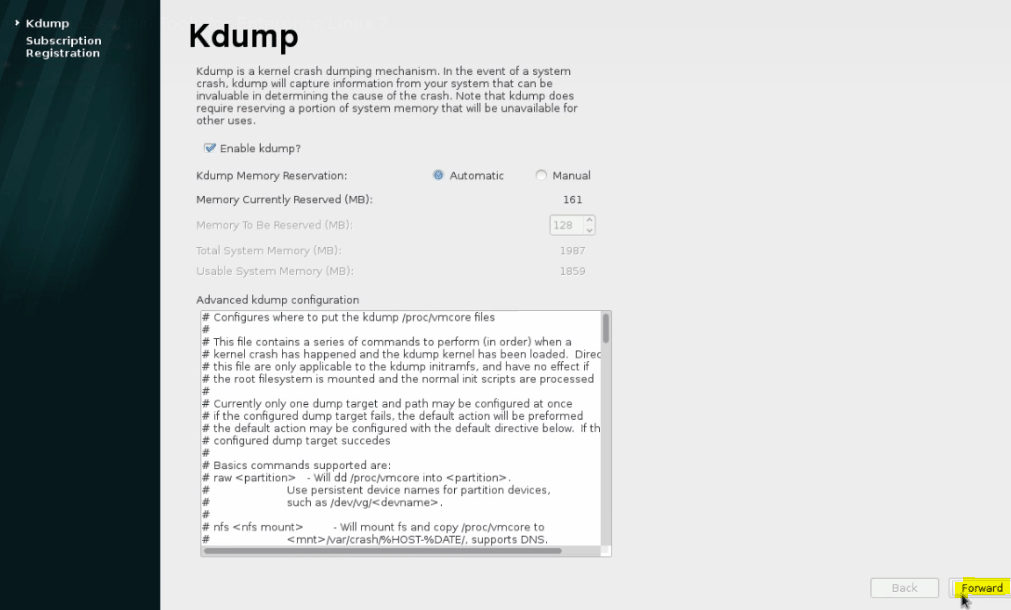
Step 59: Now let’s go ahead and click forward to take the Kdump defaults
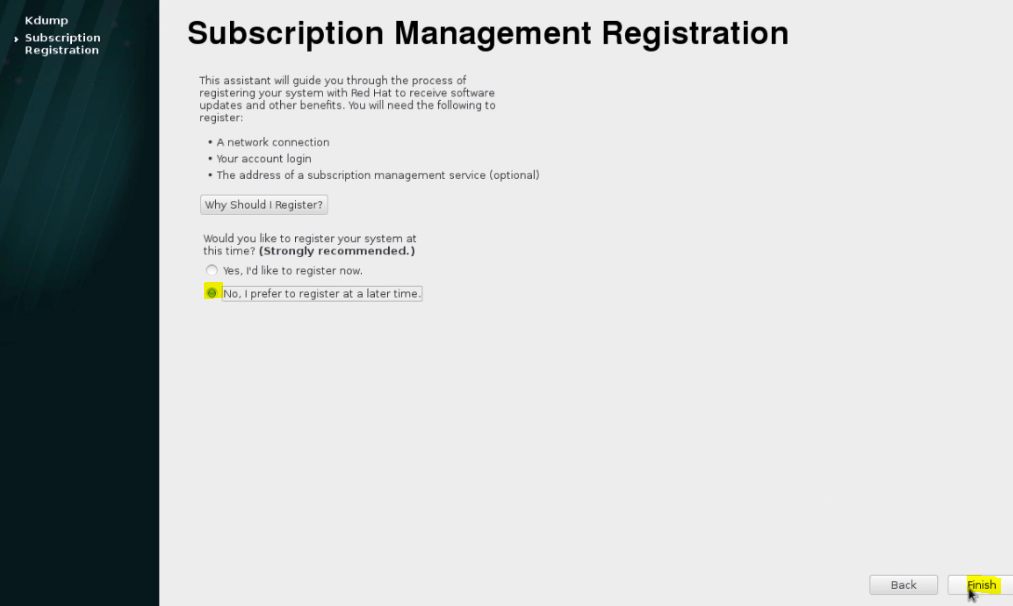
Step 60: Let’s go ahead and click No, I prefer to register later. And click Finish.
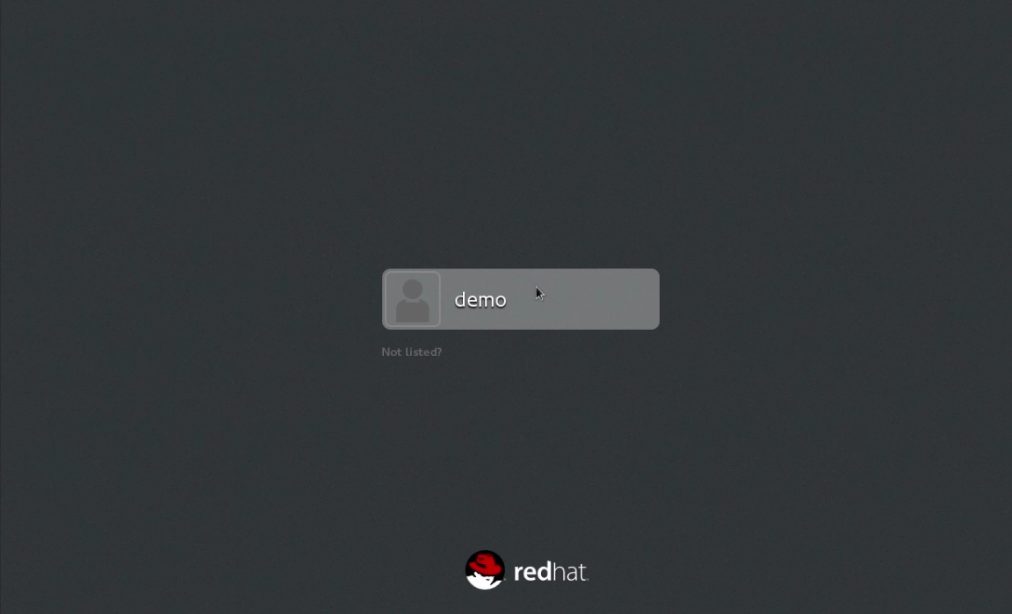
Step 61: We can use the mouse to click on the username.
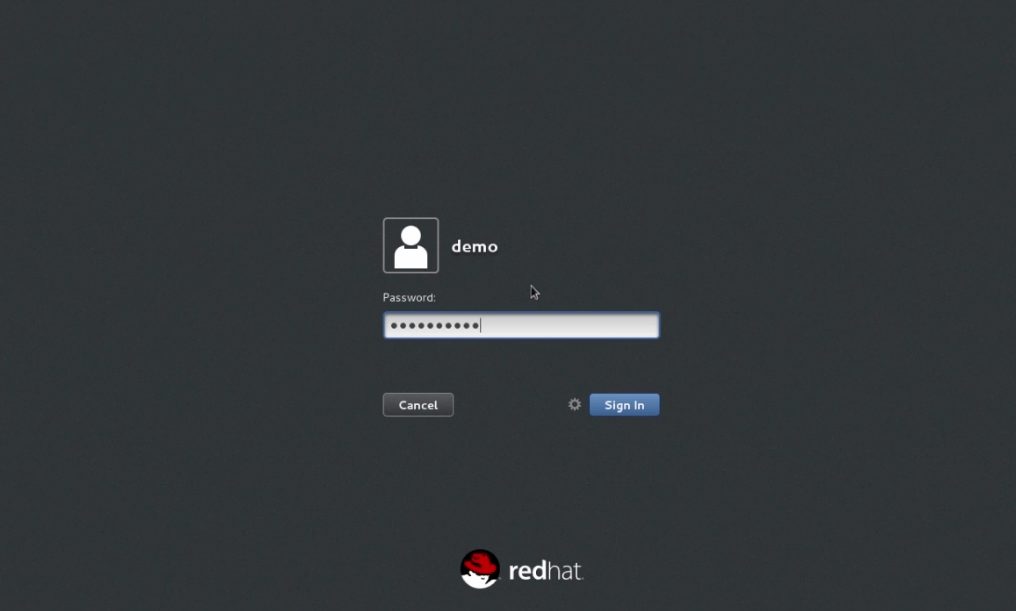
Step 62: Type in the password we entered for the user during installation.
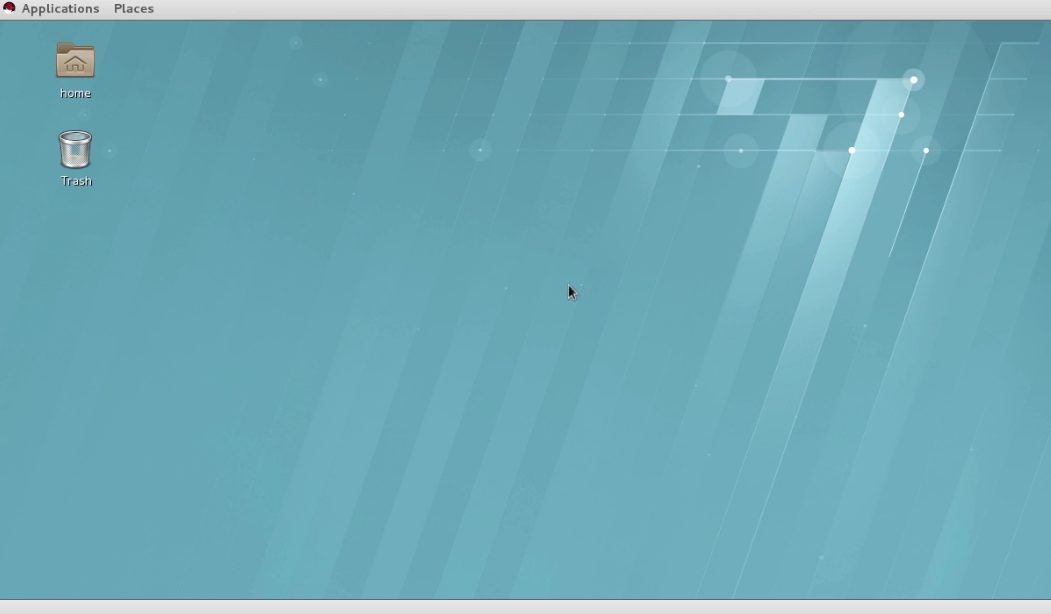
 Step 63: We will have a working RHEL 7.0 machine ready to work on.
Recommended Articles
We hope that this EDUCBA information on “Install Unix” was beneficial to you. You can view EDUCBA’s recommended articles for more information.
