Updated July 4, 2023
Introduction to Unity
Do you want to create a game in very less time? Are you a beginner in game development? Then Unity is the best choice for you. Unity is a powerful cross-platform game development engine to create 3D or 2D games, simulations, etc. This article tells you how to install unity for Windows platform. Installing Unity in MacOS is also very similar to Windows. So let’s get started.
How to Install Unity?
Unity can be installed by visiting the Unity store and with the help of Unity Hub. Detailed instruction is provided below with each step elaborated.
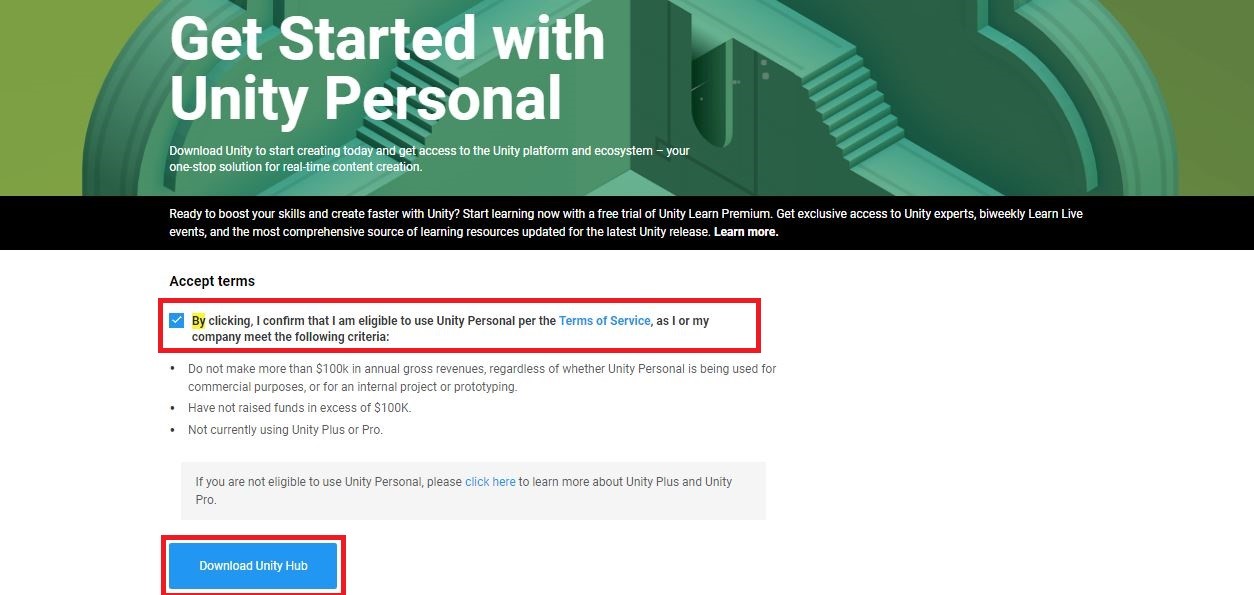
Step 1: The first step is to visit https://store.unity.com/download. Accept the terms and conditions and click on Download Unity Hub.
Unity Hub is the application that will help us download Unity Editor of different versions. It is useful to choose different unity versions to open the projects. It resolves package-related errors if any and organizes the projects and their locations. So it will be easier for us to search and open the project with the needed unity version.
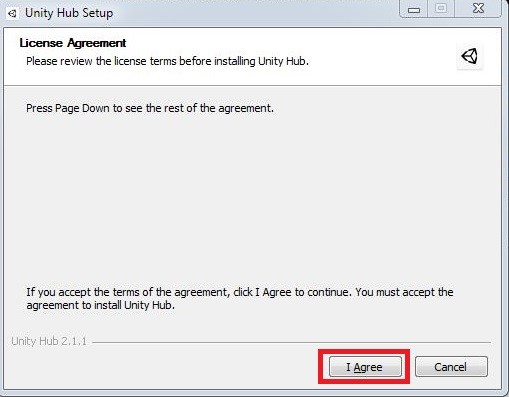
This will download the UnityHubSetup.exe. Once the download is complete click on the file. This prompts us to the Unity Hub Setup window. Click on I Agree.
In the next window, we have to select the destination folder and click Install. By default, the destination folder path will be C:\Program Files\Unity Hub.
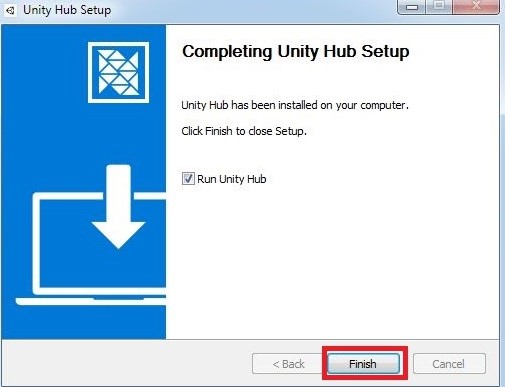
This will open Completing Unity Hub Setup. Click on Finish Button since the Run Unity Hub box is checked, it will automatically open the window for the next steps. Well Done..! This step completes the installing of the Unity Hub.
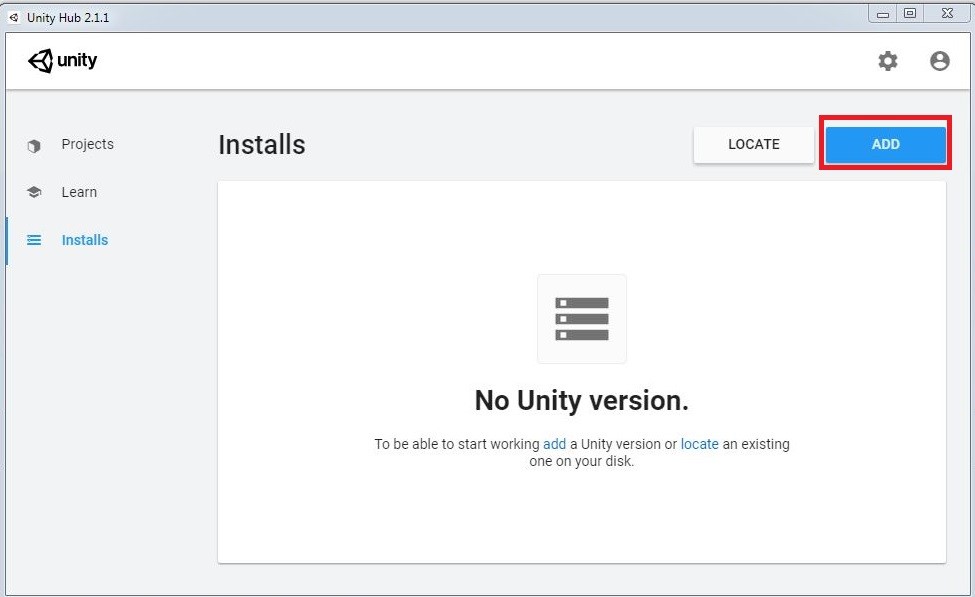
Step 2: In the next step, the Unity Hub window will open as below. In the left side panel, it has three sections. Projects, Learn and Installs. We will get some basic idea about these sections before proceeding to the next step.
- Projects: This section is used to open different Unity Projects, with their previously opened unity versions specified. It will also show the target platform, project location and last modified time of the project. We can filter the projects as well.
- Learn: In this section, we can find any tutorials if added.
- Installs: This section contains different unity versions to choose from. This is the section using which we are going to install the Unity Editor.
Go to Installs tab and click on Add button. This will prompt us to Add Unity version window.
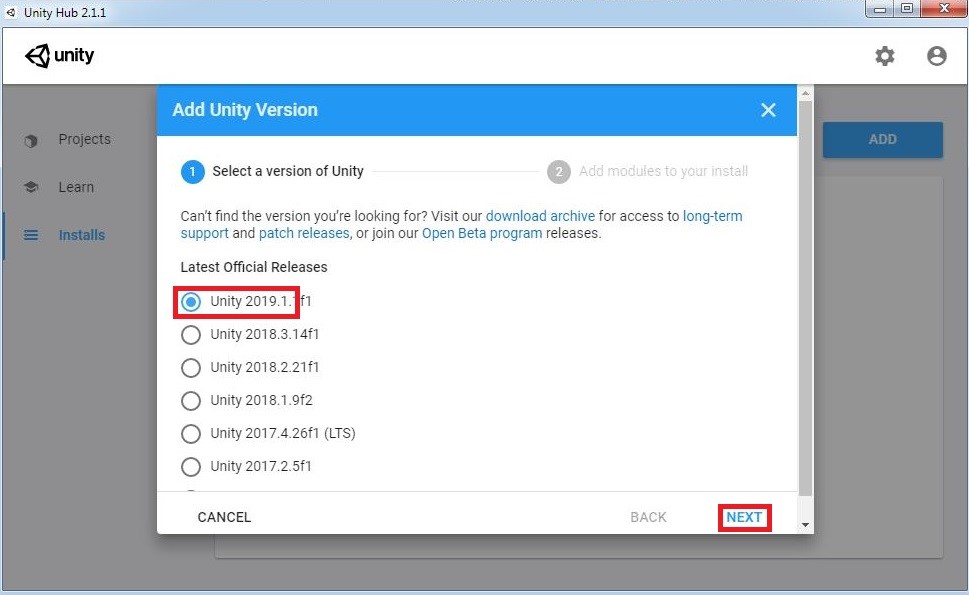
The list shows us different Unity versions. Choose the Unity version from the list and click on Next. In the below image we have selected 1 version of unity. If you want other versions, choose it according to your requirement.
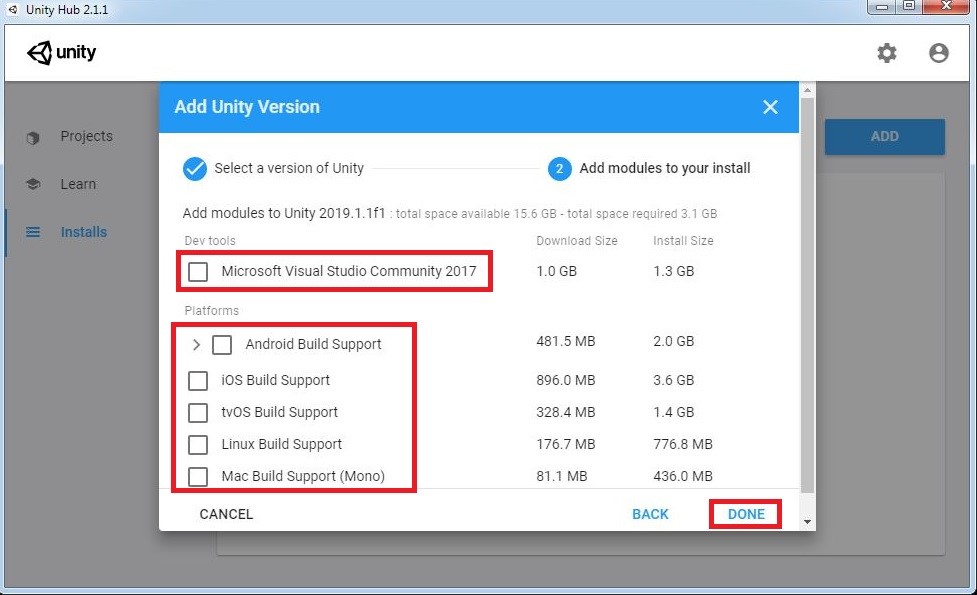
Select different modules like DevTools and Platforms. Devtools is needed for the script editing in unity. Unity by default shows, Visual studio for script editing. If you want you can use different script editor and add it later in the Unity Preferences. From the Platforms, we can choose different build supports like Android, Windows, iOS, WebGL, etc. By default, unity comes with windows to build support. So we need not worry to install it separately. After selection click on the DONE button.
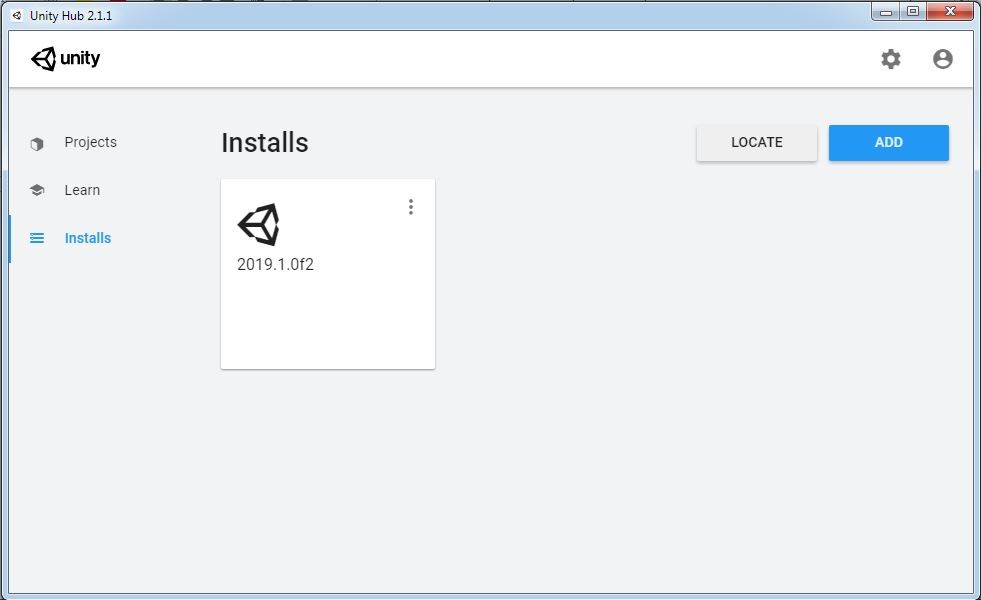
Wait till the installation is complete. Once it’s installed it will show the Unity Installation version like below image. It means unity is installed in your machine and you are ready to create your first project. Here we can also check the version.
If you already have Unity installed on your machine you can just click on the Locate Browse for the unity editor location and add it to the hub. Thus we can add multiple Unity installations into Unity Hub. Based on our need we can assign Unity versions to open the specific project.
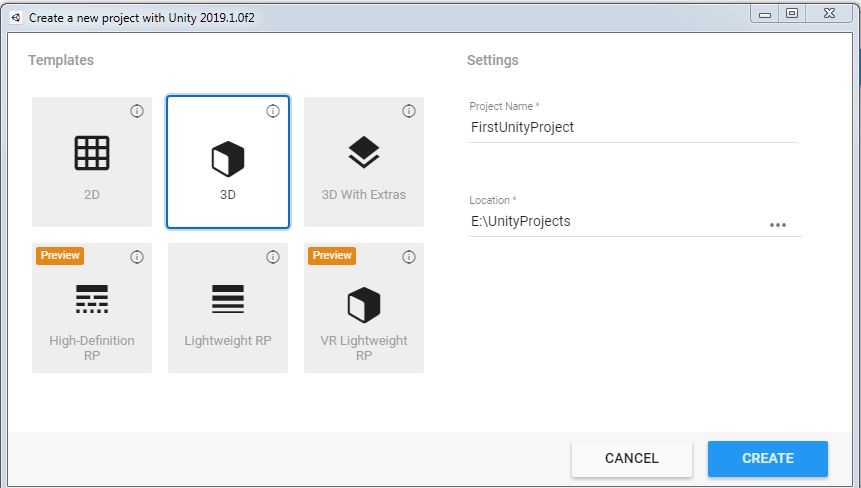
Step 3: Let us start with creating our first Unity Project. To do this we have to navigate to the Project section in the Unity Hub. We can find two options here Add and New. Add is used to link the existing unity project and open it. New is used to create a fresh project. For now, we will create a new project.
In the template sections, there are many options like 3D, 2D, High-Definition RP, etc. Let us have some brief knowledge about each of them.
- 3D: For creating the 3D applications, which uses Unity’s built-in rendering pipeline.
- 2D: For creating 2D applications, including Texture Import, Sprite Packer, etc.
- High-Definition RP: It configures the projects that use high-end platforms. It increases the rendering quality of the project.
- Lightweight RP: This is for projects, where performance is our main aim.
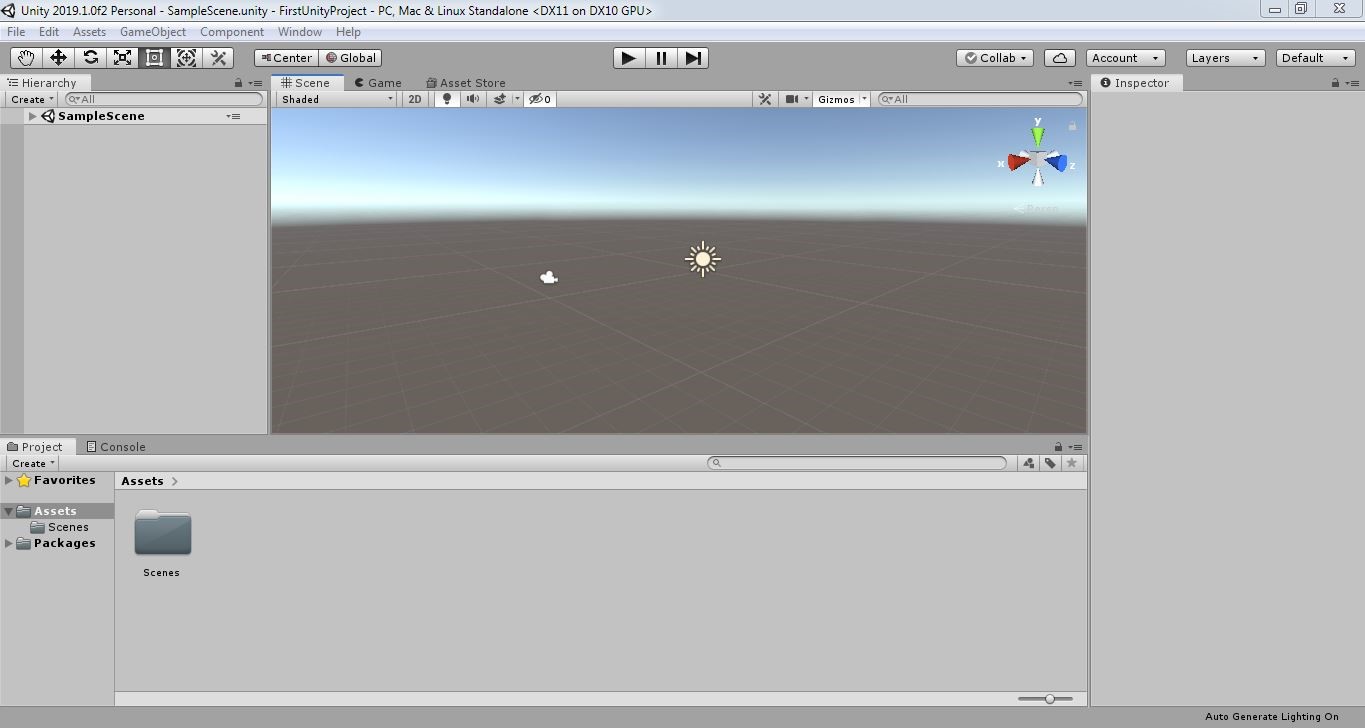
For now, we will stick to the 3D template. Once we hit Create button it will start importing packages, scripts, textures, etc. needed for the project. And finally the editor will be opened and you are ready to create your own Application.
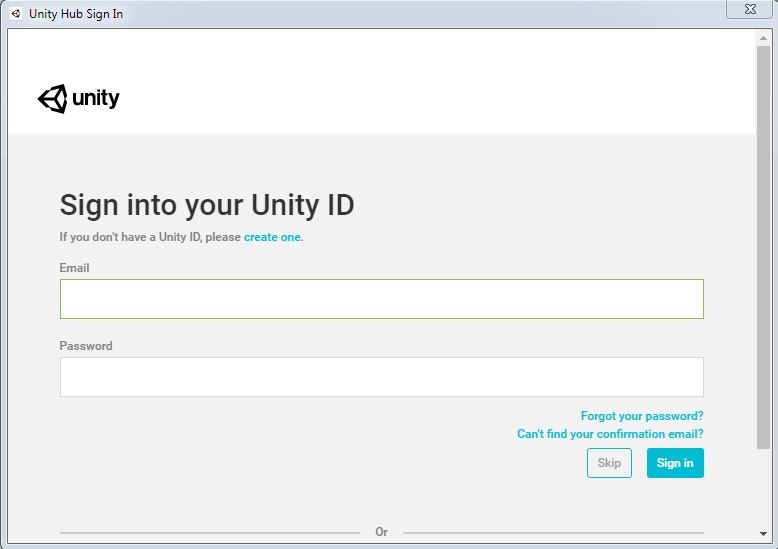
Step 4: In order to access the Unity Assets, we can create a Unity ID and login. If you don’t have one, create the ID by clicking create one. We can also log in with the help of the Gmail account as well.
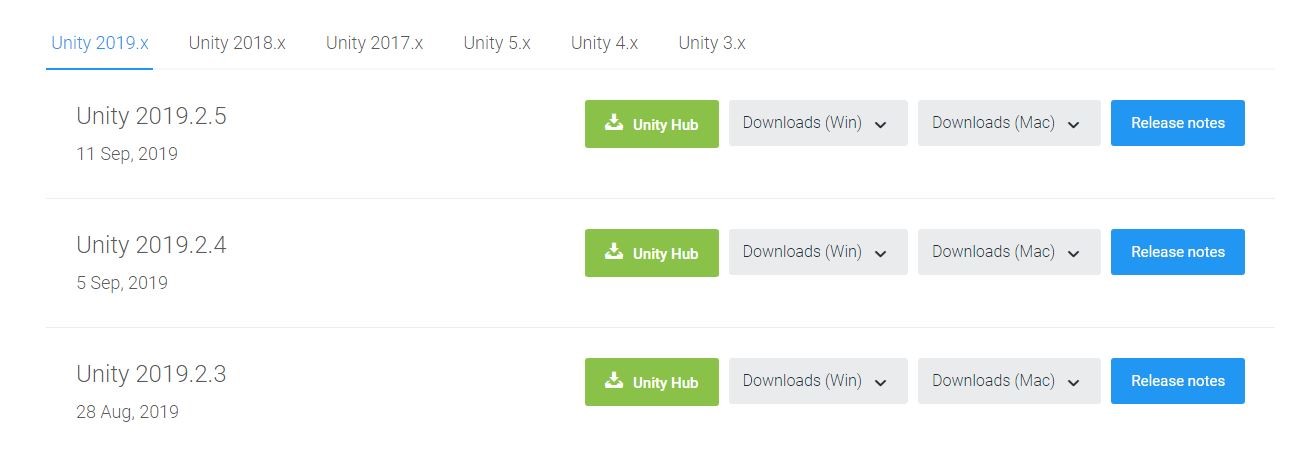
Step 5: We can download the older unity versions (both Personal and Pro) from the below-mentioned link. Either we can download the Unity Hub and follow the above instructions or directly download the unity Editor. Release notes also provided in this site.
https://unity.com/releases/editor/archive
Conclusion – Install Unity
One thing we need to keep in mind is that there is no backward compatibility for the unity Projects from Unity 5. That means, projects made in Unity 5.x will not open in Unity 4.x. But Unity 5.x will import and convert the 4.x projects. So it’s advisable to back up the project before opening in other unity versions. Once the project is opened, check for any errors or warnings in the console. If everything is fine to go ahead and turn your ideas into reality.
Recommended Articles
This is a guide to Install Unity. Here we discuss How to Install Unity for Windows platform step by step with given screenshots. You may also look at the following article to learn more –

