Updated June 29, 2023

Introduction to Install JIRA
The following is a detailed guide on how to install JIRA, which is a multi-lingual project-tracking tool developed by an Australian firm, Atlassian Inc. It is a platform-independent tool and works with any operating system. JIRA is a powerful project management tool for software development with uses in workflow management, process management, requirement management, task tracking, bug tracking, etc. Development and technical support teams utilize it to increase work efficiency in a set time frame.
JIRA runs centrally on a server; thus, different users can interact with it via web browsers on computers on the same network. JIRA can serve as a whiteboard where you can visually keep track of the status of all team members in various stages of a project. Once you receive a task, select the appropriate option on the status of your task, i.e., “in progress,” “not started,” “completed,” etc. In this way, the status of your task and the team’s overall workflow is visible to everyone. The tool eliminates the need for frequent emails and follow-ups regarding the task status. Furthermore, real-time visual progress improves team productivity.
How to Install JIRA on the Server Side
Before going through the installation steps, one must know the prerequisites to run JIRA effectively in the system.
Step 1: To access the full functionality of the system, Javascript should be enabled in the browser without any script-blocking tool.
Step 2: JRE/JDK must be updated to the latest version.
Below are the detailed steps for installing JIRA are as follows:
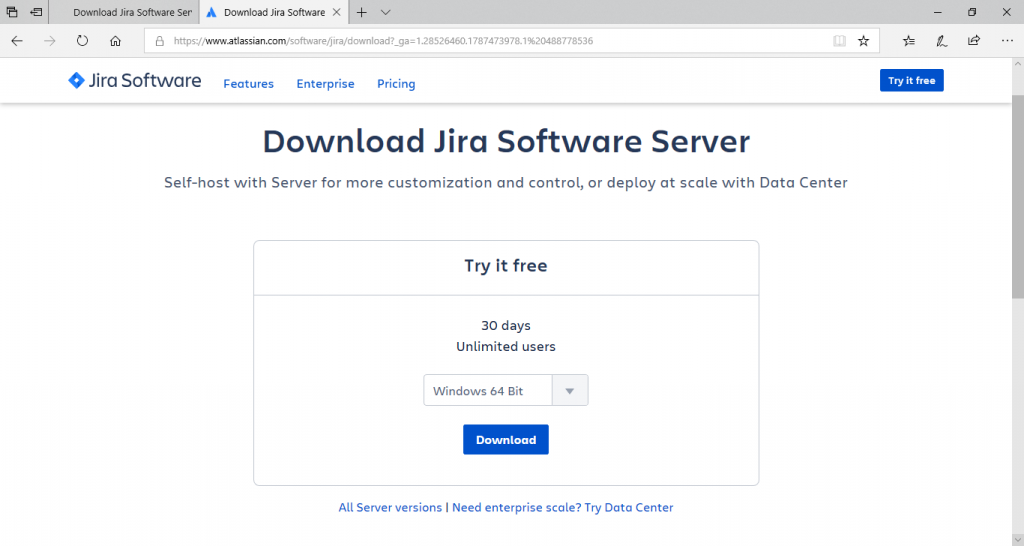
Step 3: To download and install JIRA, visit the official website of Atlassian.
Step 4: After selecting the ‘Operating System,’ click on the ‘Download’ option. One can change the ‘Operating System’ type by clicking on the ‘dropdown’ button.
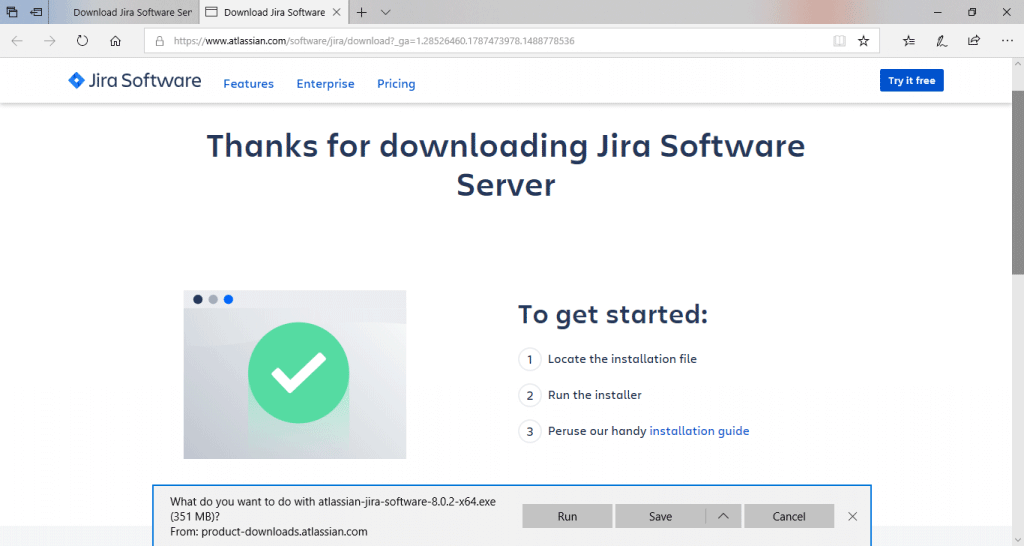
Step 5: Once downloaded, click on the ‘.exe file’. A Run confirmation pop-up will appear; click on ‘Run’ to proceed.
Please refer to the screenshot below:
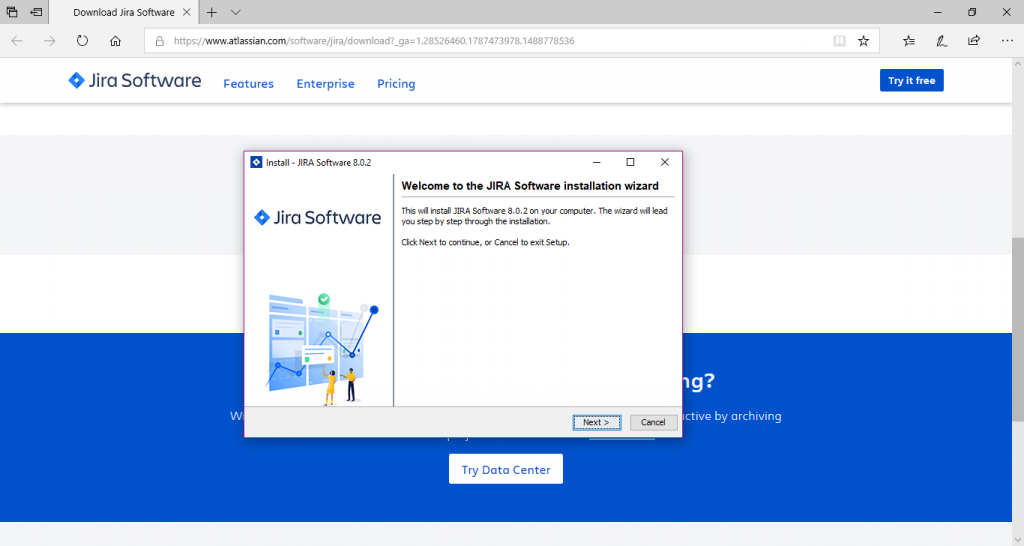
Step 6: Once the JIRA installation wizard appears, click on ‘Next.’
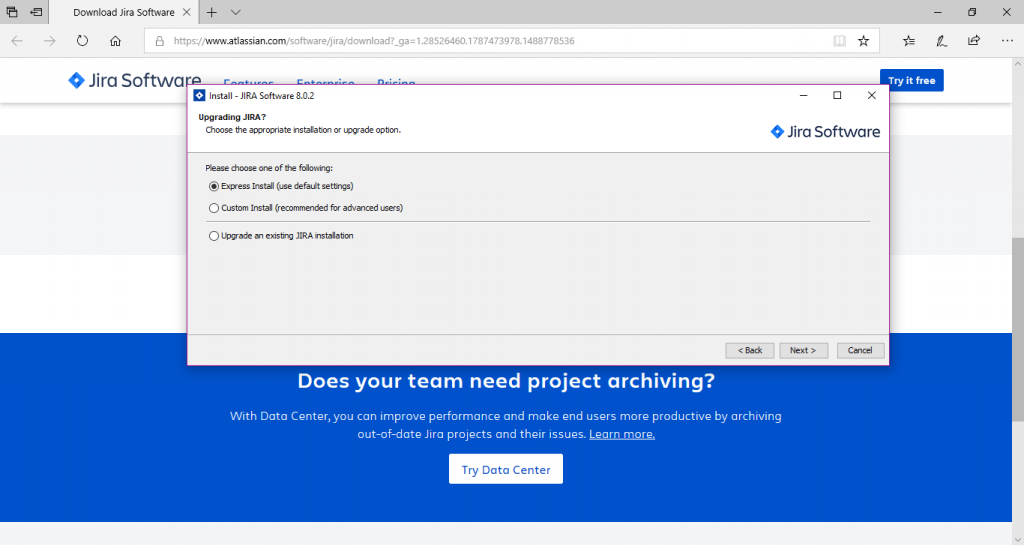
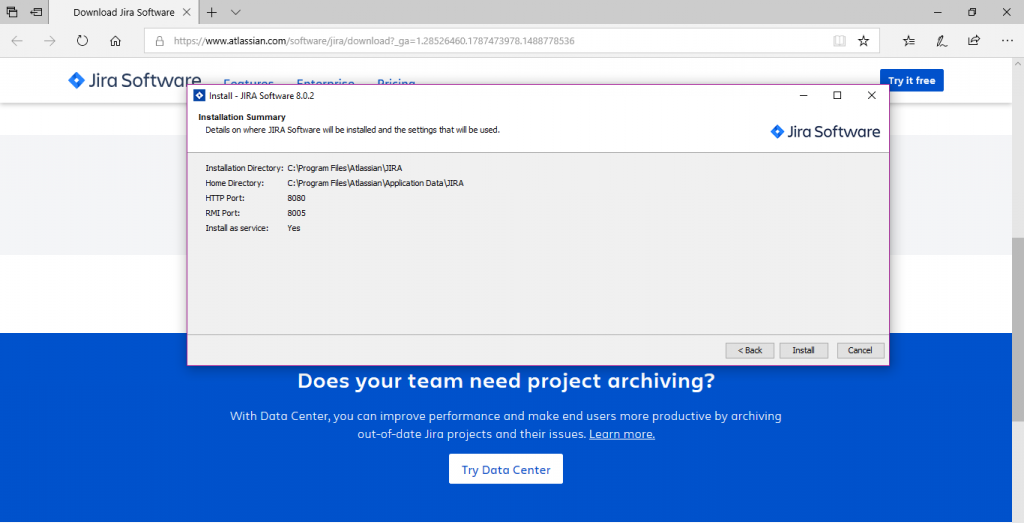
Step 7: Choose the desired installation option and click on ‘Next’ again.
The installation summary will display: Destination Directory, Home Directory, RMI Port, HTTP Port, etc. One can refer to the screenshots below:
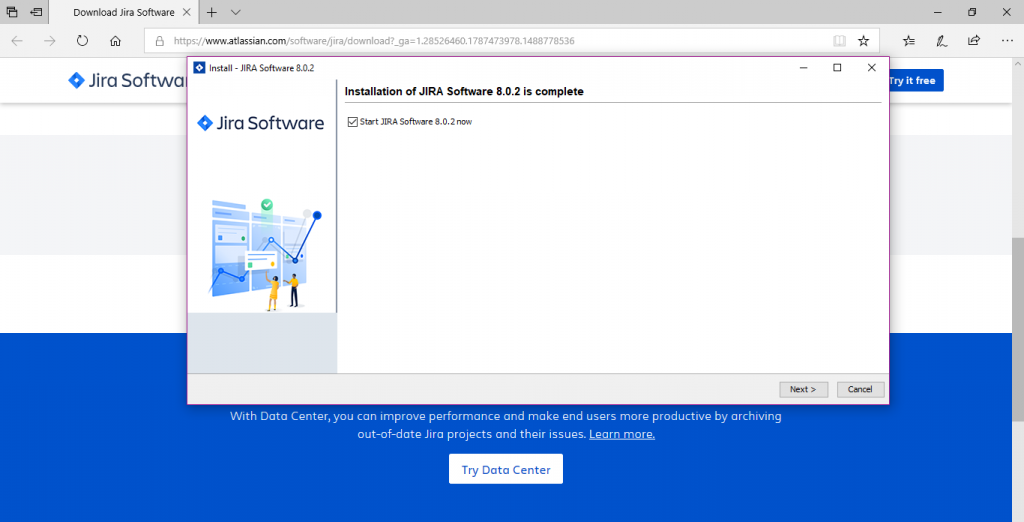
Step 6 – Click on Install. It would take a few minutes to complete the installation.
Step 7 – Make sure to tick the ‘Start JIRA Software 8.0.2 now’ checkbox to start JIRA automatically. Proceed to click on ‘Next.’
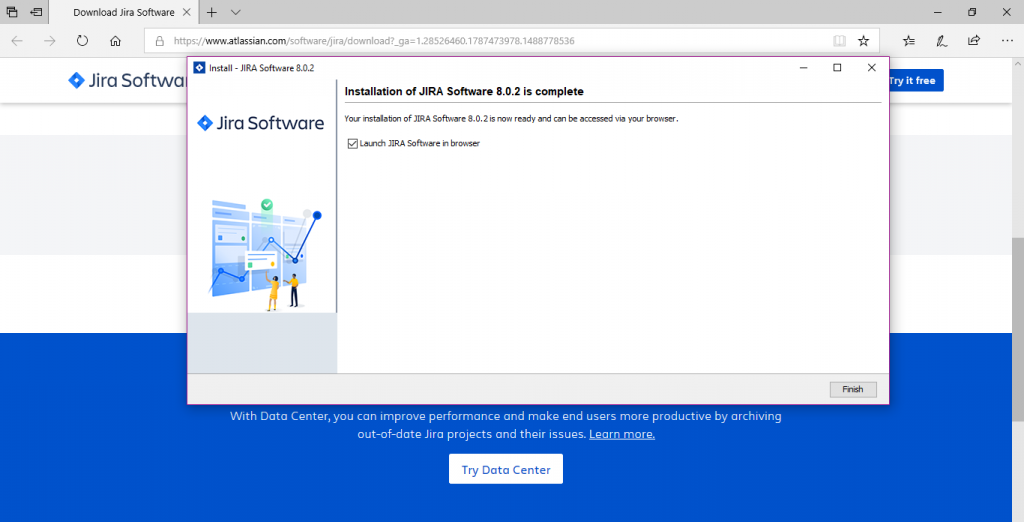
Step 8 – Click the ‘Finish’ button.
Setting up JIRA Application
The installer will create the following shortcuts on the start menu:
- Access JIRA
- Start JIRA Server
- Stop JIRA server
- Uninstall JIRA
The next steps are:
Step 1: Click on ‘Access JIRA.’
Step 2: Select license type as ‘JIRA SOFTWARE (Server)’. The organization name should be ‘Self.’
Step 3: ‘Your instance is’ field should appear and run.
Step 4: Click on ‘Generate License.’
Step 5: A confirmation pop-up box would appear. Click on ‘YES.’
Step 6: Enter administrator account details. Once the setup is complete, more administrators can be added.
Step 7: Enter your mail server details to set email notifications. JIRA will now be able to send notifications when problems differ.
Step 8: JIRA will automatically close the setup once done.
Once the JIRA setup is complete and it starts running on the server, a user can access it from any browser. The JIRA site will be accessible from the base URL (or a URL like http://<computer_name_or_IP_address>:<port> ).
How to Install JIRA from ZIP file
Step 1: Download the zip file for the relevant operating system:
- Jira Core at https://www.atlassian.com/software/jira/core/download
- Jira Software at https://www.atlassian.com/software/jira/download
Step 2: To install JIRA, one must create a Directory (also known as Installation Directory)—having a path without any spaces. Assuming <Installation-Directory> is the concerned location, extract the JIRA zip file therein.
Step 3: To store data such as files, logs, and search indexes in JIRA, Home Directory must be created. The installation and home directory should be different. One can assume <Home-Directory> as the concerned location.
The method to instruct JIRA to find <Home-Directory> once started is as follows:
- Set up the preferred environment variables
- Edit the ‘jira-application.properties’ file
Step 4: The default listening port of JIRA is 8080. One may require a different port if there is an application already using the same port to run on the server.
Recommended Articles:
JIRA is also available as a mobile application and supports all known browsers. Since it is a commercial product, one needs to purchase a license; however, a 30-day free trial is available.
For additional useful tutorials, please click on the following links:

