Updated June 16, 2023
Introduction to Custom SQL in Tableau
Multiple tables exist in a database; often, various tables must be joined to get desired data. Any visualization tool working on an extensive database employs JOINs to get access to data from the database. Tableau supports connectivity with multiple types of data sources, the most common SQL server. When Tableau is connected with the SQL server, requisite data gets loaded into Tableau’s environment. Automatically, through SQL queries, the joins are performed by Tableau. However, in complex situations, these SQL queries may not be in an optimized form. We can streamline data extraction operations using the Custom SQL option in Tableau.
Working with Custom SQL in Tableau
We will connect the “Employees” database in MySQL. It contains various details about employees in an organization. Various tables present in the database include employees, departments, salaries, dept_manager, etc. Using this database will work on and demonstrate the concept of Custom SQL in Tableau.
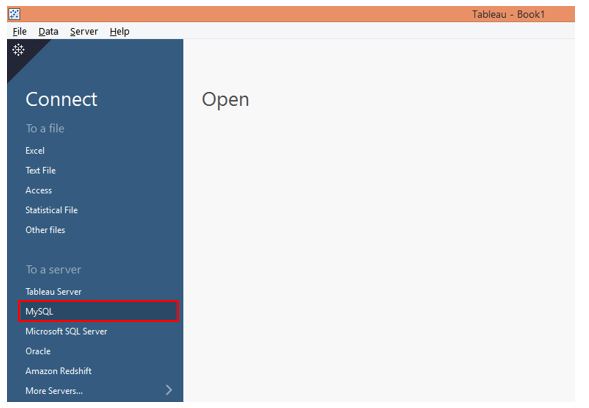
Step 1: Let’s first connect to the data source. In this case, it is MySQL. So click on MySQL, as highlighted in the below screenshot.
Step 2: The MySQL Connection dialogue box pops up when we click on MySQL. We must provide the required credentials to access the data in this dialogue box.
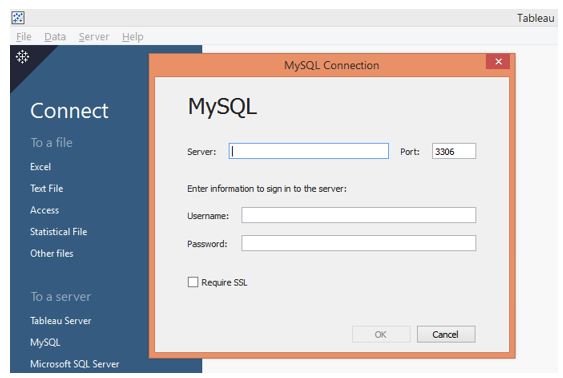
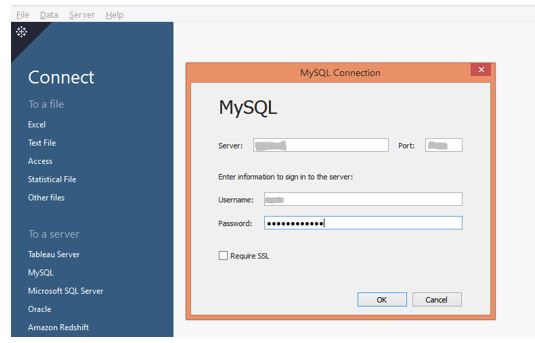
Step 3: We supplied the requisite credentials in the MySQL Connection dialogue box to connect with the database. When done, click on the OK button.
Step 4: If you provide the correct credentials, MySQL establishes a successful connection, as depicted in the following screenshot. We have got a “Connected to MySQL” message. Now, in the Database section, we can select the desired database from the drop-down.

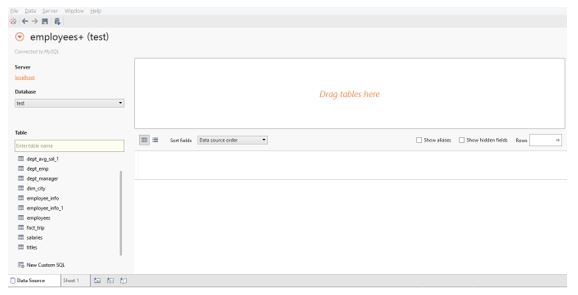
Step 5: We selected the “test” database from the drop-down menu. As we can see, there are multiple tables present in this database. We will use the required table to serve our purpose.
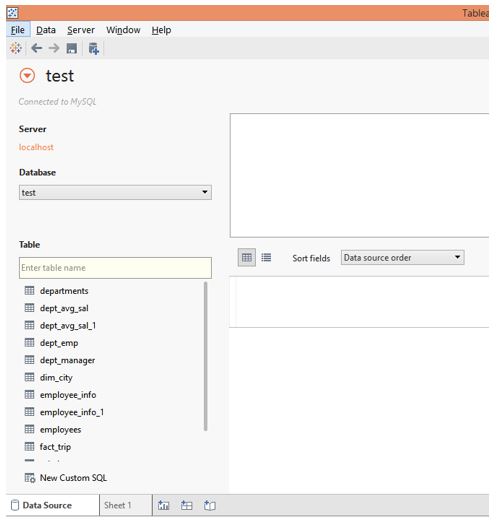
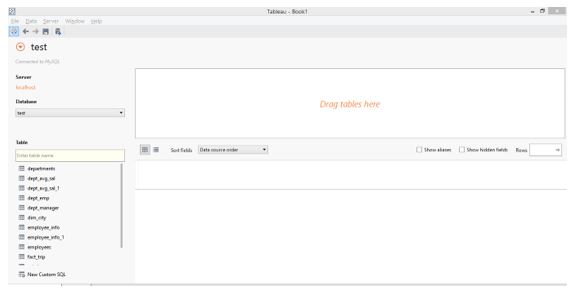
Step 6: When you load the database, the layout in the Data Source resembles the one depicted in the following screenshot. We can directly drag the requisite tables into the “Drag tables here” section.
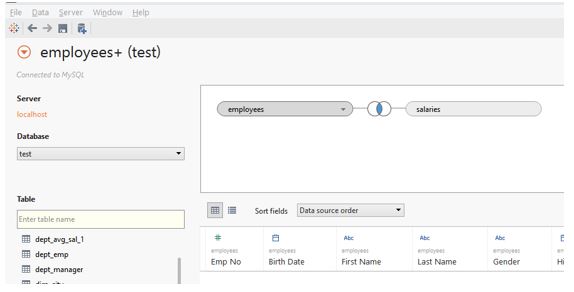
Step 7: We brought tables of employees and salaries into the “Drag tables here” section, and automatically Tableau created a join between the two tables. Note that if Tableau identifies a common field between them, it creates the join.
Step 8: Look at the data obtained after Tableau joined the employee’s table with the salary table.
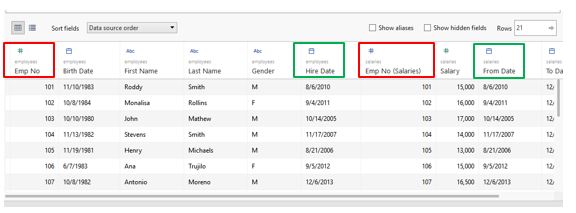
Carefully study each of the fields in the above table. We can find that Emp No. The field has been repeated as highlighted by the red boxes. This happens because Tableau, by default, considers fields from all tables once it performs the join. Similarly, the Hire Date and From Date fields are identical. Both fields represent the date the employee started working for the organization. However, the employee’s table refers to the date as ‘Hire Date’ and the Salaries table as ‘From date.’ The green boxes have highlighted the two fields.
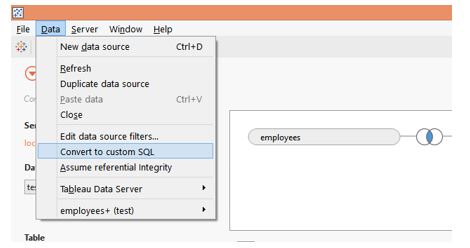
Step 9: We can overcome the redundancy witnessed in the above step using Custom SQL functionality in Tableau. When joining two tables, Tableau generates its own SQL query. Tableau does allow us to work on it. Under the Data tab, Click on the “Convert to custom SQL” option shown in the following screenshot.
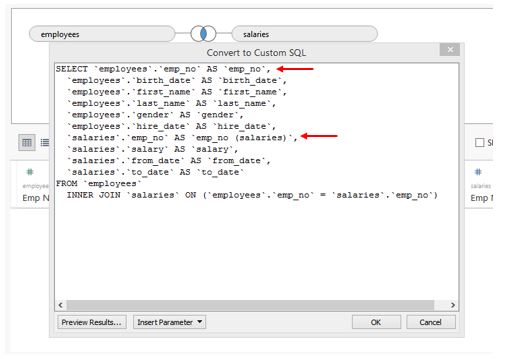
Step 10: The above step navigates us to the “Convert to Custom SQL” section, as shown in the screenshot below. Observe the SQL query. We can see that both tables consider the emp_no field, as highlighted. Also, hire_date and from_date are two same fields, but as they are present in the two tables with two different names, they have been considered separate fields. We will edit this SQL to obtain overcome redundancy.
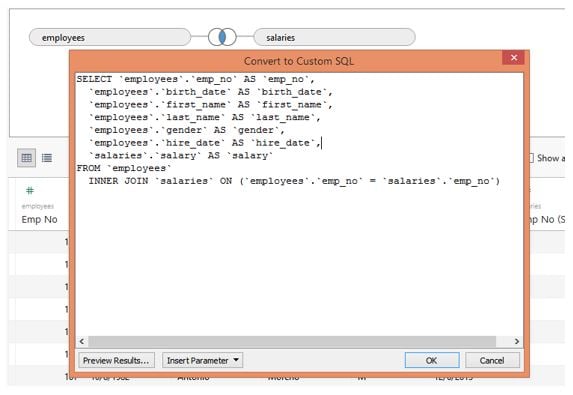
Step 11: As we can see in the below screenshot, we edited the SQL query. Go through it once, and observe the changes we did. Here, we removed those fields which were earlier repeated. So we removed emp_no, from_date, and to_date from the salaries table. Once done writing the desired query, click on the OK button.
Step 12: When the SQL query is updated, we get options to update the table viz. “Update Now” and “Automatically Update.” Click on any of them to proceed. The table shall be updated based on the new SQL query.

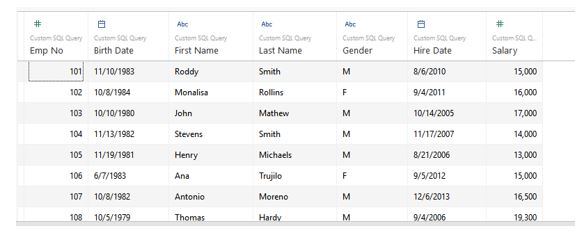
Step 13: When we correctly follow the above steps in order, we obtain the updated table as shown below. Please go through the table and study its fields. Now, we can see that the table looks more meaningful, and it contains no repeated fields. The fields don’t appear to come from different tables. The Custom SQL functionality in Tableau enabled us to modify the default SQL query and update the table in the required manner. So, the functionality is helpful when the default SQL query, bringing data from multiple tables, is not optimized.
Step 14: The Custom SQL query created due to updating the default SQL query can be seen in the tables section. Instead of all the tables, “Custom SQL query” appears. The user creates the SQL query, which can act as a table. We can edit it as many times as required. To edit the Custom SQL query, click the “Edit Custom SQL Query” option in the drop-down menu, as shown in the following screenshot. If we click on the Duplicate option, then a duplicate of the query will be created by Tableau.

Step 15: We can remove the Custom SQL query from the environment by clicking on the “Remove” option, as shown in the following screenshot.

Step 16: Click on Remove the custom SQL query from the Data Source tab permanently, as shown below.
Conclusion
Tableau, along with allowing connectivity with data sources of various types, also will enable users to manipulate SQL query(s) when connecting with the SQL server. The Custom SQL functionality is crucial, especially in the case of complex databases, to optimize the SQL where each line of code determines the processing performance.
Recommended Articles
This has been a guide to Custom SQL in Tableau. Here we discuss the introduction and working with Custom SQL in Tableau. You may also have a look at the following articles to learn more –
