Professional Tips and Time Savers While Using ZBrush
Understanding and getting accustomed to 3D interfaces will take time, especially when you are new to the three-dimensional software. To get along with the software quickly, it is good to know some quick tips and methods that will help you understand the application and save your time during the workflow.
This post focuses on the basic and intermediate level techniques that are proved to cut down the manual work or extra time and efforts you invest while working on ZBrush. It also serves the purpose to get you habituated with the 3D interface.
1. Performance
We all know ZBrush is sculpting software, and it demands quite a large mesh to handle high detailed 3D models. Whereas ZBrush is evident that we should work on a low-res model to carry on an easy and flexible workflow but, is it possible for artists to really work on the same mundane low-resolution object all the time?
We often want to push the limits far and take a chance of working on really complex high-resolution files with never-ending polygon count. ZBrush can easily run into millions of polygon, and be going any further can slow down your machine immediately. Added to that, if you have a computer or a laptop with low config, handling the job is an even more daunting job.
ZBrush warns you about the system speed with the active memory. If your Active memory is above 2000 or 3000, it is time for you to shift into a Compact now mode. ZBrush clears the cache and allows you to work with the complex operation even your machine is not robust.
Preferences > Memory > Compact Memory
2. Lazy Mouse
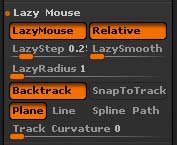
Once the Lazy Mouse is turned on, the drawing would shift its place from below the cursor to under the brush point that is being ‘dragged by the mouse. It is usually displayed on the screen as a red line; it provides absolute control over the brush point and is perfect to draw smooth curves or any kind of detail work.
By default, the lazy mouse is on. If you want to toggle it on and off, follow the below
Stroke > Lazy Mouse
Or you may also use the L key to toggle on and off
The pressure of the lazy mouse is too low by default, so you may not have an idea about what to do with the tool. Once you make out the purpose of the tool and learn to adjust its preferences, you will start to fall for the tool.
Preferences > Tablet > Lazy – Change the setting from 0.5 to 1 and see the changes
3. The numeric one (1) key
So, you like the lazy mouse, and now you want the stroke was twice as strong?
To fulfill the requirement, the 1 key is at your service. Press the numeric 1 key on your keyboard and repeat the last stroke. But, you must be sure that the process you want is the last stroke you make. The numeric 1 key can also transform an object through a rotation preview.
4. DynaMesh
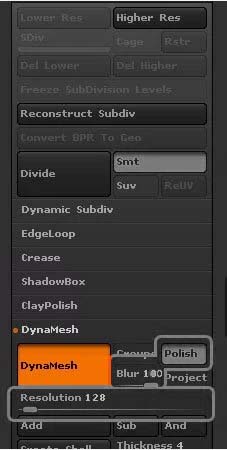
If you are using software like Maya or other 3D programs to create your model, but your final intention is to complete a high-end sculpting model. You should obviously use the ZBrush tool at one point.
Import the low-resolution 3D model into ZBrush and apply DynaMesh to form a high-resolution grid to the object that will permanently populate polygons evenly on the surface. Henceforth, you can play anything with the model in ZBrush as it ready to go through every level of the production pipeline. The model can be sculpted and baked.
To activate DynaMesh, you should turn on the Polish and set Blur to 100. The resolution slider should start at the minimum end and continue to go higher as you are working on the image. Usually, 128 is a better value to start with for each subtool.
5. ZRemesher
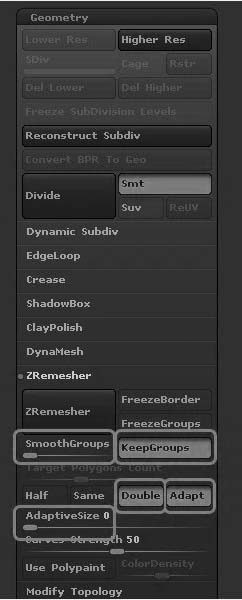
In case you, a model is made of complex angles that cannot be handled with the DynaMesh. There is another way you can save your day. Try ZRemesher by creating polygons.
Try applying Auto Groups with UV, Groups by Normal with appropriate angle or another UV config that maintains similar shapes with your model.
Apply a crease to each Polygroup by pressing Crease PG, which falls under Geometry > Crease > Crease PG
Adjust Smooth Groups and the Adaptive to 0, use ZRemesh and activate the Keep Groups, Double and adapt buttons activated. ZRemesh the model more times to subdivide the mesh, and it’s now ready to polypaint.
6. Clowning
In case you are using any texture generating tool or software like Quixel or substance painter, you may have created a color ID mask somewhere while working on the texture generating pipeline.
ZBrush can conveniently handle the texture maps and turn them useful. Use the import-export setting under preferences to convert clown masks into Polygroups and save time placing them in ZBrush.
Preferences > Import Export > Import > Import Mat
The program assumes every bit of color is its own material applied to the exported mesh from some 3D software.
7. ZBrush Preferences
ZBrush has a vast collection of Brushes which is good news for everybody who is using it. But at the same time, having access to so many brushes makes it easy to forget that each one of them has its own modifier. It is essential to have backface masking while sculpting thin objects, and it is recommended to turn it on all the time.
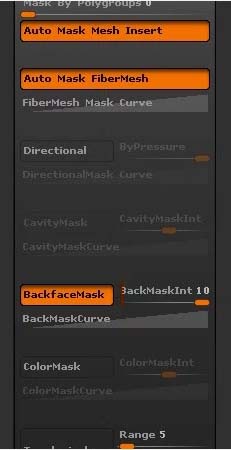
Brush > Auto Masking > Backface Mask
Do not forget to turn the Backface Mask on for every brush you use. By default, it is turn off unless you created your brushes and save them with a backface mask on.
8. ZBrush Settings
Brush modifiers are another important part to discuss while discussing Brushes. By turning on BRadius with a clip, a curve brush will help speed up the work, especially while sculpting the hard surfaces and block outs. The Inset depth of the geometry is defined by the radius of the brush you are using here.
9. Morph Target Modeling
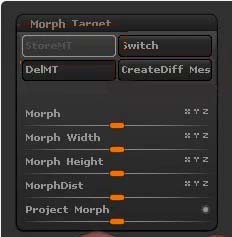
The method is used to sculpt on a morph target and edit the target geometry to generate a new mesh out of it. There are multiple techniques you can create a new mesh from target geometry.
Start sculpting on a PM3D mesh. You should store the morph target to continue the sculpting on the mesh. After your sculpting session is completed and you are happy with the output, go to the Morph Target palette and click on Create Diff. You will immediately see a new mesh added to the tool palette. New meshes may have their Normals inverted sometimes. To fix this, go to Tools > Display properties > Flip.
10. UV Master
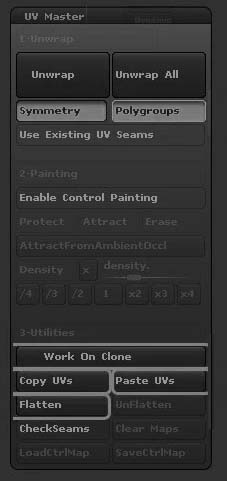
Traditionally UV mapping is one tough task every 3D artist wants to avoid if he has a chance. The hours of laborious work untangling the net is tedious and a severely boring job. Thankfully, it is possible to share the UV master plug-in from ZBrush to other 3D software packs.
Sharing the workflow with Maya is made easier when it comes to UV mapping an object. You can export a 3D image into the ZBrush from Maya. Use .OBJ format and run the UV Master plug-in to generate a base layout. By working on the same mesh model in Maya software, you can resume working on the flattened UV maps which you generated with the help of the UV Master plug-in inside the ZBrush.
Make use of the color ID to create UV playgroups for ZBrush for a comfortable workflow.
Select ZPlugin > UV Master > Polygroups and Work on Clone. Unwrap All to create a new UV Layout.
11. Paintshop
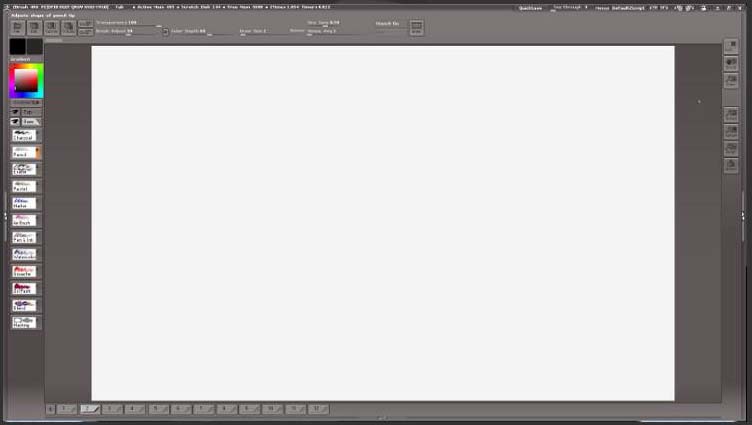
If you are waiting to draw some quick sketches while you are working on ZBrush. No need to shift into MSpaint or any fully developed program as Illustrator or CorelDraw. There is a sophisticated tool built within ZBrush. It is the Paint Shop, which helps you to quickly put your imagination on the canvas. Though the tool is not made as a high-end drawing application, it is still very useful for artists with a great collection of tools for painting purposes.
You can also paint on a flattened canvas, and the color information can be transferred to a 3D Mesh.
12. Tools brightness adjustment
With a large number of tools open at one time on your screen, it becomes hard to find the selected tools
among the sub-tools and panels. Thanks to the brighter color that displays the current tool effectively.
However, you can take this to the next level by controlling the brightness of the tools as per your requirement.
To control the brightness and shading of the non-selected tools – go to the preferences > Edit > Inactive sub-tool dimming. You can play with higher and lower scrolling ranges to dim and brighten the tools.
13. Faster workflow
For a faster workflow on ZBrush, using the keyboard and especially using the spacebar all the times provides you easy shortcut methods to access various types of tools. One of the useful functions it caters is
Brush – Changing the size, focal shifting
Polypainting Options
Changing material
Color picker
Another important feature in the space bar is to instantly locate the mouse cursor while it is outside the viewports of ZBrush.
14. TransposeMaster Plugin

Often times, artists come across a situation where they should either transform or rotate a complete model. But, they do not understand the near problem about the sub tools or properties of their character. The Gloves, weapons etc., won’t easily transform along with the original mesh object.
Transpose Master Plugin is designed to come in handy in a situation like this. With the help of the plugin, all the sub tools are selected to the lowest subdivision can be easily controlled in few clicks.
Z Plugins > Transpose Master > TPoseMesh
Do not forget to clean the meshes at the bending areas after you finished working on the plugin. Once your transform the original mesh, just use Z plugins > Transpose Master > TPose > SubT and the transform information will be transferred to the sub tools of the original mesh object. It helps to save a great deal of time and efforts on working on individual objects.
15. Background color change
Though ZBrush’s default gradient color background looks good while sculpting your objects, many designers prefer to work on a solid color more than a gradient. If you belong to the same category, this tip is for you.
You can change the default gradient color by going into the document palette and select the Range setting to 0 (Zero). It removes the gradient in the background and gives a solid gray color. However, you can also change it to the color of your choice by pushing the back color above the Range option and pick the color of your choice from the screen.
To list out the tips and tricks of enormous software as ZBrush is an unending process. So, we listed the most common and moderate level tricks that can help beginners seeking good knowledge to catch up quickly with the workflow. We hope our 15 tricks will help you comprehend and accustom yourself to the ZBrush sculpting software as quickly as possible.
Recommended Articles
Here are some articles that will help you to get more detail about the ZBrush, so just go through the link.
