![]()
What is Pixel Art?
In this article, we are going to learn what is pixel art. Pixel art is like 2D sculpting where you have total control and you can manipulate every single pixel to differentiate pixel art from pixelated art. You can use any tool to create the art as you want to control the pixels regardless of which tool you use. So, techniques of drawing are equally important as the tool used. Pixel art was born from limitations so many manual techniques are still in use today. Generally, aliasing is a bane in digital art but in pixel art, aliasing keeps everything sharp.
Hardware Tools
- Mouse – It is good with clicks and offers precision but it is harder to draw. It is good for finishing touches.
- Tablet – It is good with strokes and has intuitive control but is it harder to tap or click and it is good for initial sketches.
- Keyboard – It is the most powerful tool as the keyboard shortcuts make the process of making art and animation much faster and you can make even your own shortcuts to suit your need.
Software, programs, and settings
- Specialty pixel-art programs – Graphicsgale, MS Paint XP/Vista, Aseprite, Promotion
- General art program – Paint tool SAI, GIMP, Adobe Photoshop
- Software tools – Regardless of the program used you will need Pencil tool, Eyedropper, Eraser, Bucket
- Other must-have tools – Selection tool, recolor tool, line tool, rotation tool, color settings, circle tool
- Avoid – Blur, brushes, blurred gradient as you cannot predict the result or output as you want 100% control over the artwork.
- Canvas size – Depending on the art style you can make a Large sprite to canvas ratio for playable character as in Medroid II: Return of Samus, or Low sprite to canvas ratio for playable character as in Super Metroid, or Tiny sprite to canvas ratio as in Cave story.
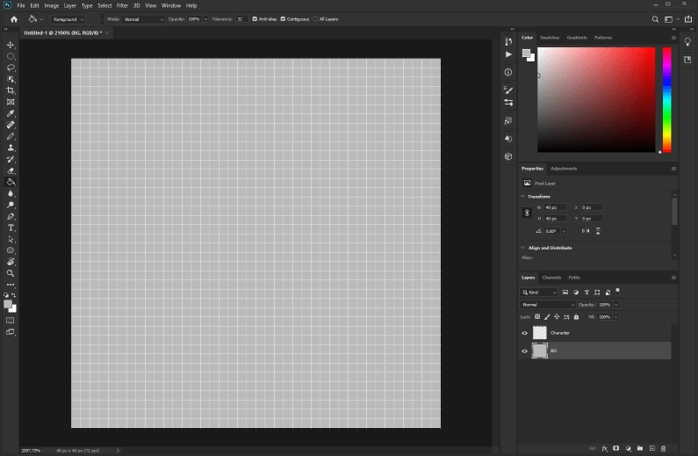
Step 1: Let’s have some hand’s practice and the tool which we are using is photoshop so create a new document and change the dimensions to pixels and set width and height to 40 and the resolution to 72 pixels/inch and leave the rest of the settings to default values.

Step 2: The canvas will be very tiny so alt and mouse wheel scroll to zoom in and then go to show grid from view menu or press Ctrl + ‘
![]()
Step 3: As we can see the grid is large and for pixel art, we need a small grid size.
![]()
Step 4: Then go to guide, grid, and slice preferences from the edit menu.
![]()
Step 5: Change to gridline every 1 pixel and change the color to light grey.
![]()
Step 6: Then in the general section change image interpolation from bicubic automatic to the nearest neighbor which preserves hard edges.
![]()
Step 7: Then create a new layer and name it Character.
![]()
Step 8: Now it’s time for painting and when we use the brush tools, we can something like this with smooth edges which we do not want in pixel art.
![]()
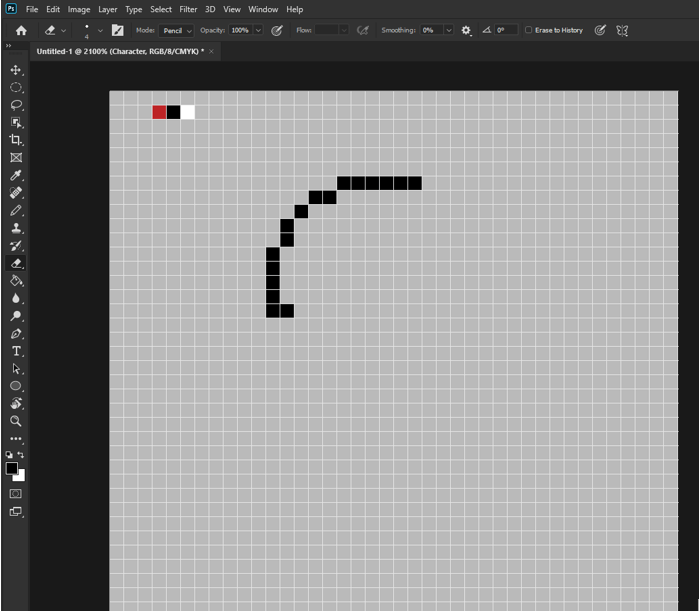
Step 9: So, we will use the pencil tool so we get sharp pixels as shown.
![]()
Step 10: Undo the previous step and then unlock the background and give it a name and then using paint bucket tool or press G fill the background with grey color.
Step 11: Now we want to create a color palette. We will be creating a simple art using only 3 color which is red, black, and white. So, we have changed the background to grey. For a more complex color palette we can go to color.adobe.com where there are lots of prebuilt ones. Also, we can select a color and it will create a palette for us.

Step 12: You can use the eyedropper tool to sample color from the palette and start drawing. Suppose if you make a mistake and want to use an eraser then make sure that the mode is a pencil which will remove pixels.
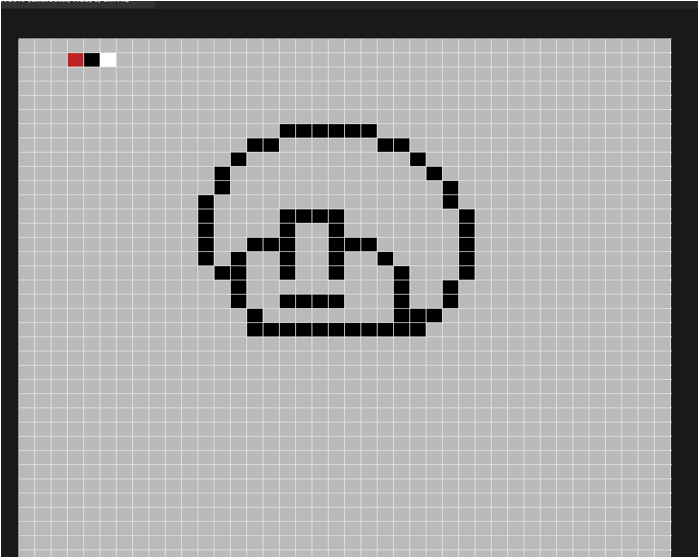
Step 13: As we can see we have created a basic face shape
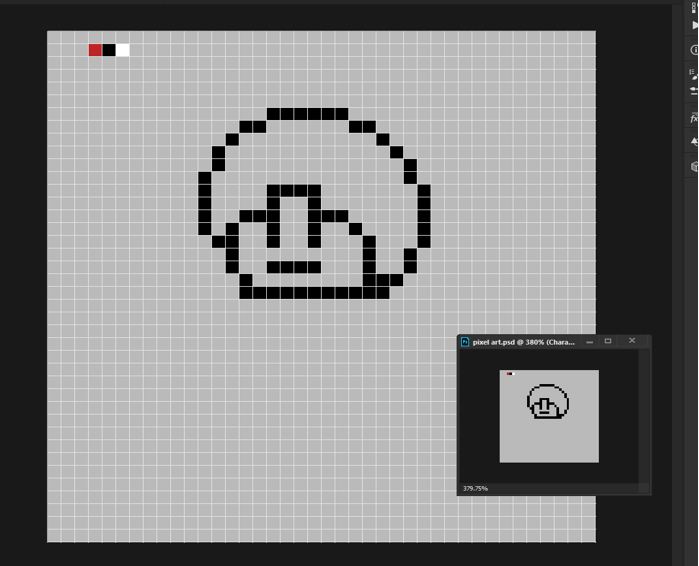
Step 14: If we are creating a game asset then the artwork will be viewed at a much smaller scale so to preview it simultaneously while drawing, we can open a new window from Window -> Arrange

Step 15: We can move the window wherever we want and turn off the grid using Ctrl + ‘ to see how the output will be viewed in-game engine.
Step 16: Now suppose we want to fill an area with white pixels and we use the paint bucket tool then the pixels will bleed outside the boundary as photoshop is using anti-aliasing to smooth out pixels.
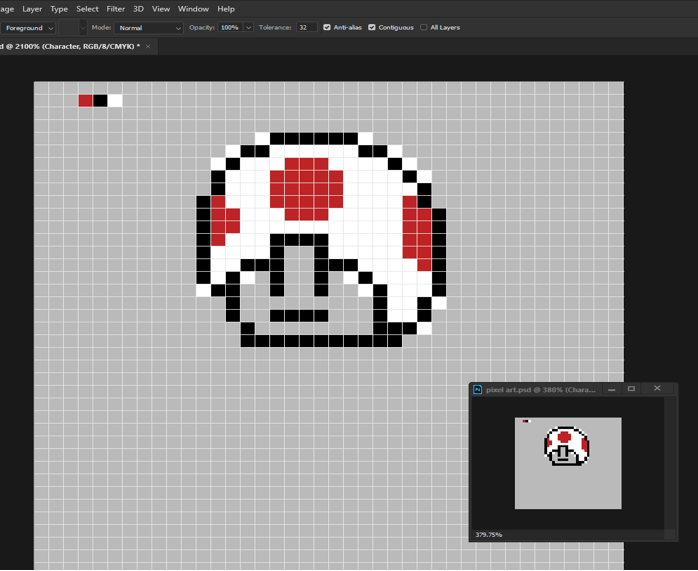
Step 17: So, if we turn off anti-aliasing then we can fill inside the boundary.
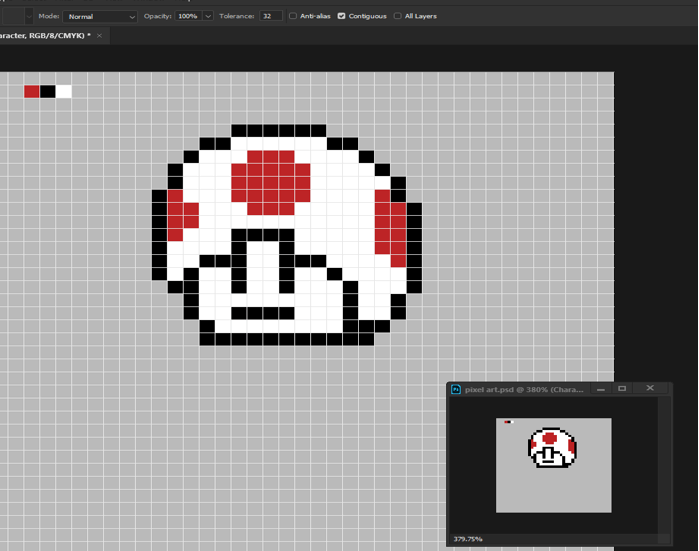
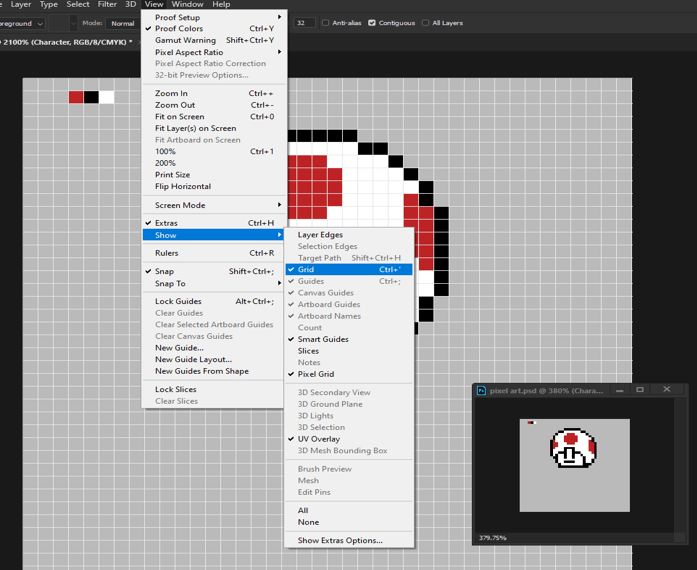
Step 18: Now we can turn off the grid to see the actual art, also we will turn off the pixel grid.
Step 19: Then we can adjust the saturation from the adjustment panel and selecting hue/saturation.

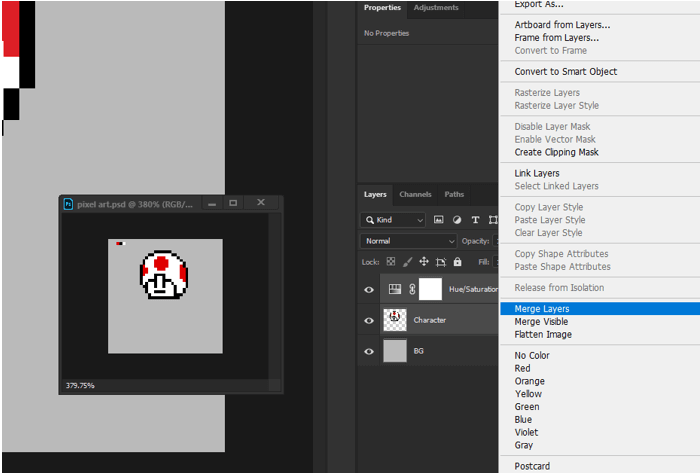
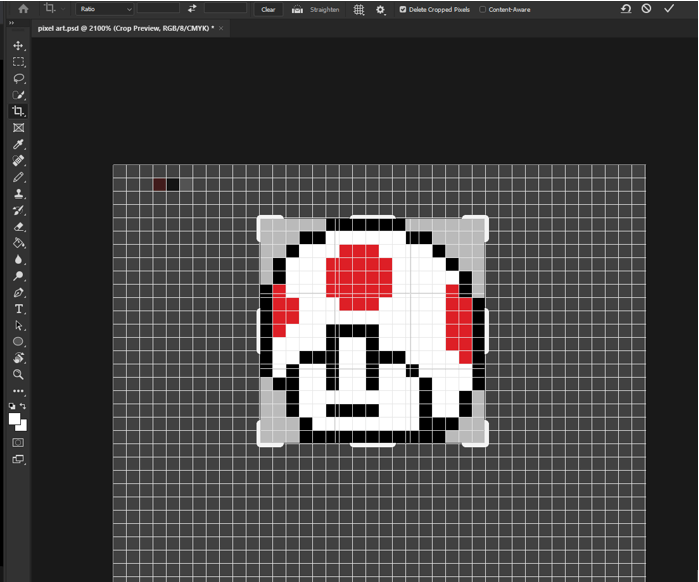
Step 20: Then right-click the character layer and the adjustment and then merge layers.
Step 21: Now if we want to share online or give it to someone then the size is too small so we need to enlarge it but first we will crop the image to keep the necessary parts and also turn on a grid to aid cropping.
Step 22: Then go to image size from the Image menu or press Alt + Ctrl + I.
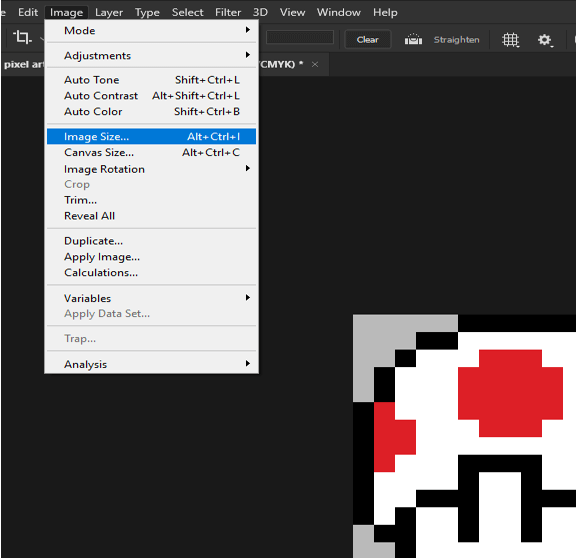
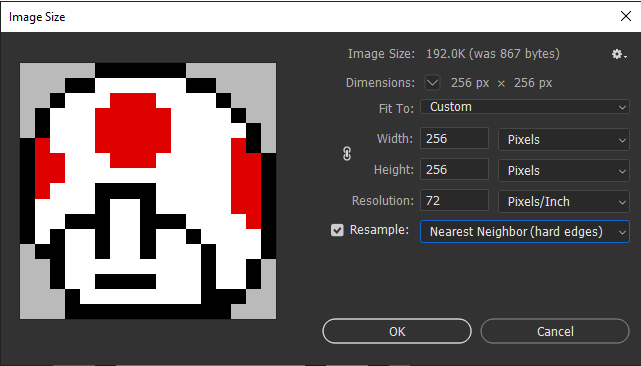
Step 23: So, we can set the width and height to 256 pixels and resampling to the nearest neighbor which gives us hard edges.
Step 24: Then press Ctrl + 1 to view the actual size and it is what we can share with others by using save as and image quality to high.
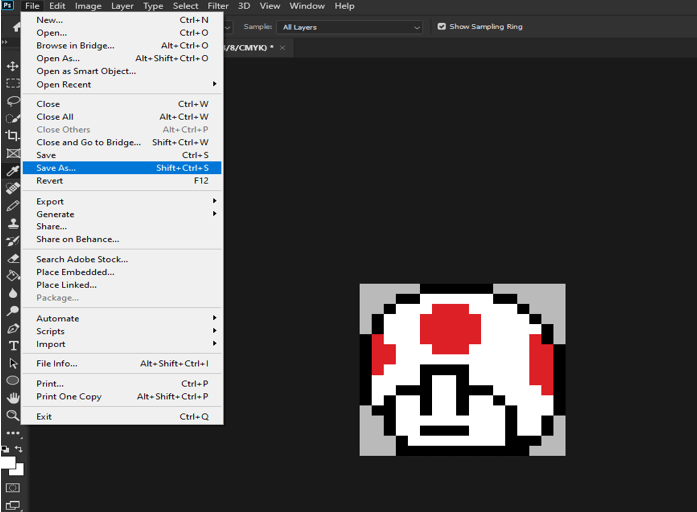
Step 25: So, this is our final pixel artwork.

Conclusion
In this article, we are have learned what is pixel art. Firstly we have started the prerequisite of creating pixel art like hardware tools and programs to use. Then we created a sample pixel artwork in photoshop as the tool demonstrating the techniques to be used for creating pixel art.
Recommended Articles
This is a guide to What is pixel art?. Here we discuss the Introduction, prerequisite of creating pixel art like hardware tools and programs. You may also have a look at the following articles to learn more –
