Updated August 25, 2023
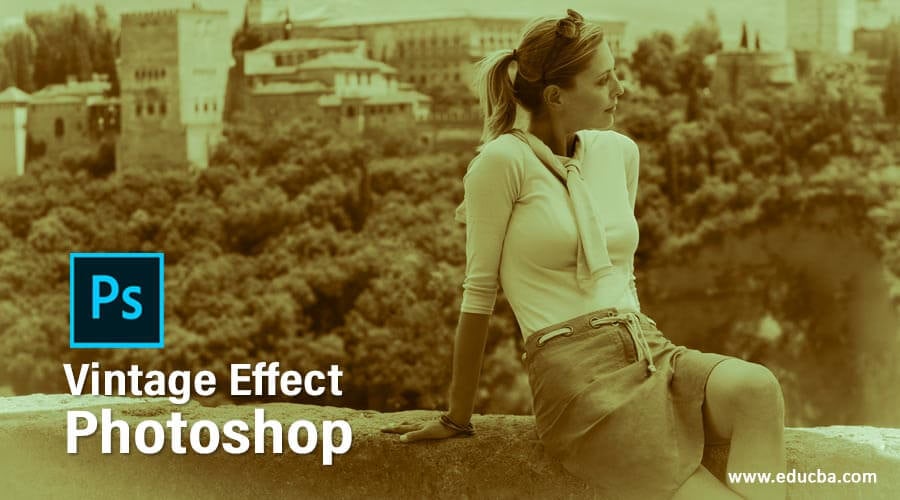
Introduction to Vintage Effect Photoshop
Vintage is an old photography effect through which you can add old photographic look to your image and for that you have to make some color management, controlling of black & white mode of image, and management of other important parameters of an image. By creating vintage effect on your image you can give it a different type of color feel which express you mood of that particular image and purpose also. Here in this article we will discuss how we can manage color, change the blending mode of image, and other parameters for creating Vintage Effect in Photoshop. So let us start our discussion about this topic.
How to Create the Vintage Effect in Photoshop?
You can create vintage effect in Photoshop by just having commands on different parameters of this software such as color correction, settings of blending mode, and some other features. But I think we should have a look at the working screen of this software for our better understanding of this topic. So let us discuss it.
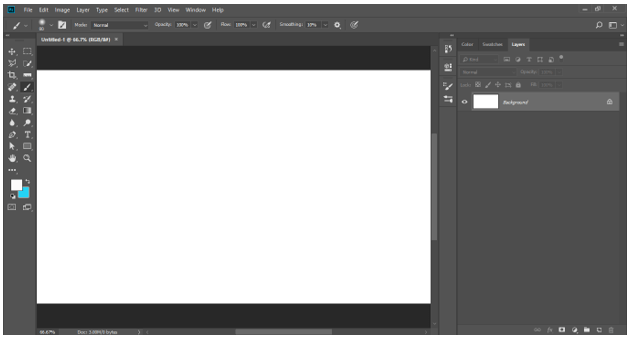
At the top there is a Menu bar with some menu tabs, below this, there is Property bar of active tool or image, below this bar the user screen is divided into three sections as at the left side we have tool panel, at the center we have display window, at the right side we have some tabs such as color tab, layer panel, and some other important tab. You can rearrange all these sections according to your requirement.
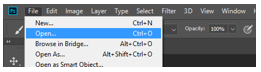
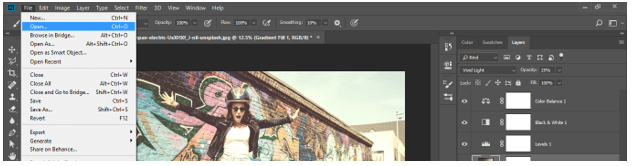
Now go to File menu of Menu bar of this software for having an image for your learning in this software. Once you click on File menu, a drop down list will be open. Choose Open option from the list by click on it.
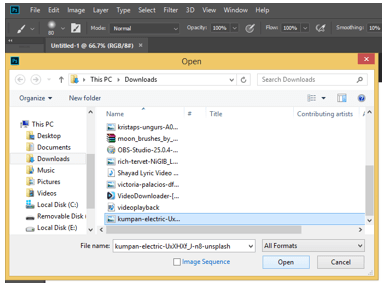
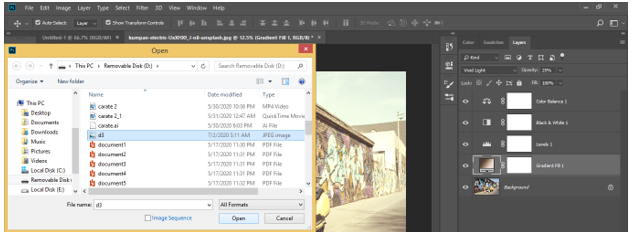
Once you click on Open option, a dialog box will be open. Now search for the desired folder of your personal computer in this box or location where you have saved your image then select that image by click on it. Once you done click on Open button of this dialog box for placing your selected image in this software.
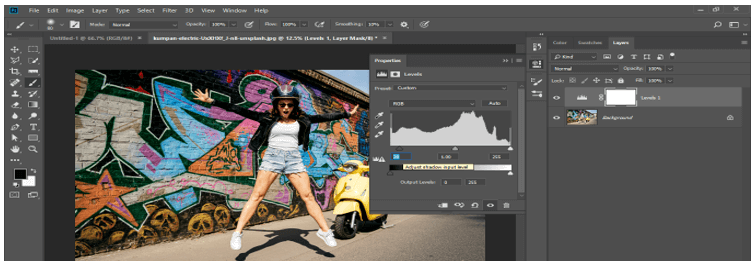
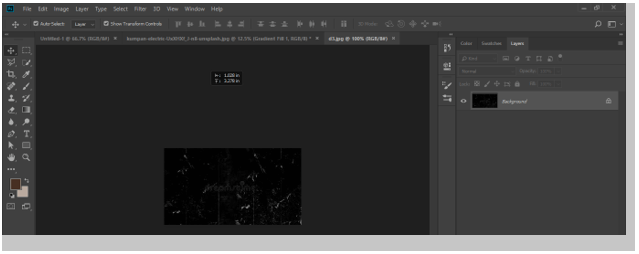
You image will place in this software like this. You can adjust size of your image according to you. Now go to bottom of layer panel of this software and click on Adjustment layer button. A popup list will be open, choose Levels option from the list by click on it.

Now give 20 as value in ‘Adjust shadow input’ option of this box for adding darkness in your image.
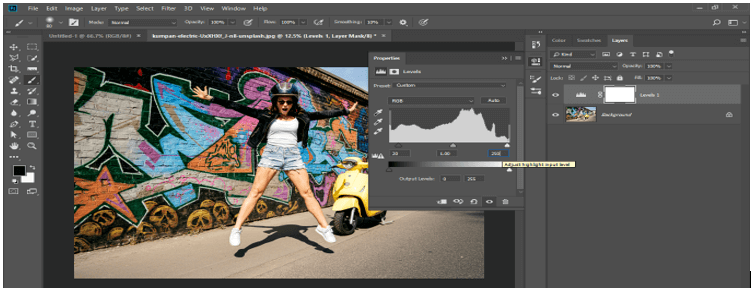
Now give 250 as value in Adjust Highlight input level option of this box for adjusting highlight value.
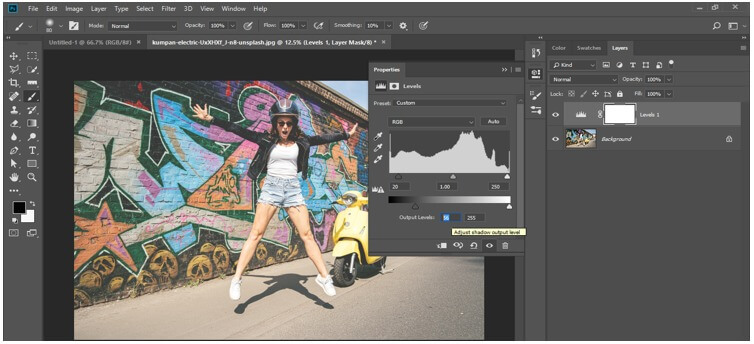
Now give 56 as value in Output option of the box. You can see the effect of changing value of level parameters on your image.
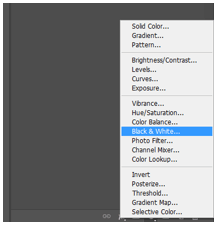
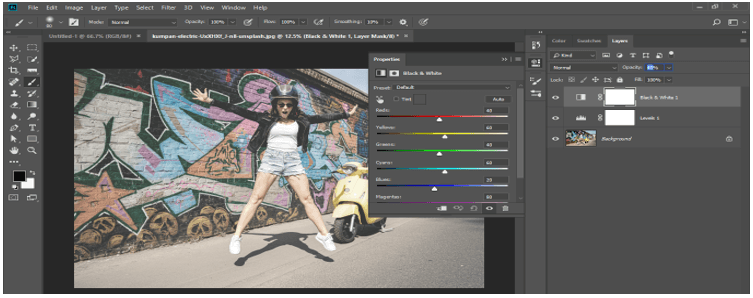
Again go to Adjustment layer button and click on it. Choose Black & White option from the list by click on it.
Go to layer panel and decrease opacity of black & white layer up to 40 %.
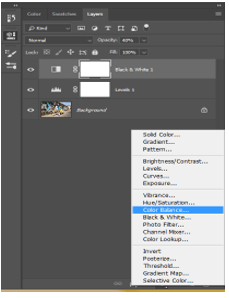
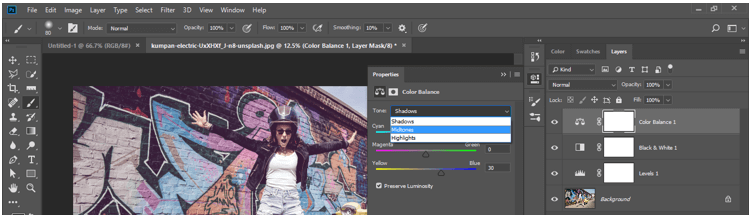
Again go and click on Adjustment layer button. Choose Color Balance option from the list by click on it.
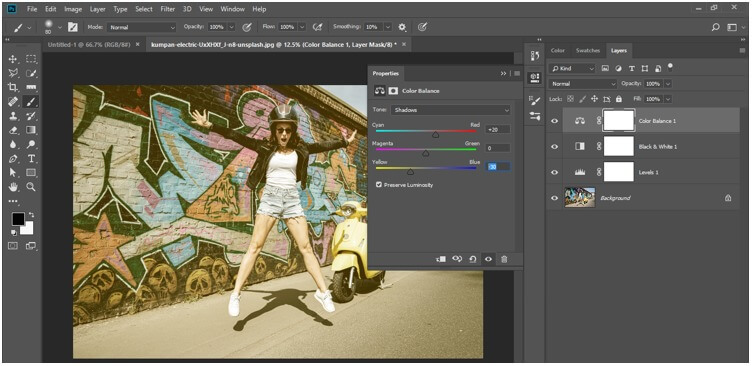
Choose Shadow option in the tone option of this box.
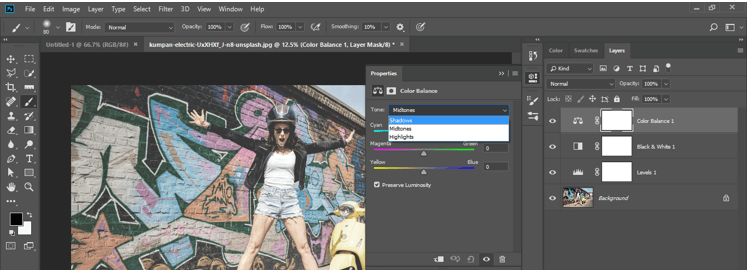
Set value of Cyan as 20 and Yellow value as -30 and you can see effect on your image of these value changes.
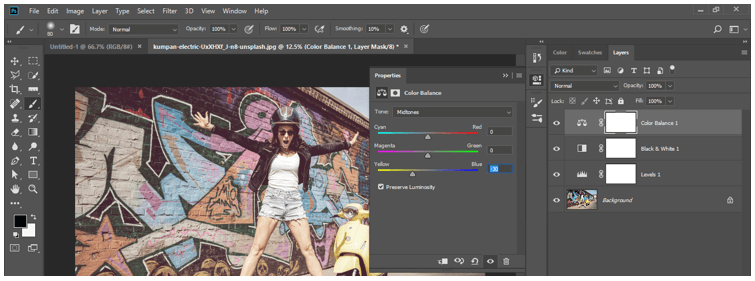
Now choose Midtones option in tone option of this box.
Set value of Yellow as -30.
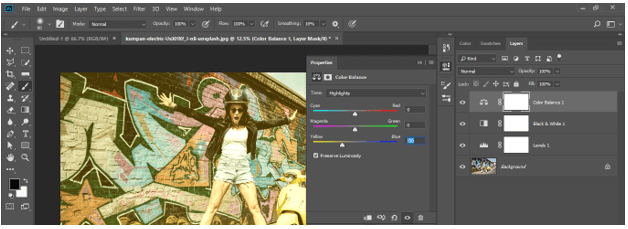
Now choose Highlights option in tone option of this box.
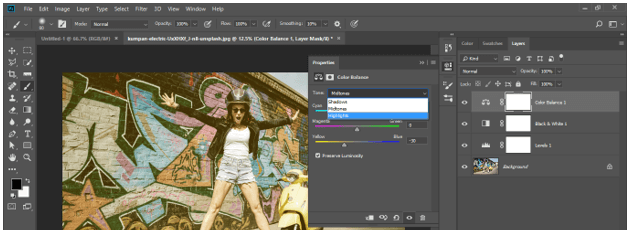
Set Yellow value as -30 here also.
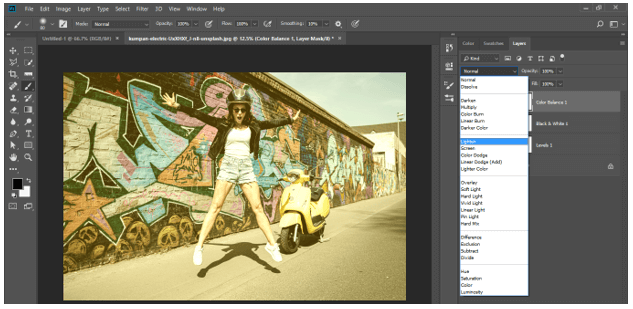
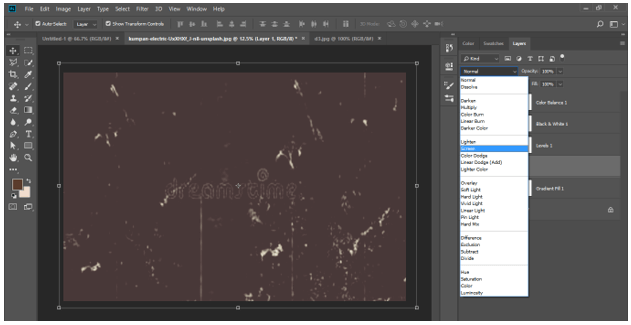
Now click on drop down arrow of mode option of this layer and choose Lighten option from the list.
Now click on color box of Foreground color and choose 5b3c2c color code in the Color Picker box by typing it in code box.
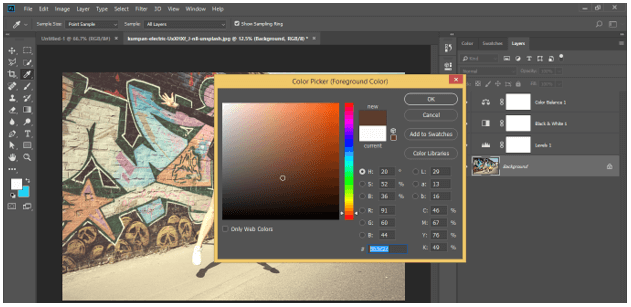
Now click on color box of Background color and choose efdbcd color code in the Color Picker box by typing it in code box.

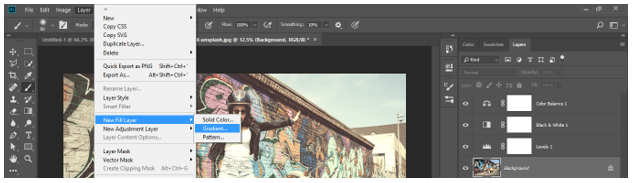
Now go to Layer menu of menu bar and click on it. Go to New Fill Layer option of drop down list and choose Gradient option from new drop down list.
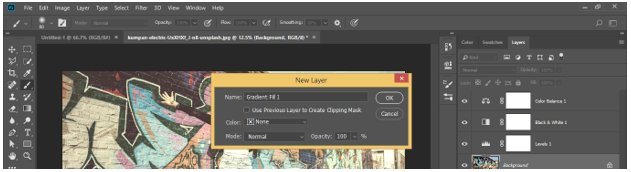
A New Layer box will be open. Click Ok button of this box.
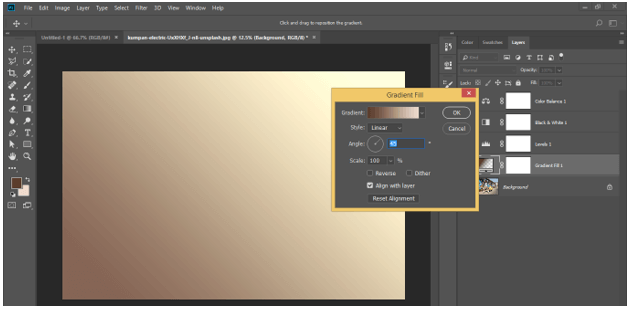
Now choose first gradient from gradient preset in gradient fill box.
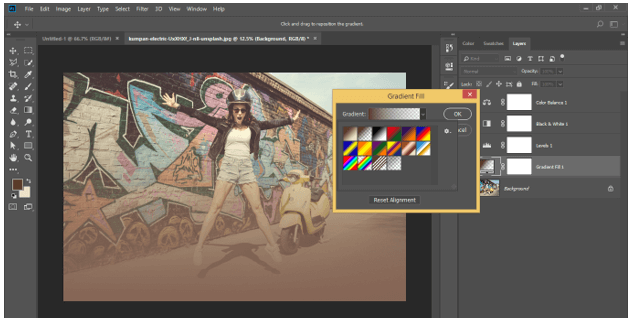
Set angle of gradient as 45 degree then press Ok button of this box.
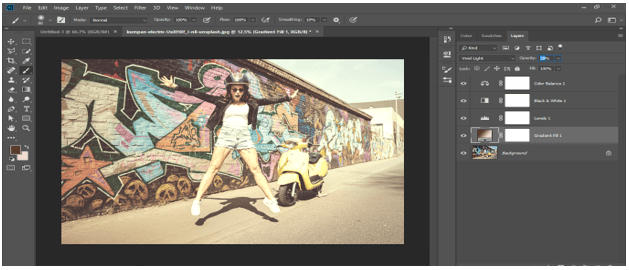
Go to mode option of this layer and click on drop down arrow. Choose Vivid light option from the list.
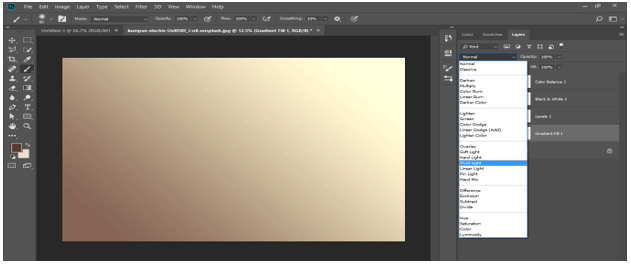
Decrease opacity of this layer as 25 %.
Now let us have an image of vintage background which I have downloaded from internet. For image, go to File menu and click on Open option.
Now choose your desired file from your desired folder of your computer then press Open button of this dialog box.
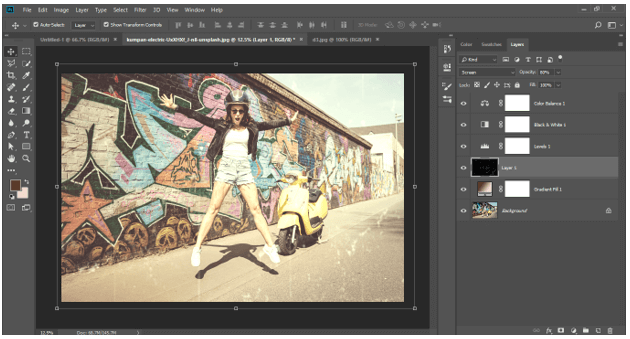
Your image will open in new tab of Photoshop software like this. Drag this image to the vintage image tab with the help of mouse left button.
Adjust the size of this image by moving handles of transform box of this image. Adjust size in this way so that it covers your vintage image like this then press ‘commit transform’ button of property bar of this image or you can simply press Enter button of keyboard.
Now click on Mode option of this layer and choose Screen option from the list.
Decrease the opacity of this layer as per your choice that how much this image effect you want on your original image.

This is final vintage effect on your image.
In this way you can create vintage effect in Photoshop by using different parameters and techniques of this software.
Conclusion
Now after this article you can understand what Vintage effect is in Photoshop and how you can create it for getting an old look on your image. You can apply your own idea with this effect by analyzing different parameters of this effect and can create your own new vintage effect.
Recommended Articles
This is a guide to Vintage Effect Photoshop. Here we discuss How to Create the Vintage Effect in Photoshop and different parameters of this effect. You may also have a look at the following articles to learn more –
