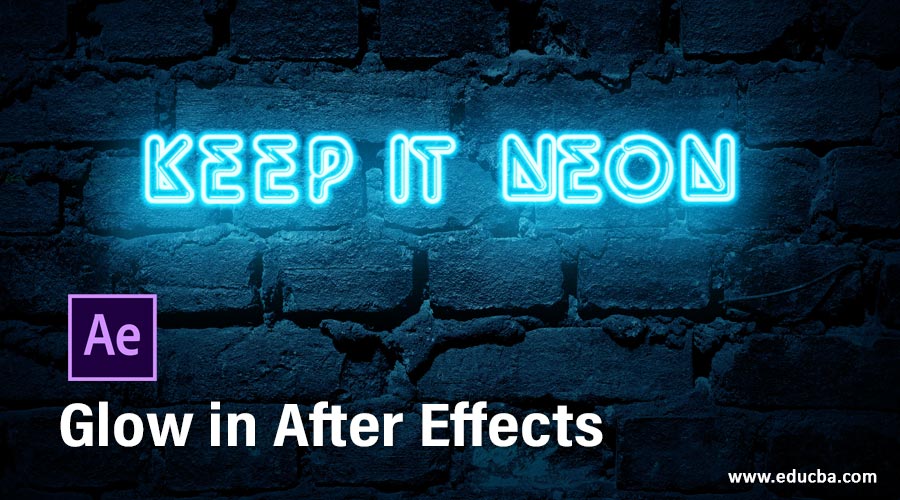
Introduction to Glow in After Effects
Adobe After Effects is an animation and video editing software and, in this article, we are going to learn how to create a glow effect. For this purpose, first, we will look at the inbuild glow effect, and then we will create a customized glow effect from various effects and also the use of the plugin.
Steps of Glow in After Effects
Here are the following steps mention below
Step #1
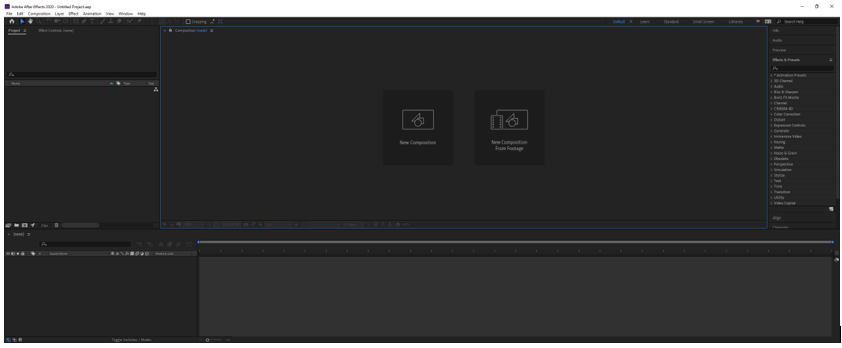
Let us first familiarize ourselves with the interface before starting to get a better understanding. At the top is the menu bar like File, Edit, etc. and each has its own submenu. Next, just below it, we have a tool panel and their properties. On the left side there is project panel that consists of the project files and effects control panel which shows the effects applied on a particular layer. Then there is the composition panel which shows the preview of the animation or video. At the top right, we have various layout presets which will arrange according to the type of work. We can even create our own custom layout. At the right, there are various sections used to edit the video. At the bottom, there is layers and timeline panel which is used to add media and add animation keyframes.
Step #2
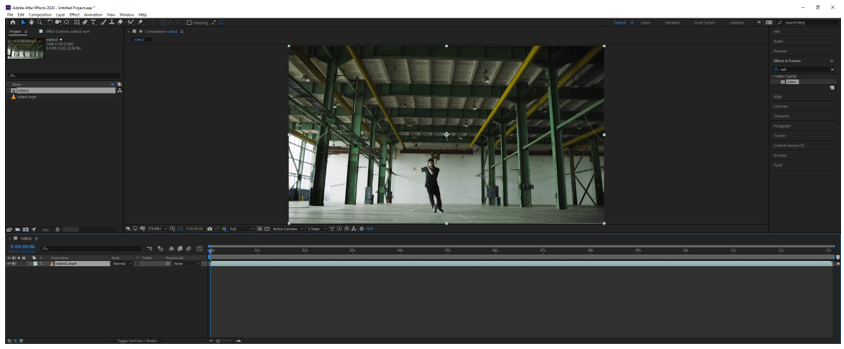
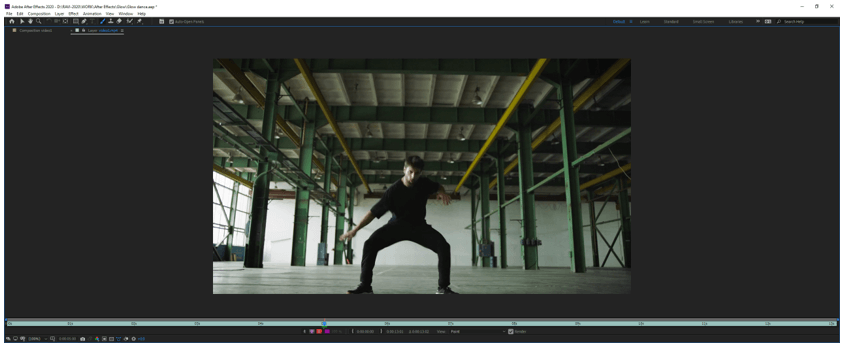
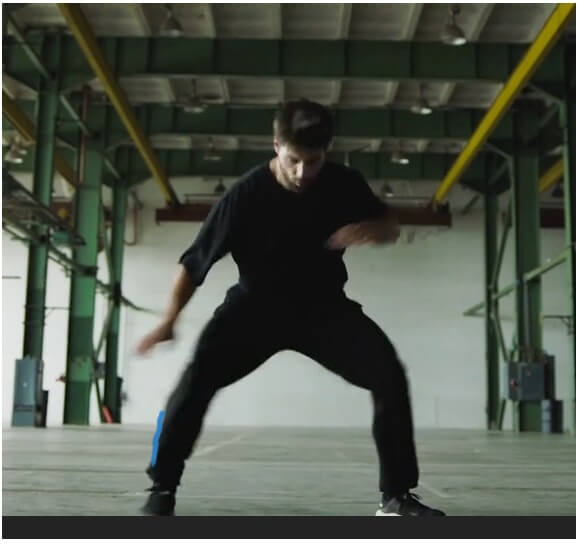
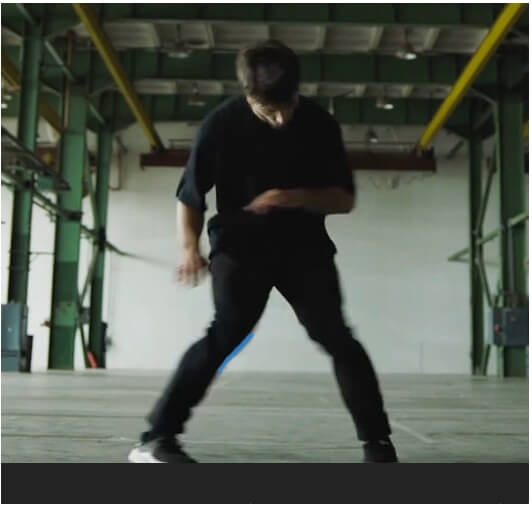
Double click on the Project panel to import the video footage. This is a dance video in which we will add a glow effect.
Step #3
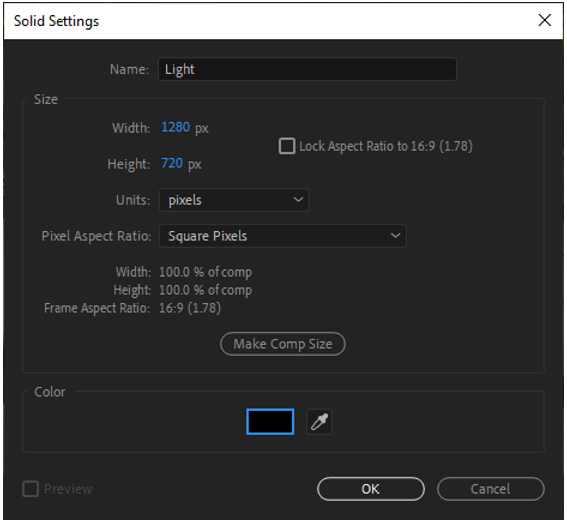
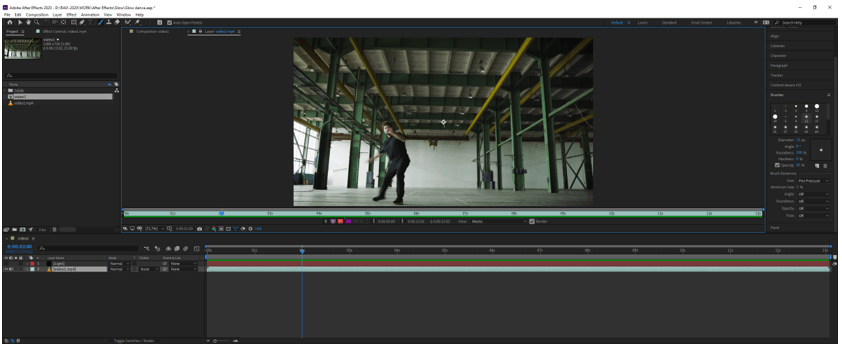
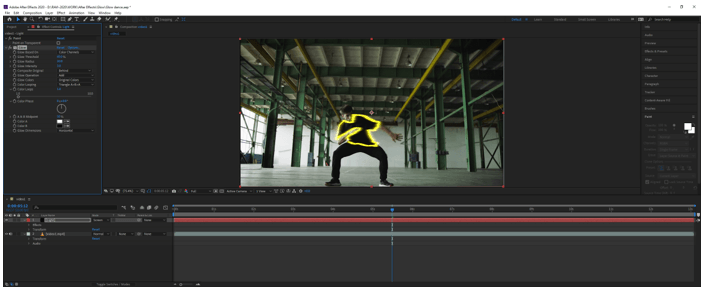
Next, create a solid by right-clicking on layers panel and name it Light and set the color to black.
Now hide the solid layer and double click the video so now we are in layer editing mode as we can see it has its own timeline and changing it will not change the main timeline. Then open the brush panel from Window -> Brush and then select the brush tool or press Ctrl + B. In brush panel we select a soft round 5-pixel brush. Also, open the painted panel which is in Window -> Paint and select the color. Set the mode to Normal, channels to RGBA as we will also get the alpha channel output and duration to a single frame.
Step #4
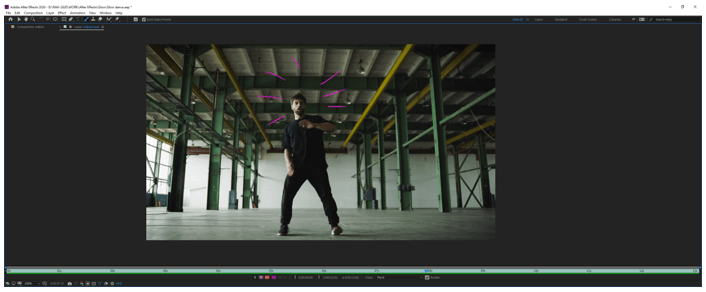
Let’s move the current-time indicator at around 5 seconds mark where we are starting this effect and I have double click to layer panel to make it full screen and in brush dynamics section we have set size and flow to pen pressure as in this example we are using a graphic table. If you do not have a graphic tablet you can create with mouse and in that case, it will not matter to set the dynamics as it will be according to brush settings.
Step #5
We have created a brushstroke as shown. Now we will create similar strokes around the edges of the person but we will change the frame by pressing Ctrl and right arrow.
Step #6
We have created different strokes at the various frame and some of them are as shown.

Step #7
Then we change the color and couple of frames ahead we have created the stroke as shown.

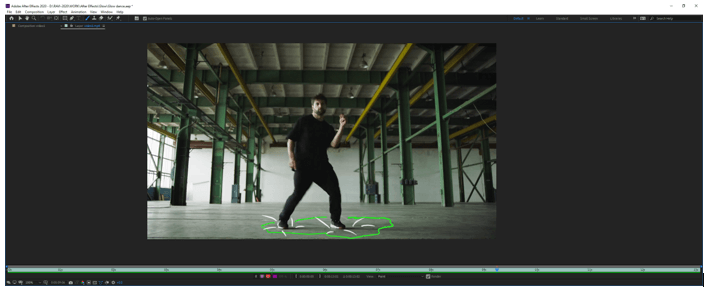
Step #8
Then we will show the motion of the hands with another color and do it for a couple of frames and similarly, we can do it for entire video.
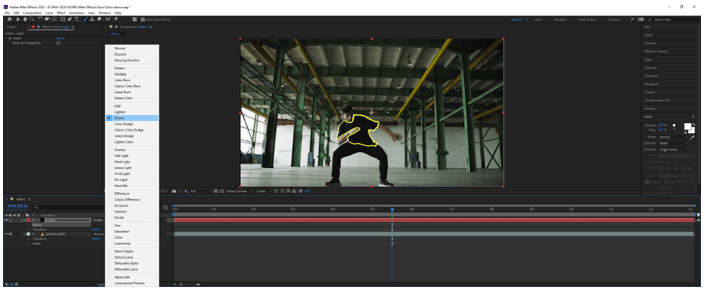
Step #9
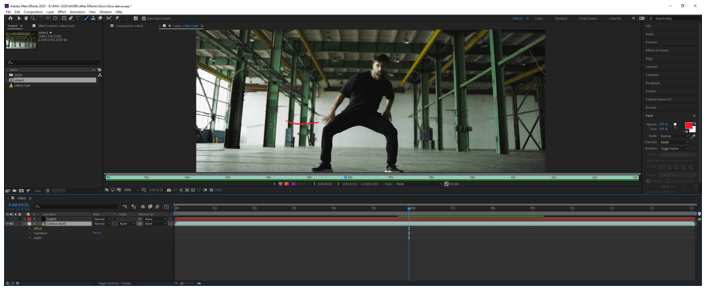
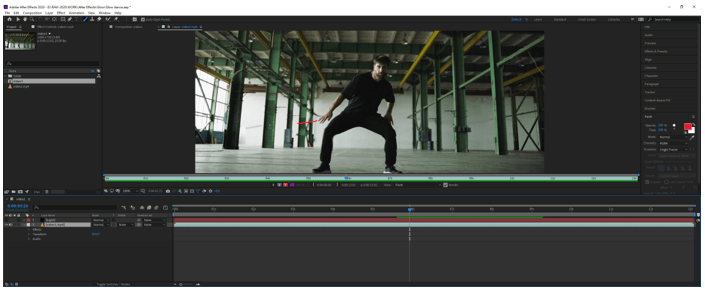
Next, we will exit from layer editing mode and in our main comp, we will to the video layer cut the effects from it and paste it in solid layer and make sure that the play head is at the first frame and now we can see that the effects are only on the solid.

Step #10
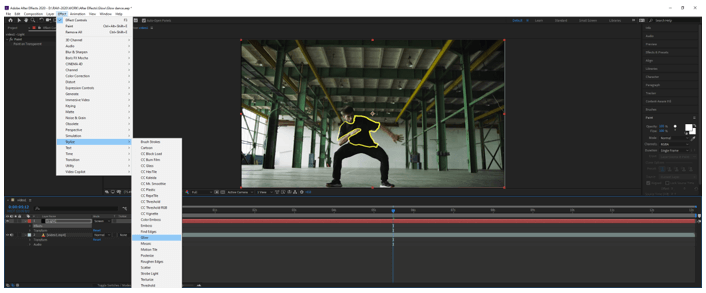
Change the mode of light layer from Normal to Screen and also add an effect from the Effect menu for glow which is in stylize.
Step #11
Now let us understand various parameters of glow effect, first, we will change the glow intensity to 3.0, and as we can see the line has become thicker.

Step #12
Next, we change the glow radius to 20.0 which gives a halo effect

Step #13
Next, change the flow dimensions to horizontal to get a different effect.
Step #14
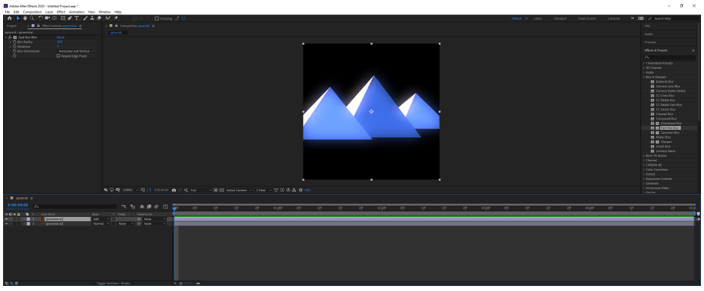
Next, we will look at how we can create a customized glow from effects other than glow for this we will use an illustrator file and create a comp by dragging it in the layers panel.

Step #15
Then duplicate the layer and then from effects and preset panel add Fast Box Blur and set blur radius to 18.0 and iteration to 4 and set the mode to Add which will create a nice glow effect
Step #16
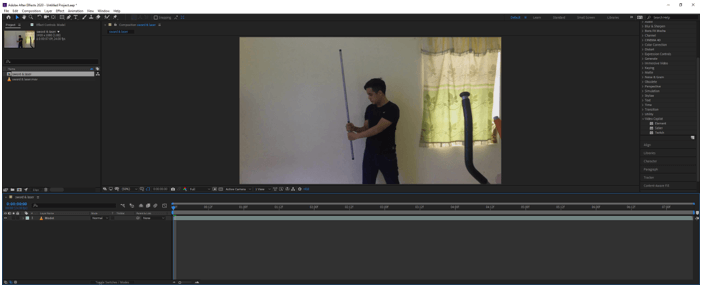
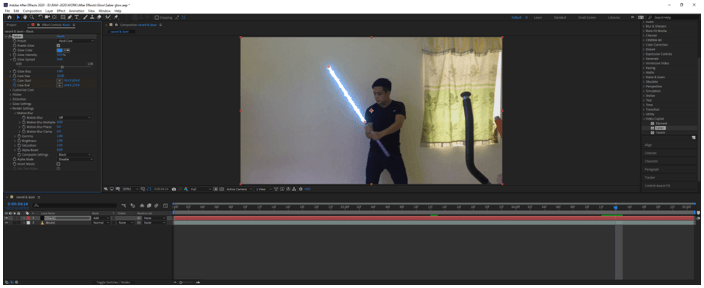
Now we will see the use of a plugin called Saber to create a lightsaber. We have imported the footage and created a comp. Then created a solid and dragged the saber effect on solid and set the mode to add.
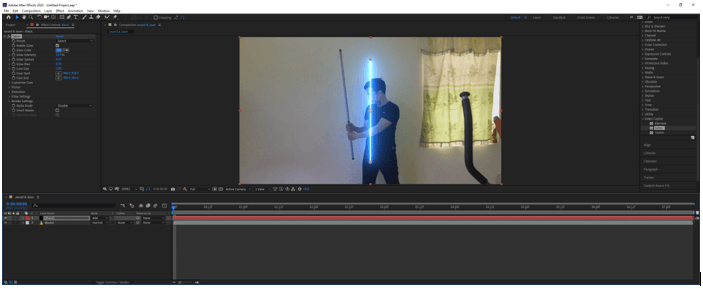
Step #17
Then align the saber with the stick and set the motion blur to off, set keyframe on core start and end and trim the solid black to around 2 seconds.

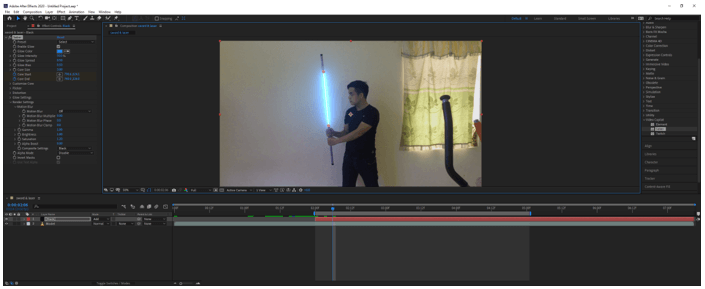
Step #18
Then frame by frame keep on adjusting the core end to the handle start and reduce the work area.

Step #19
Similarly, now start adjusting the core start frame by frame
Step #20
After finishing the frame by frame adjustment of the core start Trim Comp to Work Area from the Composition menu or press Ctrl + Shift + X

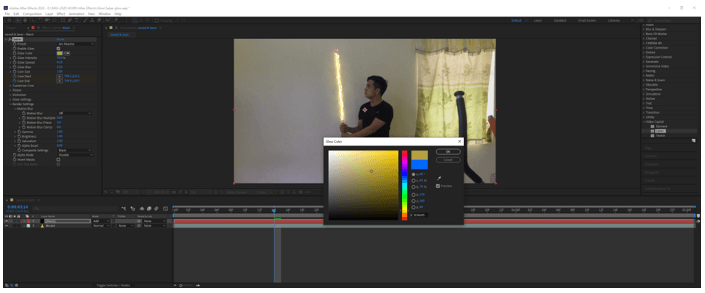
Step #21
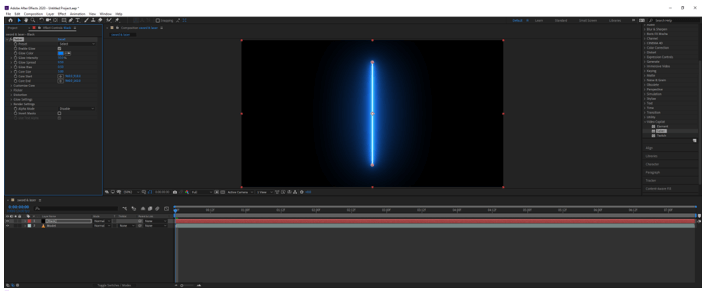
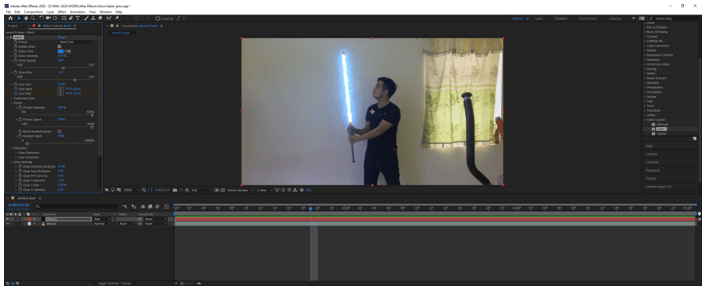
Now we can select various preset for saber from the effects and preset panel. We can also change the color.
Step #22
Now let us look at various parameters, for the hardcore effect we have set the intensity to 50%
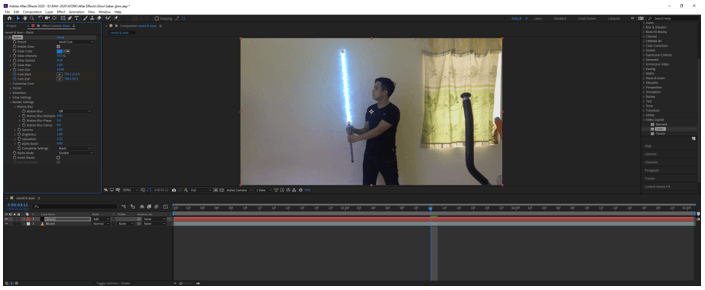
Step #23
Then we change the spread to 0.60 which reduces the glow.
Step #24
Then we change the flickering intensity and flicker speed which gives a glow with the flicker. Similarly, we can play with other settings to get the needed effect or spell.
Conclusion
In this article, we have learned not only how to use the default glow effect in the After effects but also seen how to create a customized glow effect. Apart from that, we have seen how to use a plugin to achieve a cool saber glow effect like in Star Wars.
Recommended Articles
This is a guide to Glow in After Effects. Here we discuss how to use the default glow effect in the After effects along with proper steps. You may also have a look at the following articles to learn more –
