Updated March 27, 2023
Overview of Tkinter Menu
Tkinter Menu is a widget that helps in creating a set of action items that are going to be used in the application. Tkinter is a standard package in python. To create multiple choices in terms of symbols and text, the menu helps with that. The moment any of the choices is clicked or touched, an action is activated, which could be in terms of any operation like opening a file, saving a file, etc.
There is two popular variety of Menu, we will discuss here:
- Pull-down
- Pop-up
Syntax:
Below shown is the syntax to create any Menu widget:
w = Menu ( master, option, ... )Master: The parent window, where the widget needs to be imbibed.
Option: The various parameter related to the widget used.
Menu Methods with Examples
The different methods are given below:
1. Pull-down Menu
Let’s discuss the first type of menu, i.e. Pulldown Menu.
Code:
from tkinter import *
Master = Tk()
variable = StringVar(Master)
variable.set("Open") # default value
wi = OptionMenu(Master, variable, "Open", "save", "save as")
wi.pack()
mainloop()
Output:
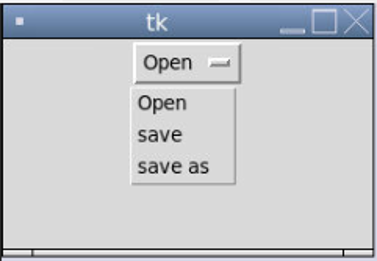
As one can see, “OptionMenu” is used from the Tkinter package to implement a pull-down menu. Tk helps in the creation of the top-level window. Here “OptionMenu” will pop up with a button. To which, we have set a default value of “Open”. Rest other values “save” & “save as” can be selected from the dropdown. If further someone wants action to be associated with it, one can use the .get() function to accomplish it.
As one can notice, as we had only three options. However, we easily put it in “OptionMenu”; however, if someone has a great list of things to be showcased under “OptionMenu”,
Then here is the approach:
Code:
from tkinter import *
Items = [
    "egg",
    "toffee",
    "chicken",
    "beef",
    "bread",
    "Choclate",
    "Milk"
]
Master = Tk()
click = StringVar(Master)
click.set(OPTIONS[0]) # default value
wi = OptionMenu(Master,click,*Items)
wi.pack()
mainloop()
Output:
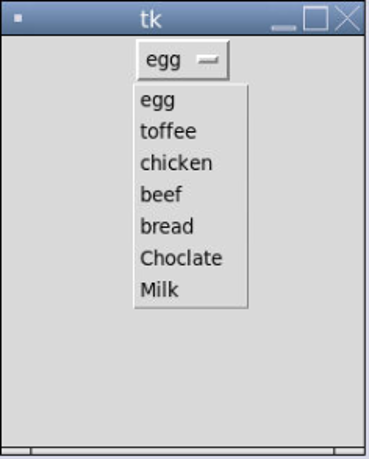
In order to pass the list in “OptionMenu”, the list should be prefixed with an asterisk symbol. This code has easy maintenance, as one can simply add, remove or edit any item in the list quickly. Plus, the code looks less clumsy and more readable.
One can even add a submenu to the menu.
Code:
from tkinter import *
from tkinter import filedialog
def Donothing():
    x = 0
root = Tk()
menu = Menu(root)
root.config(menu=menu)
filemainmenu = Menu(menu, tearoff=0)
filesubmenu = Menu(filemainmenu, tearoff=0)
menu.add_cascade(label="File", menu=filemainmenu)
filemainmenu.add_cascade(label="Save", menu=filesubmenu)
filesubmenu.add_command(label="Save Nothing", command = Donothing)
root.mainloop()
Output:
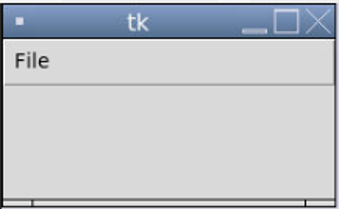
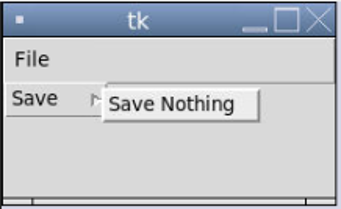
As one can see, “Save Nothing” is a submenu of the “Save” Label.
With the help of “add_cascade”, one can create a sub-menu under the main menu. If you notice well, the “filesubmenu = Menu(filemainmenu, tearoff=0)” command is used to associate filesubmenu with filemainmenu. One can add a seperator as well between the options. Like:
Code:
from tkinter import *
from tkinter import filedialog
def Donothing():
    x = 0
root = Tk()
menu = Menu(root)
root.config(menu=menu)
filemainmenu = Menu(menu, tearoff=0)
filesubmenu = Menu(filemainmenu, tearoff=0)
menu.add_cascade(label="File", menu=filemainmenu)
filemainmenu.add_cascade(label="Save", menu=filesubmenu)
filesubmenu.add_command(label="Save Nothing", command = Donothing)
filemainmenu.add_separator()
filemainmenu.add_command(label="Exit", command=root.quit)
root.mainloop()
Output:
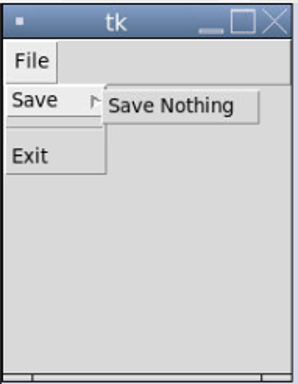
If someone notices well, we used the command: “filemainmenu.add_seperator()”. Its sole purpose is to add a line of separation to the menu.
There are many methods related to the drop-down menu. One needs to experiment with all in order to get a good grip over Menu designing with Tkinter.
2. Pop-up Menu
The pop-up menu is the menu shown anywhere in the window. It is also known as the context menu. Let’s understand it through the code below.
Code:
from tkinter import *
def Hi():
message.config(text = "Hi")
def Hey():
message.config(text = "Hey")
root = Tk()
root.title("This is an Example: PopUp Menu")
#w = Label(root, text="Right-click to display menu", width=40, height=20)
#w.pack()
message = Label(root,bg = "grey")
message.pack(fill = BOTH,expand = YES)
# create a menu
popup = Menu(root, tearoff=0)
popup.add_command(label="Print Hi",command = Hi)
popup.add_command(label="Print Hey",command = Hey)
def perform_popup(event): # To display the popup menu
try:
popup.tk_popup(event.x_root, event.y_root, 0)
finally:
popup.grab_release()
message.bind("", perform_popup)
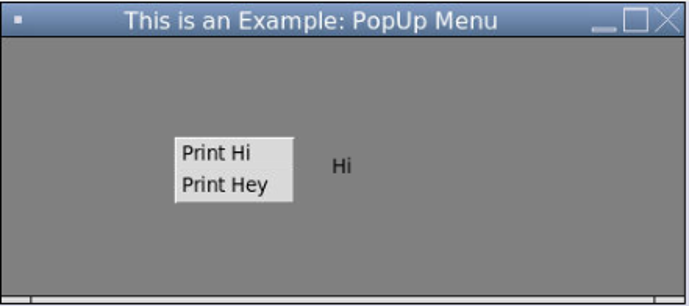
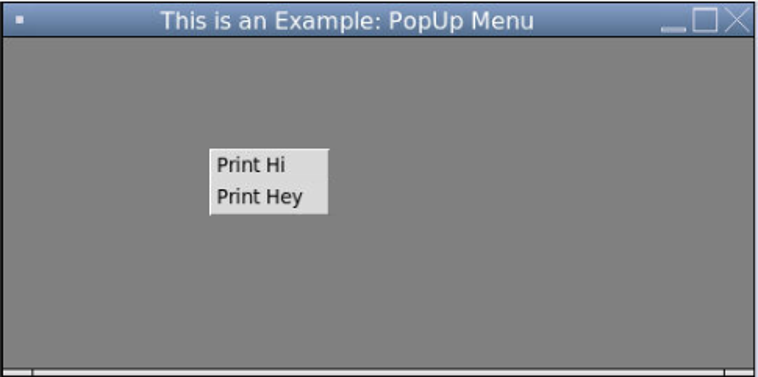
mainloop()Output #1
Output #2
As one can see, how to pop up window is used to print “Hi” or “Hey” accordingly, with the help of functions defined. First, the window is created with the help of the Tkinter root(which is the top-level window), and then a pop-menu is added to it with the help of “Menu(root)”
When tearoff = 0, it means menu options will be added at the starting position. When one right clicks, it opens the 2-D popup menu with options listed over the window. The label one clicks, action triggers as per that which we call event.
Command:
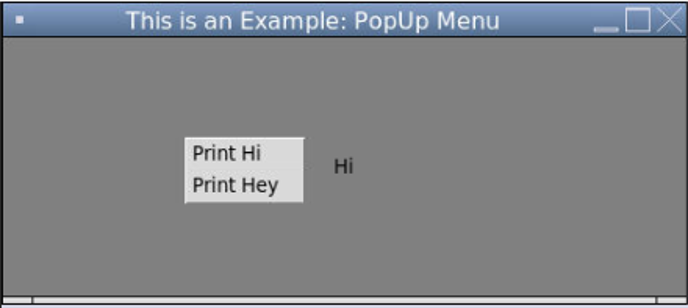
"popup.tk_popup(event.x_root, event.y_root, 0)" will post the pop up at location "x_root" and "y_root"Suppose someone doesn’t want any action to be associated with the label. One can opt for it by simply doing nothing.
Code:
from tkinter import *
def Donothing():
    x = 0
def Hey():
    message.config(text = "Hey")
root = Tk()
root.title("This is an Example: PopUp Menu")
#w = Label(root, text="Right-click to display menu", width=40, height=20)
#w.pack()
message = Label(root,bg = "grey")
message.pack(fill = BOTH,expand = YES)
# create a menu
popup = Menu(root, tearoff=0)
popup.add_command(label="Print Hi",command = Donothing)
popup.add_command(label="Print Hey",command = Hey)
def perform_popup(event):    # To display the popup menu
    try:
        popup.tk_popup(event.x_root, event.y_root, 0)
    finally:
        popup.grab_release()
message.bind("", perform_popup)
mainloop()
Output:
Conclusion
As we saw above, the Tkinter menu and its various usage-based on certain examples. The examples shown above are straightforward and easy to grab. Tkinter menu is of great help in building applications with various options as part of it. One can embed options in a drop down or pop up menu as per requirement and hence associate it with action items. There are many methods available with the menu; one must get their hands dirty to understand it fully.
Recommended Articles
This is a guide to Tkinter Menu. Here we discuss the overview, Syntax, Menu Methods and Examples along with the codes & outputs. You can also go through our other suggested articles to learn more –
