Updated August 22, 2023
Switching Columns in Excel (Table of Contents)
Overview of Switching Columns in Excel
I guess all of us are very well aware of how MS Excel works and its basic and advanced operations. MS Excel assists with everyday office work like analyzing data, re-calculation, V lookup, H lookup, etc. Some of us have our own personal Excel made consisting of day to day requirements to keep a check on our expenses. At least, I have one! Here, it is very important to understand how in excel, the rows and columns move from one serial order to another without affecting other data in the loop.
Now, let us start with the topic for today. But first, we need to understand Rows and Columns and how to distinguish between them. Of course, it is very basic, yet let us start with those first. Moving horizontally towards the left or right in Excel, we move in a row. And while we are moving vertically, it means a column.
How to Switch Columns in Excel?
Let us now begin by exploring different ways in which we can switch columns in an Excel sheet. We have taken the following data for our examples to understand the above and provide an explanation.
Here is Customer-related data, where customer details, the products they prefer, and their rating are given.

Example #1
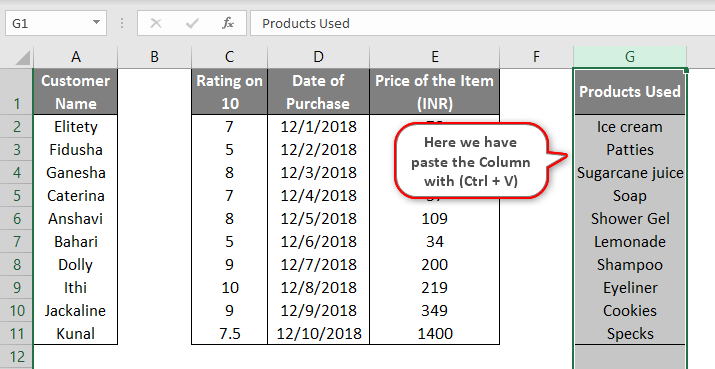
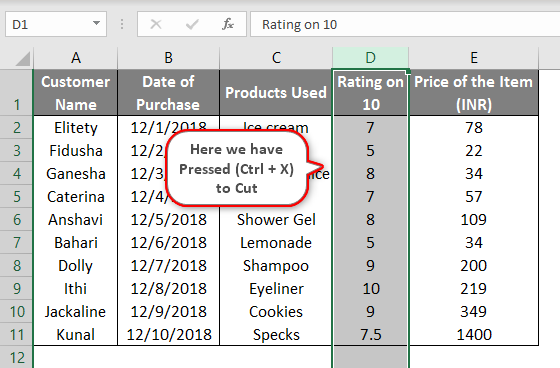
- The easiest way to shift any data from one place to another is by using the Cut + Paste function, which is the basic function of Ctrl + X and Ctrl + V, as shown below.
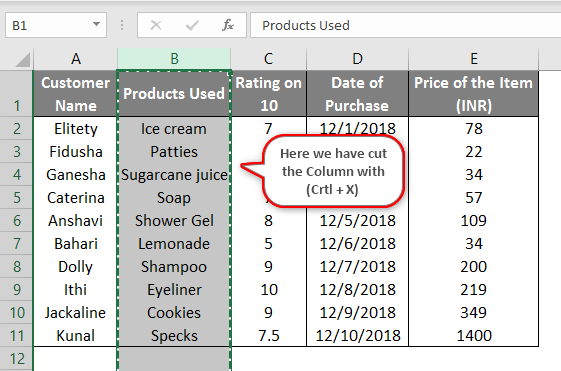
- We have cut the entire column B in the screenshot here and pasted it at the end in another screenshot. With the help of Ctrl + V, we have pasted in Column G.
- Now we will understand the content with the following examples.
Example #2
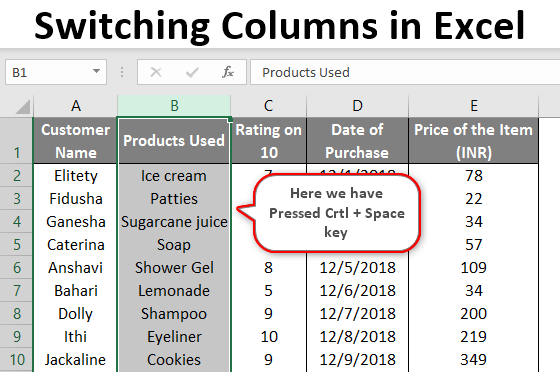
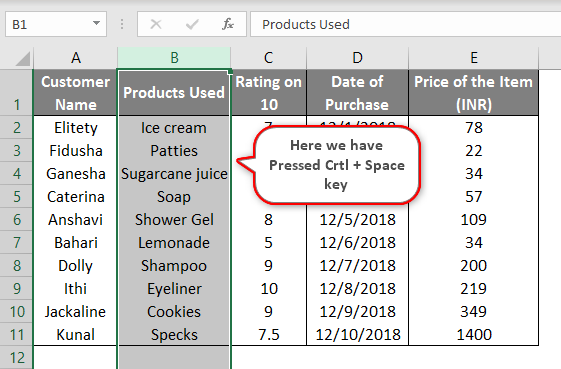
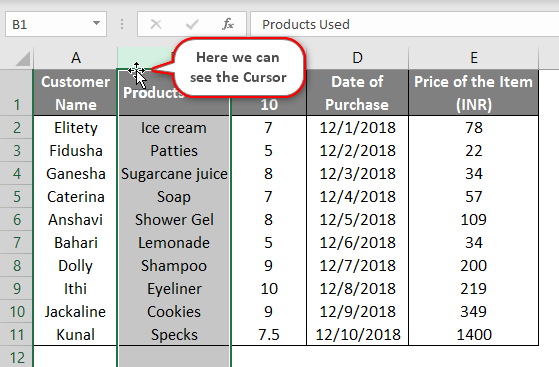
- Suppose we need to move the contents of Column B to Column A. Then we need to perform the below-mentioned task. Select the entire column by clicking anywhere in column B (in the example, we selected cell B2) and then press Ctrl + Space.
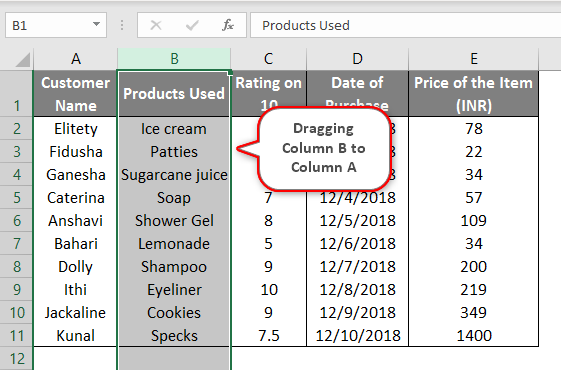
- After selecting the entire Column, we shall bring the cursor to the extreme left or right corner of that cell; as soon as we do that, a small four directional arrow cursor appears near the cursor. As soon as this arrow appears on the screen, we should press Shift Key and then drag the selected cell to the desired location where we want the data to be pasted. In our example, we drag it to Column A.
- When we drag the entire Column leftwards by pressing the left side of the mouse to bring it to column A, the movement can be traced with a green color outline on Column A. That outline is the result of dragging the column. After bringing the cursor there, we should release the mouse. The Shift key moves the content to the desired place instead of overwriting the contents of the column where it is moved.
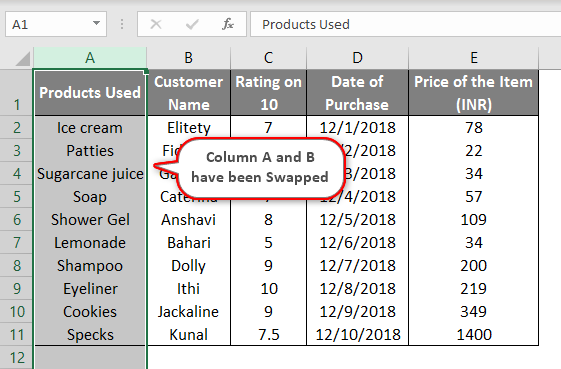
- After dragging it to the desired location, it looks like this; If you carefully observe, you will see that Columns A and B have been swapped. Column A contents have been replaced by Column B and vice versa. So basically, the Column “Customer Name” has shifted towards the right. However, the same happened without affecting any other data in the sheet.
- Now supposedly, we do not use the Shift Key and still try to drag the items, then we will get the following information. As you see below, the message pops up – There are already data here. Do you want to replace it? So, without shifting, if we try to drag the data, the contents will be replaced instead of shifting places. That’s why we need to use the Shift button from the keyboard.
Example #3
Taking the same data, let us learn more about switching Columns.
- We can move the content of two columns together at the same time. For example, we have selected Columns B and C together and repeated the same procedure as explained in example 2, only with a difference that now we are dragging this in-between Columns D and E.
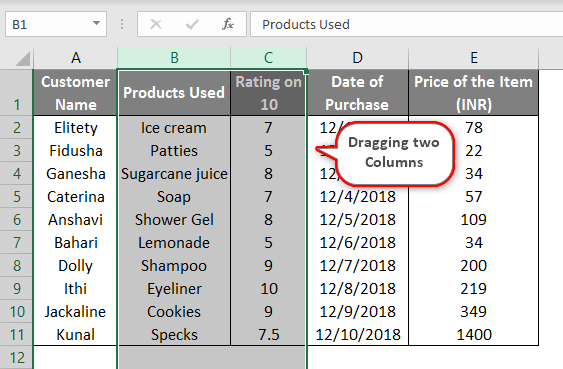
- As soon as we shift the data between Columns D and E, the result is presented on the left side of the screen. As you can see, the data dragged has come between the Date of Purchase and the Item’s Price.
- However, we can move only two adjacent columns together. As in the above case, the two columns which we moved were adjacent to one another. However, if we try moving 2 non-adjoined cells simultaneously, it will not produce the correct result.
Example #4
We have another shortcut method for performing the same task.
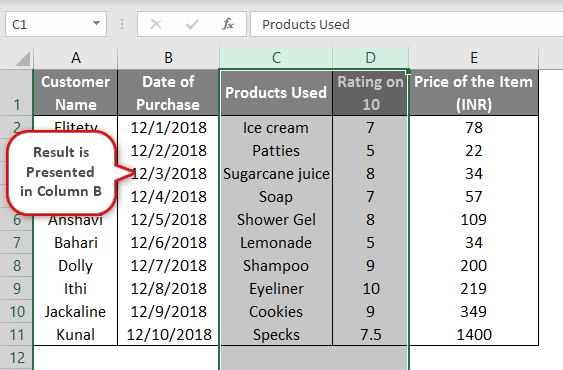
- Taking the above example, we cut the content from Column D by clicking Ctrl + X.
- In this example, we want to shift column D’s contents between Columns A and B. So, we bring the cursor on column B by selecting the entire column and pressing Shift + Ctrl and “+ sign”. Then we move the cursor to the cell where we want the column to be pasted. That result is presented on the left side as soon as we do.

These are the shortcut ways to switch columns in an Excel sheet.
Things to Remember About Switching Columns in Excel
Here are a few points to remember while performing the movement of columns.
- While dragging the selected column leftwards, as shown in example 2, we should keep the Shift key pressed until the time column has been dragged at the desired location.
- Only two adjoined columns can be shifted to a new area; otherwise, it will not give the correct result.
- Moving columns from one place to another will not impact other contents in the data if used correctly.
Recommended Articles
This is a guide to Switching Columns in Excel. Here we discuss How to Switch Columns in Excel, examples, and Templates. You can also go through our other suggested articles to learn more –
