Updated July 3, 2023
Why Move Columns in Excel?
Moving columns in Excel means changing the order of columns to make the data look organized and easy to understand. For example, when an accountant wants to compare the company’s income and expenses, they move the income and expense columns together for easier comparison.
Individuals who frequently use Excel often need to rearrange data, including swapping columns in databases. While comparing them side by side is an option, using an Excel shortcut to move columns when working with huge databases is more convenient. Fortunately, there are multiple methods by which we can do this. This article will provide detailed explanations and examples for each of these methods.
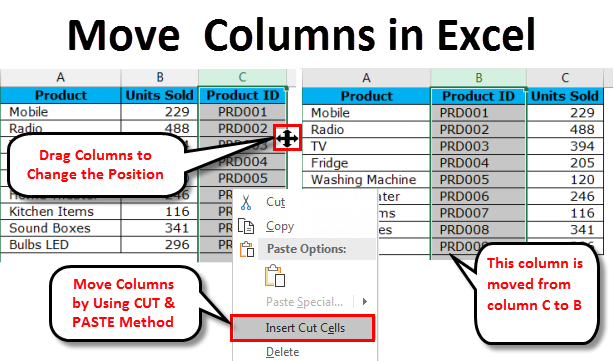
Table of Contents
How to Move Columns in Excel
In this article, we have provided a detailed explanation on how to move single and multiple columns in Excel using examples.
Method #1: Drag-and-Drop
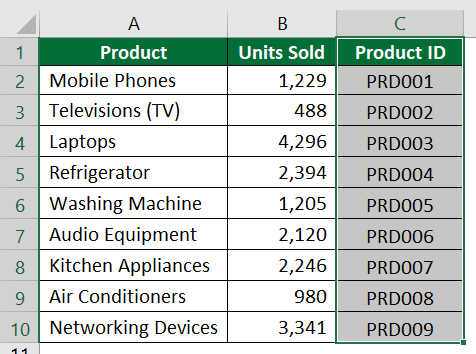
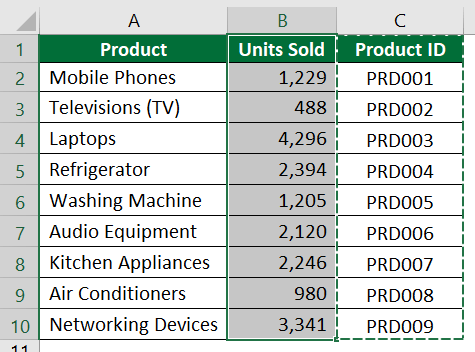
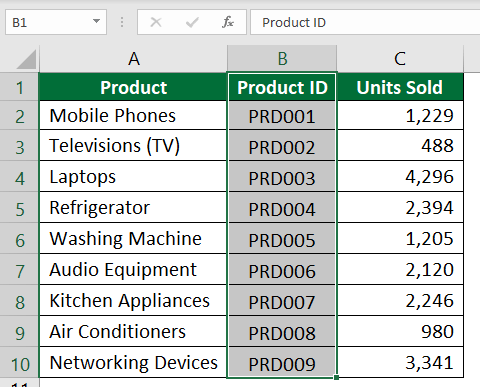
Consider the below data of Product List, Sold Units, and Product ID data. If you look at the data structure closely, the Product ID should ideally be after the Product List. So we need to move the Product ID column to the left side of the Units Sold column.
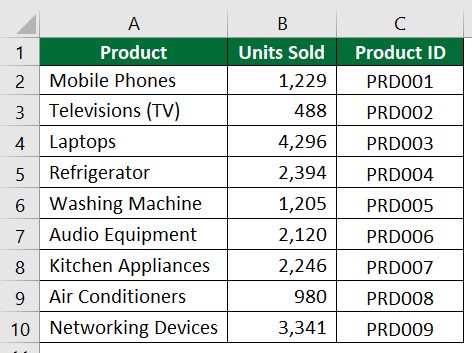
Solution:
Step 1: Select the entire Product ID column.
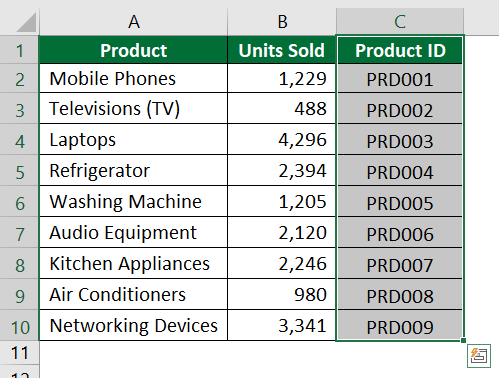
Step 2: Move the mouse pointer to the left side border of column C. A four-sided arrow appears, as shown below.
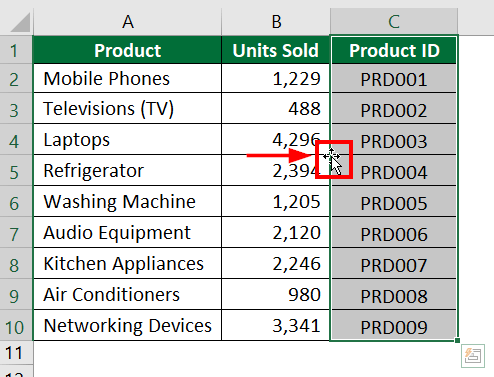
Step 3: Press and hold the shift key on your keyboard. It is the Excel shortcut to move columns. Then, click and hold the left button/side of the mouse.
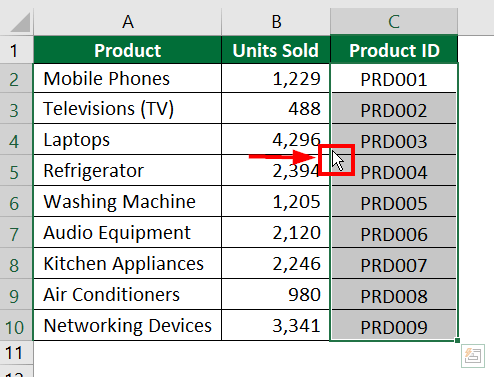
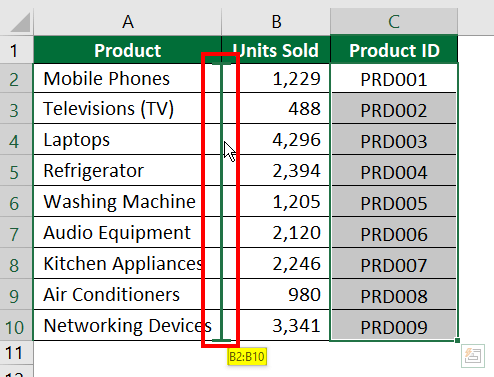
Step 4: Now, move the entire column in Excel to the desired location, i.e., Column B.
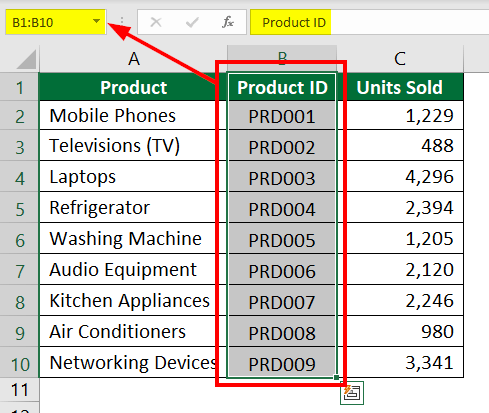
You will notice a green-colored straight line when you try to drag. Just release the left mouse button and the shift key to drop the column to the desired location.
Method #2: Insert Cut Cells
Let’s consider the same data from the previous example.
Step 1: Select the entire “Product ID” column along with the header.
Step 2: Right-click on the column and select “Cut” or press “Ctrl +X”.

Step 3: Now, select column B.
Step 4: Right-click on column B and select “Insert Cut Cells”.

Method #3: Move Multiple Columns in Excel
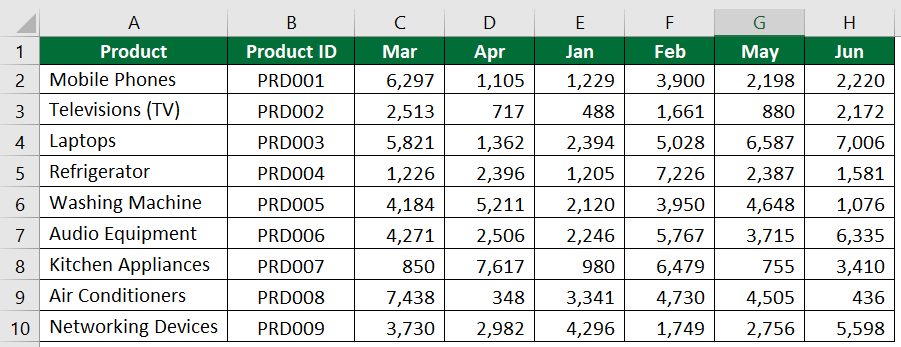
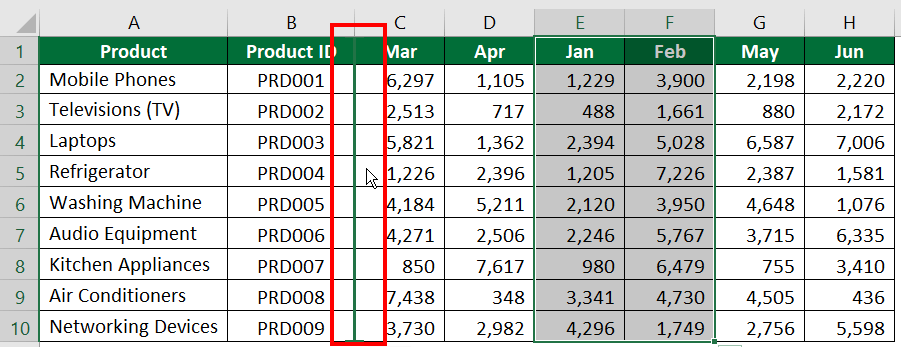
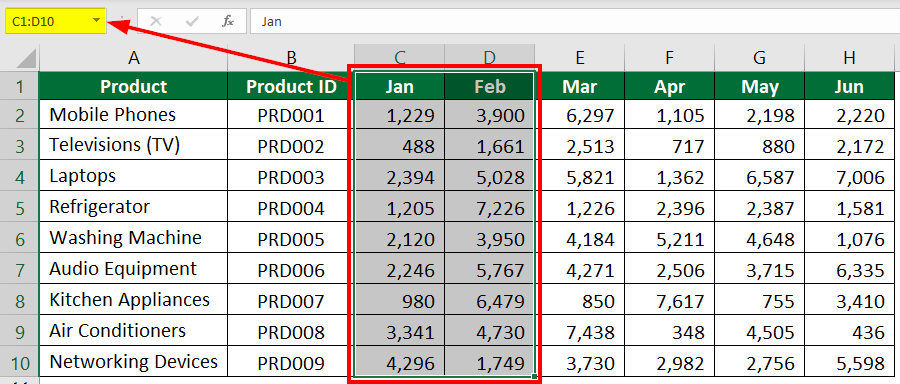
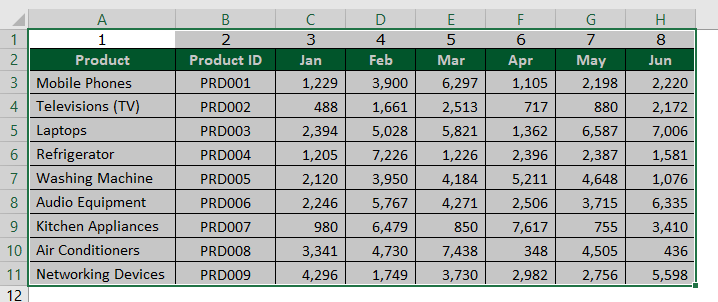
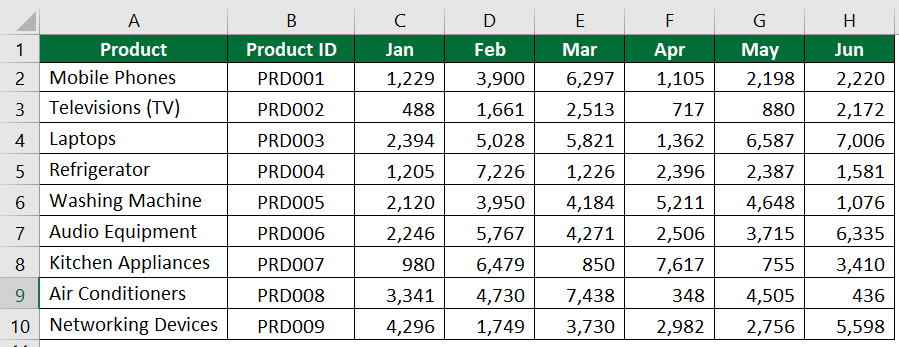
Consider the below data of various products sold between January to June. However, the data columns are not in proper order. We need to rearrange the columns so that the columns for January and February come before the March column.
Solution:
We will move columns using the drag-and-drop method.
Step 1: Select Columns E and F and place the mouse cursor on the left edge of column E.
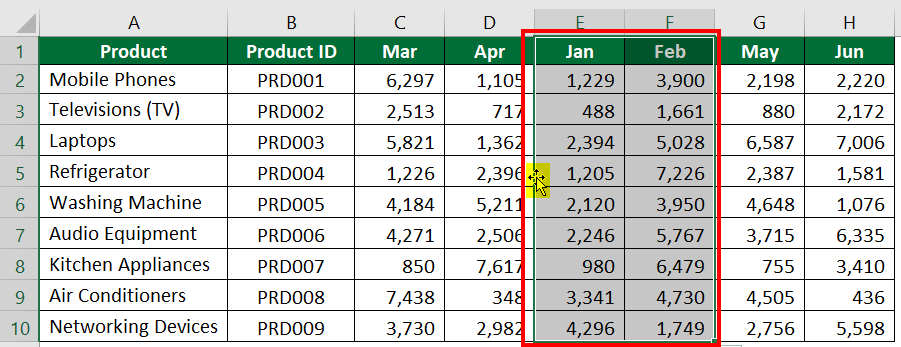
Step 2: Press and hold the shift key and the left mouse button. Then, drag the columns to the border between columns B and C.
Method #4: Data Sort
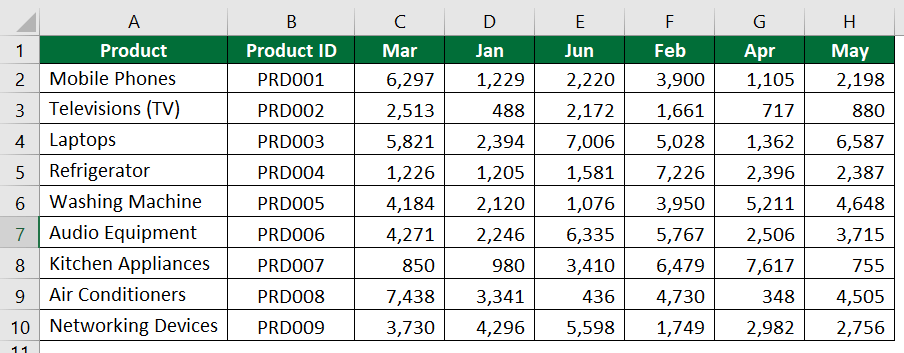
In the above example, we have moved adjacent columns. But what if you want to move columns that are not adjacent? For that, you can use the Data Sort method.
Let’s consider the data used in the above example.
Solution:
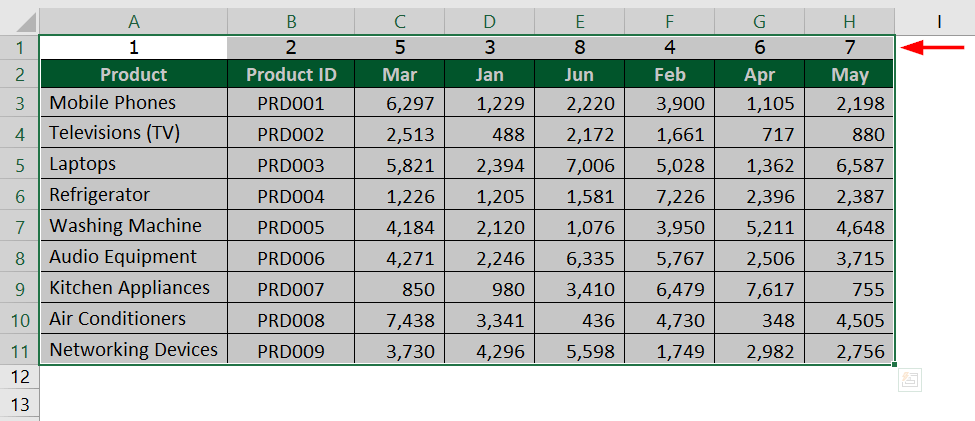
The first step before applying this method is to add a new row at the top of the table.
Step 1: To add a new row, right-click on row 1, click “Insert,” and select “Entire row”.

Step 2: Now, we need to add the numbers in the new row. The number indicates the position of each column in the table.
For example, if you want January data in the third column, then enter 3 in Cell D1.
Step 3: After entering the numbers in the first row as per the order you need, select the entire data.
Step 4: In the “Data” tab, select “Sort” under “Sort & Filter”.

Step 5: Select “Options”, as shown below.
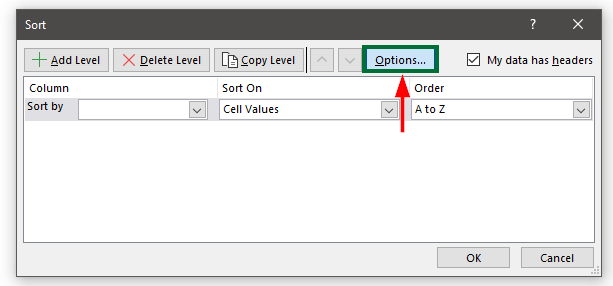
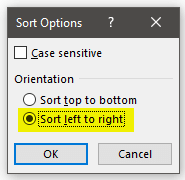
Step 6: Select “Sort left to right” from the “Orientation” options and click on “OK”.
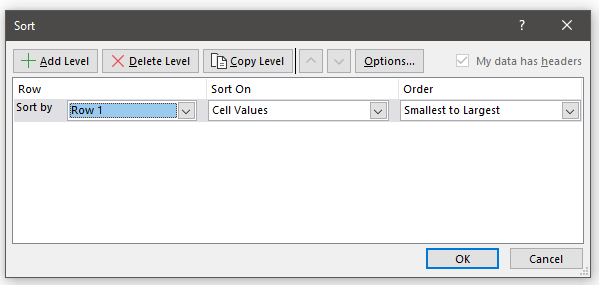
Step 7: Select the following option from the “Sort” Window and click “OK”.
- Select “Row 1” in the “Sort by”
- Select “Cell Values” in the “Sort On” menu.
- Select “Smallest to Largest” in the “Others”.
The data is sorted from smallest to largest number, as shown below.
Step 8: Now, you can delete the first row.
Frequently Asked Questions (FAQs)
Q1. Why can’t we move columns using the copy-and-paste method?
Answer: When you use the copy-and-paste method to move columns in Excel, Excel will delete the original column’s data and then add the copied data column. For instance, if you copy data from column A and paste it into column C, the data from column A will replace the existing data in column C. This way, we can lose information if we use the copy-and-paste method.
Q2. How do I move columns in Google Sheets?
Answer: For moving columns in Google Sheets, you cannot use the same methods as we did for moving single and multiple columns in Excel. The three methods to move columns in sheets are:
- Drag-and-Drop
- Move Left/Move Right
- Cut, Insert, Paste, Delete
Note that the drag-and-drop for Excel and google sheets have different steps.
Q3. When you move columns in Excel, does the formatting stay the same?
Answer: Yes, whenever you move single or multiple columns in Excel, there are no changes in the formatting of the particular columns.
Recommended Articles
This article is a step-by-step guide on how to move columns in Excel. Here we discuss how to move columns around in Excel using Drag-and-Drop, Insert Cut Cells, and Data Sort methods. You may also refer to the below articles in Excel for a better understanding:–
