EDUCBA

EDUCBA

MENUMENU
  • Free Tutorials
  • Free Courses
  • Certification Courses
  • 280+ Courses All in One Bundle
  • Login
Home Design Design Tutorials Illustrator Tutorial Slice Tool in Illustrator
Secondary Sidebar
Illustrator Tutorial
  • Tools
    • Adobe Illustrator Tools
    • Selection Tool in Illustrator
    • Width Tool in Illustrator
    • Illustrator Grid Tool
    • Pathfinder Tool in Illustrator
    • Pen Tool In Illustrator
    • Measure Tool in Illustrator
    • Mesh Tool In Illustrator
    • Blend Tool in Illustrator
    • Direct Selection Tool Illustrator
    • Illustrator Free Transform Tool
    • Shape Builder Tool in Illustrator
    • Slice Tool in Illustrator
    • Smooth Tool in Illustrator
    • Eyedropper Tool in Illustrator
  • Basic
    • What is Adobe Illustrator
    • Install Adobe Illustrator
    • Adobe Illustrator For Windows
    • Adobe Illustrator for Windows 8
    • How to Use Adobe Illustrator
    • Adobe Illustrator for beginners
    • Adobe Illustrator for Students
    • Illustrator Shortcut Keys
    • Illustrator Plugins
    • Illustrator Repeat Action
    • Illustrator auto trace
    • Layers in Illustrator
    • Moon in Illustrator
  • Effects
    • Effects in Illustrator
    • Insert Image in Illustrator
    • Crop in Illustrator
    • Remove Background In Illustrator
    • Remove White Background in Illustrator
    • Shapes in Illustrator
    • Text Effects In Illustrator
    • Watercolor Brushes Illustrator
    • Blending Modes in Illustrator
    • Blur in Illustrator
    • Brushes in Illustrator
    • Change Background Color in Illustrator
    • Graphic Styles in Illustrator
    • Change Artboard Size in Illustrator
    • Logo Design in Illustrator
    • Rasterize in Illustrator
    • Resize Image in Adobe Illustrator
    • 3D Effects in Illustrator
    • 3D Text in Illustrator
    • Filters in Illustrator
    • Reflection in Illustrator
    • How to Make Logo in Illustrator?
    • Transparent in Illustrator
    • How to Add Texture in Illustrator?
    • Neon Effect in Illustrator
    • Create Table in Illustrator
    • Paper Texture in Illustrator
    • Stamp Effect in Illustrator
    • Sun in Illustrator
    • How to Warp Text in Illustrator?
    • Metal Effect in Illustrator
    • Action in Illustrator
    • Illustrator Gold Gradient

Related Courses

Illustrator Training Course

Adobe Flash Training Course

3Ds Max Modeling Training Course

Slice Tool in Illustrator

slice-tool-in-illustrator

Introduction to Slice Tool in Illustrator

The slice tool in Illustrator is also called the slice selection tool. The slice tool is used in the creation of web pages, and web design works. The slice tool helps the user to create different slices or pieces of the object and place them according to their requirements and needs. Once the slices are made from the object, they can select, locked or hidden according to their usage. The user can also select multiple slices and lock them all with the help of the Slice tool Options.

Slice Tool in Illustrator 1

Start Your Free Design Course

3D animation, modelling, simulation, game development & others

How to Use the Slice Tool in Illustrator?

When creating web pages in Adobe Illustrator, there is a vast diversity of interconnecting slices associated. These may cover vector graphics, raster images, and HTML codes, all functioning in conjunction to produce a smooth web experience. To segregate and edit these distinct elements in the same program, Illustrator permits you to produce extremities between them called slices or pieces. The slicing process tells the Illustrator which part of the web page you want to separate from the rest and save them individually as JPEG or GIF, or PNG.

We will take the EDUCBA website template as an example of the explanation process:

All in One Design Bundle(280+ Courses, 100+ projects)
AutoCADHoudiniAdobe Premiere ProPhotoshop
SolidworksVFX Visual EffectsCorelDrawUnreal Engine
Price
View Courses
280+ Online Courses | 100+ projects | 2000+ Hours | Verifiable Certificates | Lifetime Access
4.6 (65,098 ratings)
  • Drag the EDUCBA template to the canvas.

Slice Tool in Illustrator 2

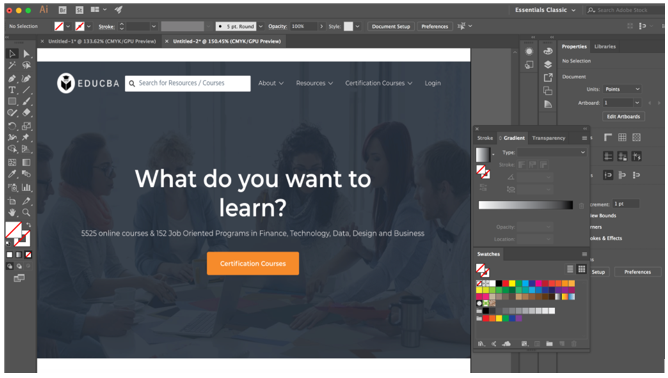
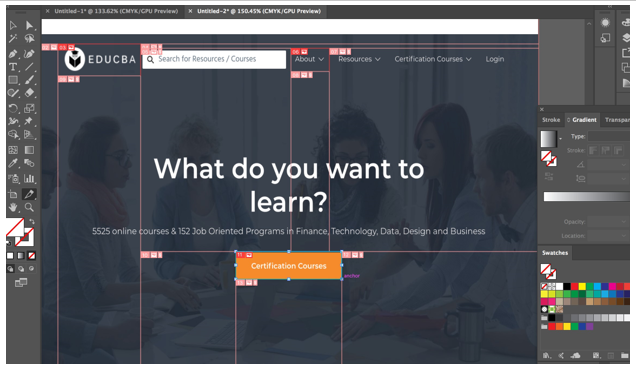
  • After laying down the objects on the artboard as per your requirements, it is simple to convert any of the elements or objects into a slice. First, choose the slice tool, which appears to be like a scalpel in the toolbar panel, and then form a box around the elements that you wish to add to the slice. You can also choose elements with the Selection tool and then click on Object > Slice > Make. In this example, we will slice the EDUCBA logo, about dropdown, certification courses button; you can pretty much slice anything you want. The following screenshots explain the process of slicing using the slice tool.

Slice Tool in Illustrator 3

  • When you utilize the Illustrator slice tool, the software will undoubtedly slice any images and objects that are surrounding the element. All slices or pieces are produced in a table cell layout, so they are enhanced for the web.

Slice Tool in Illustrator 4

  • Once you have sliced the elements you require, to choose a slice, click on the slice selection tool from the toolbar panel, it appears to be like the slice tool but with a small mouse-like cursor above it. Then, select the slice. If you want to choose more than one slices, just hold on to Shift and click on the slices one by one.

Slice Tool in Illustrator 5

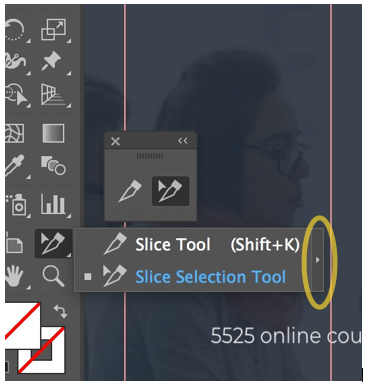
  • You can bring out the slice tool option out of the toolbar by clicking on the outside arrow as highlighted in the above image, as it makes it easier to use the tool efficiently.
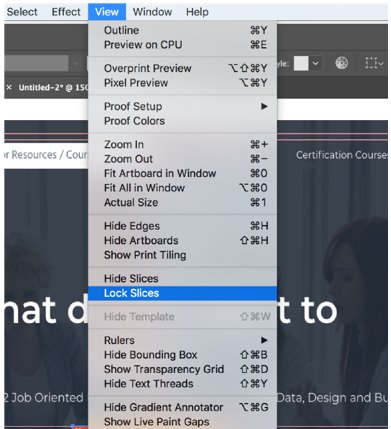
  • When you are satisfied with the position of the slice and desire to avert fortuitous changes, you can secure or lock it by advancing to the layers panel by clicking on the edit column of the slice. To secure all of your slices right away, choose View > Lock Slices from the menu bar at the top.

lock slices

  • Now for saving the selections that you have made, click on File > Save for web; you will get a window as shown below.

save for web

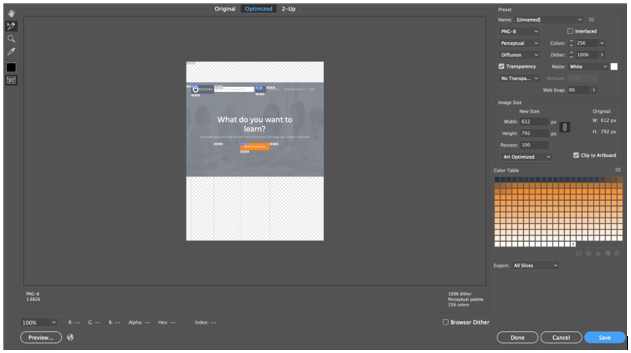
  • Using the slice selection tool, you can select the individual elements you have sliced and save them individually as JPEG, PNG, or GIF. Logos can be saved in the SVG format.
  • After clicking on save, you will get a popup to save your selection, as shown below.

save for web 2

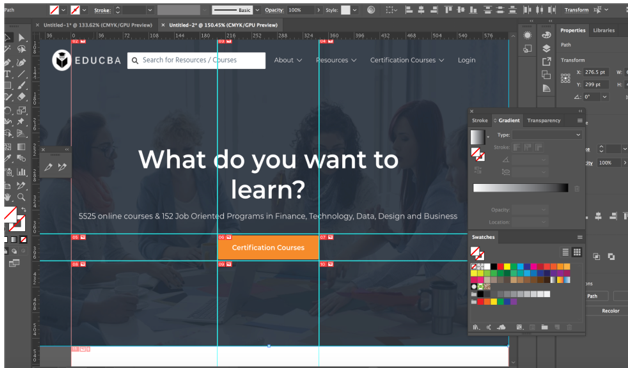
  • Another way of creating slices is through guides. We will use the same example as above and use guides for slicing individual elements. For guides, we need rulers, which we can enable by pressing Command + R for Mac and Ctrl + R for Windows. We will create guides as shown below:

Selection Using Guides

  • Once you have created guides, the next step is to slice the element by clicking on Object > Slice > Create from guides.

Slicing Using Guides

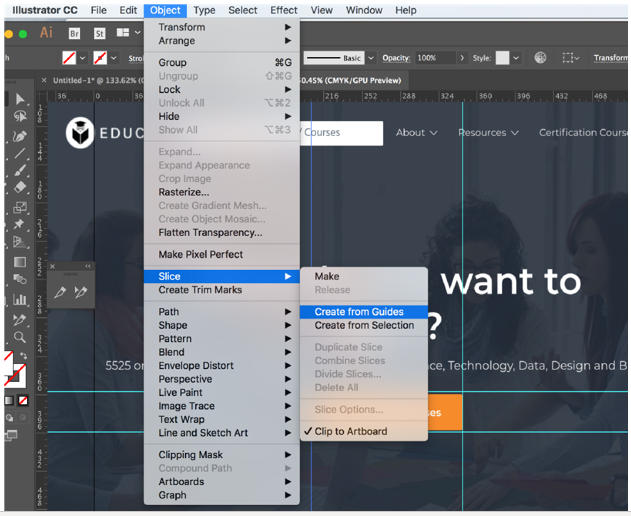
As you can see, the elements are now sliced.

Slicing Done

  • To remove a slice, choose it with the slice selection tool and then hit the delete key. If you wish to eliminate every slice in your work and start again, go to Object > Slices > Delete all.
  • Removing a slice will also remove the artwork that is connected, so if you wish to preserve the art unharmed, you should release the slice instead. To achieve this, choose the slice that you require and then go to Object > Slice > Release.
  • Eventually, it is viable to conceal the table cells of your slices and analogous logos without eliminating the slices from your work. To achieve this, select View > Hide Slices.

Conclusion

Fundamentally, you utilize the slice tool to sketch out rectangular paths over the object region you want to clip out of the layout. That is the solitary aim of slices, to sculpt the illustration out in slices that are rectangular from the layout file. Illustrator divides a single illustration into several images. It produces an HTML table, with every cell of the table consisting of one of these slices or pieces of the image. In this way, when you register the web page in a browser, all the images that are sliced emerge in conjunction, similar to a puzzle. The supreme part is that the slices are preserved in the file, implying that you have kept it as a document. It is possible to make a slice layer in Illustrator and include all your slice paths below that layer. This makes it easier to find the slice paths and permits you to conserve the precise measurements of all the illustrations that were in the first instance clipped out of the file.

Recommended Articles

This is a guide to Slice Tool in Illustrator. Here we discuss How to Use the Slice Tool in Illustrator step by step with a few illustrations. You may also look at the following article to learn more –

  1. Install Adobe Illustrator
  2. 3D Effects in Illustrator
  3. Eraser Tool in Photoshop
  4. Rectangle Tool in Photoshop
  5. Adobe Illustrator for Windows 8
  6. 3D Effects in After Effects
  7. Install Adobe Creative Cloud
  8. Eraser Tool in Photoshop
  9. Overview of Smooth Tool in Illustrator
Popular Course in this category
Illustrator Courses (1 Courses, 2+ Projects)
  1 Online Courses |  2 Hands-on Projects |  12+ Hours |  Verifiable Certificate of Completion
4.5
Price

View Course

Related Courses

Adobe Flash Training (2 Courses, 1+ Projects)4.9
3Ds Max Modeling Training (5 Courses)4.8
0 Shares
Share
Tweet
Share
Primary Sidebar
Footer
About Us
  • Blog
  • Who is EDUCBA?
  • Sign Up
  • Live Classes
  • Corporate Training
  • Certificate from Top Institutions
  • Contact Us
  • Verifiable Certificate
  • Reviews
  • Terms and Conditions
  • Privacy Policy
  •  
Apps
  • iPhone & iPad
  • Android
Resources
  • Free Courses
  • Photoshop Tutorial
  • 3ds Max Tutorial
  • All Tutorials
Certification Courses
  • All Courses
  • Design Course - All in One Bundle
  • Photoshop Course
  • Maya Course
  • Unreal Engine Course
  • Unity Course
  • DaVinci Resolve Course
  • Pro Tools Course

ISO 10004:2018 & ISO 9001:2015 Certified

© 2022 - EDUCBA. ALL RIGHTS RESERVED. THE CERTIFICATION NAMES ARE THE TRADEMARKS OF THEIR RESPECTIVE OWNERS.

EDUCBA
Free Design Course

Banner Creation, Object Selection, Sky Replacement, Advance Filters & others

*Please provide your correct email id. Login details for this Free course will be emailed to you

By signing up, you agree to our Terms of Use and Privacy Policy.

EDUCBA Login

Forgot Password?

By signing up, you agree to our Terms of Use and Privacy Policy.

EDUCBA
Free Design Course

3D animation, modelling, simulation, game development & others

*Please provide your correct email id. Login details for this Free course will be emailed to you

By signing up, you agree to our Terms of Use and Privacy Policy.

EDUCBA

*Please provide your correct email id. Login details for this Free course will be emailed to you

By signing up, you agree to our Terms of Use and Privacy Policy.

Let’s Get Started

By signing up, you agree to our Terms of Use and Privacy Policy.

This website or its third-party tools use cookies, which are necessary to its functioning and required to achieve the purposes illustrated in the cookie policy. By closing this banner, scrolling this page, clicking a link or continuing to browse otherwise, you agree to our Privacy Policy

Loading . . .
Quiz
Question:

Answer:

Quiz Result
Total QuestionsCorrect AnswersWrong AnswersPercentage

Explore 1000+ varieties of Mock tests View more