Updated August 25, 2023
Introduction to Artboard in Photoshop
Artboard in Photoshop are primarily used to streamline the entire design process in Adobe Photoshop as it offers a large variety of default preset sizes along with the option to set your own customized size, and based on whether you are creating elements for website or print media, you can choose an artboard of preferred size, create multiple artboards within the same document and start the work, thus, the uses of the artboard are boundless, and there are numerous benefits of artboards that helps to transform your experience in Photoshop.
How do Artboards Work in Photoshop?
If you are familiar with using artboards in Adobe Illustrator, it is pretty much the same thing you can expect with artboards in Photoshop. Here, the artboard is considered as a layered document. If we use multiple artboards, each element can contain its own individual layers, smart objects, text, group layers, in addition to the Photoshop effects and features. Furthermore, using the layers palette, you can further rearrange the layers in each artboard.
Setting Artboard Preferences
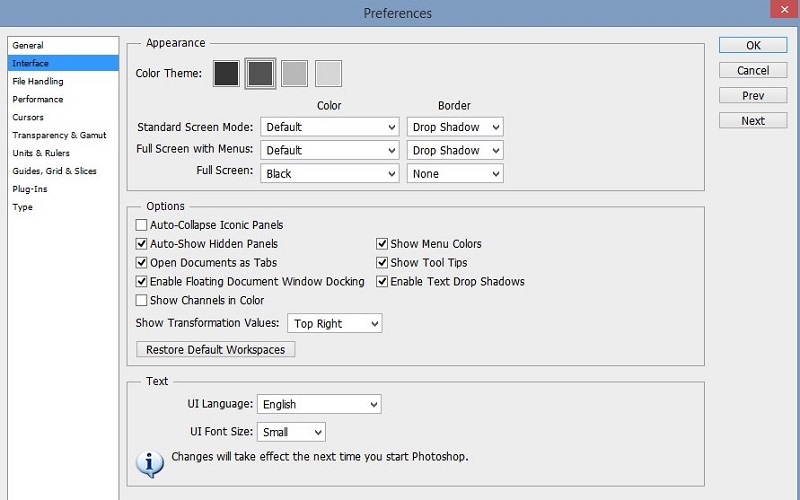
You can select and set your preferred artboard matte color and also choose whether you want the artboard borders to be visible or hidden. For doing that, Select Edit, Next, Choose Preferences and Click on Interface.
How to Use Artboard in Adobe Photoshop?
Below are the steps for creating Artboard in Photoshop.
Step 1: After opening Adobe Photoshop, you will be provided with the choice of preset artboard sizes while trying to create a new document.
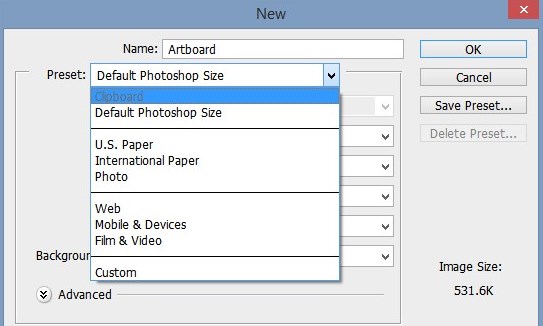
Step 2: Open Photoshop and select Create New; depending on the size of the artboard you require, you can choose from U.S. paper, International Paper, Photo, web, mobile, film, and video.
Step 3: In the latest Adobe Photoshop CC version, you will find devices like iPhone, Android, Microsoft Surface and so on.
Step 4: Choose one of the options from the above list of presets and begin your work.
How to Name and Duplicate Artboards in Photoshop?
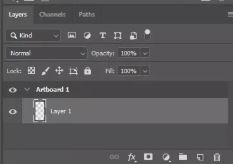
To rename the artboard, follow the below instructions.
- Select the artboard and click on Layer, then Rename Artboard.
- Give an appropriate name to the artboard and tap on Return.
To Duplicate an Artboard in Photoshop
- Go to the layers palette and select the artboard that you want to duplicate.
- After that, using the mouse, right-click and select the duplicate artboard option.
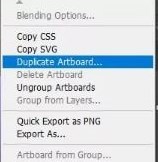
- Next, you can name the new artboard and click on OK.
Quickly Add New Artboards to a Document
There is an easy method for adding a new artboard to your existing document. After selecting an artboard, you have to click the + icon that appears around the artboard. If you want to retain all the aspects in an artboard, you can use Option/Alt and click the plus (+) icon.
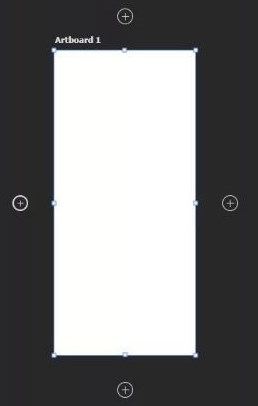
- Under the move tool, select the artboard tool.
- Choose an artboard you need to copy.
- You will notice a + icon around the artboard. Choose the + sign in the direction where you need the new artboard to be created.
Creating Designs in the Second Artboard
- Add an image on the second artboard and select the move tool.

- Holding the shift key, proportionally scale the picture
Moving Elements from One Artboard to Another
If you want to use an element from one artboard to another, you can do that simply by clicking on the object and dragging it onto the desired artboard. By default, Photoshop will position the object based on the ruler’s origins.
Exporting Your Artboards
You can also save your file as a Photoshop file to maintain all the layers. After finishing your work, the final part is exporting the design. You can choose from a long list of file formats in which you want to export your Photoshop document.
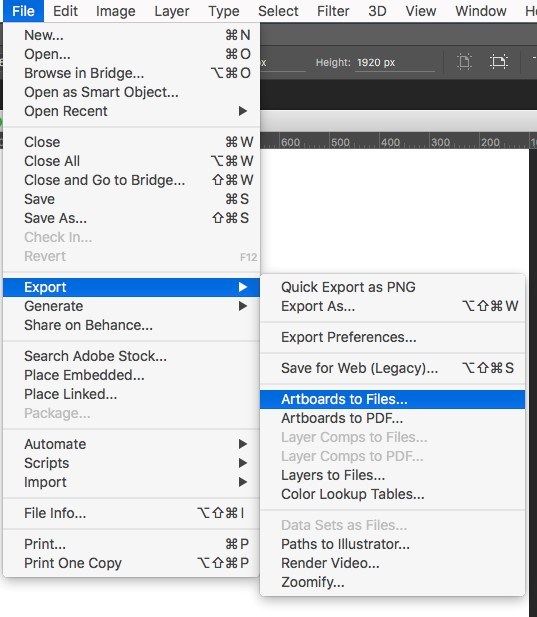
Below we will see the method to export artboards as files:
Step 1: Select File and pick Export. Then choose Artboards to files.
Step 2: From the dialog box that popped up, follow these steps:
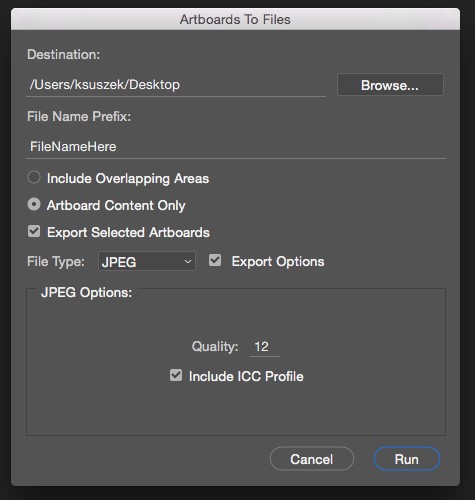
- Select the location where you want your file to be saved locally on your PC.
- Pick a prefix name for the file.
- Next, you have to mention whether you only need the elements within the artboard or the elements that overlap them as well.
- After that, you can select the number of artboards you need to export.
- Next comes the option to export the background along with the artboard. If you need the bg, select it.
- Now comes the file format for the artboard export. Photoshop supports various file formats such as BMP, JPEG, PDF, PSD, Targa, TIFF, PNG-8, or PNG-24.
- Select the format you need for the export.
- Decide if you need the artboard name to be retained in the exported file. You can also select the font, size or color in this setting.
Step 3: Select Run. Now Photoshop will export the artboard in the preference picked by you.
Conclusion
It can make work a lot easier for digital artists. Artboards offer a flexible platform where they can create designs. Once you start utilizing artboards in your work, you will notice how things fall in place the way you need them. Make use of the above-discussed methods by practising them and transform your Photoshop experience.
Recommended Articles
This is a guide to Artboard in Photoshop. Here we discuss the Introduction, how to use it, how it works, and How to Name and Duplicate Artboards in Photoshop with proper explanation. You can also go through our other related articles to learn more –
