EDUCBA

EDUCBA

MENUMENU
  • Free Tutorials
  • Free Courses
  • Certification Courses
  • 280+ Courses All in One Bundle
  • Login

3D Effects in After Effects

Home » Design » Design Tutorials » After Effects Tutorial » 3D Effects in After Effects

3D effects in after effects

Introduction to 3D Effects in After Effects

We are going to learn 3D in after effects; what is 3D? It is nothing but 3 dimensions; if we can see any object at 360°, it’s called 3D; as we know, we can create 3D objects in 3D software like Maya, etc., but the fact is we can also create 3D particles and objects in After effects. We can also create 3D text in after effects, not only 3D particles we can also give light to the certain particles, to create a normal text or object into 3D we have an option in after effects once we add that 3D option we can rotate particular object or text as 3d particles.

How to Create a 3D Room?

Below are the steps to create a 3D room with 3D Effects in After Effects:

Start Your Free Design Course

3D animation, modelling, simulation, game development & others

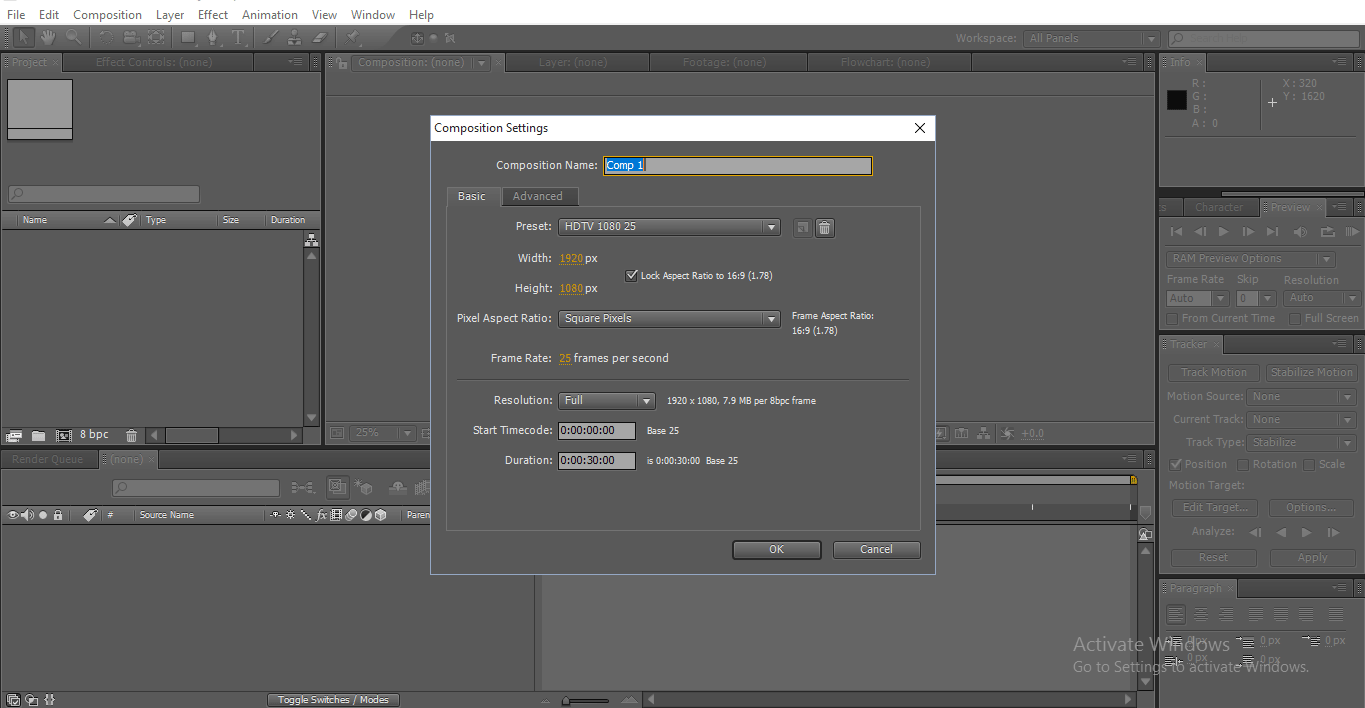
Step 1: Open a New Composition.

new composition

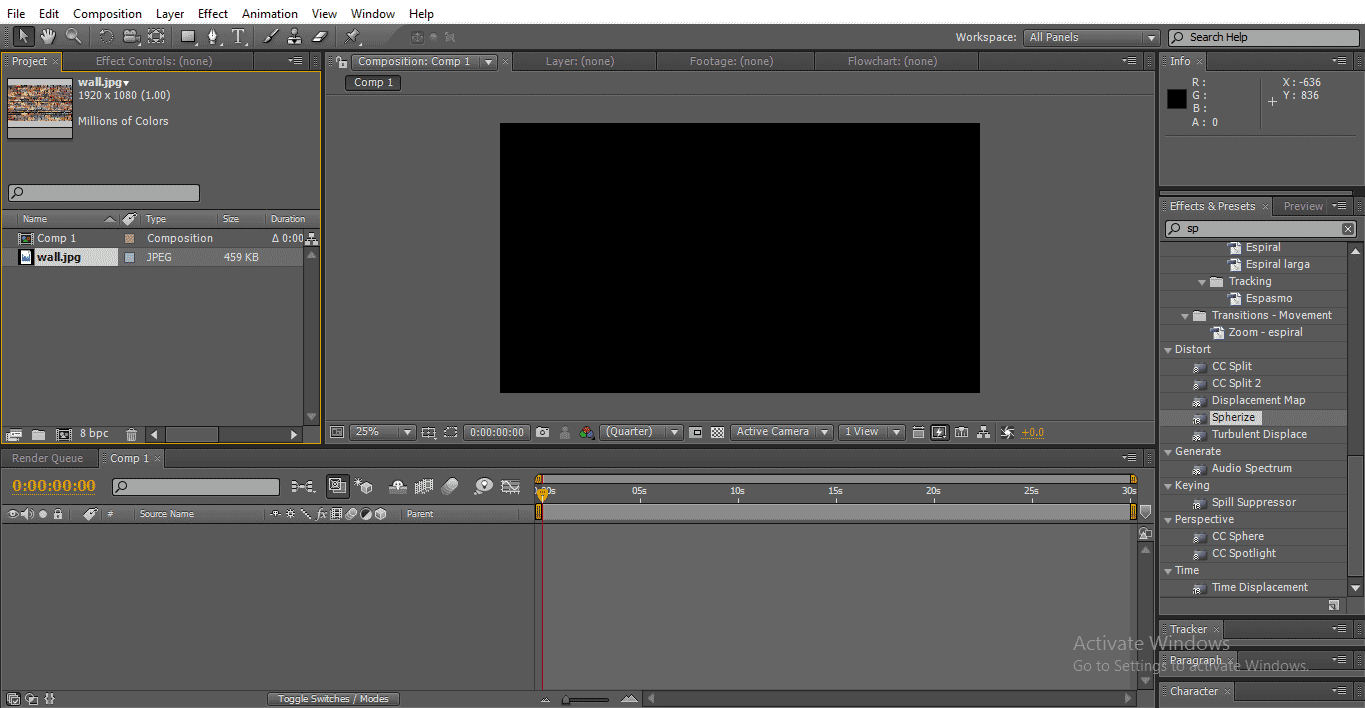
Step 2: Import a Texture Image.

texture image (3D Effects in After Effects)

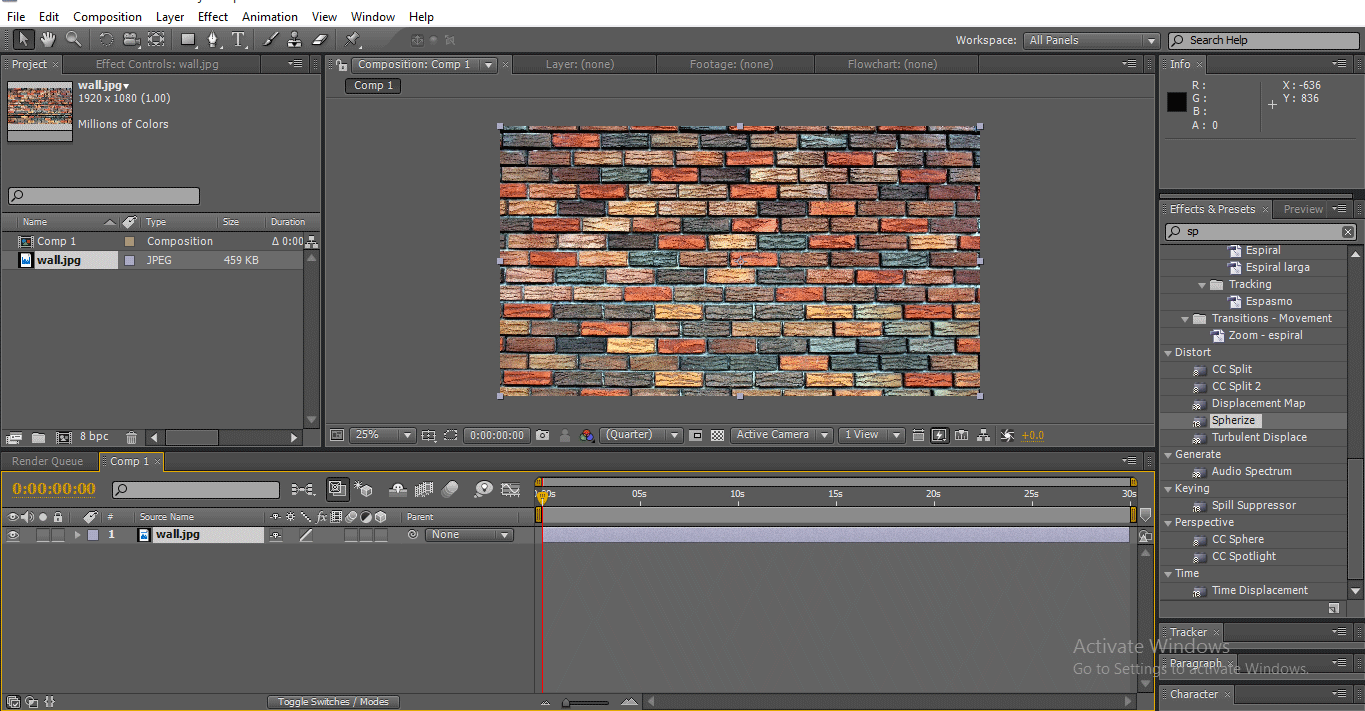
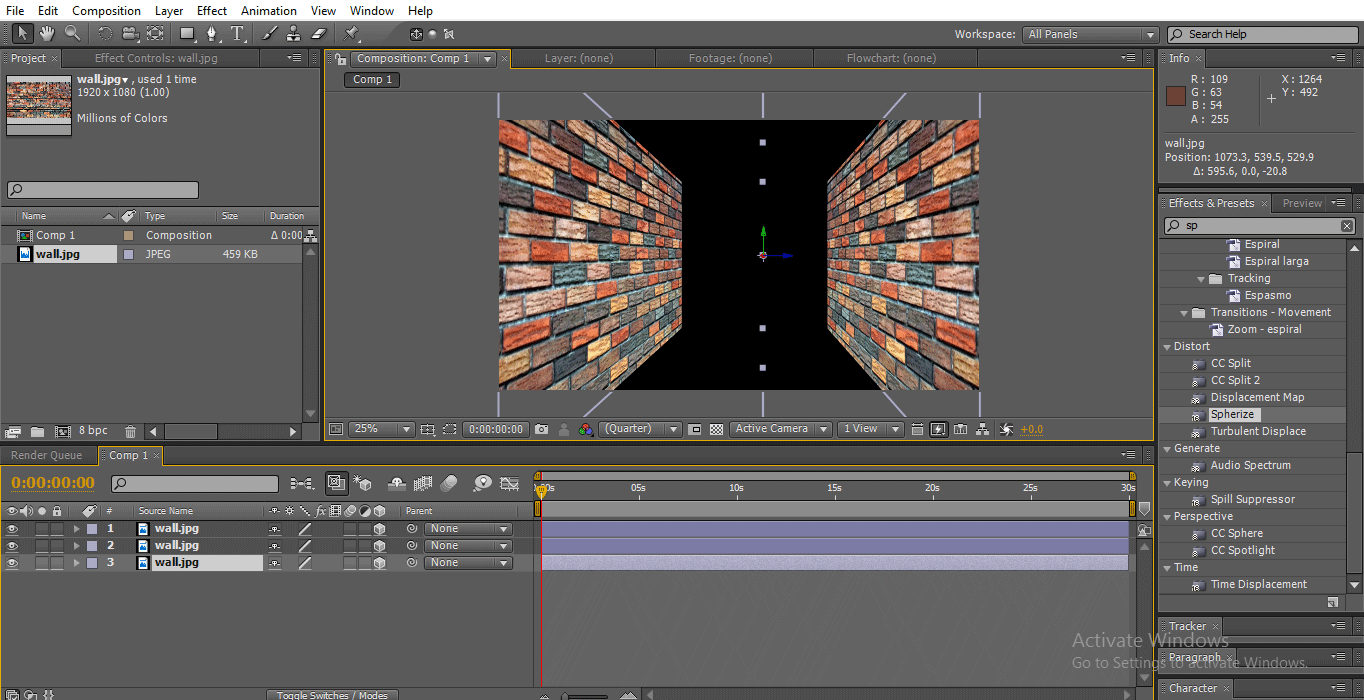
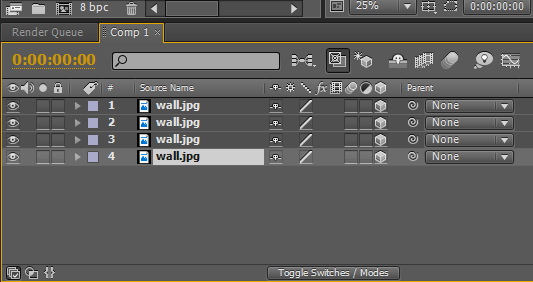
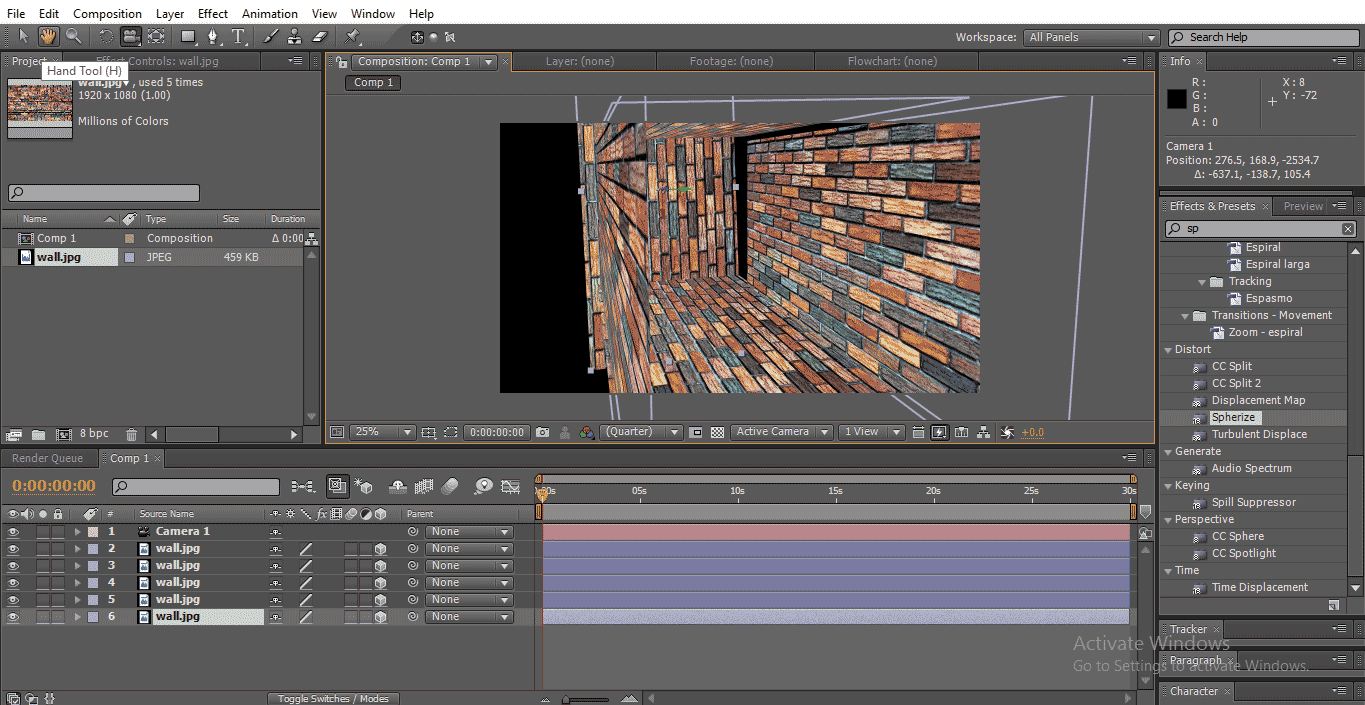
Step 3: Import the texture image to the timeline; I have imported a Texture that looks like the wall because we will create a room.

Import to timeline (3D Effects in After Effects)

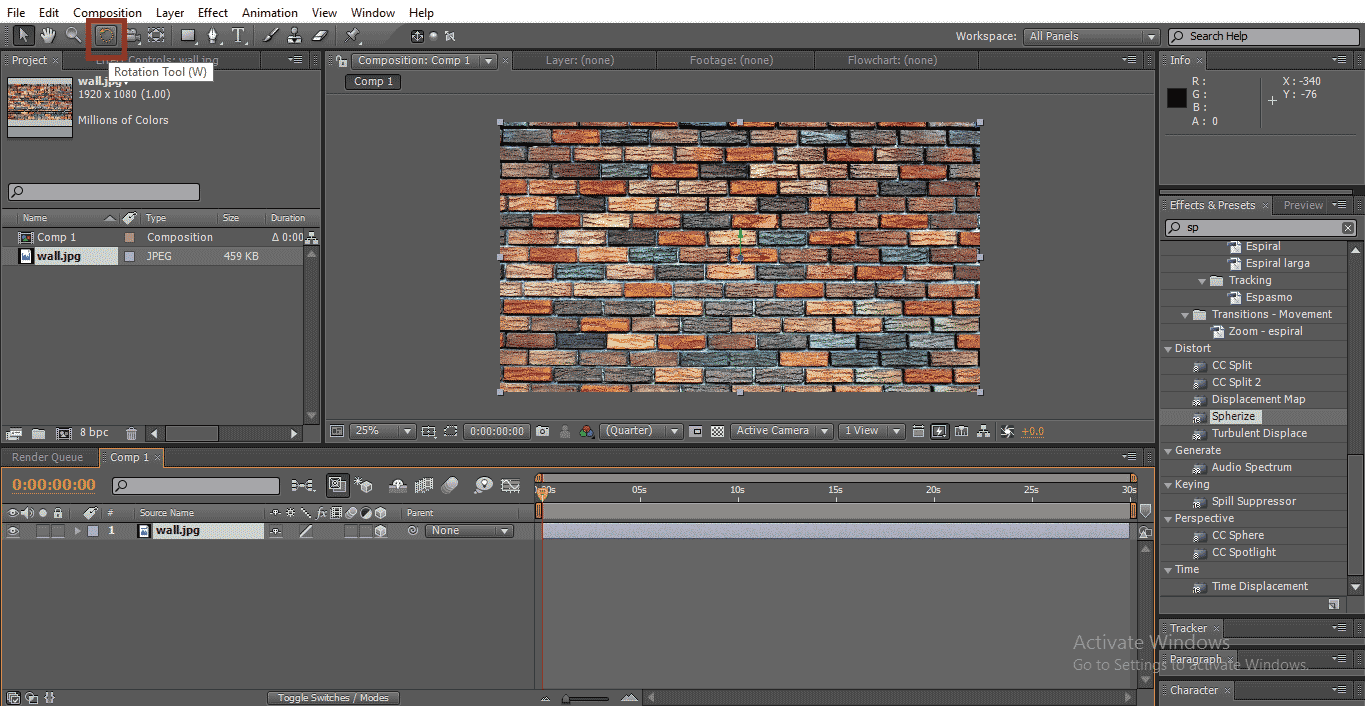
Step 4: We need to make it as a 3D layer; we need to activate this symbol to the layer as shown in the below image.

Activating Symbol (3D Effects in After Effects)

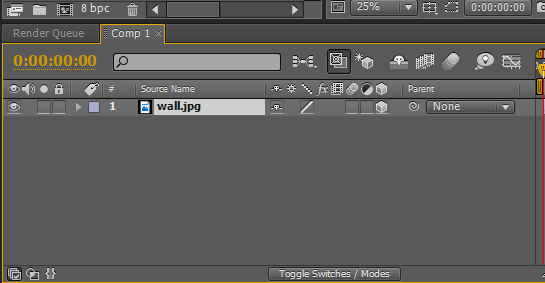
  • Once we activate this symbol to any object or a text, it will convert into a 3D object, and we can move it at 360°

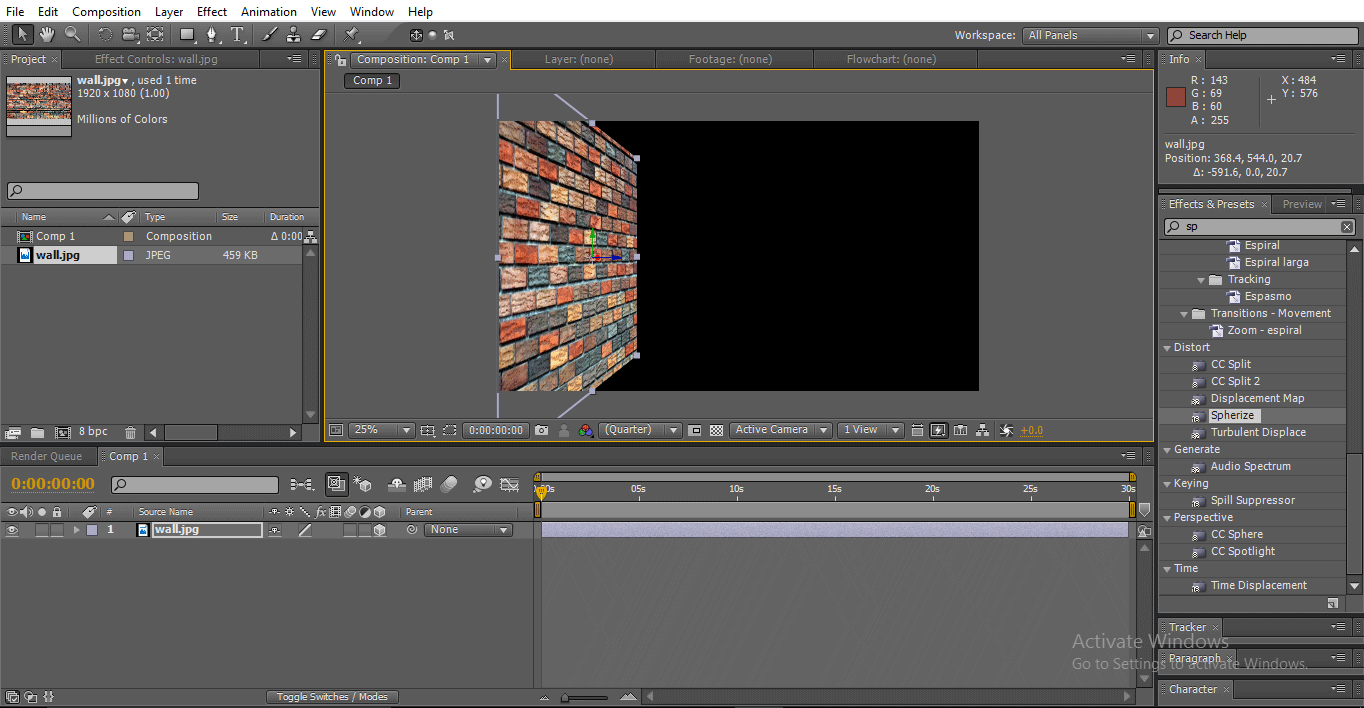
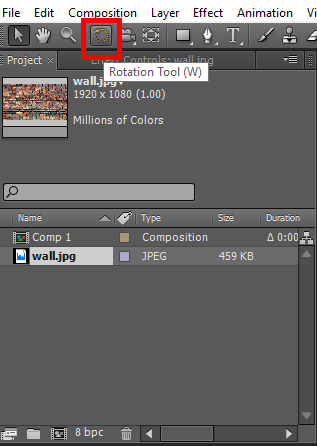
Step 5: Select the Rotation Tool; we need to rotate the wall sides ways to look like a wall.

select rotate tool (3D Effects in After Effects)

  • Here we add 3D to the layer so the image can move in 360°.

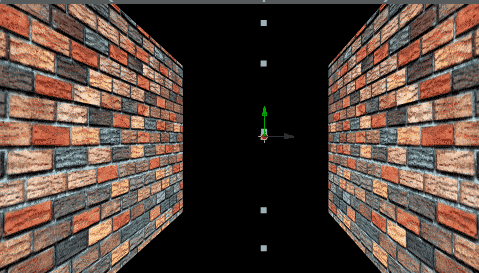
Step 6: Now the wall is in 3D, we have the XYZ axis rotate, now the wall is on Y-axis, and with that, the wall rotates at the inside angle.

Popular Course in this category
Sale
After Effects Training (1 Courses, 3+ Projects)1 Online Courses | 3 Hands-on Projects | 20+ Hours | Verifiable Certificate of Completion | Lifetime Access
4.5 (4,466 ratings)
Course Price

View Course

Related Courses
Adobe Premiere Pro Tutorial (3 Courses, 7+ Projects)All in One Design Bundle (280+ Courses, 100+ projects)

rotate x and y axis (3D Effects in After Effects)

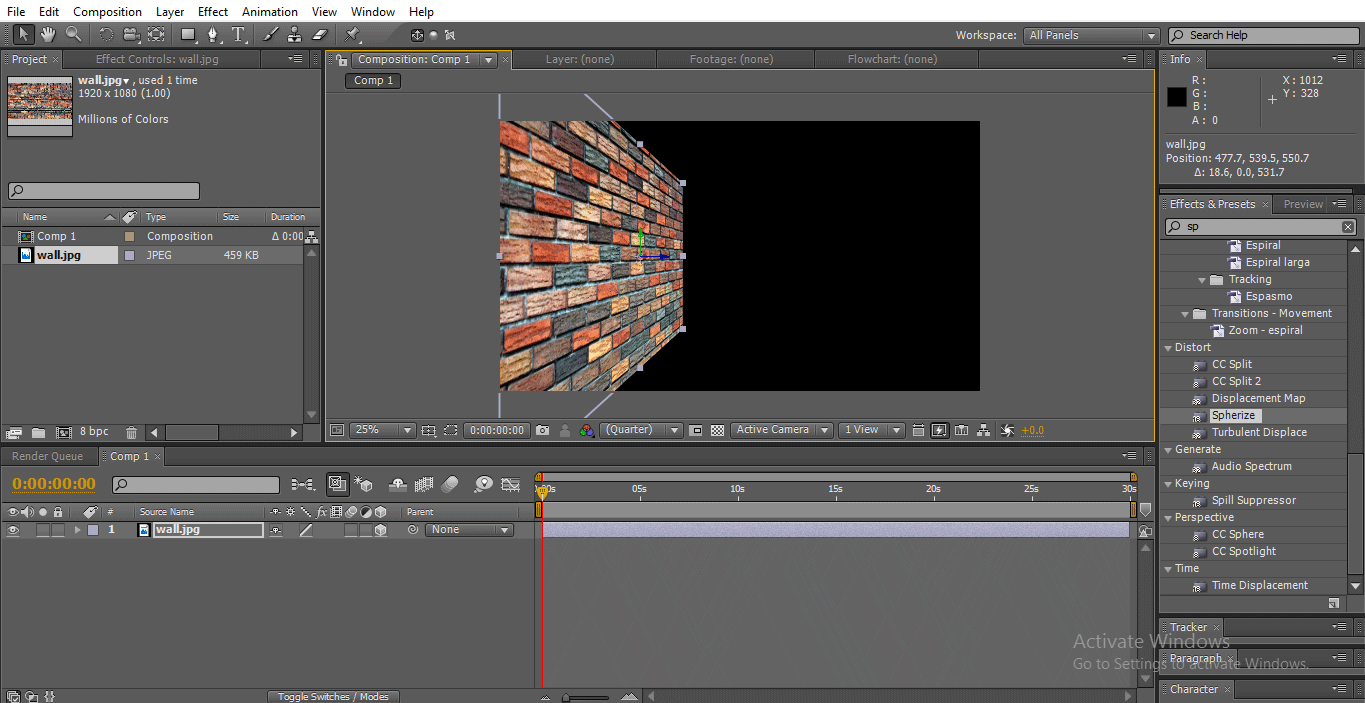
Step 7: Use the Selection tool to move the object. We need to hold Z-axis to push the wall on one side.

hold z axis (3D Effects in After Effects)

  • Here we created a sidewall, and we need to adjust the size and length of the wall now.

Step 8: With the help of the Selection tool, we need to scale and adjust the wall position.

adjust wall (3D Effects in After Effects)

Step 9: We need to create another side wall now; we need to make a duplicate of the wall.

duplicate wall (3D Effects in After Effects)

Step 10: Move the duplicate layer to the right side and adjust the size and length of the wall, which is equal to the left wall.

adjust duplicate wall (3D Effects in After Effects)

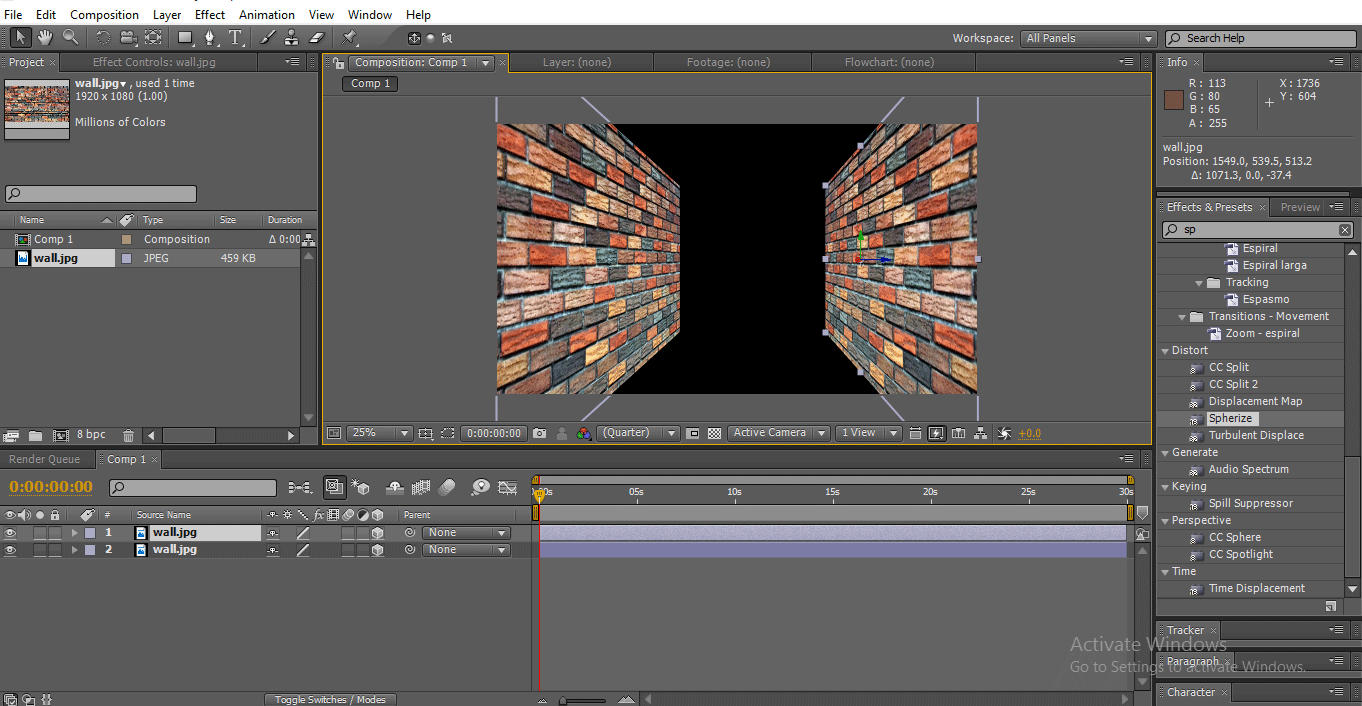
  • Two walls got ready now we need to make the floor.

Step 11: Make another duplicate of the wall. With the help of the selection tool, the tool moves the duplicate wall to the middle.

duplicate midle wall (3D Effects in After Effects)

  • Wall is in the vertical position now; we need to rotate the wall to fix it down as a floor.

Step 12: Select the Rotation Tool.

Rotation tool

Step 13: We have three-axis here X, Y and Z; we need to hold X-axis to rotate horizontally; y and z-axis rotation won’t work in this situation.

rotate 3 axis

  • In the below image, we can find the floor.

floor image

Step 14: Create the floor as a duplicate to create the Upper Sheet.

create upper layer

Step 15: With the help of the Selection tool, hold the Z-axis and move the floor up.

four side wall

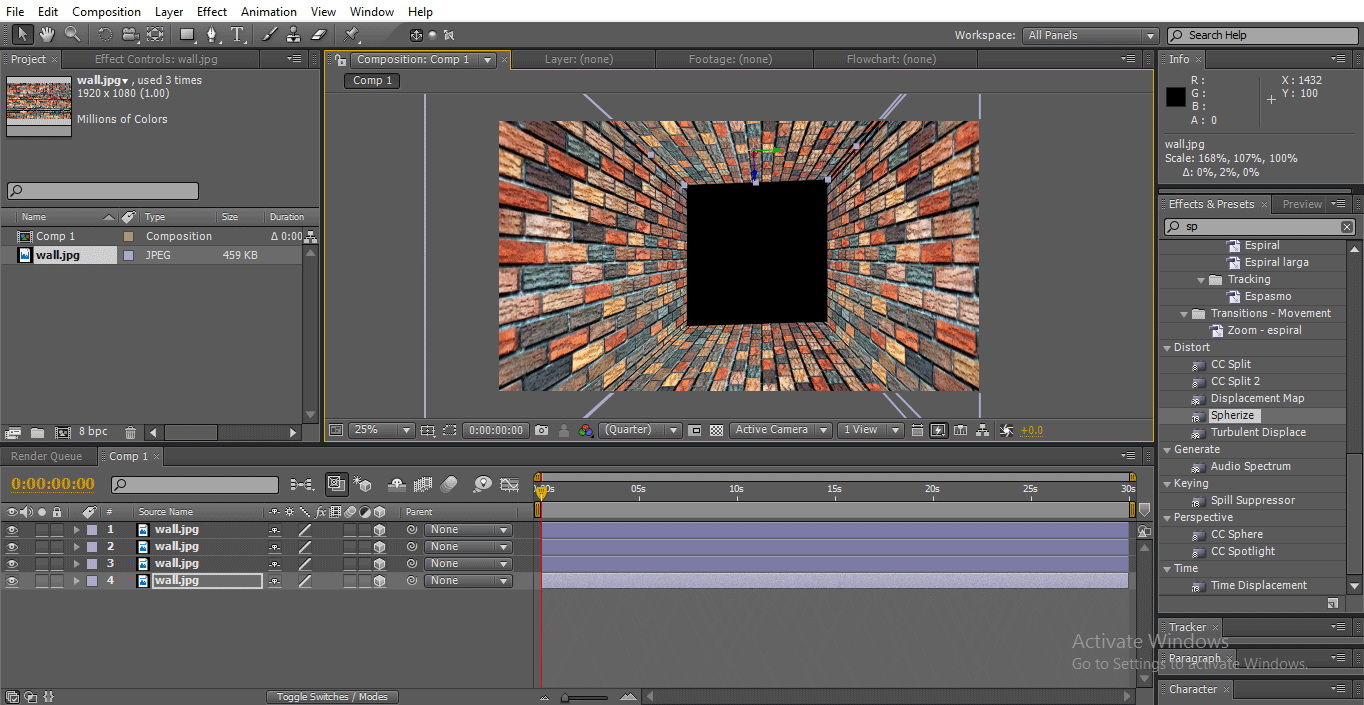
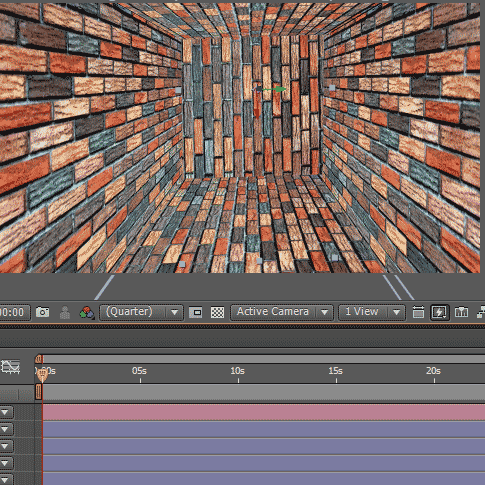
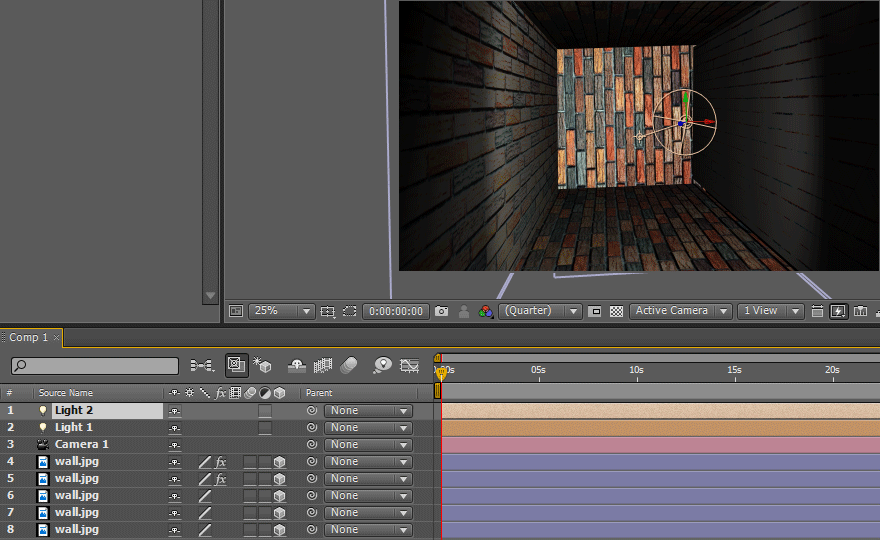
  • Now four sides of the walls got ready; we need to check the perfection of the walls with the help of the camera.

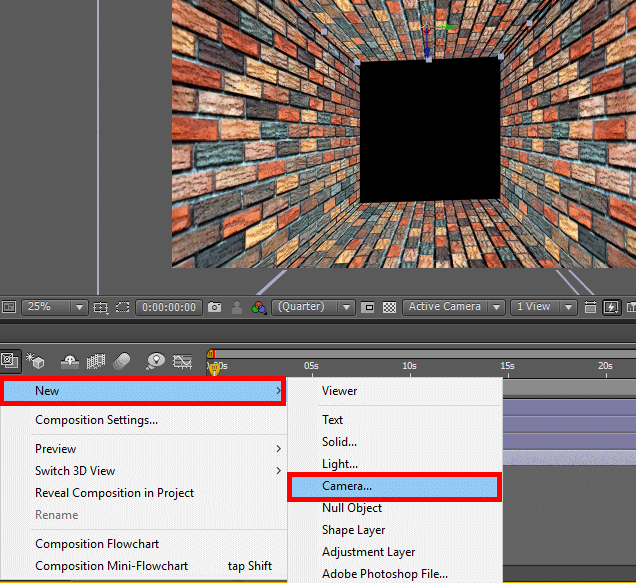
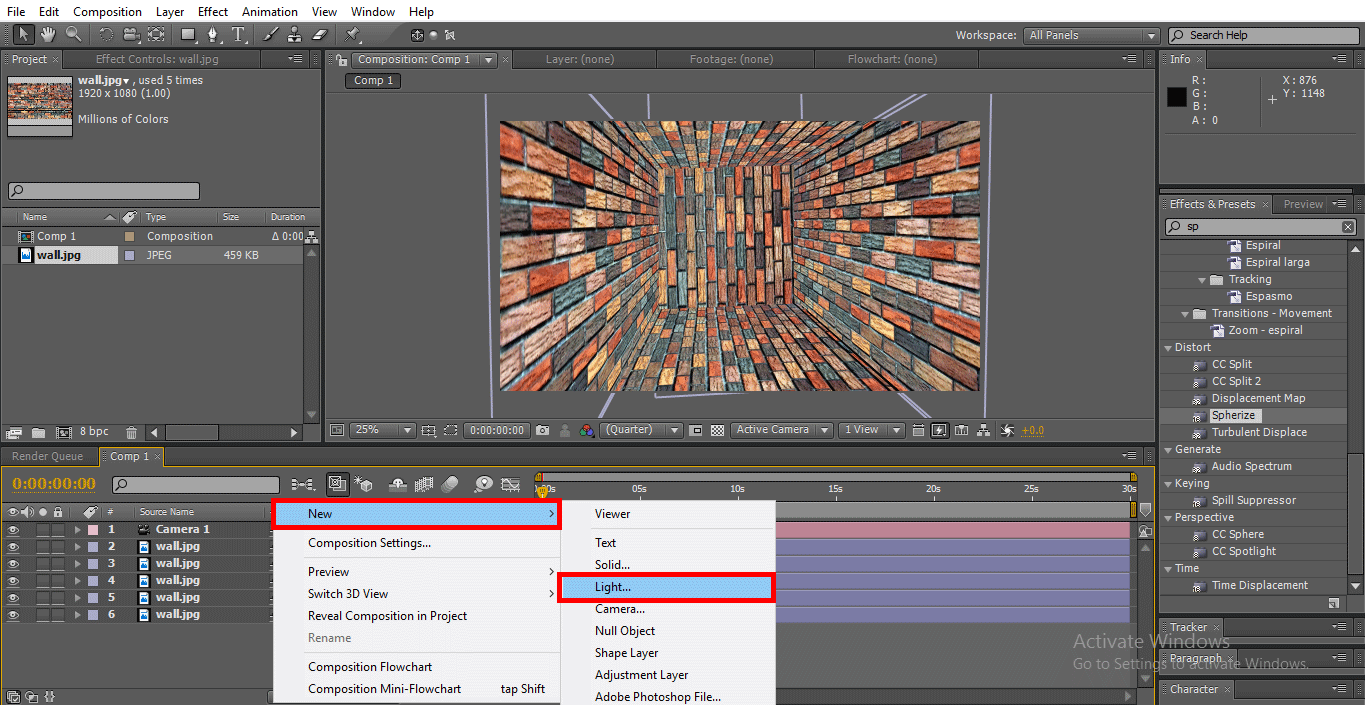
Step 16: Create a new Camera Layer.

camera layer

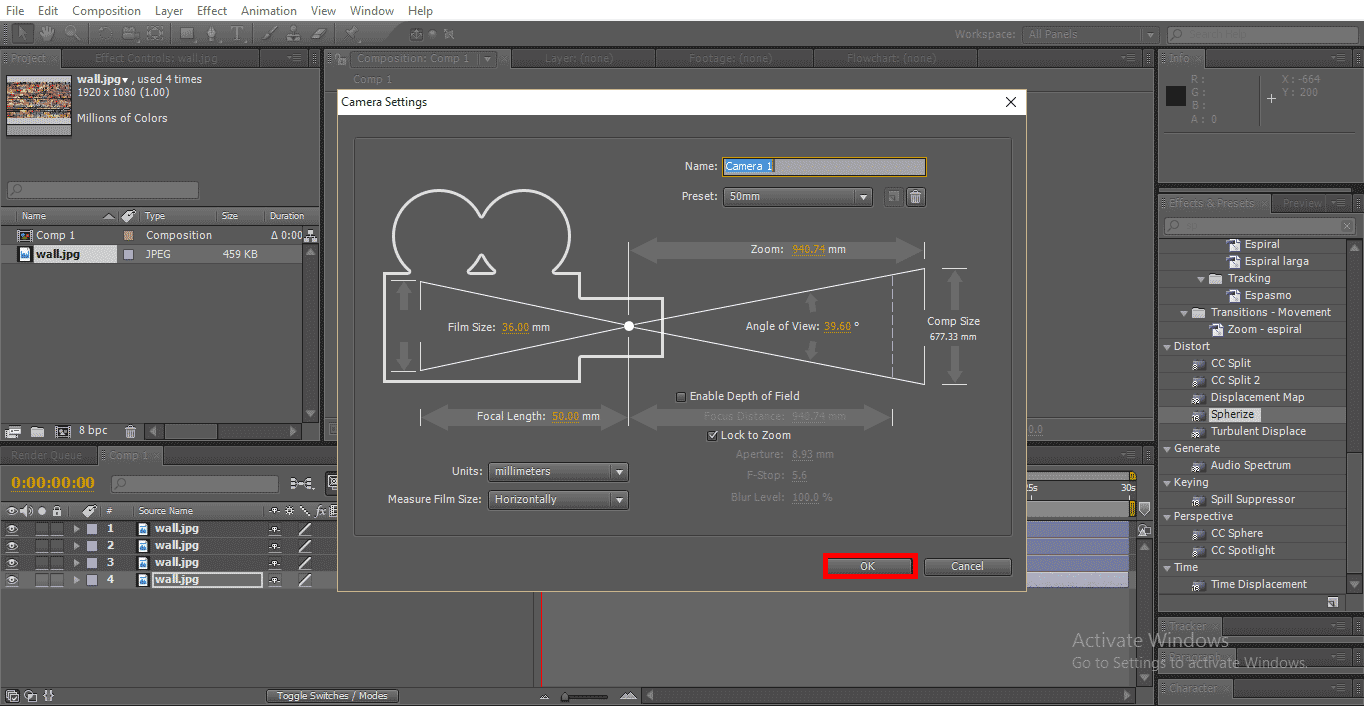
Step 17: Click OK when you get this option.

set camera

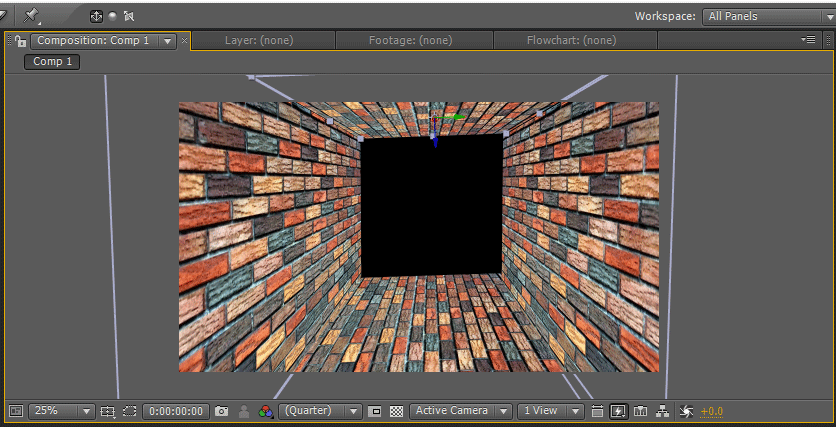
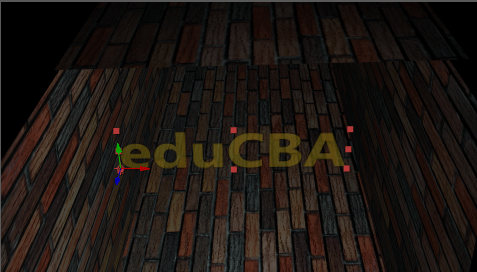
Step 18: Select Unified Camera Tool; this camera helps us to move front and back, can rotate the whole object at 360°, Hold left click to rotate the object, hold right-click to move the object’s front and back.

unified camera tool

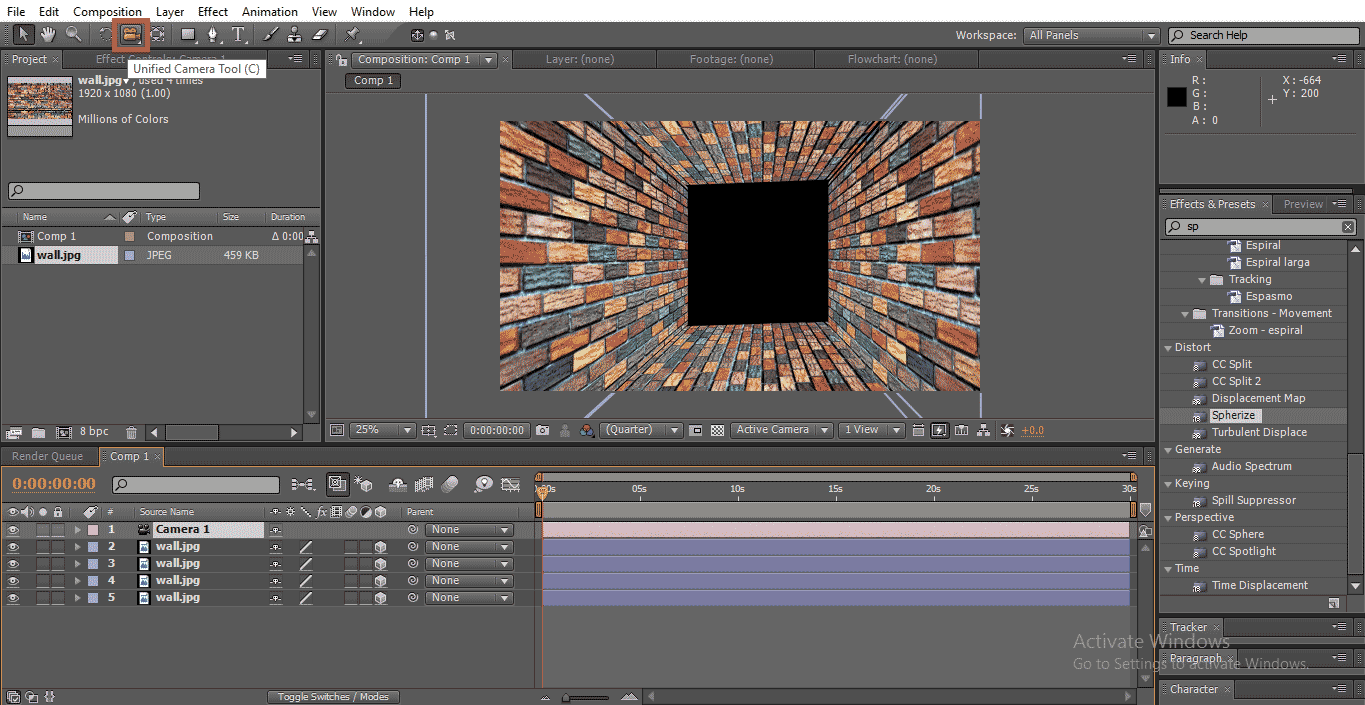
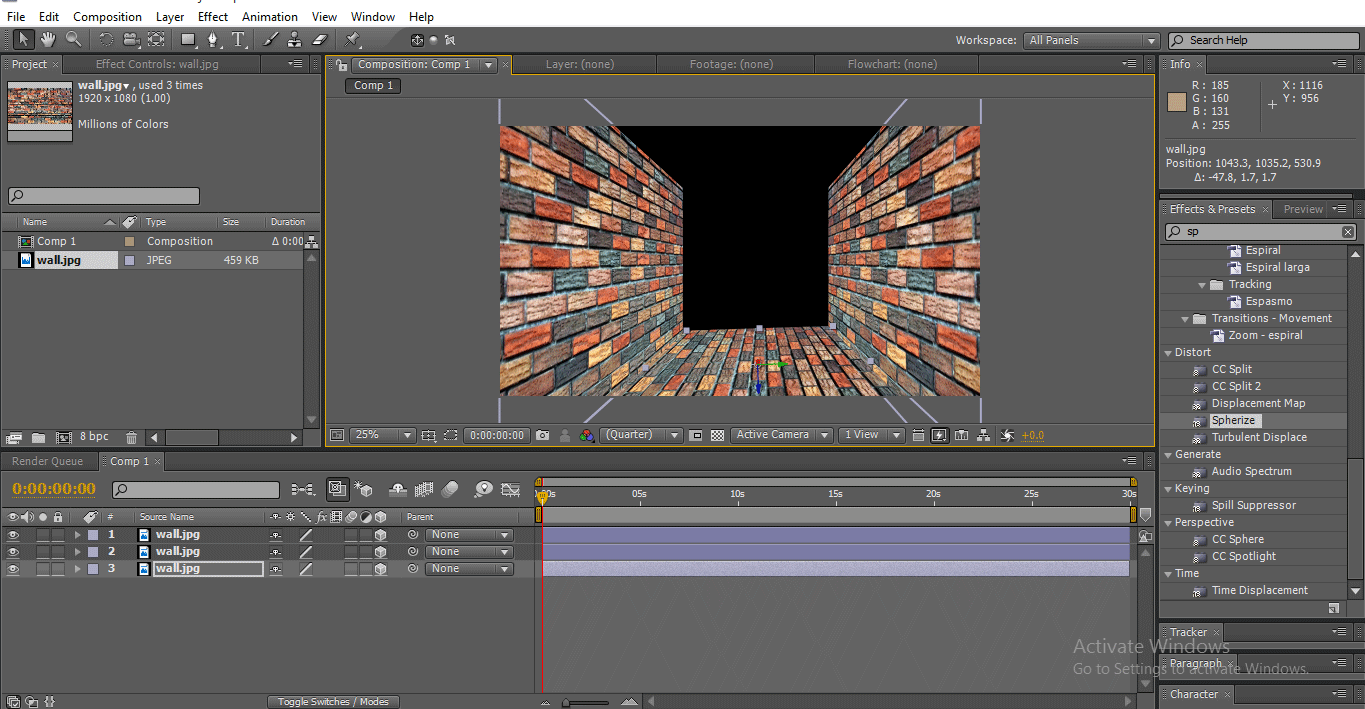
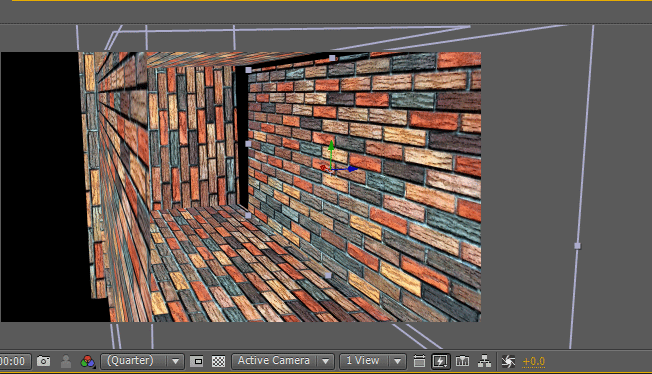
Step 19: With the help of Camera Tool can see the room in all angels by rotating and moving all directions, while we rotate and move all directions we find some problem like fixing walls, such things will be corrected in this process in the below image we can see how it works.

(3D Effects in After Effects) side1

(3D Effects in After Effects) side2

(3D Effects in After Effects) side3

  • In the above image, we can find the upper wall is not fix well; there is a gap between the walls.

Step 20: With the help of the selection tool, fix the upper wall equal to the side walls.

fixing the upper wall

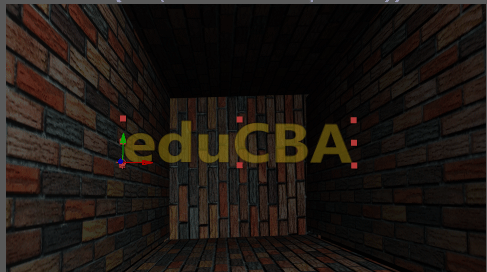
  • Now we need to create a back wall.

Step 21: Make a duplicate layer of the upper wall and move to the middle with the help of the selection tool.

upper duplicate wall

Step 22: Select the rotation tool. Hold Y-axis and rotate the wall.

rotate wall

Step 23: Use the selection tool and hold the Z-axis and move the wall back.

move back wall

Step 24: Here, we have taken the wall to the position, but it is uneven, so we need to scale the wall.

scaling the wall

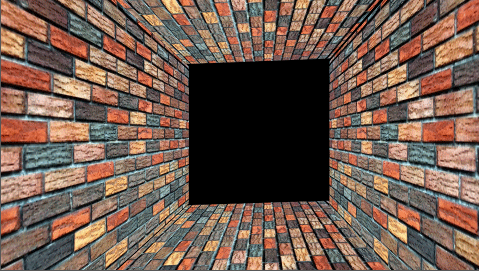
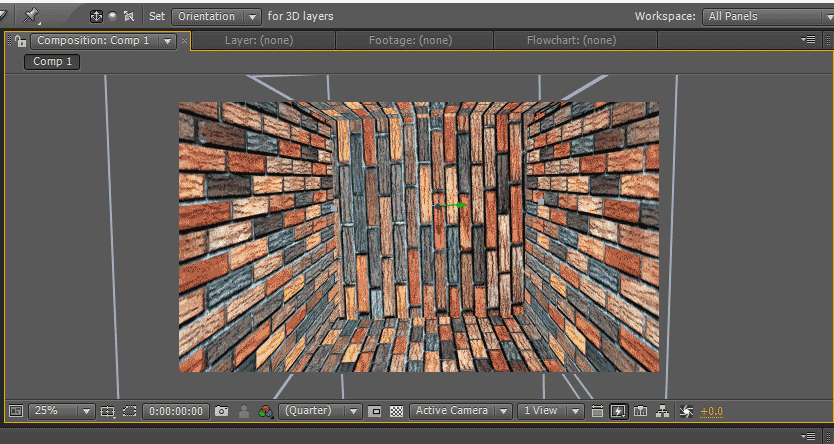
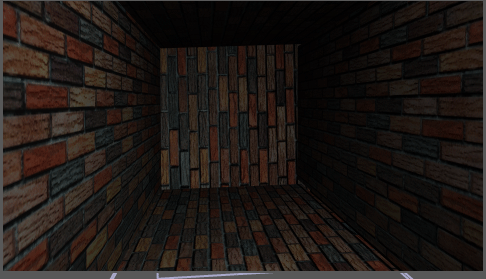
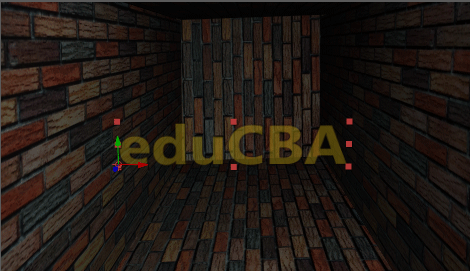
  • Here are 3D room is ready; we have set all five walls. Let’s check if all four walls are fixed correctly or not.

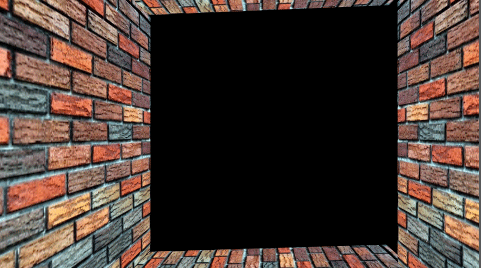
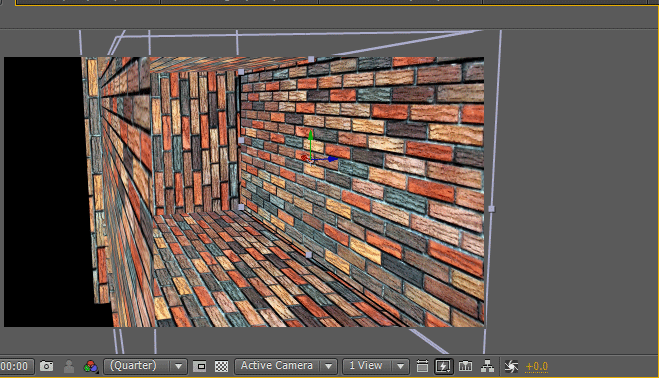
Step 25: With the help of the Camera, Rotate the room.

rotate room

  • In the above image, we can find the right sidewall is not fixed well.

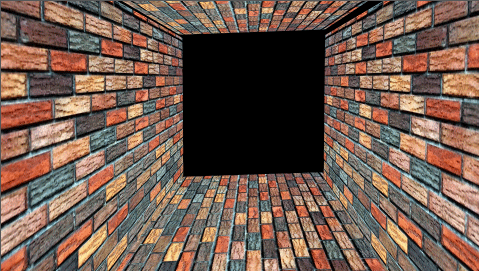
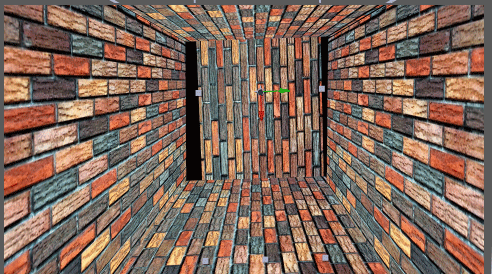
Step 26: With the help of the selection tool, fix the wall.

fixing wall

fix wall

  • As we finish our 3D room, we need to add some light to make room attraction

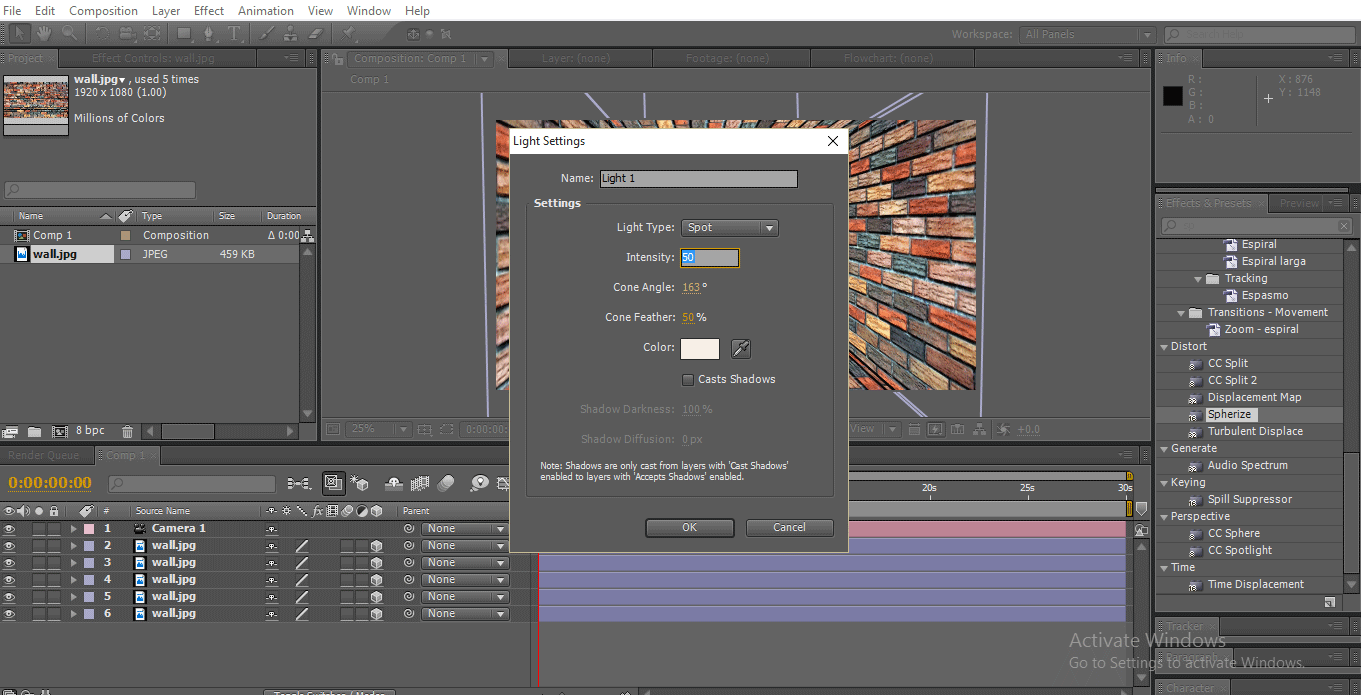
Step 27: Create a new Light Layer.

light layer

Step 28: Give the values intensity 50. Cone angel 163°. Colour as you wish.

light setting

Step 29: We set alight inside the room.

set light

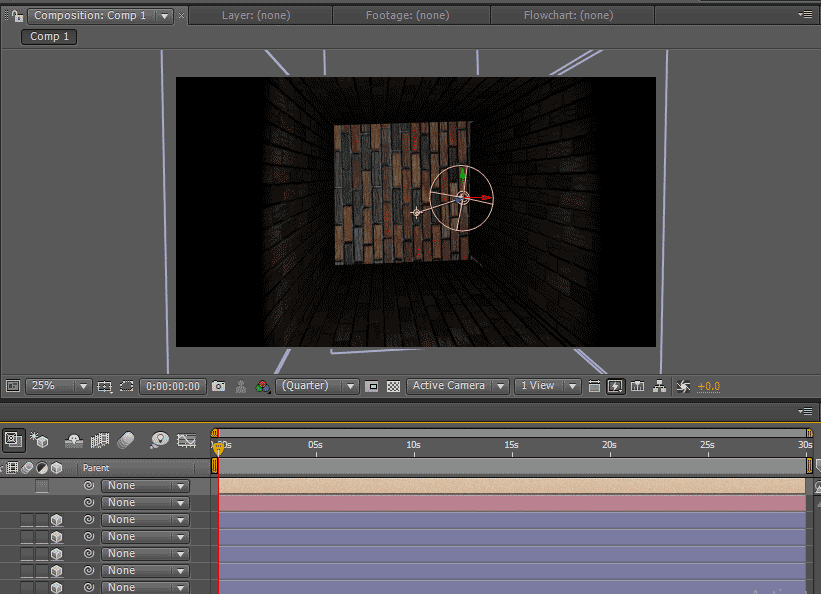
Step 30: We can change the angle of the light if we don’t get the perfect lighting.

change angle light

Step 31: We can do some color correction to make the walls looks attraction. Select a particular wall and Go to Effects, Colour correction and select Exposure and adjust the values.

 adjust exposure

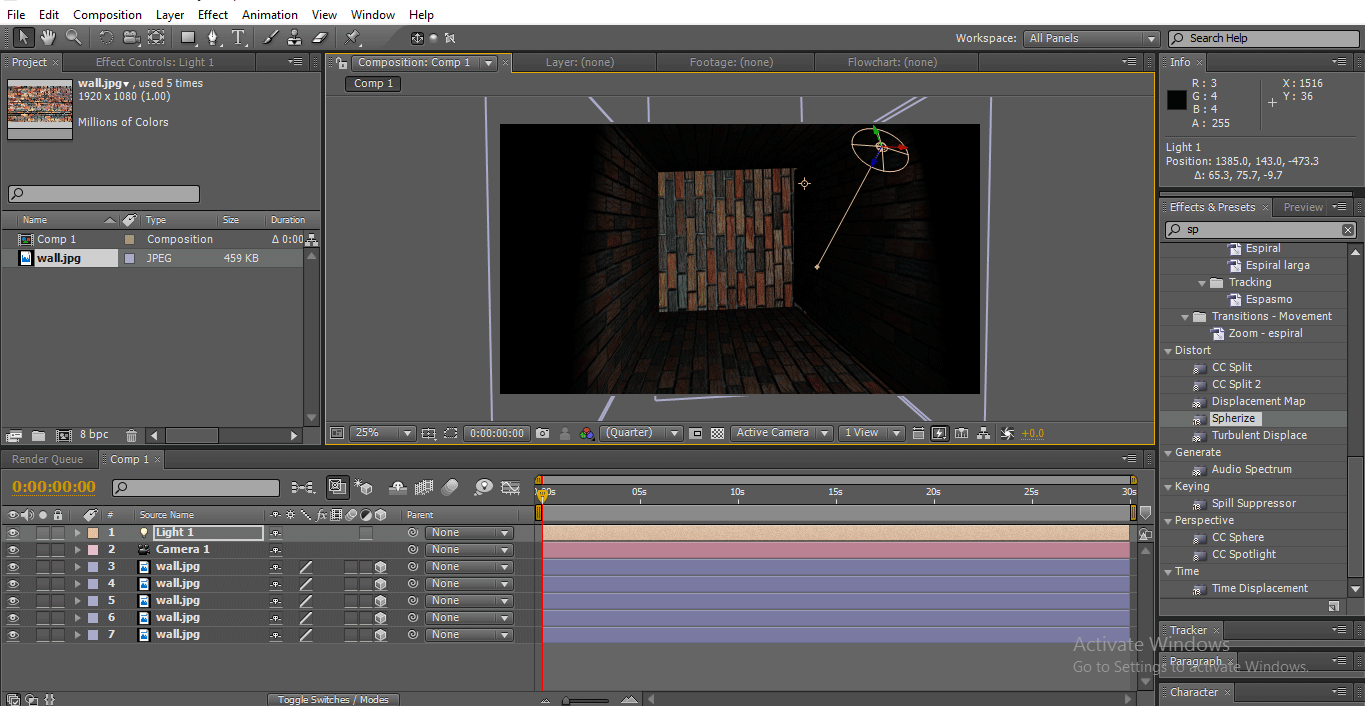
Step 32: When we feel one light is not enough, we add another light with the same values.

add light

  • Select every wall and adjust the color correction, adjusting the angle of lights to get the perfect lighting.

adjust light

Step 33: We enter a Text inside the room.

Text inside the room

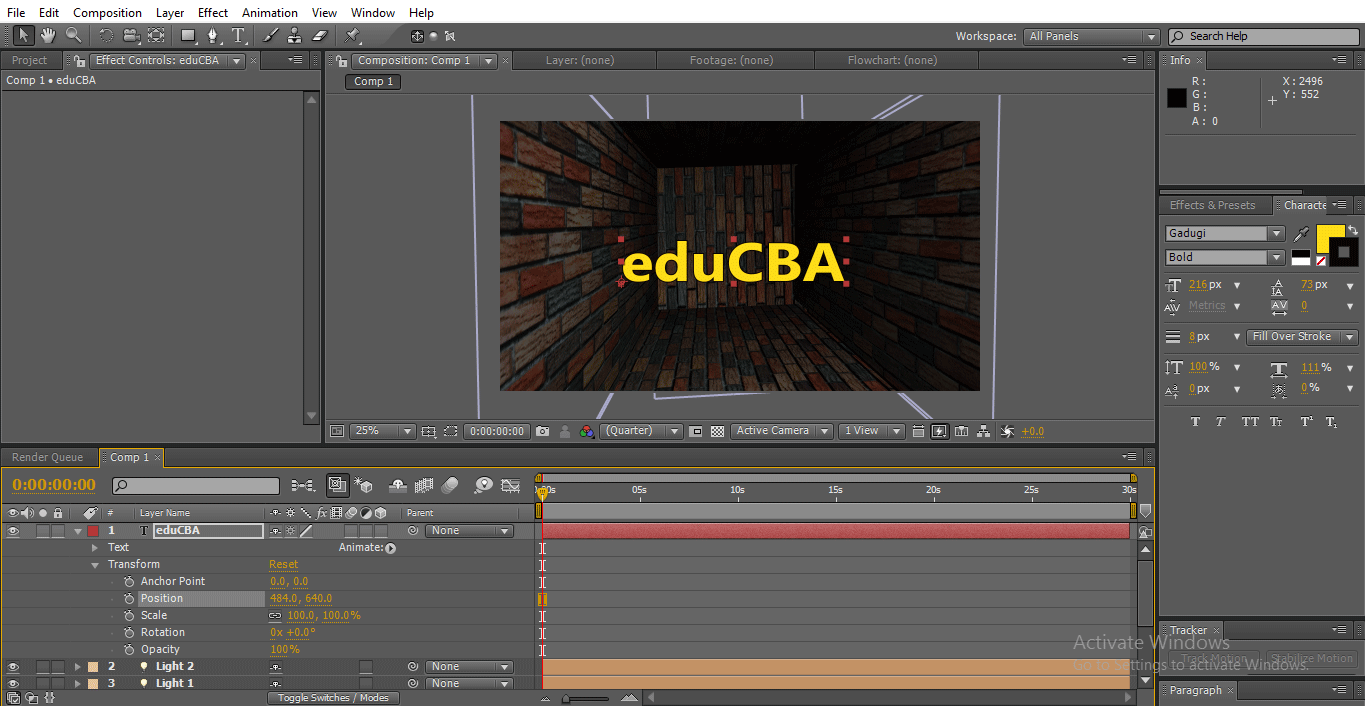
Step 34: Decrease the Opacity of the text to get a real feel and add 3D to the text layer.

decrease opacity

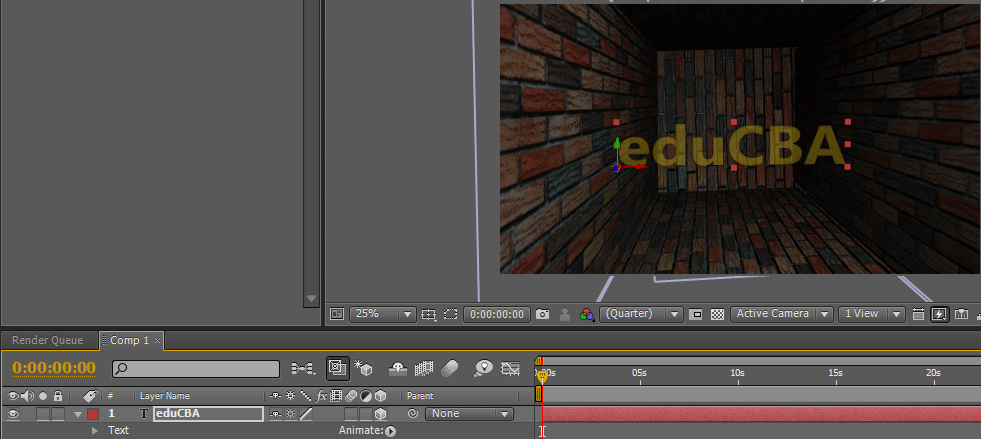
Step 35: We can see how the text moves according to the room.

final result (3D Effects in After Effects)

final result2 (3D Effects in After Effects)

final result3 3D Effects in After Effects

Conclusion – 3D Effects in After Effects

In this process, we learned how to create a room with a 3D effect, fix a light and insert 3D text in that; things we learn; How to add a 3D option to a layer,  How to create a 3D object, How to move or rotate 3D objects, How to fix a light and color correction and 3D text. I hope we learn a very interesting topic now.

Recommended Articles

This is a guide to 3D Effects in After Effects. Here we discuss the steps to create a 3D room in after effects. You can also go through our other related articles to learn more –

  1. 3D Text in After Effects
  2. Top 3d Graphics Software
  3. 3D Effects in After Effects
  4. Text in After Effects

After Effects Training (1 Courses, 3+ Projects)

1 Online Courses

3 Hands-on Projects

20+ Hours

Verifiable Certificate of Completion

Lifetime Access

Learn More

0 Shares
Share
Tweet
Share
Primary Sidebar
After Effects Tutorial
  • Effects
    • Crop in After Effects
    • Color Grading in After Effects
    • Text Effects in After Effects
    • After Effects Templates
    • After Effects Bounce Expression
    • Time Remapping After Effects
    • After Effects Gradient
    • After Effect Font
    • After Effects Duplicate Composition
    • After Effects Expressions List
    • After Effects Green Screen
    • After Effects Loop Composition
    • Drop Shadow in After Effects
    • Background in After Effects
    • Blur in After Effects
    • After Effects Freeze Frame
    • After Effects Move Anchor Point
    • After effects?Quicktime
    • Text in After Effects
    • Motion Blur in After Effects
    • Mask in After Effects
    • Color Correction in After Effects
    • Blending Modes in After Effects
    • Track Matte in After Effects
    • Transparent Background in After Effects
    • Slow Motion in After Effects
    • Animation in After Effects
    • Text Animation in After Effects
    • Logo Animation in After Effects
    • 2D After Effects Animation
    • 3D Effects in After Effects
    • 3D Text in After Effects
    • After Effects 3D Objects
    • Shape Layers in After Effects
    • Export in After Effects
    • Morphing in After Effects
    • Twitch in After Effects
    • Snowfall in After Effects
    • Rain in After Effects
    • Masking Layers in After Effects
    • Group Layers in After Effects
    • Glitch Effect in After Effects
    • Ripple Effect in After Effects
    • Composition in After Effects
    • After Effects Transitions
    • Typography in After Effects
    • Slider Control After Effects
    • Motion Graphics in After Effects
    • Wiggle in After Effects
    • After Effects Portable
    • Wiggle Expression in After Effects
    • Keylight in After Effects
    • Rotoscoping in After Effects
    • After Effects Render
    • After Effects Expressions
    • After Effects Presets
    • Duik After Effects
    • After Effects Split Clip
    • Trapcode in After Effects
    • Plexus After Effects
    • Logo Reveal After Effects
    • Mocha in After Effects
    • Twixtor in After Effects
    • Lens Flare in After Effects
    • After Effects Particles
    • After Effects Timeline
    • After Effects Tracking
    • Camera Tracking in After Effects
    • After Effects Repeater
    • After Effects Cartoon
    • After Effects Loop Expression
    • After Effects?Optical Flares
    • Glow in After Effects
    • After Effects GIF
    • After Effects Motion Tracking
    • After Effect Kinetic Typography
    • Cut Clips in After Effects
    • Lower third after effect
  • Basic
    • What is After Effects
    • After Effects Versions
    • After Effects Software
    • After Effects Shortcuts
    • Adobe After Effects Plugins
    • How to Use After Effects
  • After Effects Tools
    • After Effects Tools
    • After Effect Hologram
    • Pen Tool in After Effects
    • Puppet Tool in After Effects
    • KeyFrames in After Effects
    • Adding Keyframes in After Effects

Related Courses

After Effects Training Course

Adobe Premiere Pro Training Course

Design Training Course

Footer
About Us
  • Blog
  • Who is EDUCBA?
  • Sign Up
  • Live Classes
  • Corporate Training
  • Certificate from Top Institutions
  • Contact Us
  • Verifiable Certificate
  • Reviews
  • Terms and Conditions
  • Privacy Policy
  •  
Apps
  • iPhone & iPad
  • Android
Resources
  • Free Courses
  • Photoshop Tutorial
  • 3ds Max Tutorial
  • All Tutorials
Certification Courses
  • All Courses
  • Design Course - All in One Bundle
  • Photoshop Course
  • Maya Course
  • Unreal Engine Course
  • Unity Course
  • DaVinci Resolve Course
  • Pro Tools Course

© 2022 - EDUCBA. ALL RIGHTS RESERVED. THE CERTIFICATION NAMES ARE THE TRADEMARKS OF THEIR RESPECTIVE OWNERS.

EDUCBA
Free Design Course

3D animation, modelling, simulation, game development & others

*Please provide your correct email id. Login details for this Free course will be emailed to you

By signing up, you agree to our Terms of Use and Privacy Policy.

EDUCBA
Free Design Course

3D animation, modelling, simulation, game development & others

*Please provide your correct email id. Login details for this Free course will be emailed to you

By signing up, you agree to our Terms of Use and Privacy Policy.

EDUCBA Login

Forgot Password?

By signing up, you agree to our Terms of Use and Privacy Policy.

Let’s Get Started

By signing up, you agree to our Terms of Use and Privacy Policy.

EDUCBA

*Please provide your correct email id. Login details for this Free course will be emailed to you

By signing up, you agree to our Terms of Use and Privacy Policy.

This website or its third-party tools use cookies, which are necessary to its functioning and required to achieve the purposes illustrated in the cookie policy. By closing this banner, scrolling this page, clicking a link or continuing to browse otherwise, you agree to our Privacy Policy

Loading . . .
Quiz
Question:

Answer:

Quiz Result
Total QuestionsCorrect AnswersWrong AnswersPercentage

Explore 1000+ varieties of Mock tests View more

Independence Day Offer - After Effects Training (1 Courses, 3+ Projects) Learn More