
Introduction to Eraser Tool in Photoshop
In this article, we will learn about the Eraser Tool in Photoshop. As we all know, Photoshop is a professional tool for editing images for multiple reasons projects of the brochure, magazine making, personal photos editing, studio-level editings, and many more. It has a collection of wonderful tools to do so. Out of which today, we are going to look after the erasing tool in Photoshop. Upon undoing, the last edit completely gets removed, but we need part of the edit to retain in the image; then, we can use this erase for multiple proposes of removing minor or small things or decrease their opacity of objects from the frame, which based on the requirements of output.
Using the Eraser Tool in Photoshop
“E” is the hotkey to enable the Erase tool. It’s also available in the toolbox. There are multiple other attributions that appear on the application toolbar after selecting erase tool, which are:
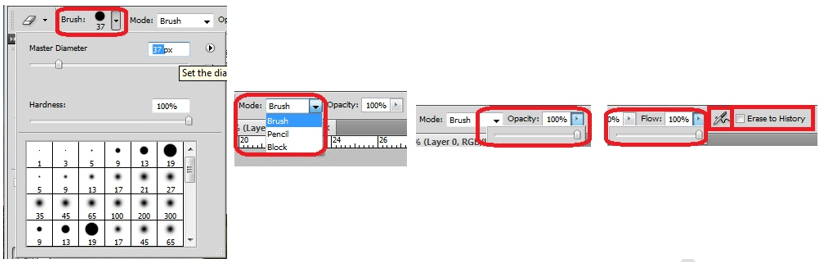
- Brush: This includes different shapes of brush, size adjustability, the hardness of edges and various other styles. Everything in brushes can be changed at any point in time as required.
- Mode: There are 3 modes which are (1) Brush (Soft edge), (2) Pencil (Hard edge) and (3) Block (Square brush size). Based on the requirements, we can go with the mode.
- Opacity: By default, the opacity range of the erasing tool is 100% which removes the entire image and makes the image transparent or shows the below layer image from the layer panel. The opacity can be changed at any point in time, depending on the requirements. The mostly used opacity ranges are 50%, 20%, 30% and based on the color which we want to partially remove.
- Flow: It helps in knowing the applicability of erasing to numbers of pixels it moved from one corner to another corner. Based on the level of percentage range set, the effects apply accordingly. This option is only applicable in brush mode.
- Airbrush: This option helps the erase tool moved pixels clear to clean without remaining traces in pixels at the area where the brush is moved to get a smooth finish. This option is only applicable in brush mode.
- Erase to History: When the erase tool is active, and we can review the image by enabling this option. Upon enabling, Erase properties will not apply to the image which we are working for.
Different Eraser Tools in Photoshop
Below are the three different eraser tools in photoshop:
- Eraser Tool
- Magic Eraser Tool
- Background Eraser Tool
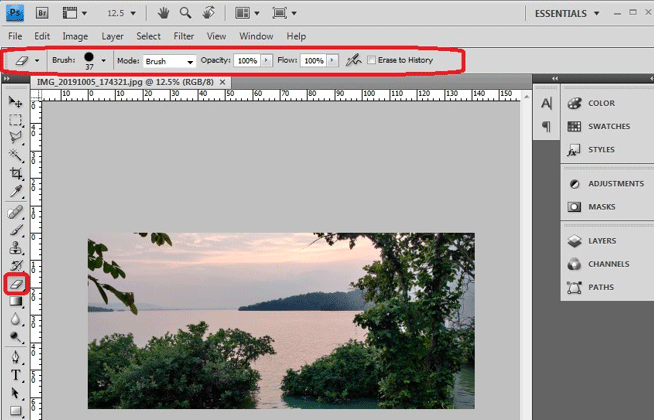
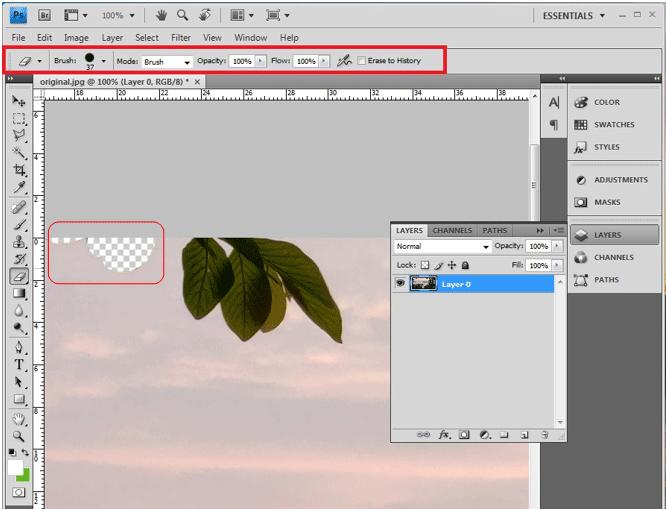
1. Eraser Tool
![]()
This is a regular or default process of using the eraser in Photoshop to remove unwanted pixels in the image. Upon erasing the image portion, it becomes transparent, and the pixels will be removed on the areas of brush movement. By doing this, the background image can be shown if we have multiple layers, make the image transparent where required and small or large portions of objects can be removed from the image which is not needed and use the clown stamp tool or other images to cover it.
This is used by all professional Photoshop artists who work for magazine making, editorials making, calendar making, cover pages, pamphlets, banners and many more.
2. Magic Eraser Tool
![]()
Magic Tool is used when the pixels of the same tolerance color needs to be removed. In the below image, after enabling the magic to erase tool, the tolerance option setting option is available beside the brush option as shown. By selecting the color that the tool removes, the portions get selected based on tolerance and perform edits or erase them. This tool provides the exact selection and has various options to select the area and modify it.
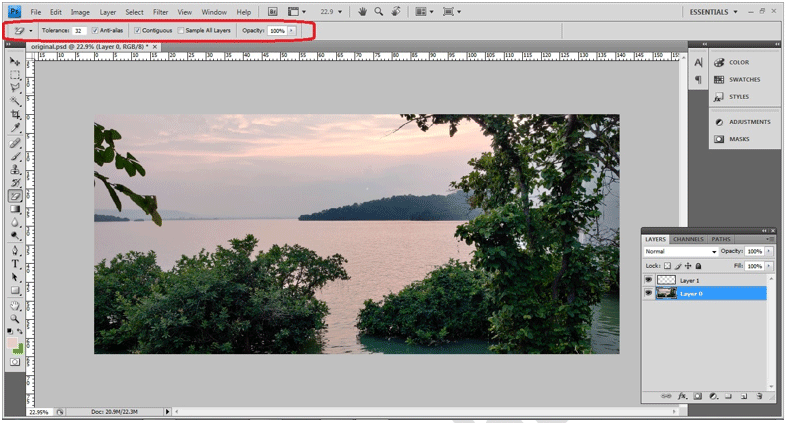
- Tolerance: For each image can range from 0 to 255, which are closely matched.
- Anti Aliased: To give a smooth edge to the complete portion of the image selected by the magic erase tool.
- Contiguous: Contiguousis enabled for the areas which need to be joined to work together.
We can add and remove the selection by using Shift and Alt keys from the keyboard.

3. Background Eraser Tool
![]()
This tool is specially used to alter the background to solid color or make the background transparent for images and layers as required. After selecting the image, this tool needs to be selected; brush properties can be changed by clicking the brush icon on top or also we can use left square brackets to reduce the size of the brush and right square bracket to increase the size. It makes the user work quickly.
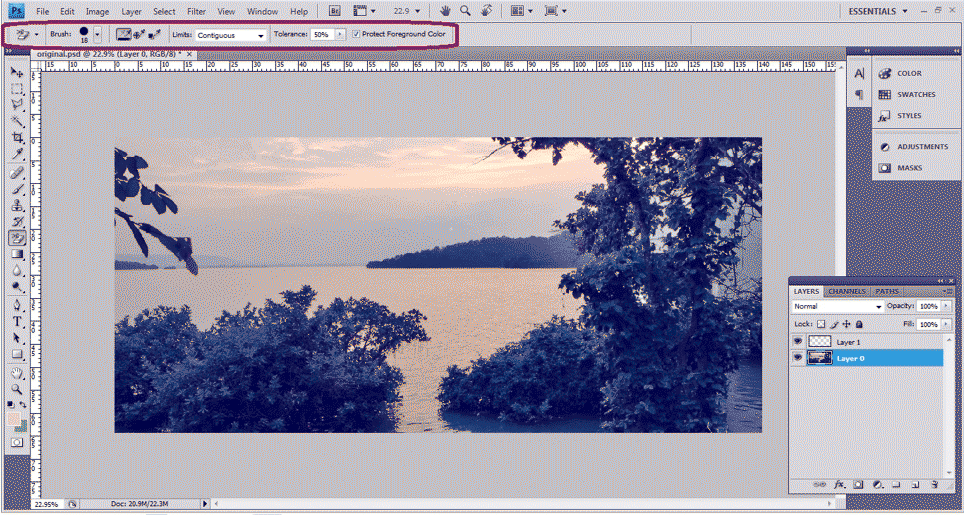
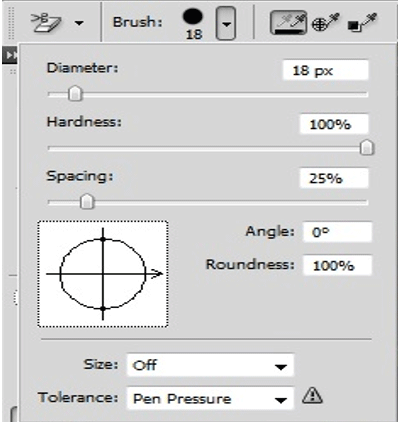
Brush: Properties such as Dimensions Hardness, Spacing, Angle, etc., can be configured as required.
Sampling: There are 3 modes of sampling, the commonly used one is continuous, and a few more are once and background switch. Based on the requirement we can switch between them.
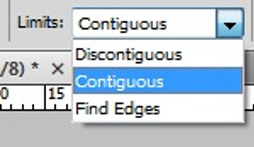
Limits: There are 3 types of limits that are the discontinuous, continuous and fine edge.
Tolerance: It’s a “%” based editing low tolerance, which needs multiple repetitions of the brush to remove the background color compactly. High tolerance removes the background color quickly but adjusts it to the required level to avoid image tiny details missing.
Protect Foreground Colour: Full opacity can be used while removing the background color of the image, which is used in television studios, movies and VFX, which use green mats and black mats.
Original Image

Before Editing

After Using Erase Tool

Conclusion
Professionals use eraser Tool for their edits which are possible as the tool is available within Photoshop; no additional add-ons or applications are required. It can be used for customizing and the images as required for projects. All large to small corrections with an image can be done. Adobe systems understood the requirement of the real-time project needs and update the tools as required for the user’s convenience.
Recommended Articles
This is a guide to Eraser Tool in Photoshop. Here we discuss how to use the Eraser Tool and the different eraser tools in photoshop. You can also go through our other related articles to learn more –
