Updated September 13, 2023
3ds Max Rigging Fundamentals
3Ds Max is a professional 3D computer designing software used in creating 3D animation, game, models, images, etc. and plays a major role in the work of Video Game developers, Film and TV Studios. Rigging in 3Ds max is an interesting part of modeling work. Rigging gives the motion to any model of our project as same as we see objects in our daily lives, such as moving our body parts, the motion of a car, etc. You can give any type of rigging according to your requirements in your project. Rigging gives a very realistic look to you.
Character Rigging in 3ds Max
Here are the steps to apply Rigging to our character/model.
- There are four viewports working areas in 3Ds max software, which are Top viewport, Front viewport, Left viewport, and the last one is Perspective viewport. We can choose any one of them for drawing our model at any time. The selection of viewport depends on the ease of drawing of the model.
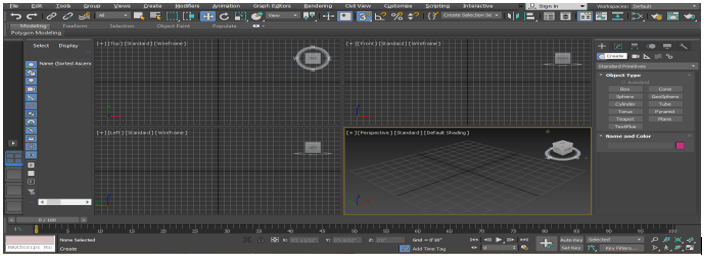
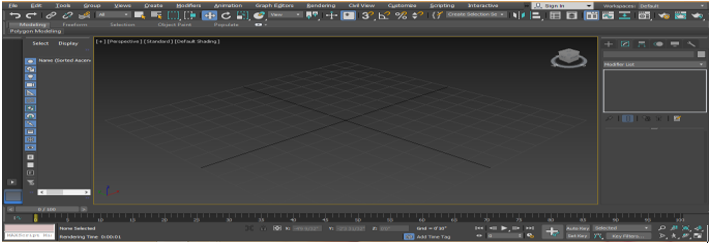
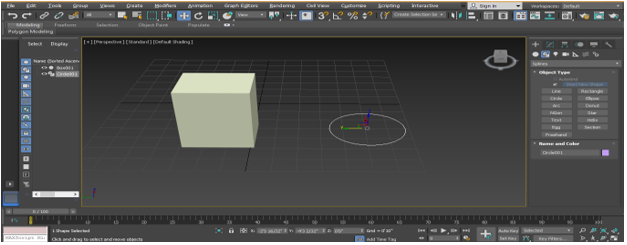
- I will draw some objects for this tutorial in perspective viewports such as box and circle; you can take any object and draw it in any viewport. Now I will make a perspective viewport in full-screen mode by pressing the Alt+W button on the keyboard.
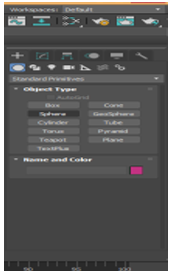
- Now I will go to the common panel.
- Click on create a tab of the common panel.
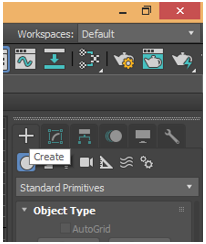
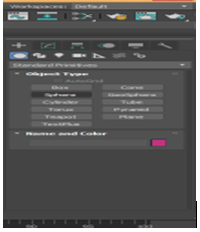
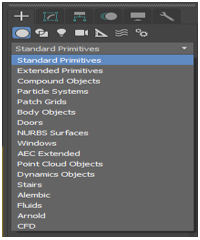
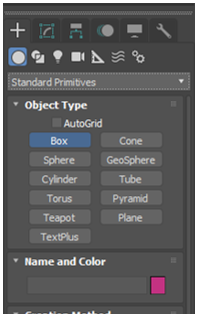
- Click on the standard primitive option of the common panel.
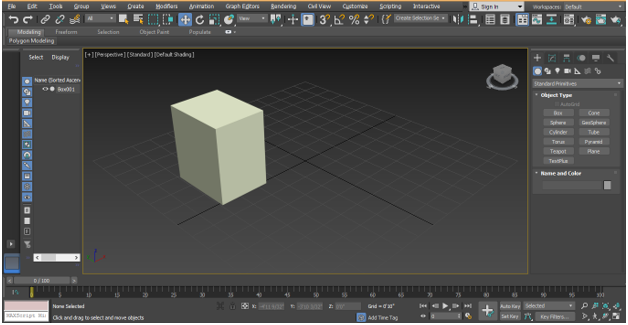
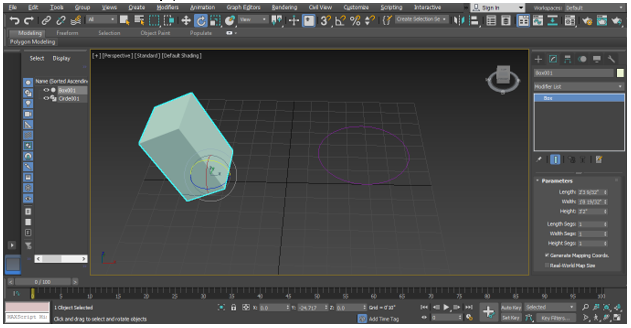
- Take the Box command by clicking on the Box tab of the common panel.
- I will click anywhere on the grid; you can click on the gird or out of the gird to draw your object and drag the mouse pointer to give length and width to the box, left click to leave and then drag the mouse pointer in an upward direction to give the height of the box and right-click or press Esc key to exit from the command.
- Now again, I will go to the common panel.
- Click on the shapes tab.
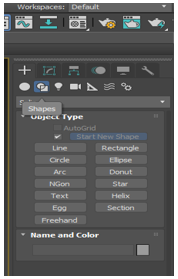
- Take circle for the common panel.
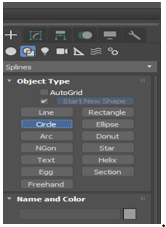
- Click on the gird, draw the circle; I am drawing this circle because it wants; when I rotate this circle, my box also reacts on its rotation in the form of changing the (box) parameter.
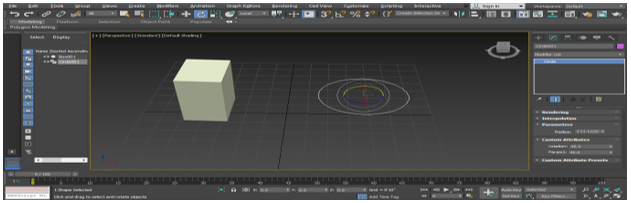
- We will set three steps: attribute editor, wire parameter, and then reaction manager for rigging. Here we will set attributes. Attribute setting means to connect the objects with each other to give motion to that object; here, we will connect circle to box. We will consider circle as parent and box, and child.
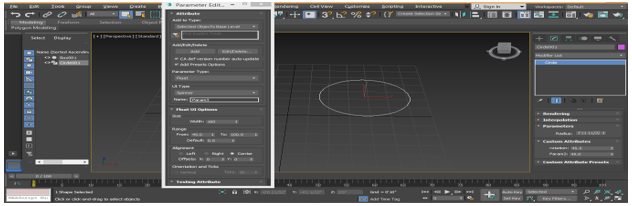
- For setting the attribute, go to animation on the top corner of the workspace, click on Parameter Editor or Press Alt+1 on the keyboard to activate this command.
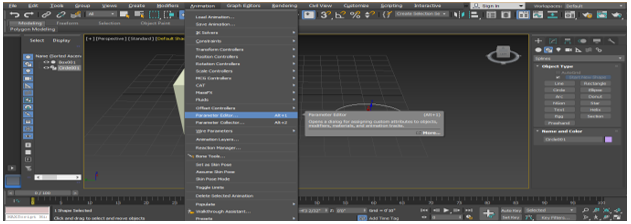
- A dialog box will open named as Parameter Editor; we will set some parameters here.
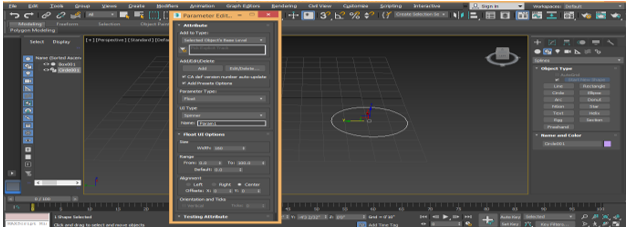
- We will change the name of the attribute here for our understanding.
- Now set the range form here for giving the motion to the object; I will set it to 45 to 100. Click on the Add tab of this dialog box.

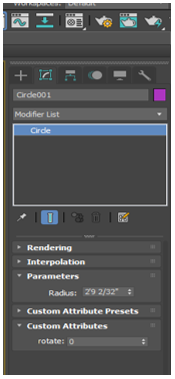
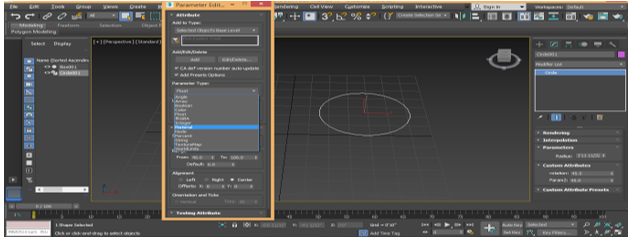
- Here we can see custom parameter is added in the common panel.
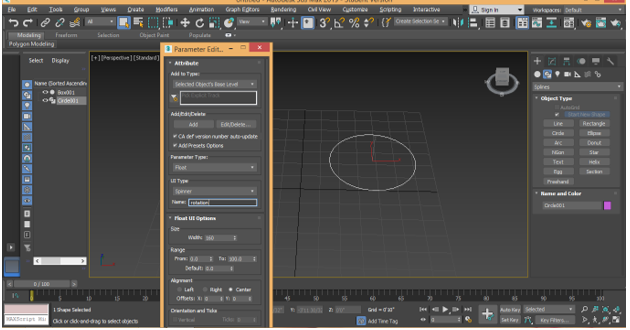
- Here our parameter is in decimal; if you don’t want it in decimal, just go on the Parameter Editor box. We see float option here in Parameter Type heading of this box float means data will be in decimal.
- We change this option in integer by clicking on it for no decimal in our data.
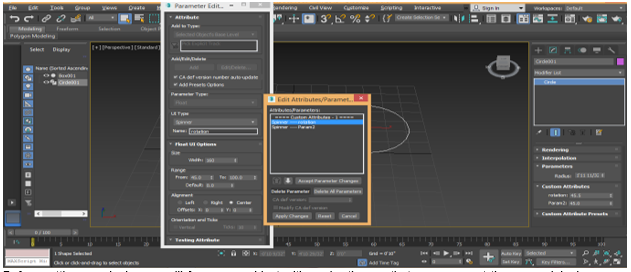
- We can edit or delete these parameters at any time by clicking on the Edit/Delete tab of the Parameter Editor box click on the Edit/Delete tab select the name which you want to edit or delete, here you can click on a different tab to edit and delete the parameter then click on apply changes.
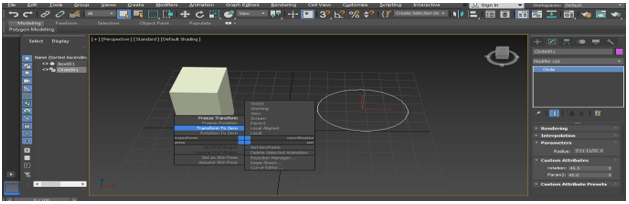
- Before setting our rigging, we will freeze our object with each other so that we can reset them on the original position; after the motion of the moving object for freezing, select both object and press Alt+right-click with the mouse. Click on the Freeze Transform option.
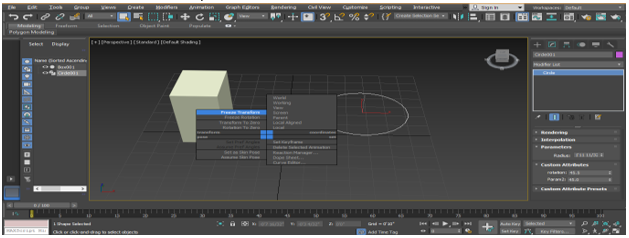
- For resetting the object on the original position after moving the motion, press Alt+right- click from the mouse. Click on Transform to zero option.
- Now we will rotate our box in a y- plane.
- To check if it is the right plane, click on view and choose the local option; from here now, you can see in which plane you are at the bottom area that is X, Y Z.
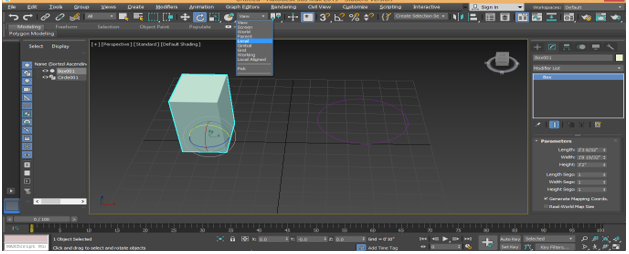
- Now click on the circle, click on rotate.
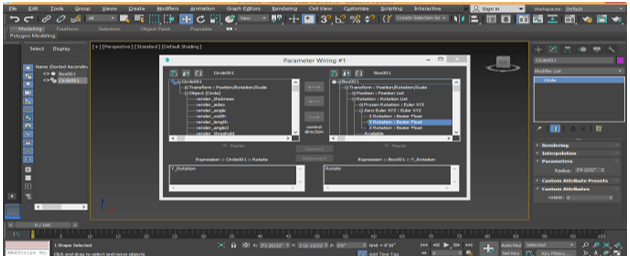
- Right-click anywhere and choose Wire Parameter from here.
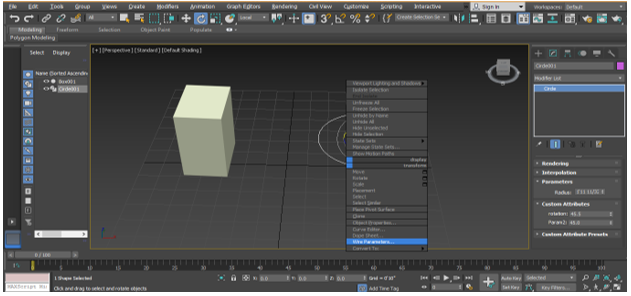
- Two options will open, that is, transform and object. We will set our rigging in transform, click on the object (Circle), click on Custom Attribute and click on Box rotate option.
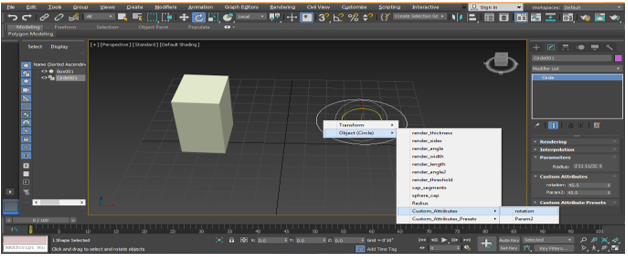
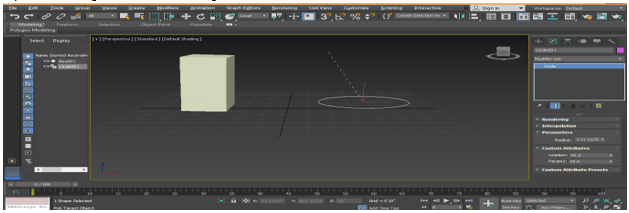
- A pointer will be generated for connecting the circle to the box.
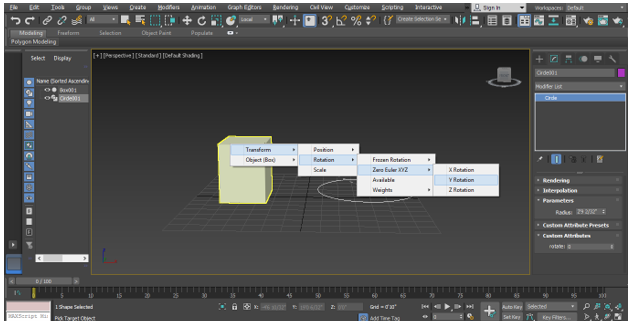
- Connect it to the box, click on Transform, click on rotation and click on Zero Euler XYZ; choose Y Rotation (you can choose plane according to you in which you want to rotate it).
- The Parameter Wiring dialog box will be open. Click on this arrow button to connect the circle with the box, and click on connect tab to connect them.
- Now when we change data of the rotation parameter in the custom attribute option of the circle, our box will rotate according to the set parameter.
- There are many types of rigging methods in 3Ds max software. You can learn them in step by step manner after learning rigging from this tutorial. By following these steps, your base becomes clear about the rigging of the object in 3Ds max software.
Conclusion
Herewith this tutorial, you can easily give any type of rigging to your object and make it very realistic for the viewer. When you have knowledge about the different types of rigging methods in 3Ds max, you will get plus point in your working area and make your model more effective than previous.
Recommended Articles
This is a guide to Rigging in 3ds Max. Here we discuss Character Rigging in 3ds Max with steps to apply Rigging to Character/Model. You may also have a look at the following articles to learn more –
