EDUCBA

EDUCBA

MENUMENU
  • Free Tutorials
  • Free Courses
  • Certification Courses
  • 280+ Courses All in One Bundle
  • Login
Home Design Design Tutorials After Effects Tutorial Rain in After Effects
Secondary Sidebar
After Effects Tutorial
  • Effects
    • Crop in After Effects
    • Color Grading in After Effects
    • Text Effects in After Effects
    • After Effects Templates
    • After Effects Bounce Expression
    • Time Remapping After Effects
    • After Effects Gradient
    • After Effect Font
    • After Effects Duplicate Composition
    • After Effects Expressions List
    • After Effects Green Screen
    • After Effects Loop Composition
    • Drop Shadow in After Effects
    • Background in After Effects
    • Blur in After Effects
    • After Effects Freeze Frame
    • After Effects Move Anchor Point
    • After effects?Quicktime
    • Text in After Effects
    • Motion Blur in After Effects
    • Mask in After Effects
    • Color Correction in After Effects
    • Blending Modes in After Effects
    • Track Matte in After Effects
    • Transparent Background in After Effects
    • Slow Motion in After Effects
    • Animation in After Effects
    • Text Animation in After Effects
    • Logo Animation in After Effects
    • 2D After Effects Animation
    • 3D Effects in After Effects
    • 3D Text in After Effects
    • After Effects 3D Objects
    • Shape Layers in After Effects
    • Export in After Effects
    • Morphing in After Effects
    • Twitch in After Effects
    • Snowfall in After Effects
    • Rain in After Effects
    • Masking Layers in After Effects
    • Group Layers in After Effects
    • Glitch Effect in After Effects
    • Ripple Effect in After Effects
    • Composition in After Effects
    • After Effects Transitions
    • Typography in After Effects
    • Slider Control After Effects
    • Motion Graphics in After Effects
    • Wiggle in After Effects
    • After Effects Portable
    • Wiggle Expression in After Effects
    • Keylight in After Effects
    • Rotoscoping in After Effects
    • After Effects Render
    • After Effects Expressions
    • After Effects Presets
    • Duik After Effects
    • After Effects Split Clip
    • Trapcode in After Effects
    • Plexus After Effects
    • Logo Reveal After Effects
    • Mocha in After Effects
    • Twixtor in After Effects
    • Lens Flare in After Effects
    • After Effects Particles
    • After Effects Timeline
    • After Effects Tracking
    • Camera Tracking in After Effects
    • After Effects Repeater
    • After Effects Cartoon
    • After Effects Loop Expression
    • After Effects?Optical Flares
    • Glow in After Effects
    • After Effects GIF
    • After Effects Motion Tracking
    • After Effect Kinetic Typography
    • Cut Clips in After Effects
    • Lower third after effect
    • Masking Layers in Adobe After Effects
  • Basic
    • What is After Effects
    • After Effects Versions
    • After Effects Software
    • After Effects Shortcuts
    • Adobe After Effects Plugins
    • How to Use After Effects
  • After Effects Tools
    • After Effects Tools
    • After Effect Hologram
    • Pen Tool in After Effects
    • Puppet Tool in After Effects
    • KeyFrames in After Effects
    • Adding Keyframes in After Effects

Related Courses

After Effects Training Course

Adobe Premiere Pro Training Course

Design Training Course

Rain in After Effects

Rain in After Effects

Introduction to Rain in After Effects

After developing Graphic software, people started creating almost all natural things in graphics, and it possible to do; most of the film and video production started avoiding shooting in the rain because they had an alternative to create rain in graphics. Creating rain in graphics is a big task, but it’s once upon a time now it’s possible and easy too; we can create raindrops in Photoshop, but it will be a single frame we can use for banners and graphic posters. If we need to create rain for a video, we need to use software like after effects; after effects, we can create rain effect very easily and effectively.

All in One Design Bundle(280+ Courses, 100+ projects)
AutoCADHoudiniAdobe Premiere ProPhotoshop
SolidworksVFX Visual EffectsCorelDrawUnreal Engine
Price
View Courses
280+ Online Courses | 100+ projects | 2000+ Hours | Verifiable Certificates | Lifetime Access
4.6 (64,612 ratings)

Methods for Creating Rain Effect

The following tutorial will show how to easily add rain effects to your image with a few steps.

Start Your Free Design Course

3D animation, modelling, simulation, game development & others

Method 1 – Applying Drizzle Effect

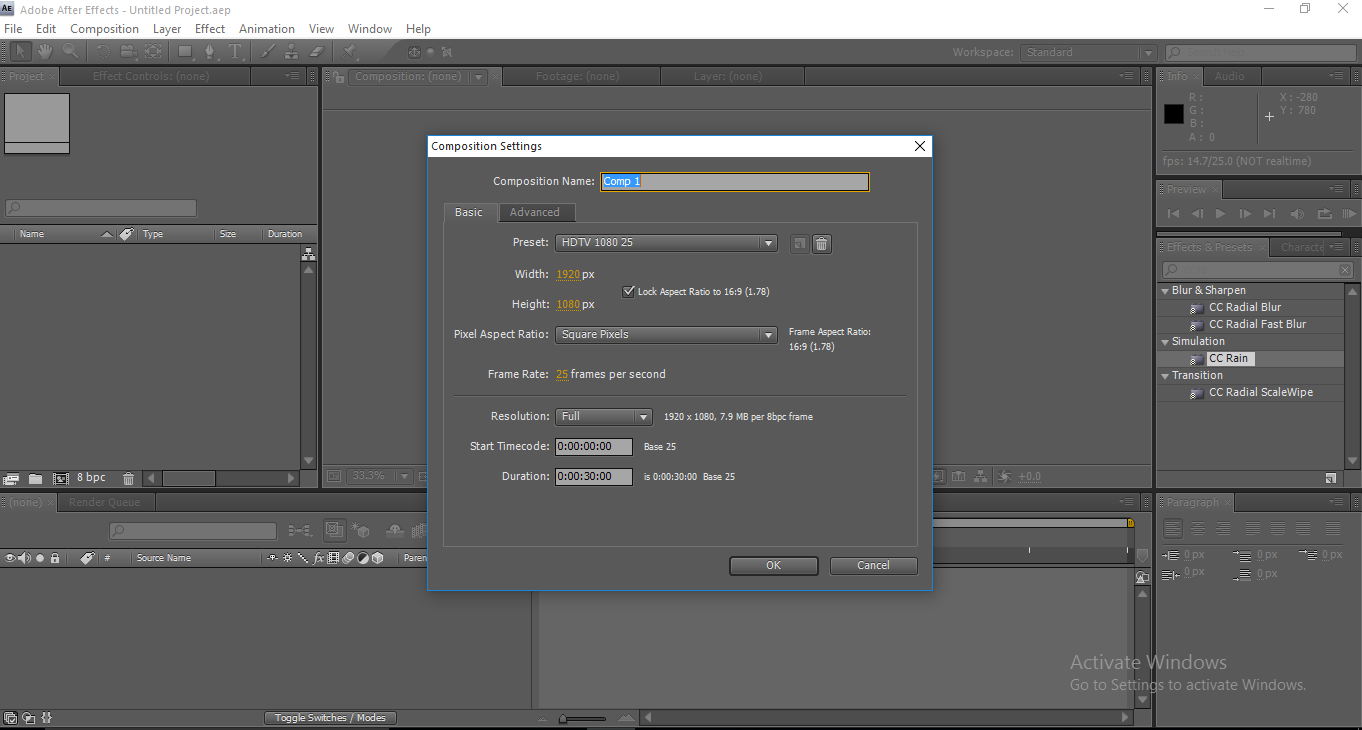
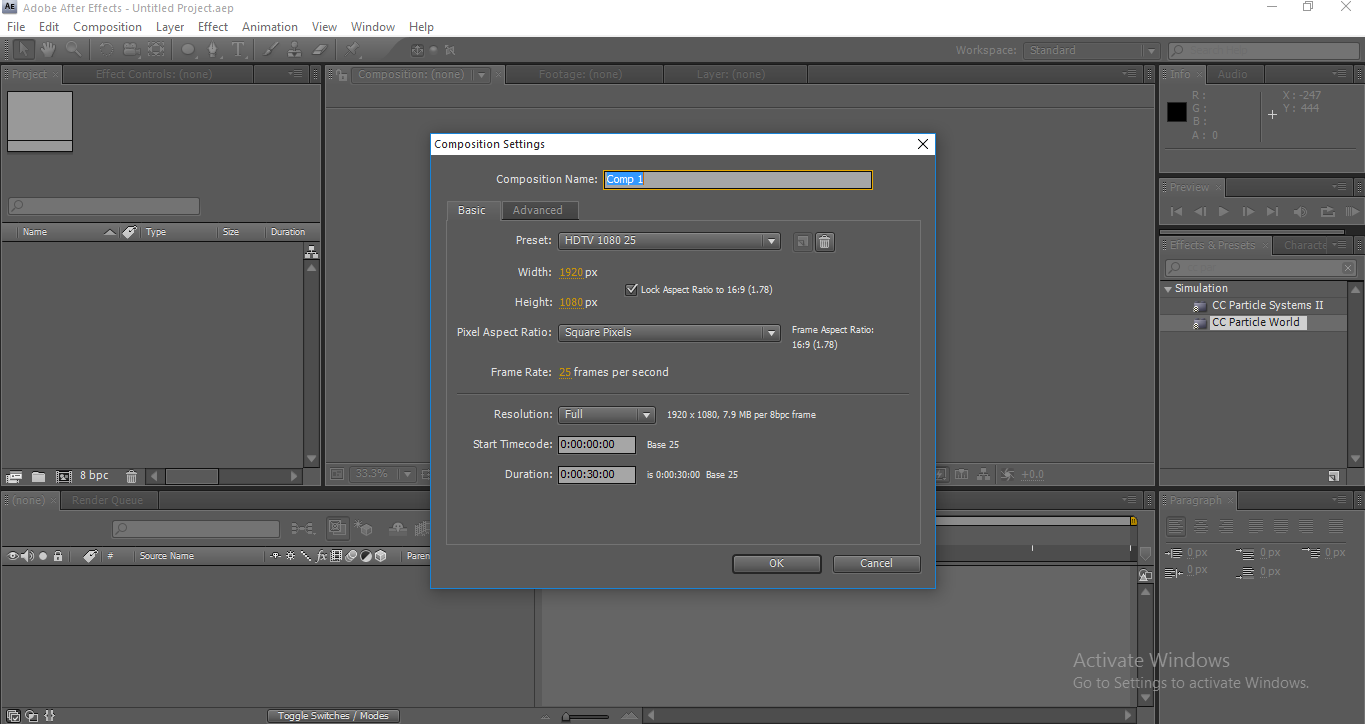
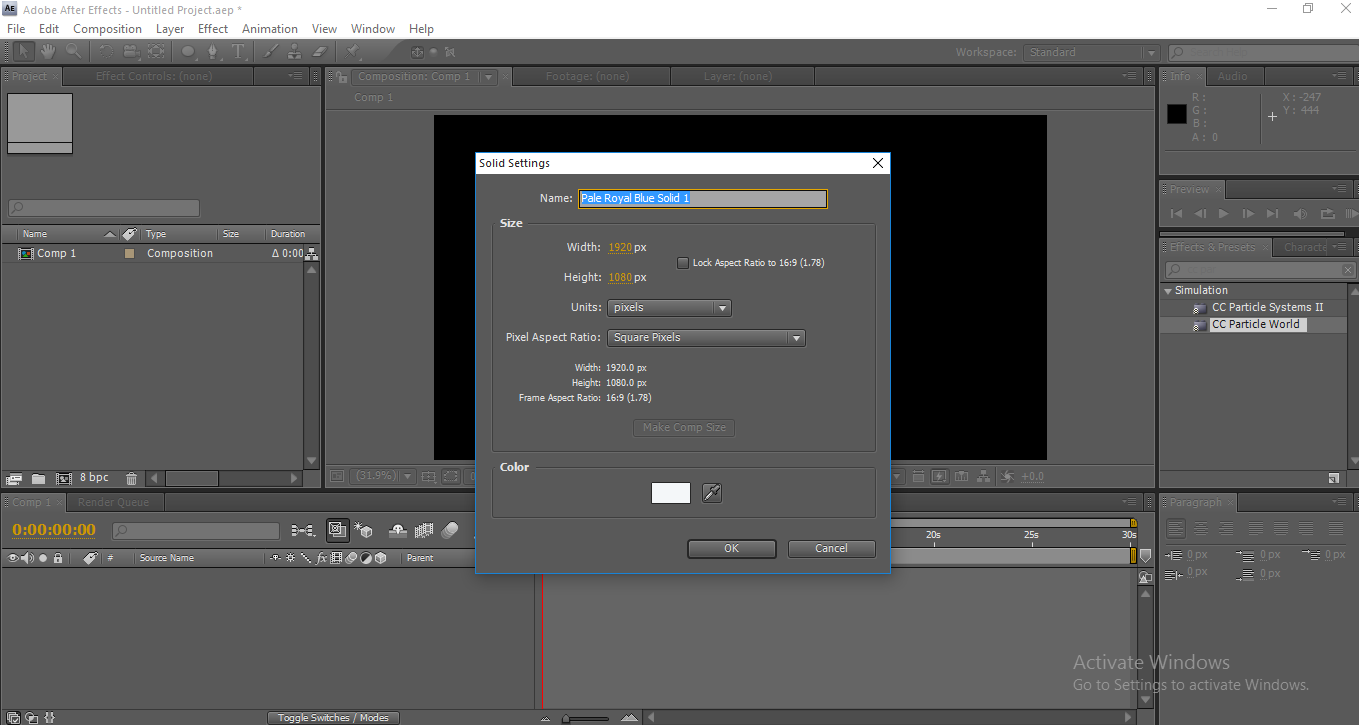
Step 1: Open a new composition.

Rain in After Effects - New Composition

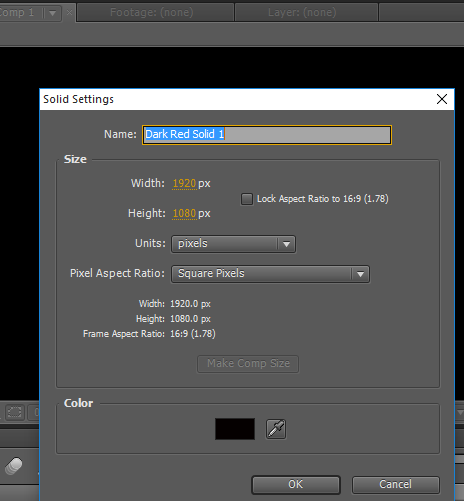
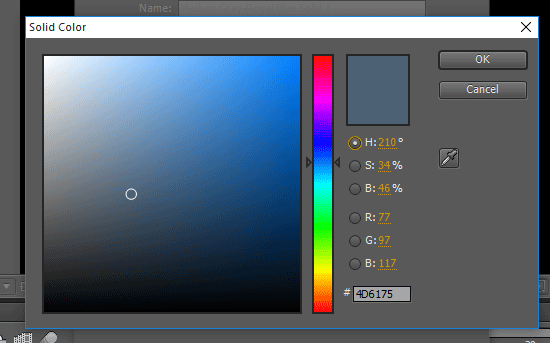
Step 2: Import a new grey solid layer; select the color and use 4d675 in the fill to get the perfect grey color.

Grey Solid Layer

Grey Solid Layer Setting

Solid Color

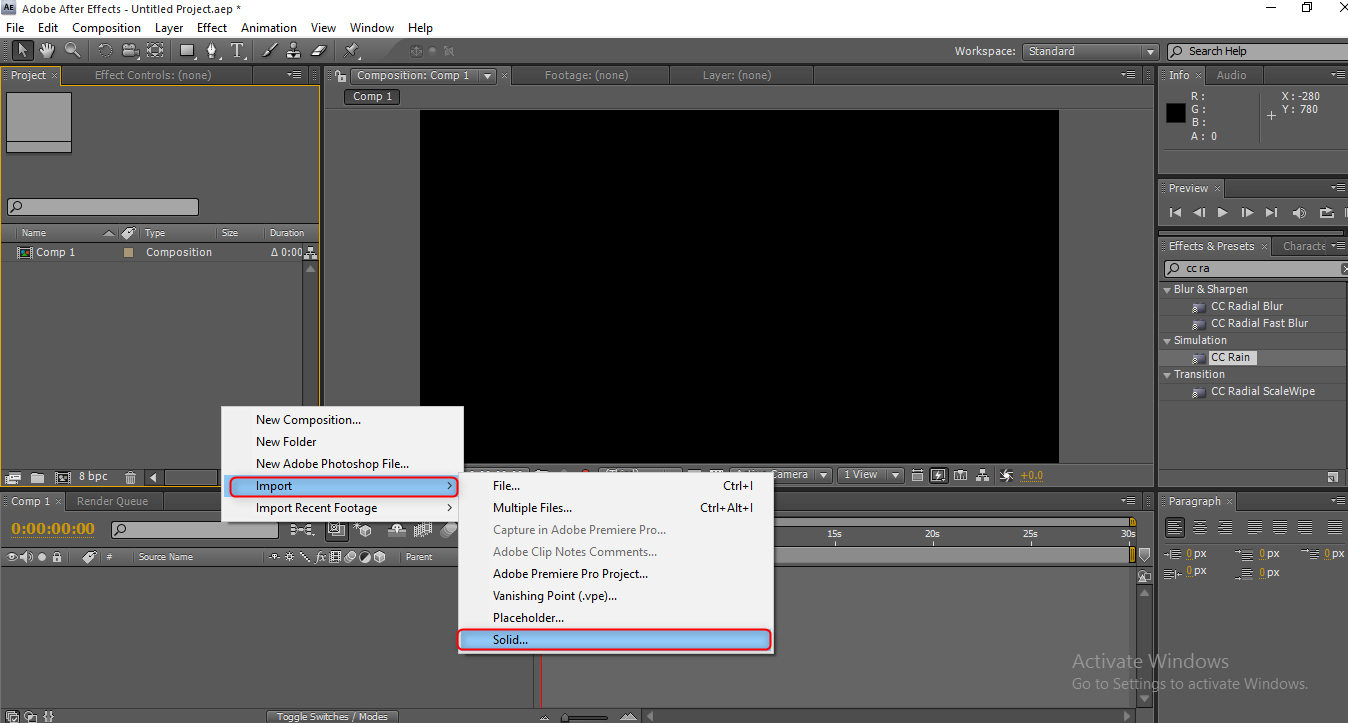
Step 3: Import the solid layer to the timeline.

Import the Solid Layer

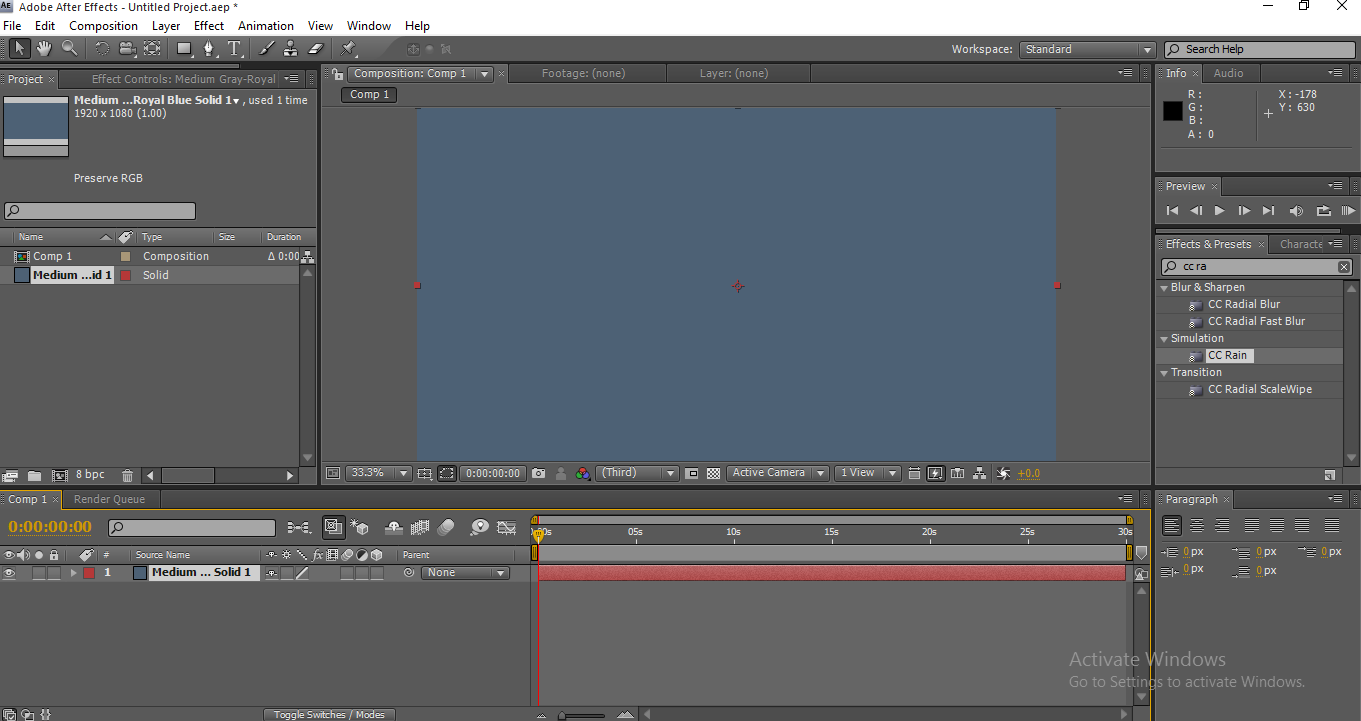
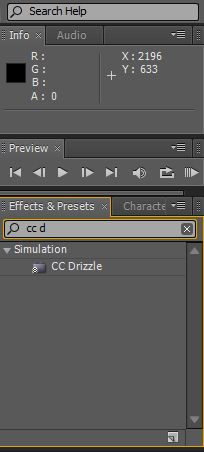
Step 4: In the effects and presets, we can find the CC Drizzle effect.

CC Drizzle Effect

Step 5: Apply the CC Drizzle effect to the solid layer.

Apply CC Drizzle Effect

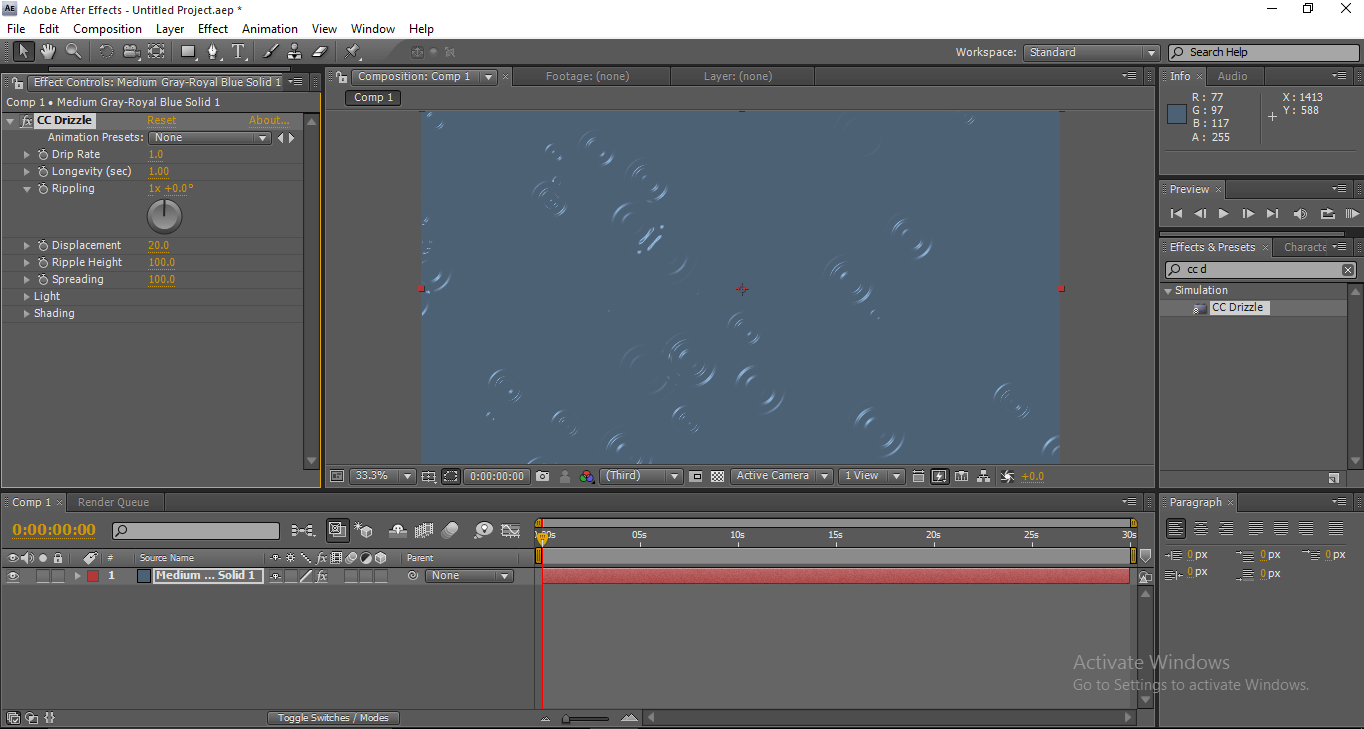
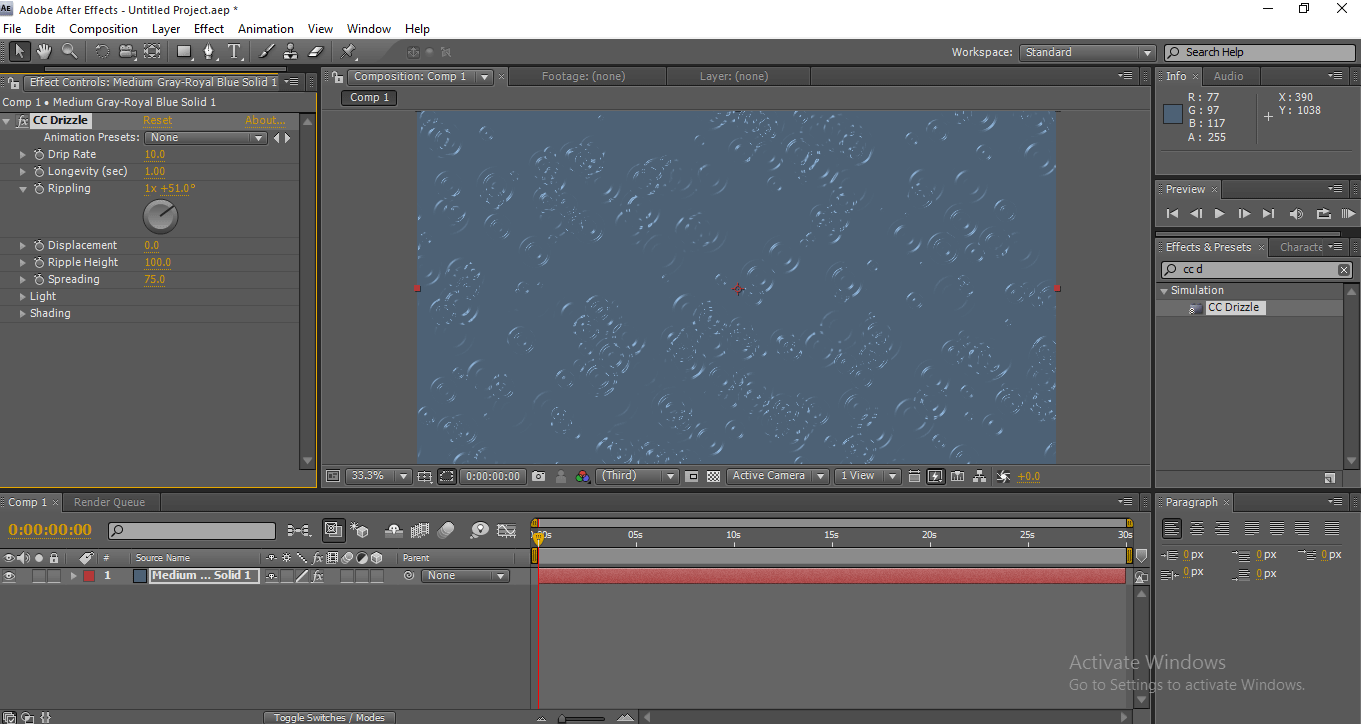
Once we apply the effects, we can find some water drop effects on the layer.

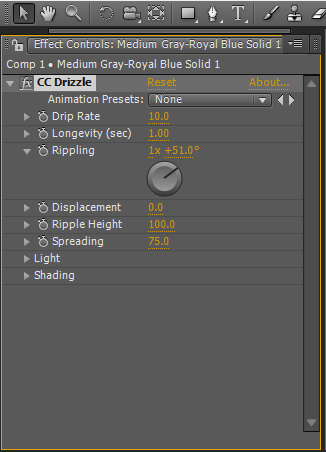
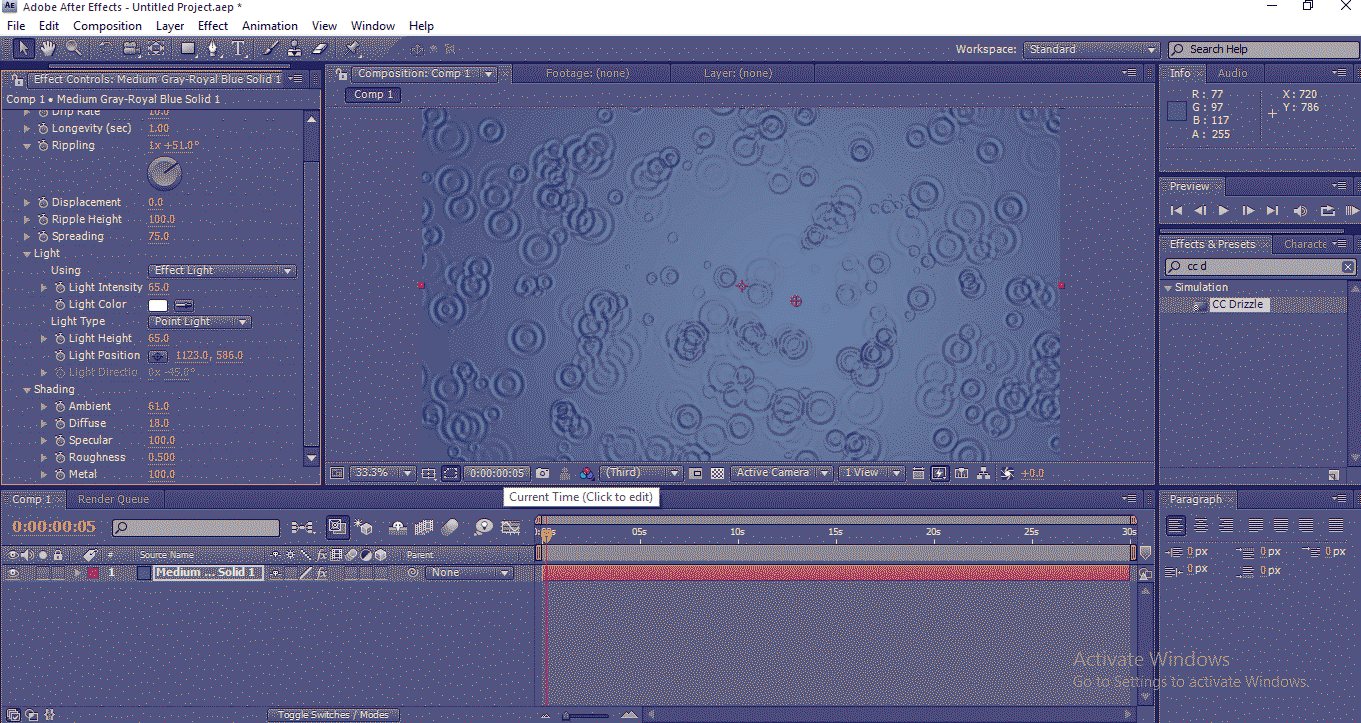
Step 6 : Now move to the configuration window and change the values, Drip rate – 10.0, Longevity (sec) – 1.0, Rippling – 1 x +51, Displacement – 0, Spreading – 75.

Configuration Window

Full Configuration Window

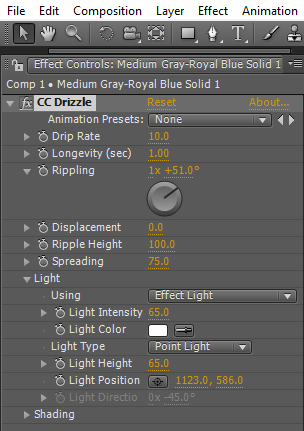
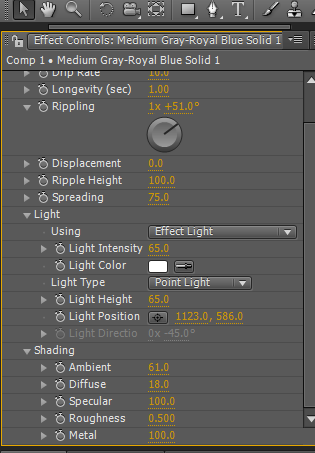
Step 7: We need to expand the light menu now. Change the light intensity to 65, Light type change to point light, Light height 65, Light position 1123, 586.

Expand Light Menu

Expand Light Menu - 1

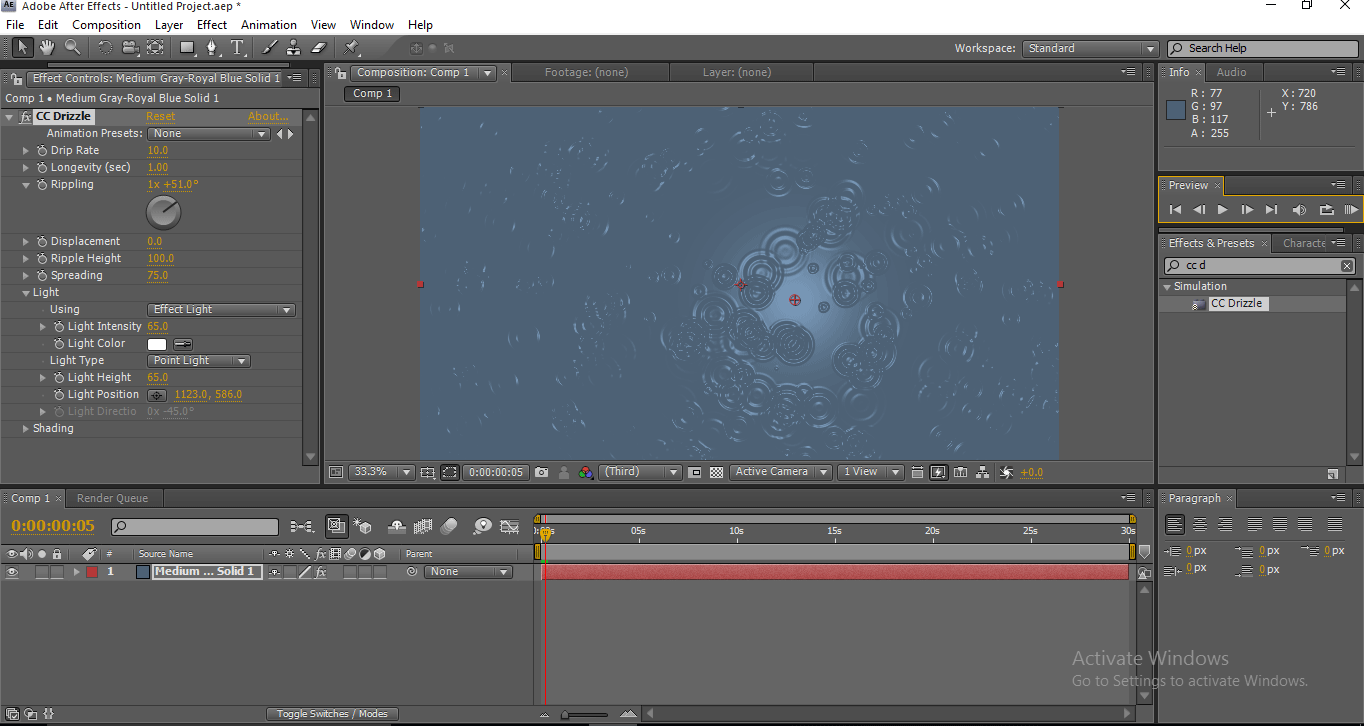
Step 8: Now, let’s expand the shading menu.

Shading Menu

Shading Menu - 1

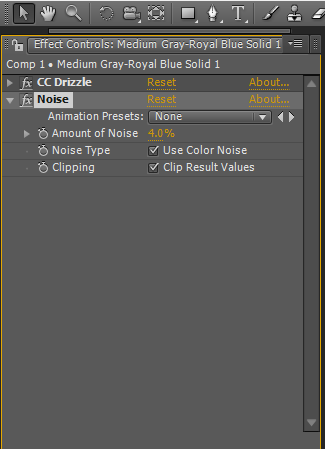
Step 9: Once we finish this process, we need to add some noise to the layer.

Noise to the Layer

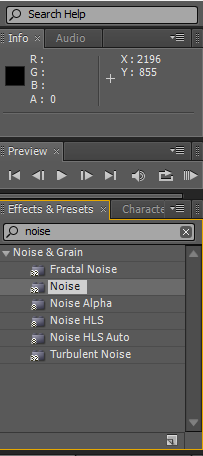
Change the noise amount to 4.04.

Change the Noise Amount

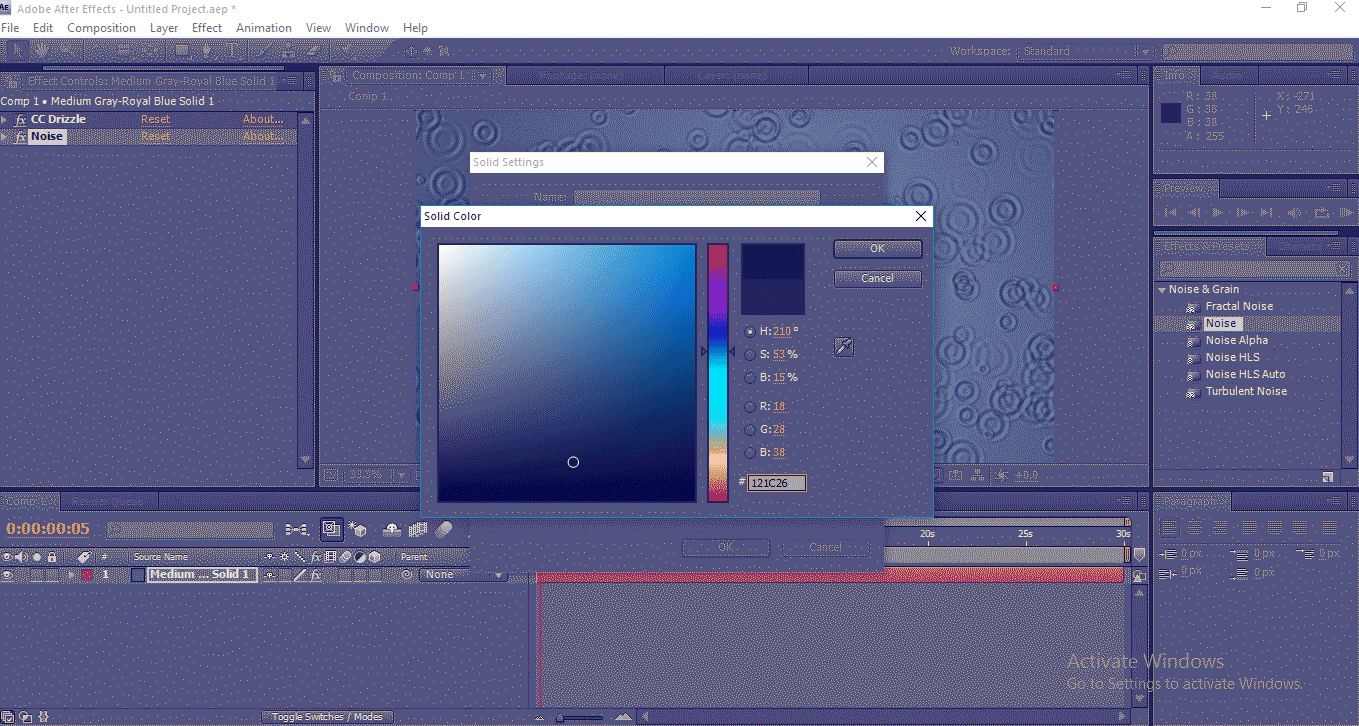
Step 10: Now add another solid layer with 121c26 in the color fill.

Solid Layer Color fill

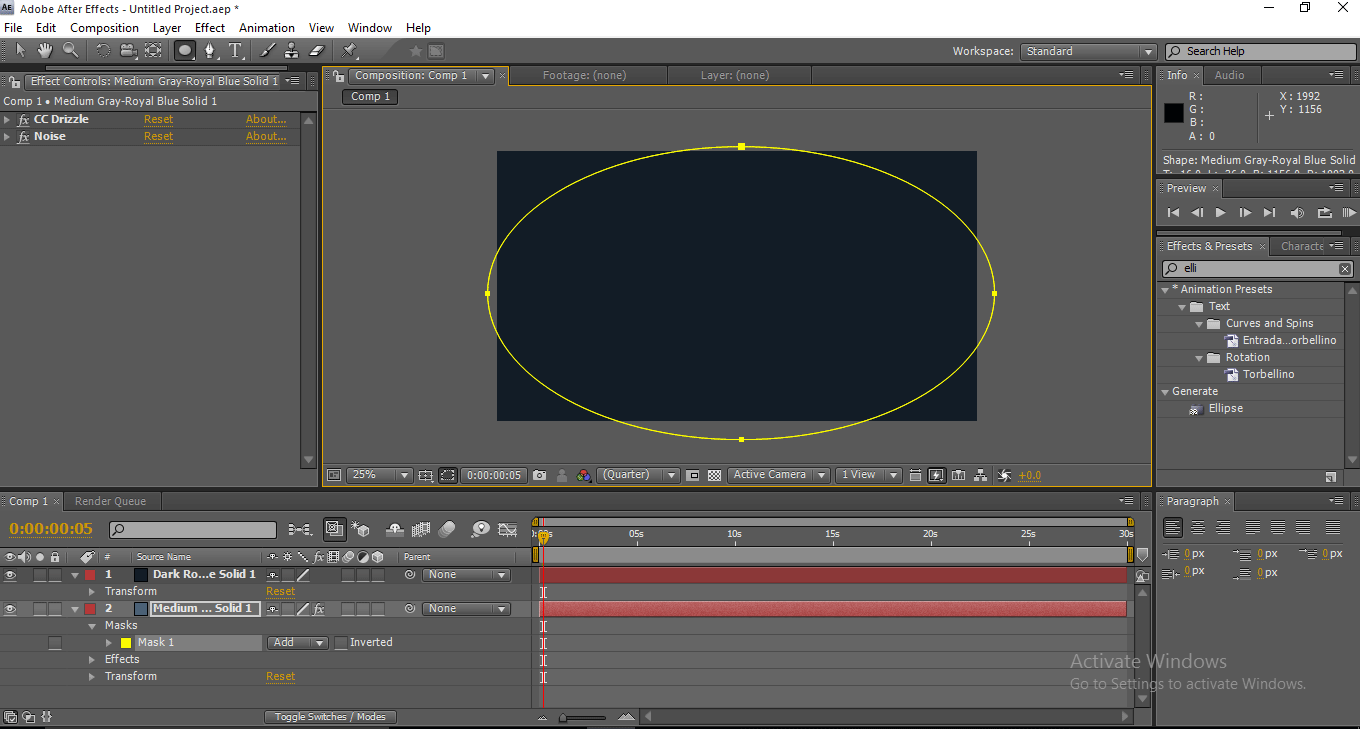
Step 11: Just apply the ellipse mask to the new solid layer; the ellipse tool is available in the toolbar, long press on a rectangle, then we will have a drop-down menu from that we can select Ellipse mask.

Ellipse Mask

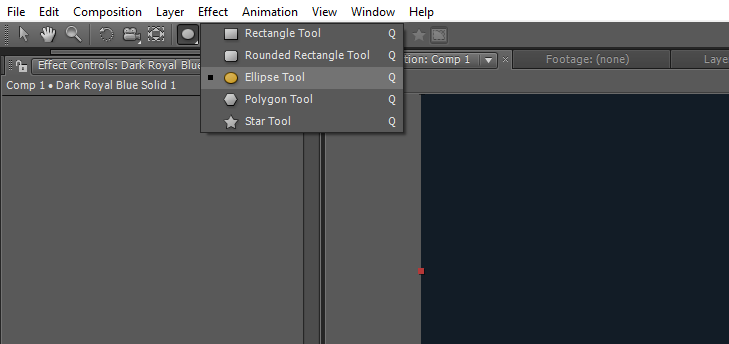
We can also use Q as a shortcut for this tool.

Step 12: Apply the mask to the new solid layer.

Rain in After Effects - Apply the Mask

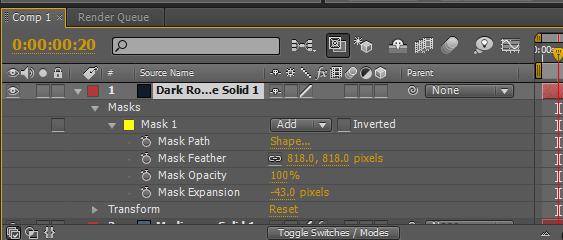
Step 13: Now expand the values of the mask. Mask feather – 818.0 pixels, Mask opacity – 100, Mask expansion – (-43).

Rain in After Effects - Values of the Mask

Step 14: Now, create another solid layer.

Another Solid Layer

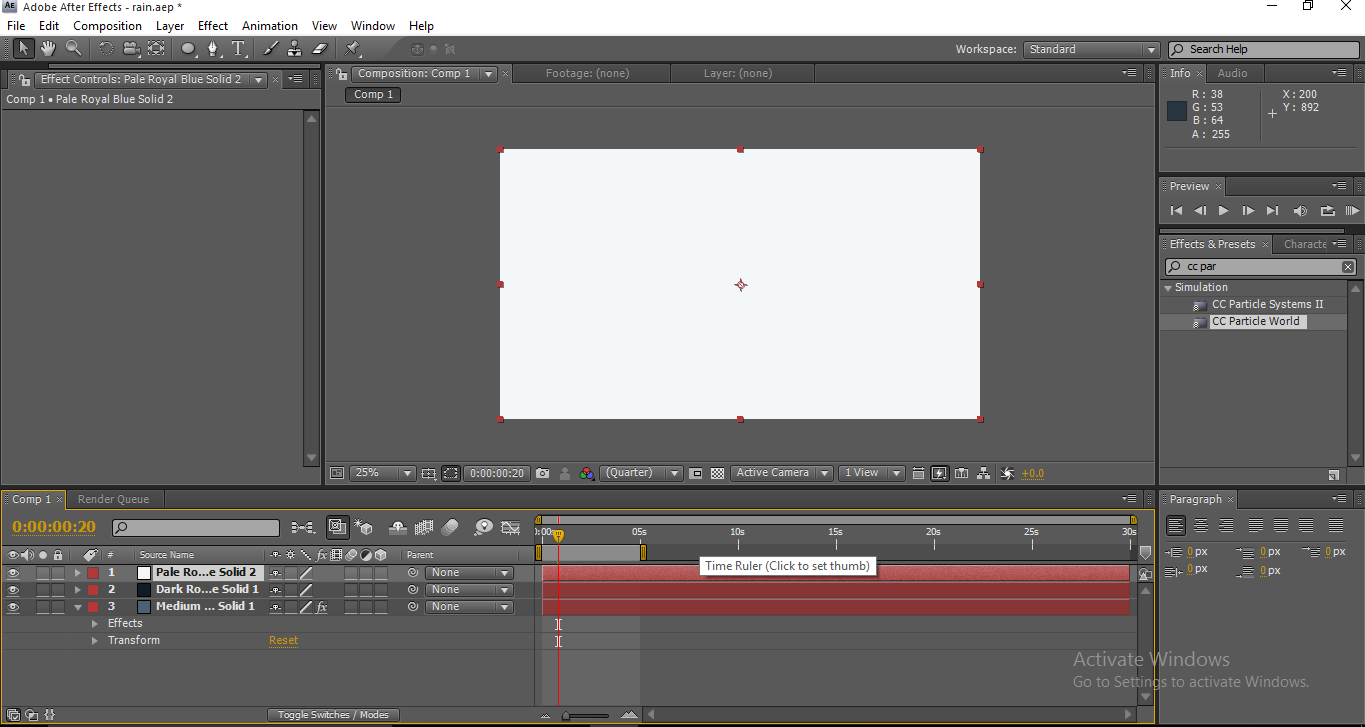
Step 15: Add CC Particles world effect to the new solid layer.

Add CC Particles

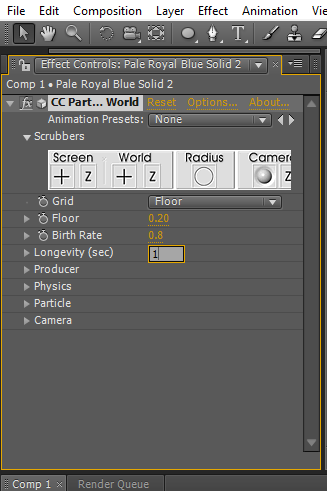
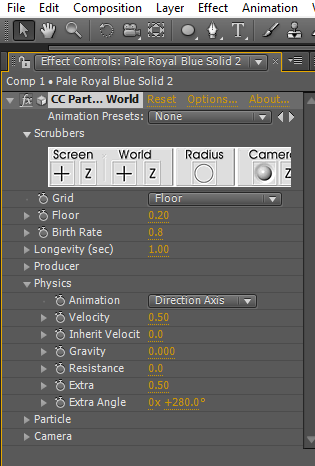
Step 16: Now, let’s expand the values of the CC Particle World. First, disable the Radius in the options, Birth rate  0.8, Longevity 1.

Values of CC Particle

Step 17: Expand the producer menu. Change the radius of XY and Z to 1.5.

Expand Producer Menu

Expand Producer Menu - 1

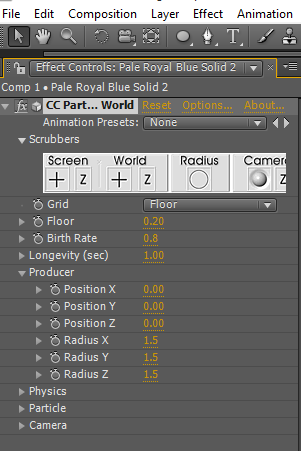
Once we change the values of XY and Z, we can find the rain effect on the screen, and we need to make it a little effective.

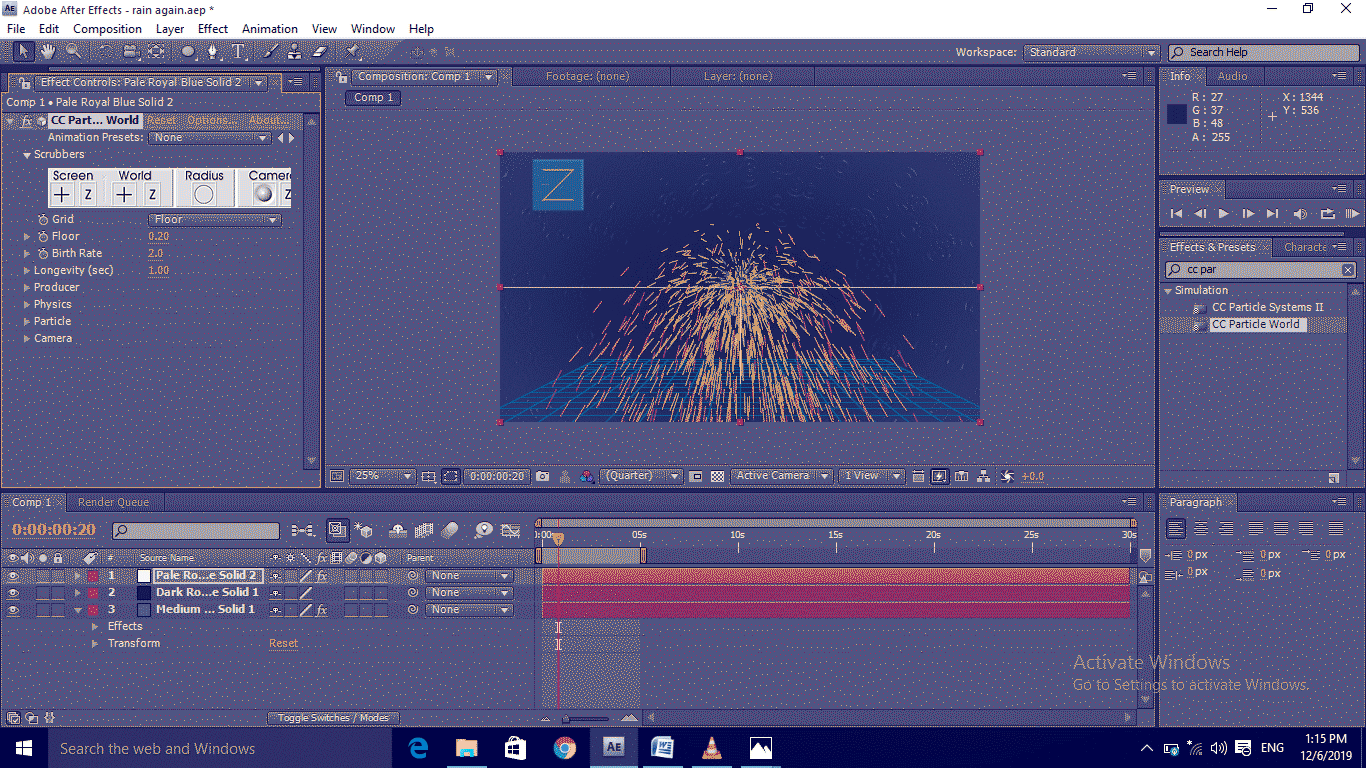
Step 18: Now expand the physics menu. Animation – Direction axis, Velocity – 0.50, Gravity – 0, Extra angel – 0x+280.

Physics Menu

Physics Menu - 1

Once we expand the physics, we can feel that the raindrops falling from the top.

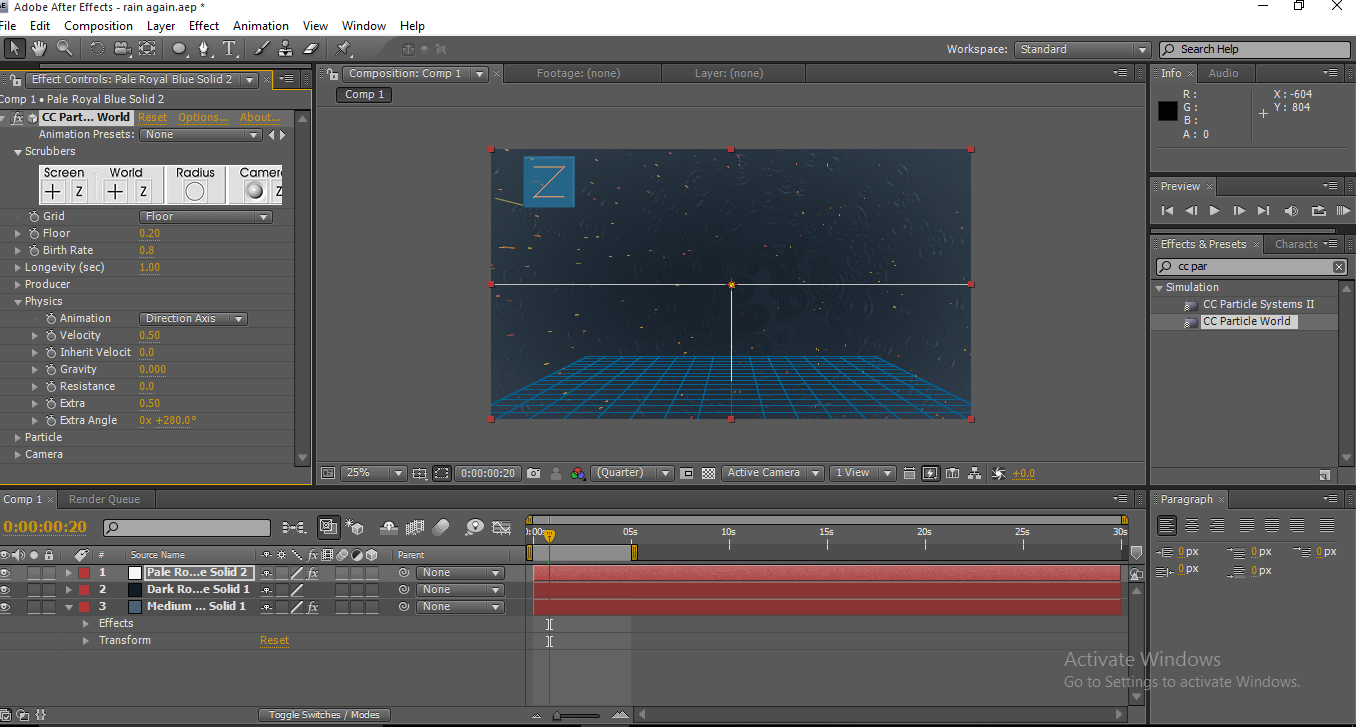
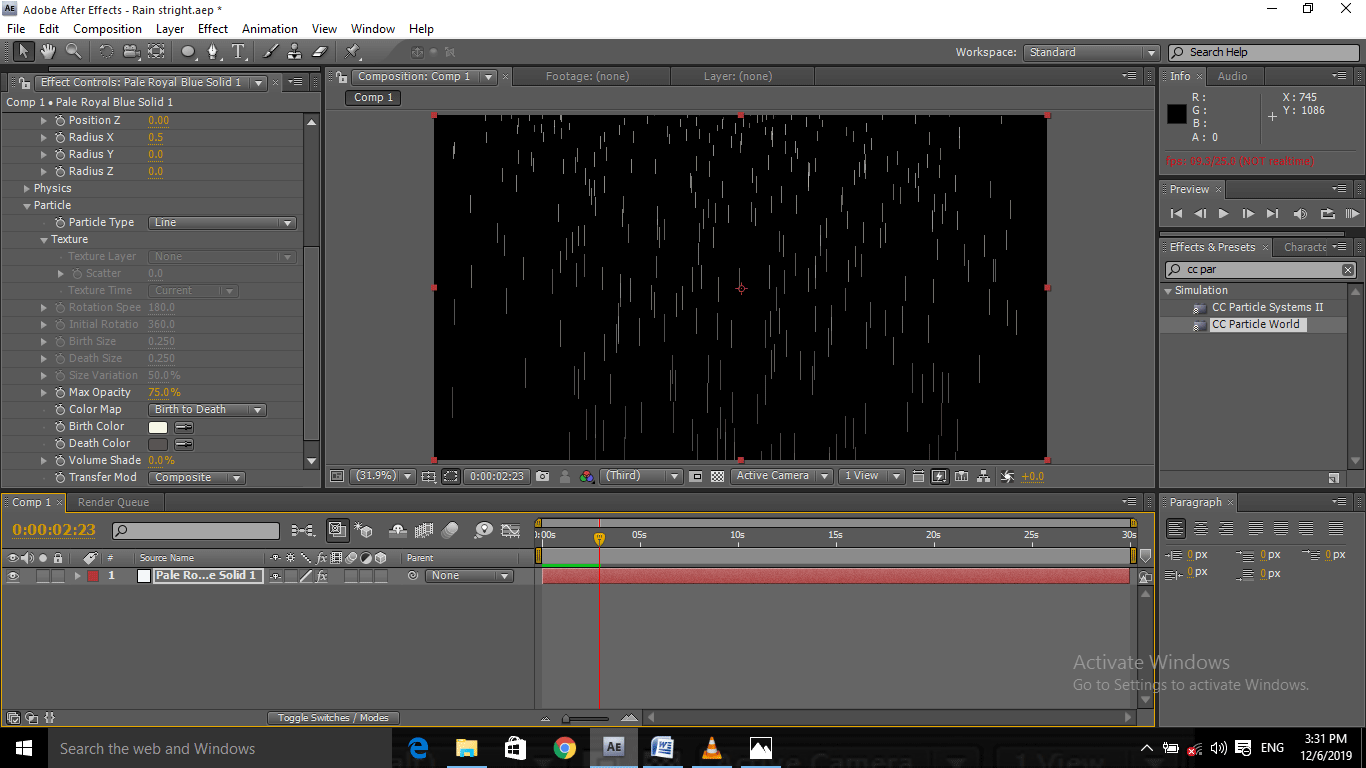
Step 19: Now, let’s expand the values of particles. Particle type line, Max opacity 100, Birth and death colors will be white.

Rain in After Effects - Values of Particles

By expanding the particles, we can change the size and opacity of the raindrops, mainly the color of the raindrops.

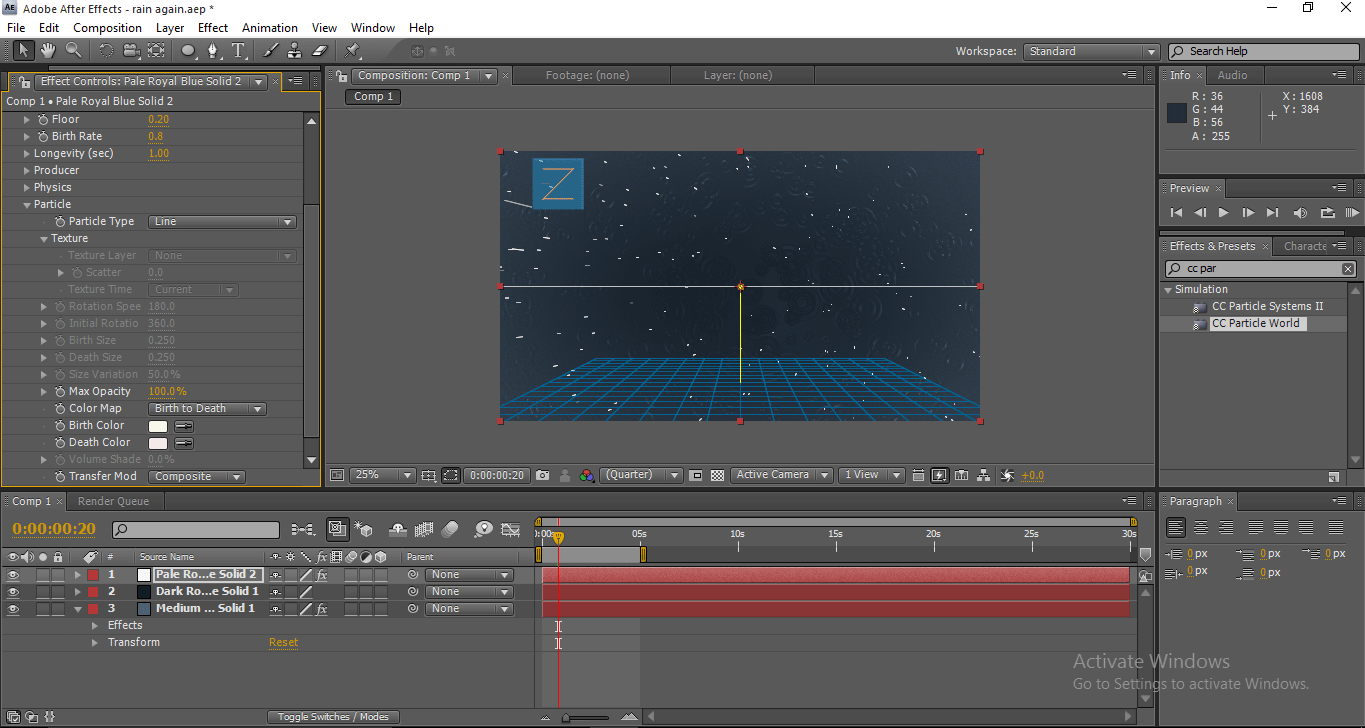
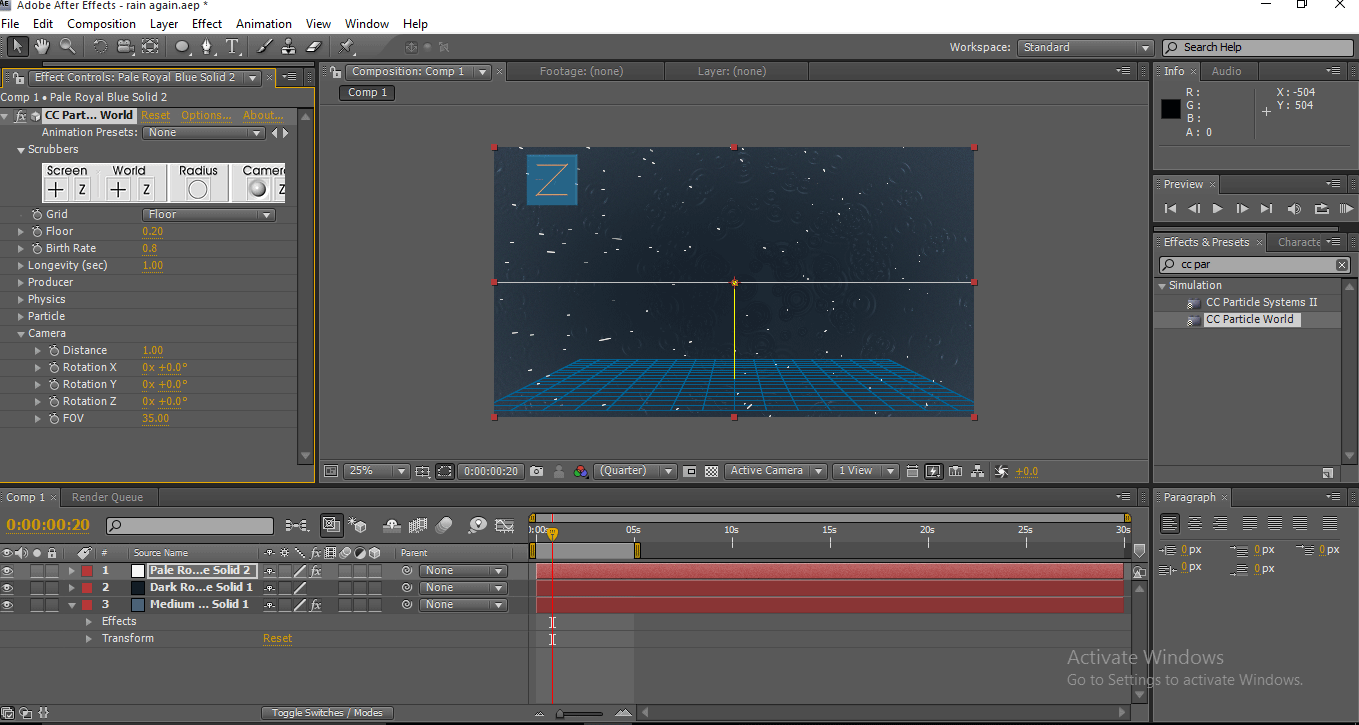
Step 20: Now expand Extra or camera values, Change FOV to 35.

Rain in After Effects - Camera Values

Step 21: Now add a camera layer.

Rain in After Effects - Camera Layer

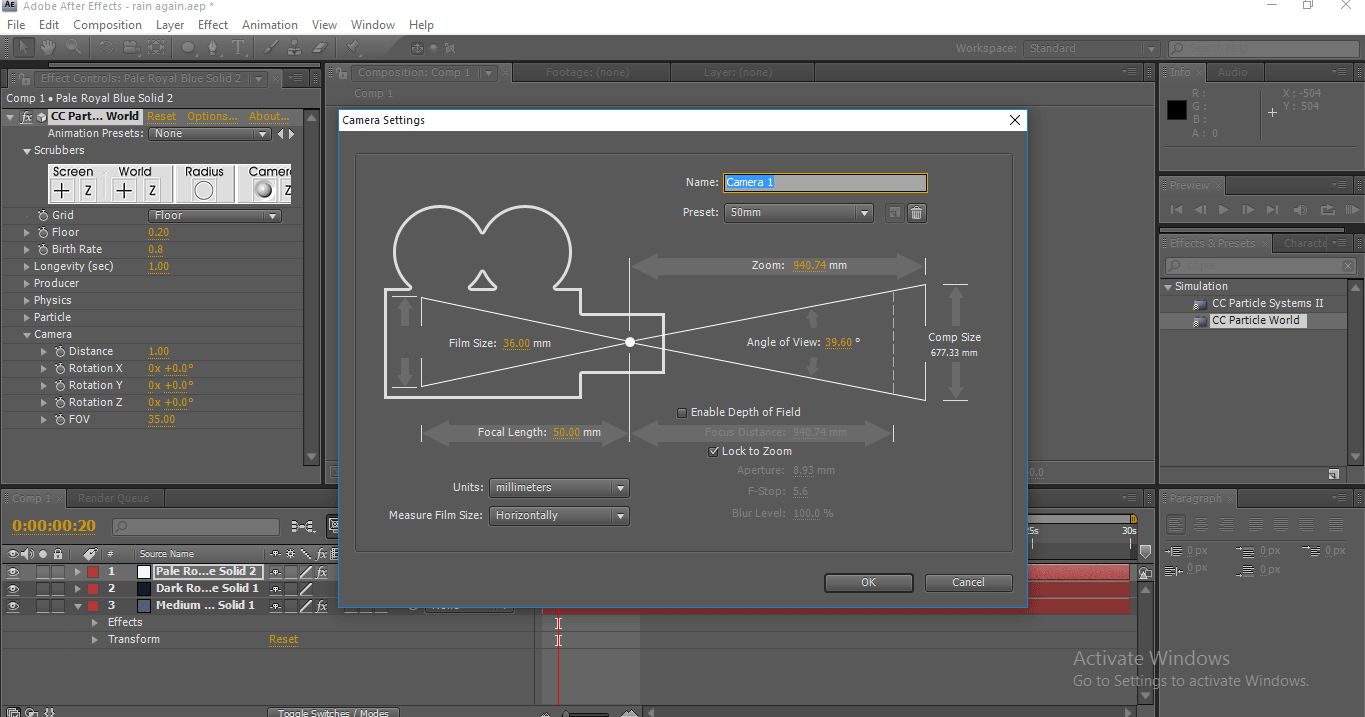
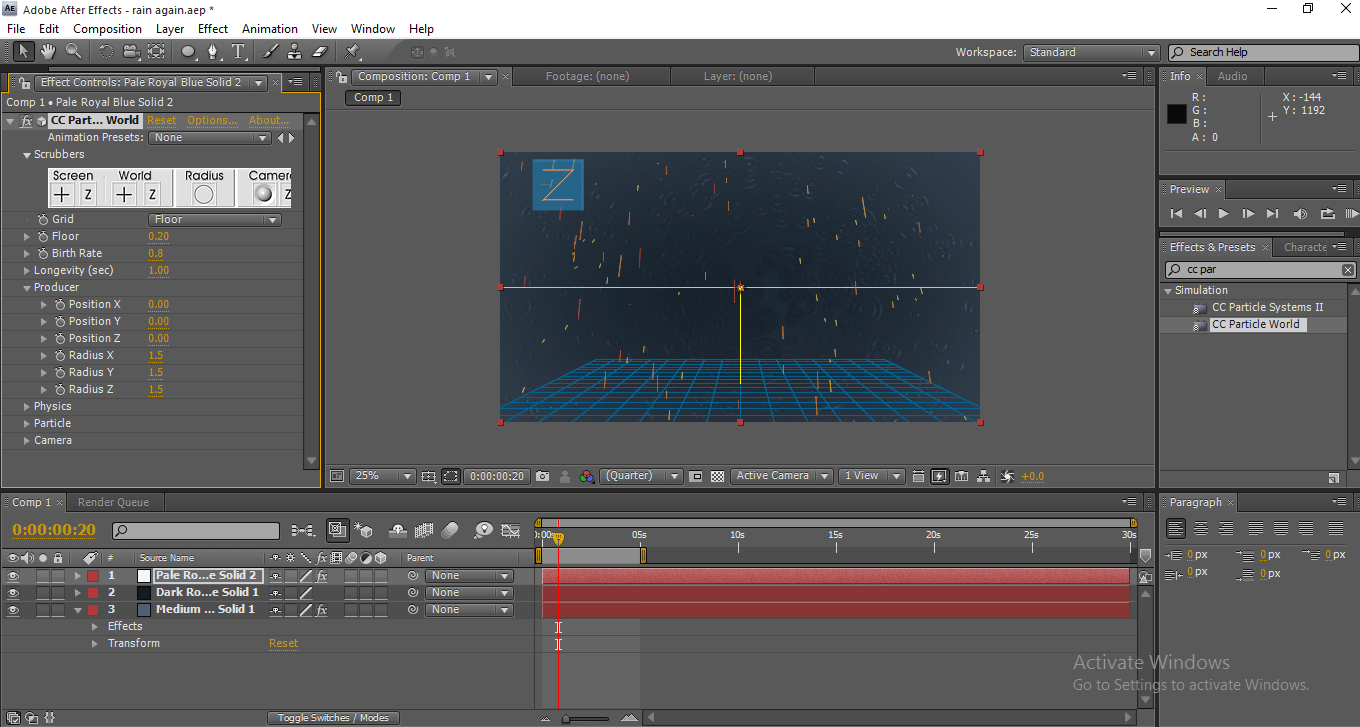
Step 22: Go to the settings configure window and expand the transform values. Position to 798.0, 873.0, -1040.0.

Rain in After Effects - Transform Values

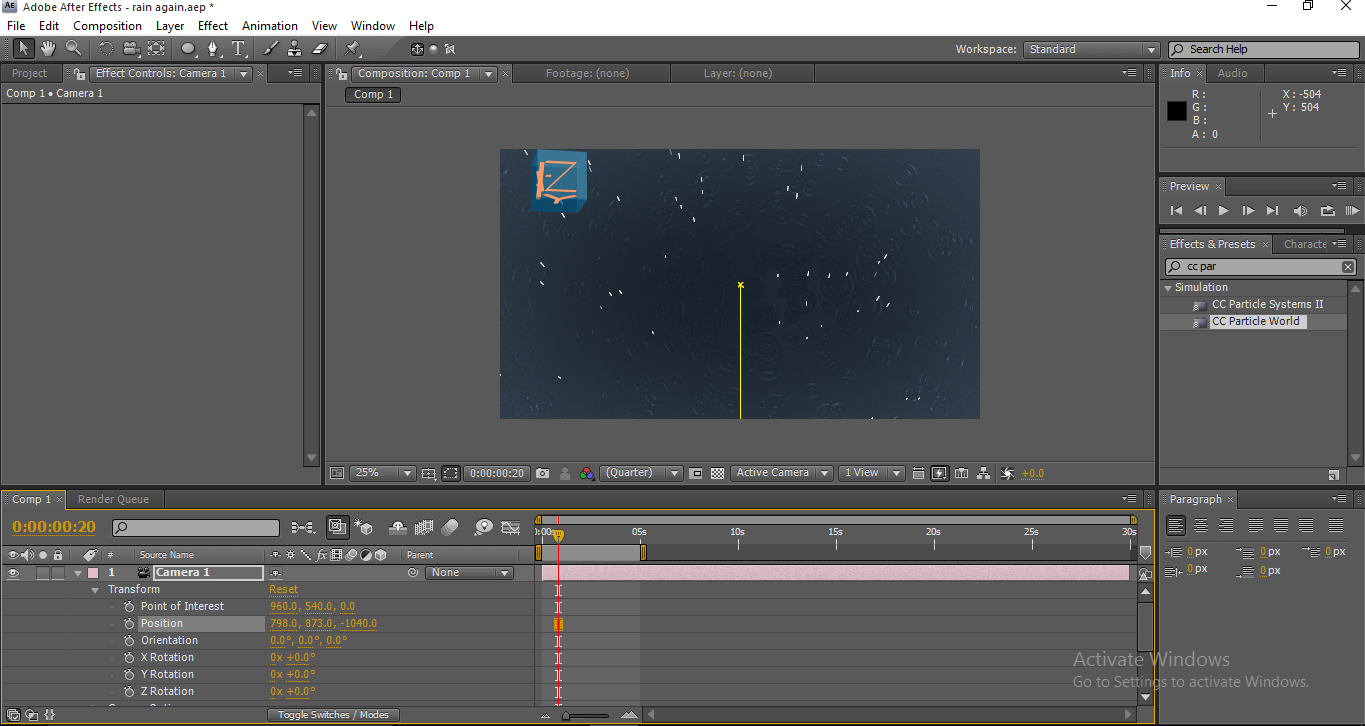
When we apply the values, we can see the raindrop went a bit upper.

Step 23: Let’s expand the camera values. Zoom 304.0 pixels, Focus distance 630.0 pixels, Aperture 7.9 pixels, Blur level 100%.

Rain in After Effects - Expand Camera Values

Step 24: Now, just render and see the rain falling.

Rain in After Effects - Rain Falling

Method 2 – Changing the Velocity

Step 1: Create a New Project.

Rain in After Effects - New Project

Step 2: Import a new solid layer.

Rain in After Effects - Import Solid Layer

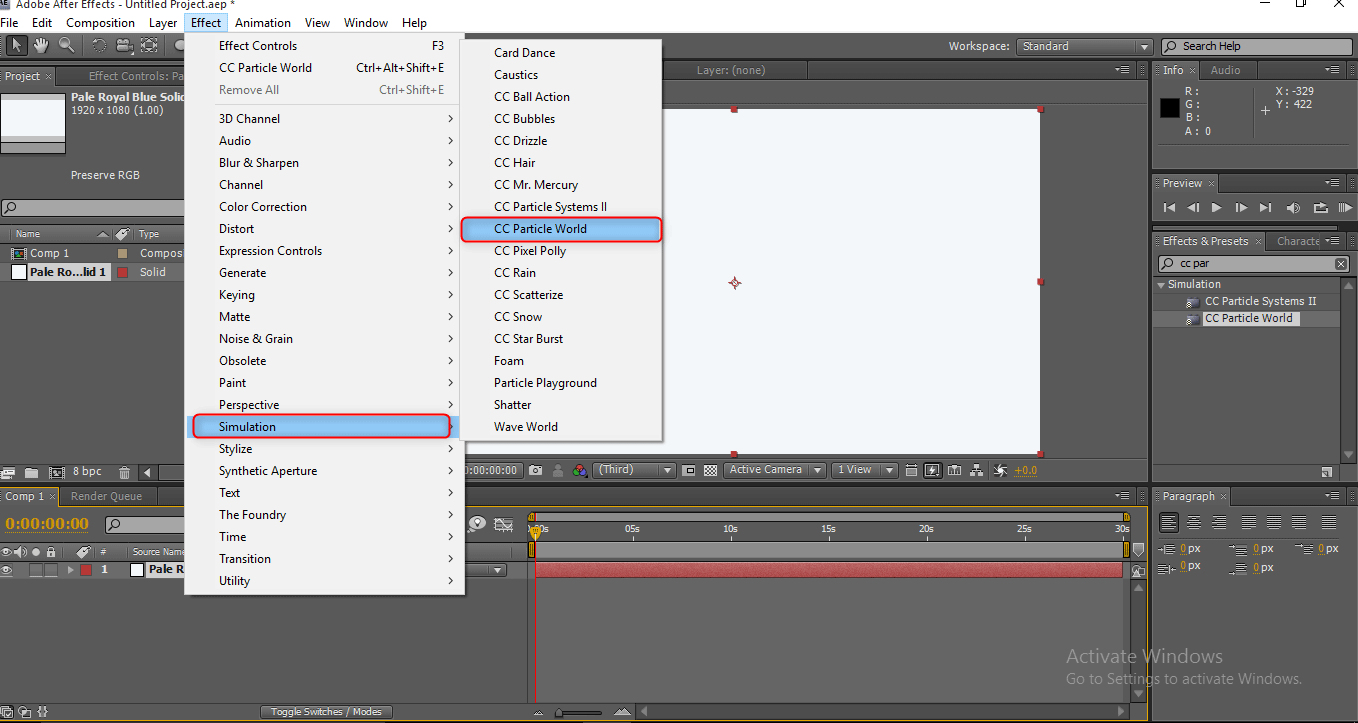
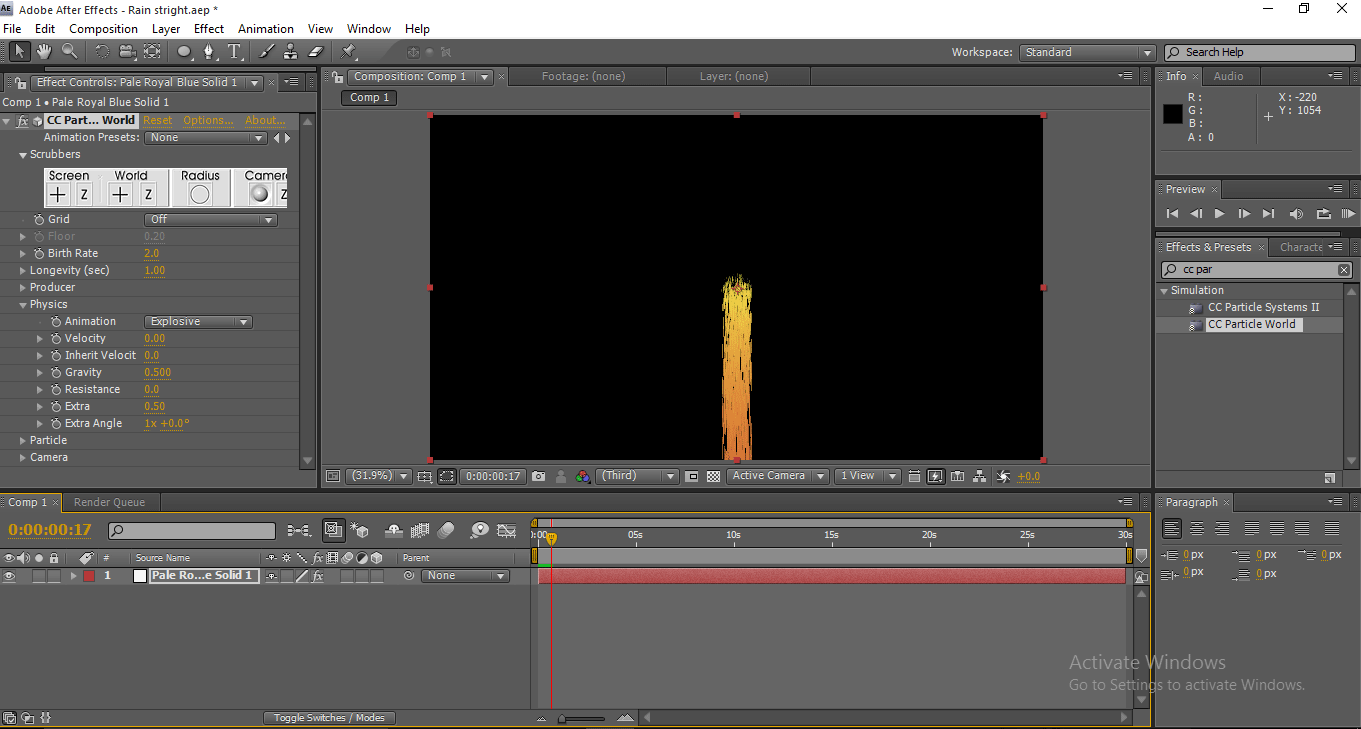
Step 3: Go to effect, simulation and select CC Particle World.

Rain in After Effects - Particles World

Step 4: Disable the grip option.

Rain in After Effects- Disable Grip Option

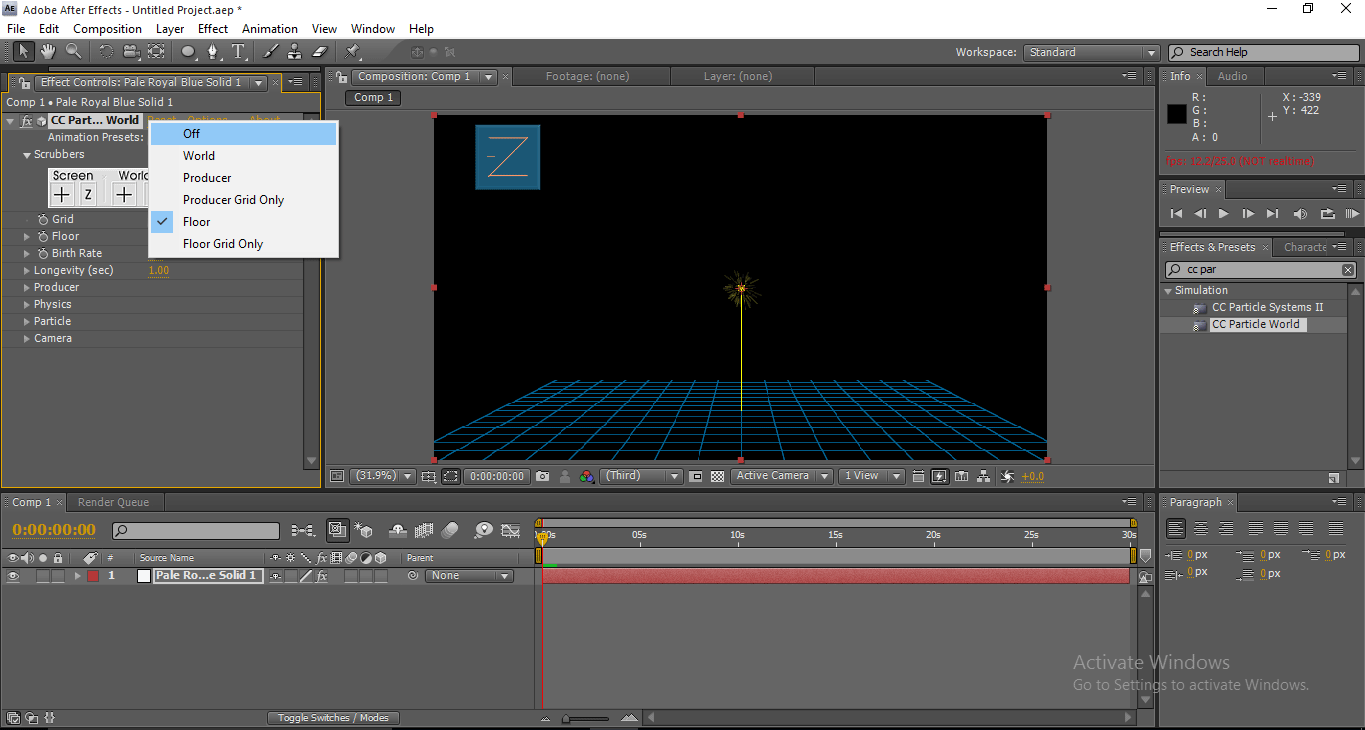
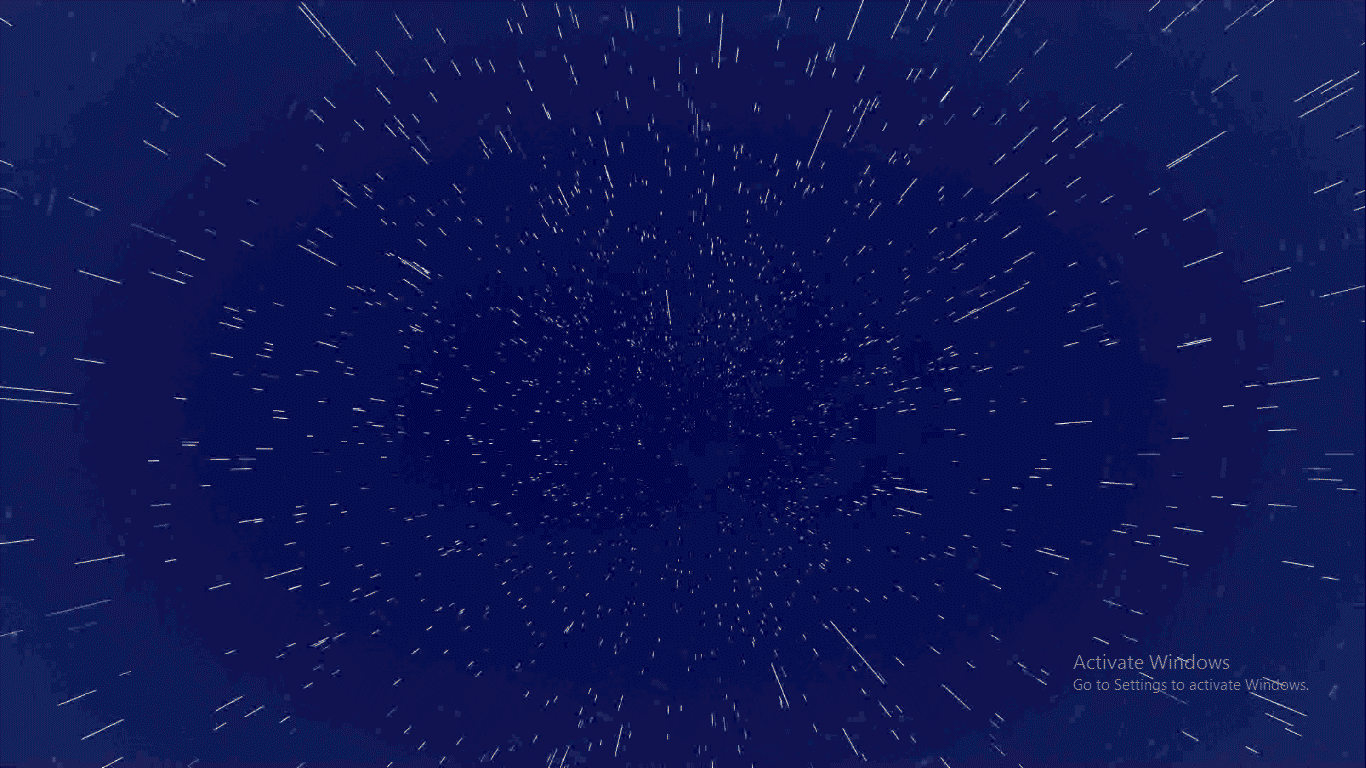
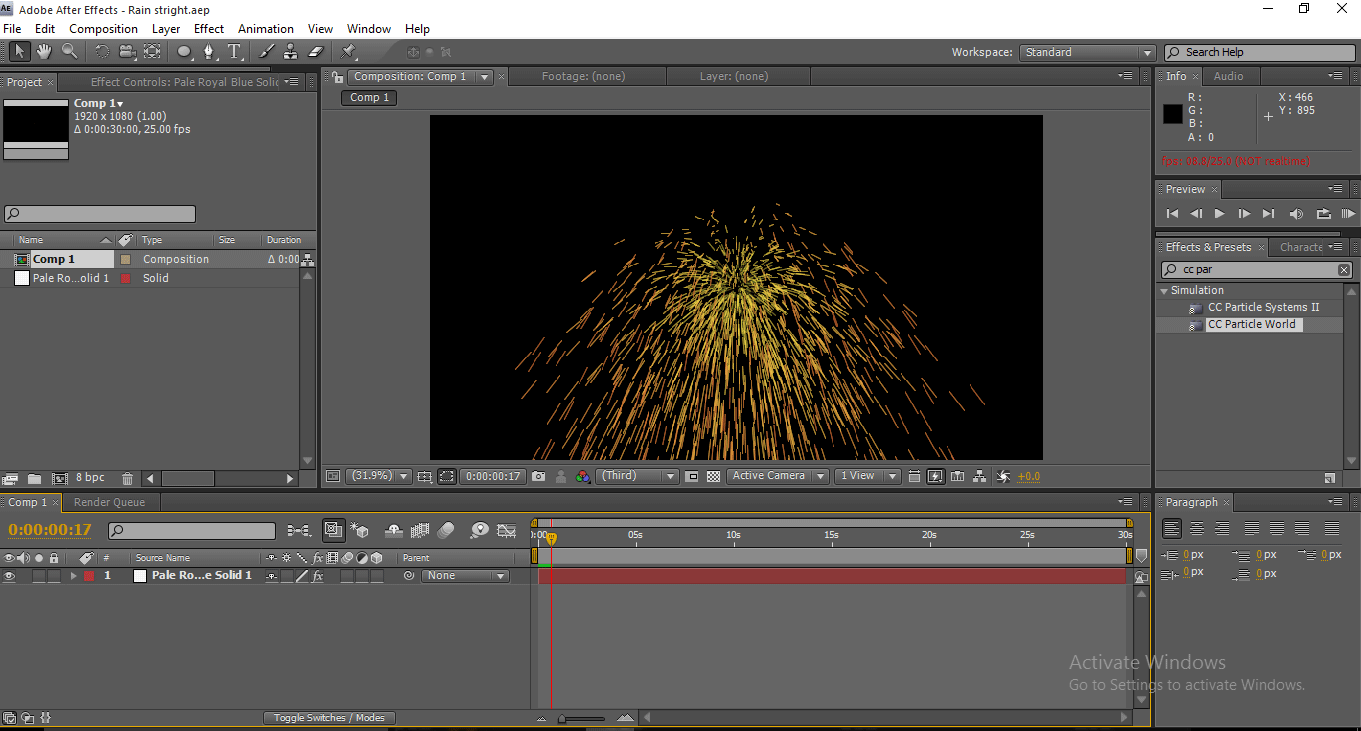
Step 5: If we start to render, we can see that the particles will fly like flairs; now, we are going to make these particulars as raindrops.

Rendering Image

Step 6: Expand the values of physic. Change the velocity value to 0.

Rain in After Effects - Values of Physics

When we change the velocity to 0, we can find that the flairs in a single line and fall in the same place.

Step 7: Now, let’s expand the values of the producer. Change the radius of X to 0.5.

Values of Producer

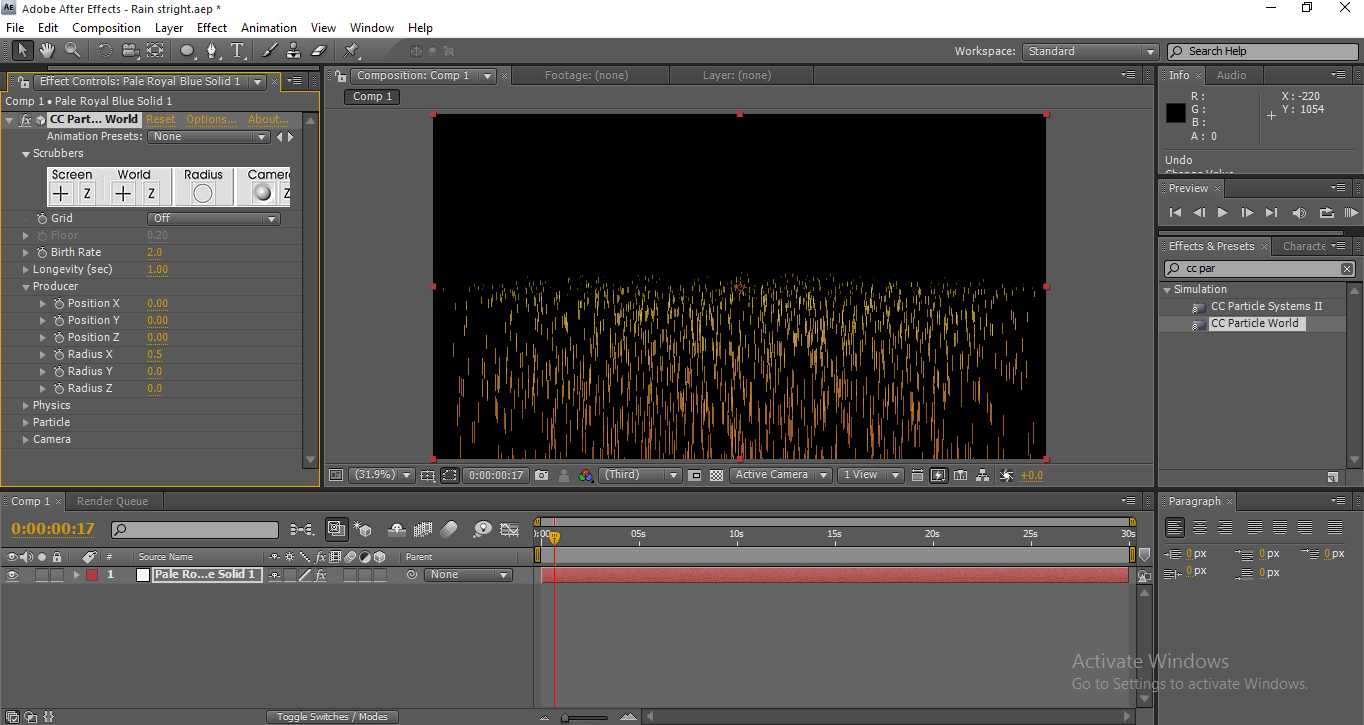
When we change the value of X radius, we can find that the particles expand the size.

Step 8: Change the Y position to – 0.30.

Change Y Position

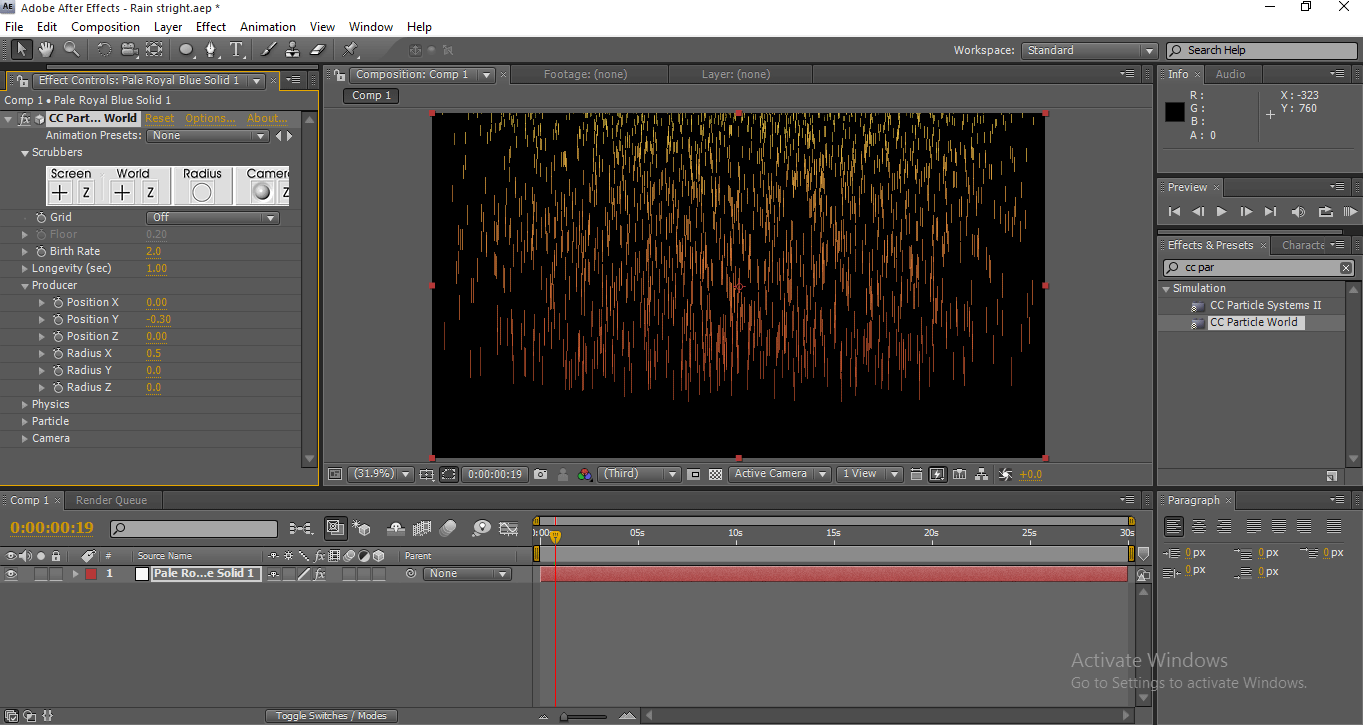
When we expand the position of the Y-axis, the particles will expand to up; when we change radius, it will expand horizontally, and when we change the position values, it will expand vertically; when we render, it will fall like rain.

Step 9: The particulars look too think and more, so we need to make it a little natural. Change the longevity to 1.10, birth rate to 0.3

Change Longevity

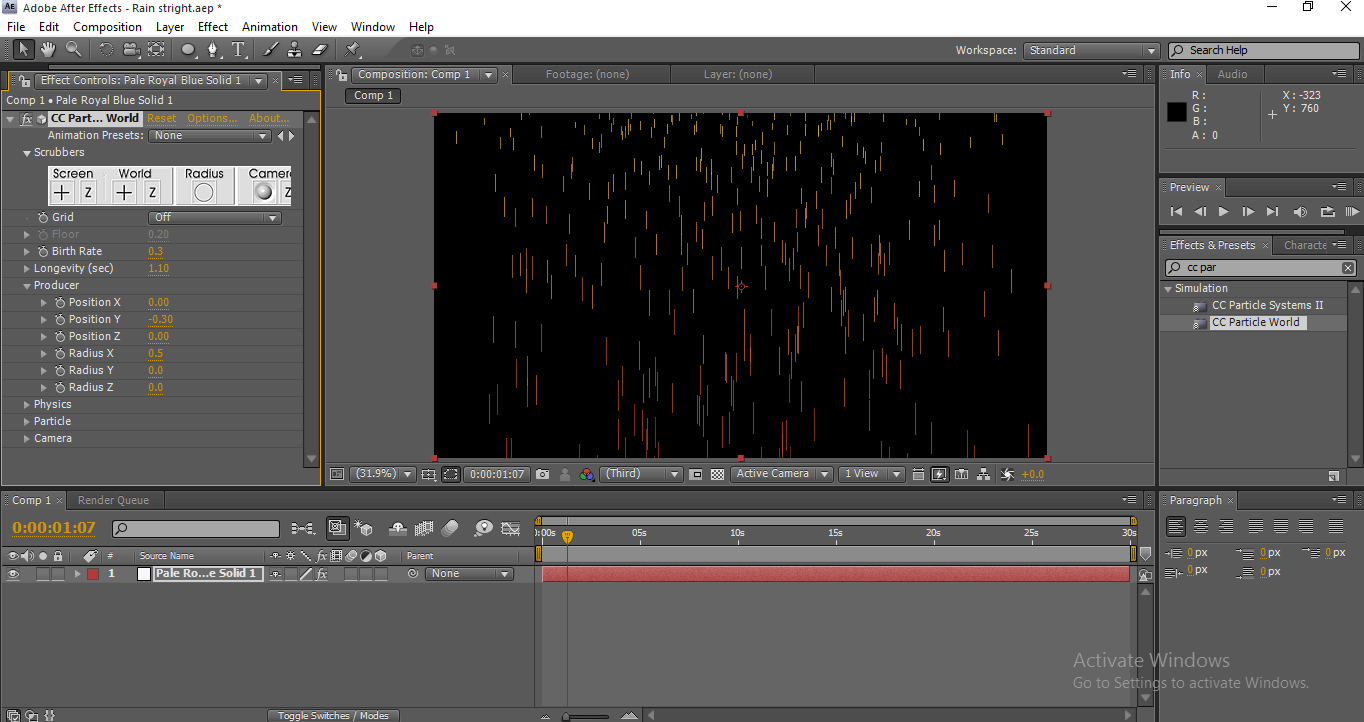
Now find the difference after changing the values of birth rate; now it looks like rain somewhat.

Step 10: It was falling like rain, but the color does not like water so, now we need to change the color of the particles. We need to expand the value of the particle. Change the birth color to white and the death color to grey.

Change Birth Color

Birth color indicate starting color, and death color indicate the end color; when it starts, it will start with white, and when it is dropping down, we need to low the color by that we will get a good natural feel. If we render in this position, we can get the rain falling effects, before method we saw the rain falling from up to down but in this process, we make to rain in plain.

Method 3 – Adding Effects

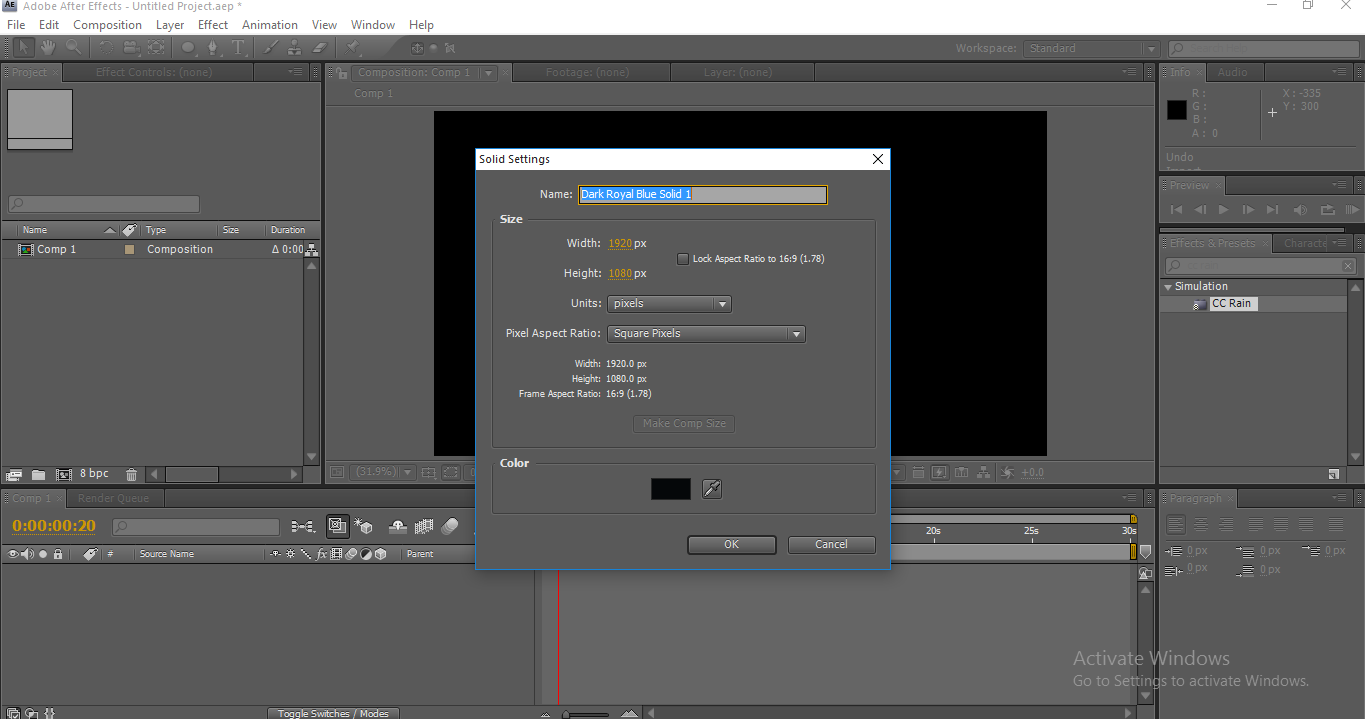
Step 1: Import a new solid layer; the solid layer needs to be a dark color like black.

Solid Setting

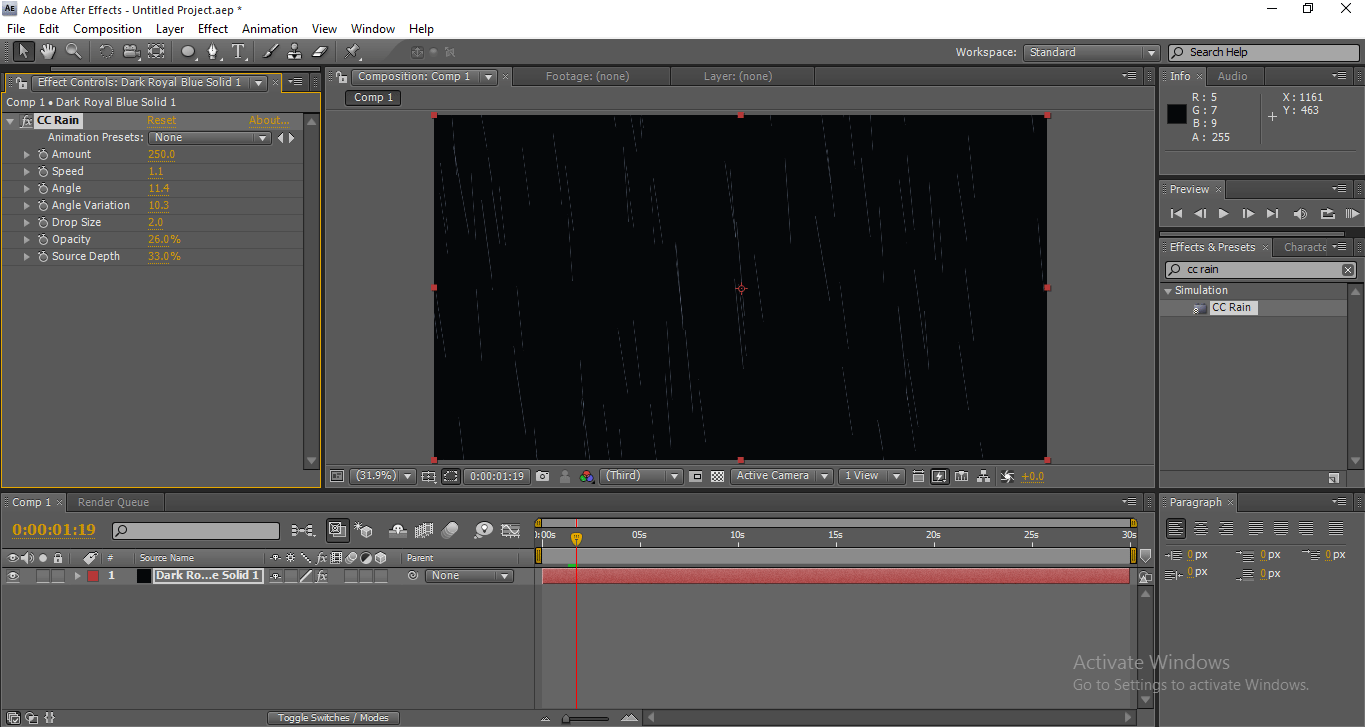
Step 2: Select CC rain from Effects and presets and apply them to the solid layer.

Applying Effects - Solid Layers

Once we apply CC Rain to the solid layer automatically, it starts raining; it’s a too basic method; if we need to make it more effective, we need to adjust the values of the cc rain particles.

Adjust the Values

Conclusion

Here you learned about creating rain in after effects; we learn Methods for creating rain, the basic method to create rain by adding simple effects, how to create a rain effect, how to create rainfall from up with the help of the camera. I hope we had an interesting topic.

Recommended Articles

This is a guide to Rain in After Effects. Here we discuss a learned Method of creating rain, The basic method to create rain by adding simple effects. You may also look at the following article to learn more –

  1. Applying Motion Blur in After Effects
  2. Slow Motion in After Effects
  3. Steps to Create Text in After Effects
  4. How Can We Use Blur in After Effects?
  5. Complete Guide to Glitch Effect in After Effects
  6. How to Create and Work Composition in After Effects?
  7. Guide to After Effects Transitions
Popular Course in this category
After Effects Training (3 Courses, 3+ Projects)
  3 Online Courses |  3 Hands-on Projects |  25+ Hours |  Verifiable Certificate of Completion
4.5
Price

View Course

Related Courses

Adobe Premiere Pro Tutorial (4 Courses, 7+ Projects)4.9
All in One Design Bundle (280+ Courses, 100+ projects)4.8
1 Shares
Share
Tweet
Share
Primary Sidebar
Footer
About Us
  • Blog
  • Who is EDUCBA?
  • Sign Up
  • Live Classes
  • Corporate Training
  • Certificate from Top Institutions
  • Contact Us
  • Verifiable Certificate
  • Reviews
  • Terms and Conditions
  • Privacy Policy
  •  
Apps
  • iPhone & iPad
  • Android
Resources
  • Free Courses
  • Photoshop Tutorial
  • 3ds Max Tutorial
  • All Tutorials
Certification Courses
  • All Courses
  • Design Course - All in One Bundle
  • Photoshop Course
  • Maya Course
  • Unreal Engine Course
  • Unity Course
  • DaVinci Resolve Course
  • Pro Tools Course

ISO 10004:2018 & ISO 9001:2015 Certified

© 2022 - EDUCBA. ALL RIGHTS RESERVED. THE CERTIFICATION NAMES ARE THE TRADEMARKS OF THEIR RESPECTIVE OWNERS.

EDUCBA
Free Design Course

Banner Creation, Object Selection, Sky Replacement, Advance Filters & others

*Please provide your correct email id. Login details for this Free course will be emailed to you

By signing up, you agree to our Terms of Use and Privacy Policy.

EDUCBA Login

Forgot Password?

By signing up, you agree to our Terms of Use and Privacy Policy.

EDUCBA
Free Design Course

3D animation, modelling, simulation, game development & others

*Please provide your correct email id. Login details for this Free course will be emailed to you

By signing up, you agree to our Terms of Use and Privacy Policy.

EDUCBA

*Please provide your correct email id. Login details for this Free course will be emailed to you

By signing up, you agree to our Terms of Use and Privacy Policy.

Let’s Get Started

By signing up, you agree to our Terms of Use and Privacy Policy.

This website or its third-party tools use cookies, which are necessary to its functioning and required to achieve the purposes illustrated in the cookie policy. By closing this banner, scrolling this page, clicking a link or continuing to browse otherwise, you agree to our Privacy Policy

Loading . . .
Quiz
Question:

Answer:

Quiz Result
Total QuestionsCorrect AnswersWrong AnswersPercentage

Explore 1000+ varieties of Mock tests View more