Updated August 28, 2023

Introduction to After Effects Transitions
Transitions in After Effect refers to a combination of effects that manipulate images and video footage by using a different type of technique for making a professional series of footage or images. Transitions also give you a wide range of manipulation techniques by using your own idea. Here we will look at the Transitions option in After Effect software and learn how to use it on any image or video footage.
How to Make Transition in After Effect?
Here we will learn the Transitions option of After Effect software by an example in some simple steps. So let us start our learning in this context.
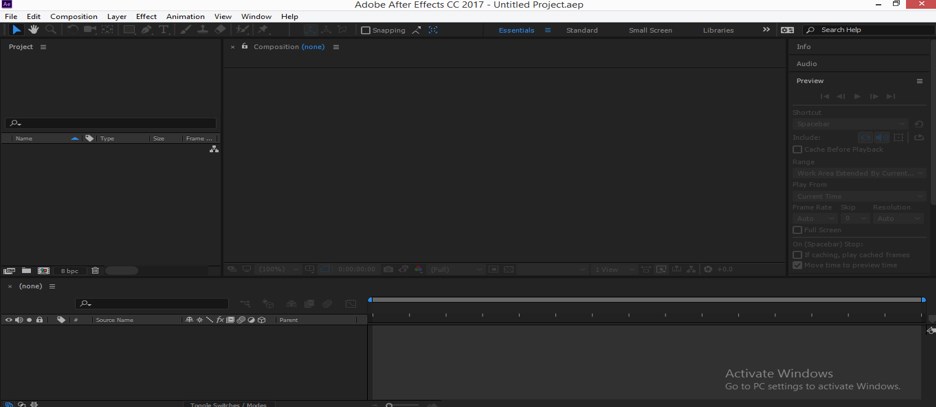
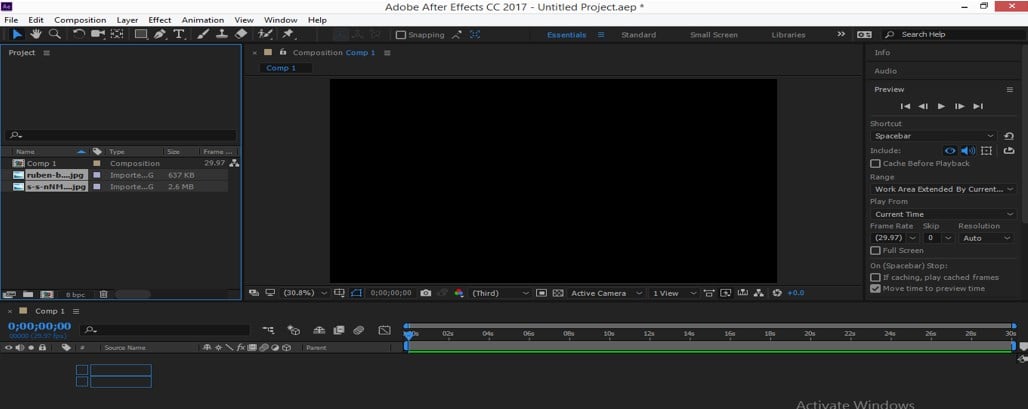
Step 1: Before starting, let us have an introduction to the User Interface of this software so that we can easily understand the different sections of this software throughout this article. At the top, we have two ribbons that are Menu bar and Tool panel for making some adjustment to this software; at the left side, we have the Project section, which shows a number of components of any project, at the right corner, we have some other parameters of this software such as Preview tab, Audio tab, Effects & Presets tab and many others, at the bottom of the working screen we have Timeline section for adjusting parameters of animation or transition.
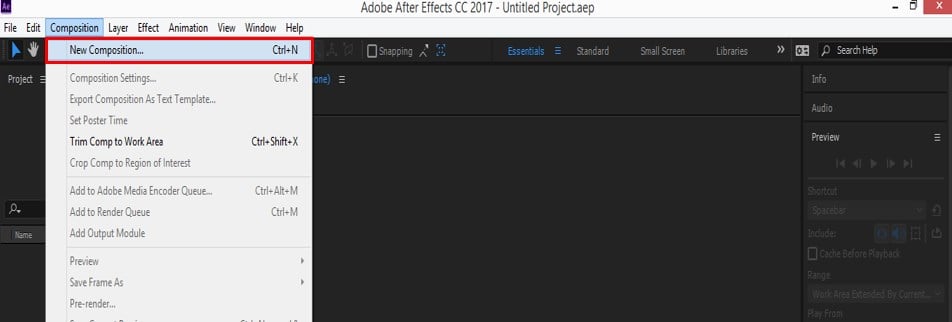
Step 2: Now take New Composition for starting our learning. We have two options for taking new composition: first is to go to the Menu bar and click on the Composition menu. A drop-down list will open; click on the ‘New Composition’ option of this list.
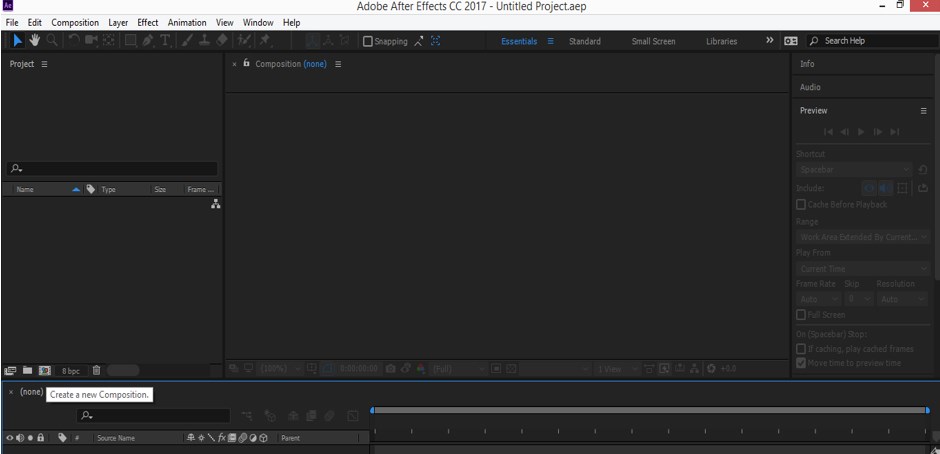
Step 3: The second one will be the Project panel, and click on the ‘New Composition’ icon, which is at the bottom end of the Project panel.
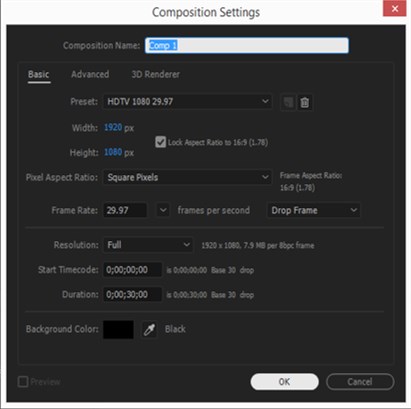
Step 4: A Composition setting box will open. Make the setting of the required composition according to you and click on the Ok button of this box for applying the settings.
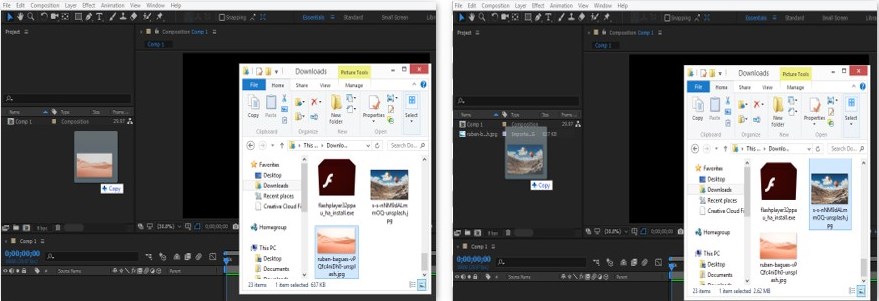
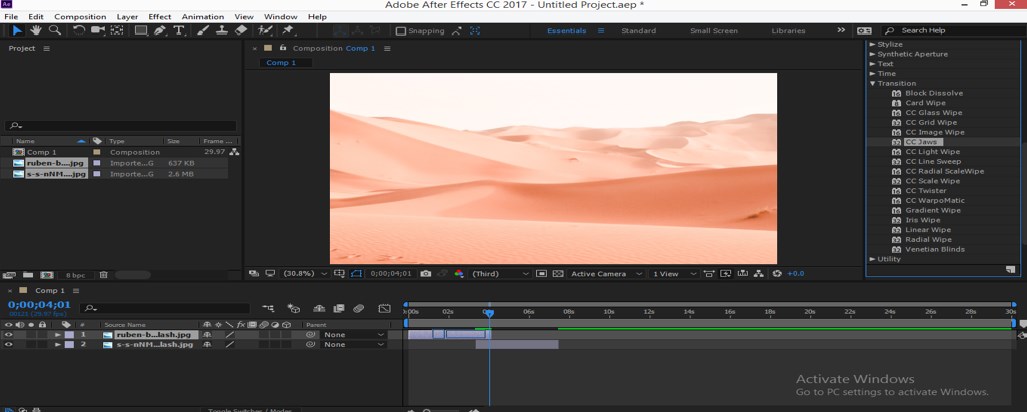
Step 5: Now, take your desired footages or images for applying the Transition option on them. I will open that folder where I have saved my images, pick them from that folder, & drop them into the Project panel of After Effect software one by one.
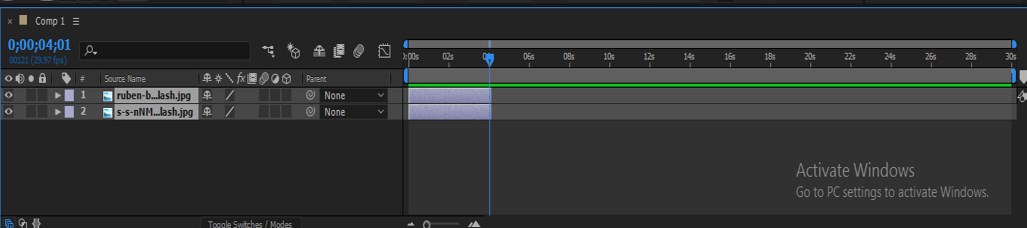
Step 6: Now select both the images and take them into the Timelines section by dragging them with the mouse button.
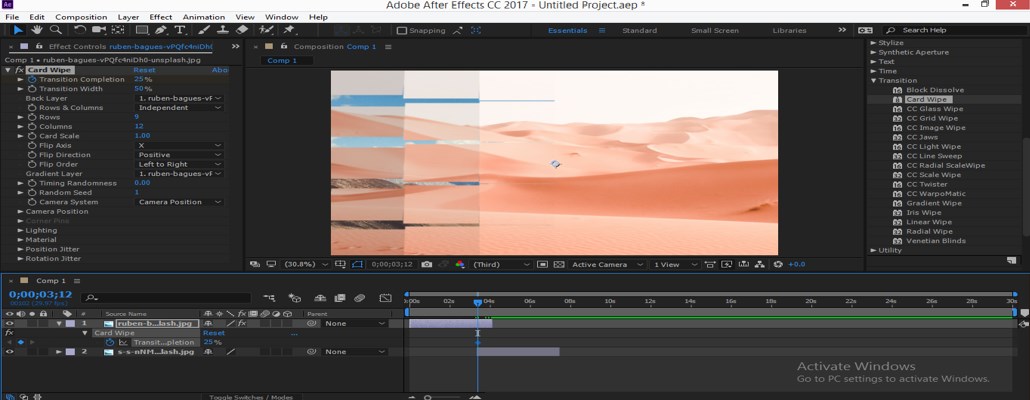
Step 7: Now, place the play head at 4 sec in the Timeline frame area and adjust the playing scale of both images at 4 sec.
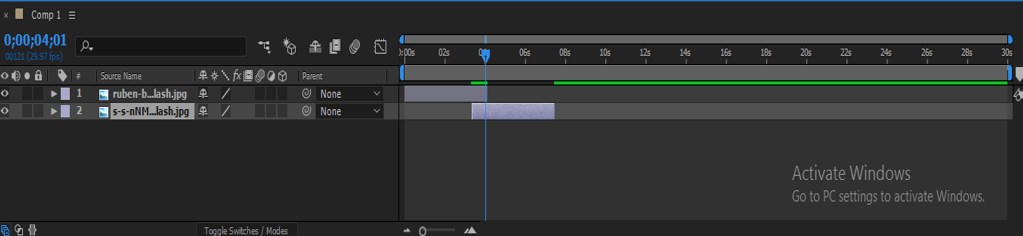
Step 8: Now, place the play scale of the second image as I did. I am doing this for showing the variation of transition when it switches from one image to another image.
Step 9: In the Effects & Presets section, we have some presets of effects. Transition is also there as a pre-designed format of transition.
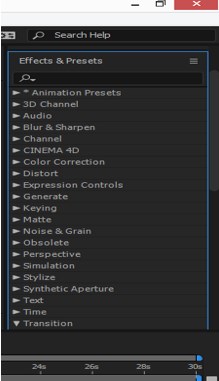
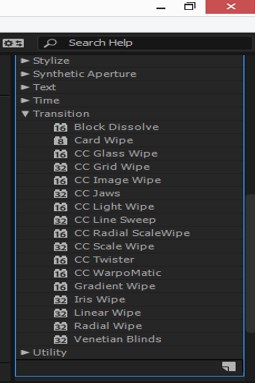
Step 10: Click on the small arrow button of the Transition option. A list of presets of Transition will be open. You can use any one of the preset of Transition from this list.
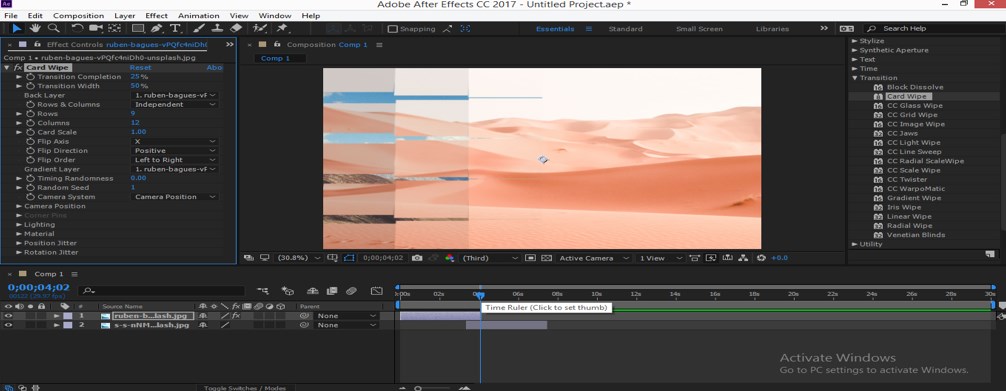
Step 11: For applying presets of Transition from this list, you just have to pick any one of them and then drop it on the layer of that image on which you want to apply it.
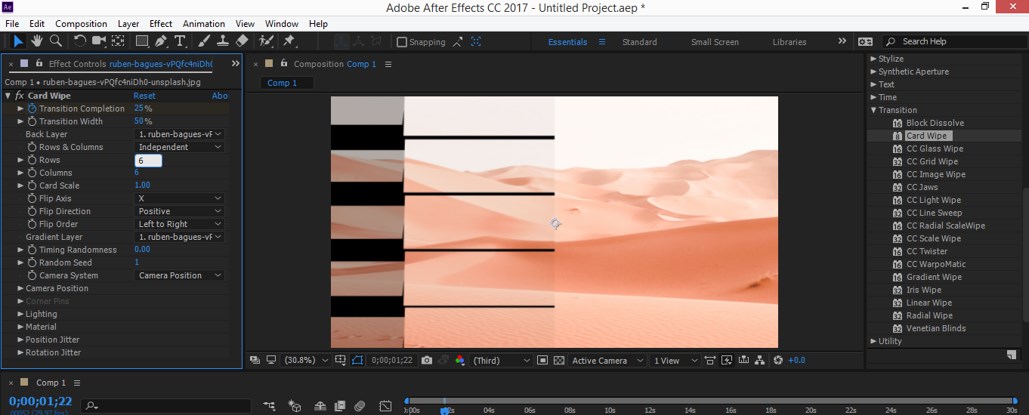
Step 12: When you apply these presets, their parameters will be open in the Project panel. Now when you play the transition, then the pre-design transition will be played like this.
Step 13: You can make changes in the parameters of the presets of transition. For making changes click on the clock icon of the parameter of the property of applied presets and then come into the Timeline section, press the U button from keyboard to open keyframe.
Step 14: Now, place play head a 4 sec and add key by click on the key icon at the left corner of the layer of this image, then make changes in the value of a parameter of this property.
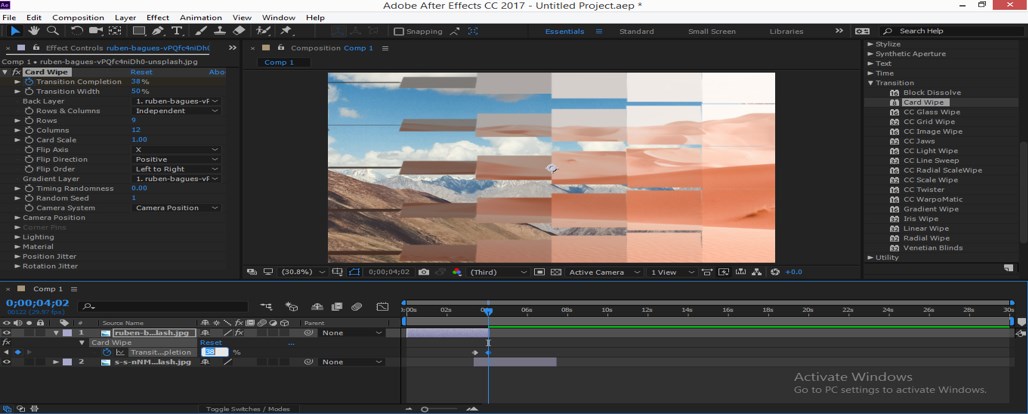
Step 15: Now, when you play this transition by the Preview tab of this software (or you can press the space bar of the keyboard to play the transition), then it will look like this.
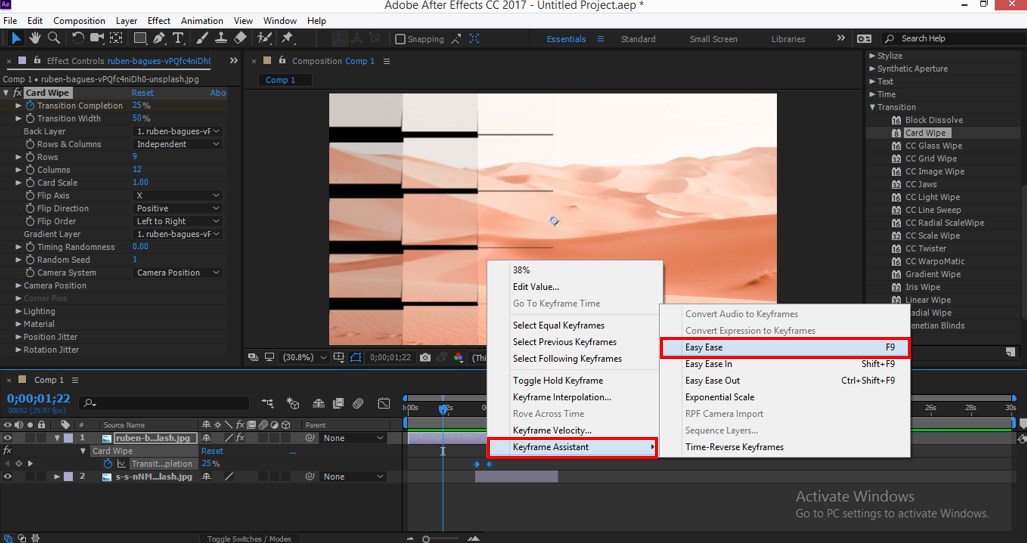
Step 16: Now select both keys and make right-click. A drop-down list will be open, go to the ‘Key Frame Assistant’ option of this list and click on the ‘Easy Ease’ option of the new drop-down list for the smooth performance of your transition or after selecting both keys, you can press F9 button from the keyboard for making ‘Easy Ease’ key.
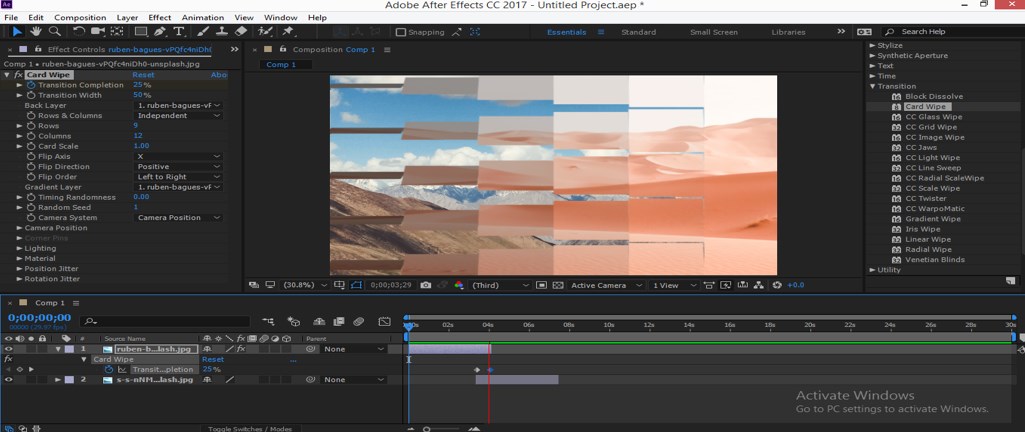
Step 17: You can increase or decrease the number of Rows or Columns of this transition for giving a new look to this transition. You can also make changes in other parameters of this transition according to you.
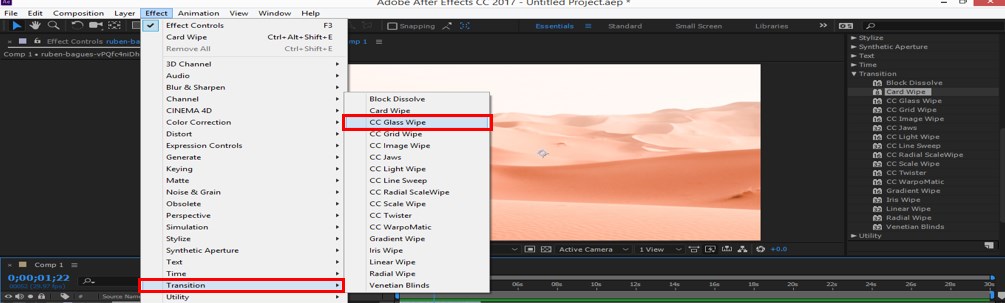
Step 18: You can make your own Transition in After Effect by using different Transition options. For making your own Transition, go to the Menu bar and click on Effect Menu. A drop-down list will be open; go to the Transition option. When you go to the Transition option list of different type of effect of transition will be open.
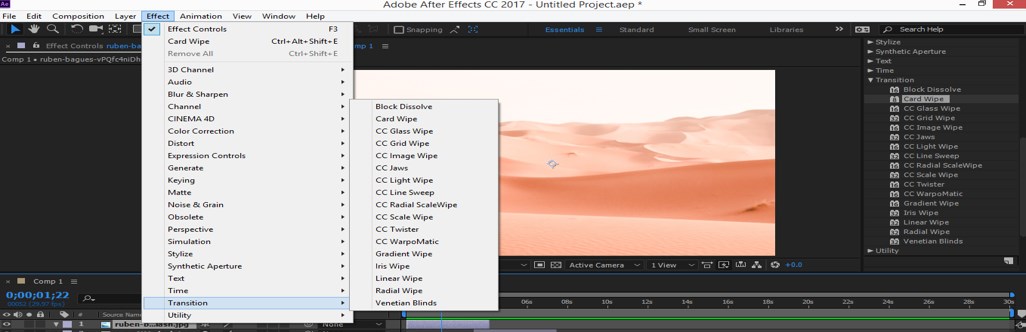
Step 19: Choose any one of the effects of this list.
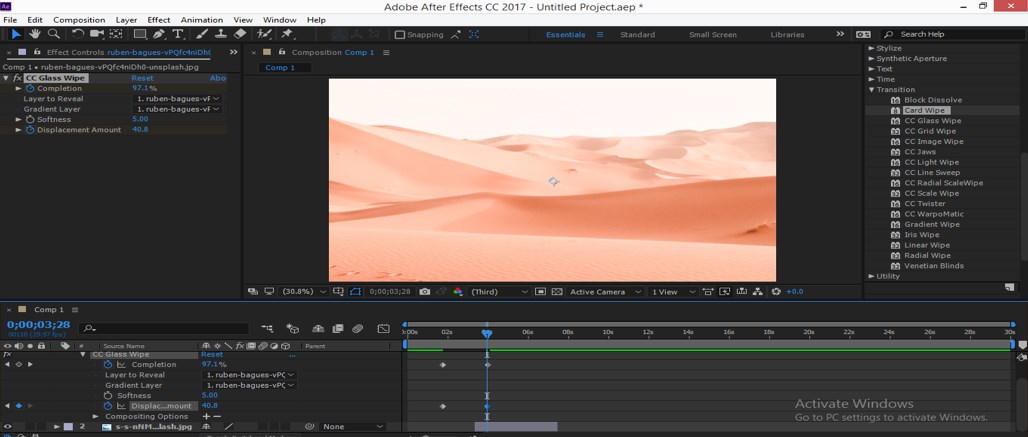
Step 20: Now click on the clock icon of the Completion property of this effect; a key will be added in the keyframe.
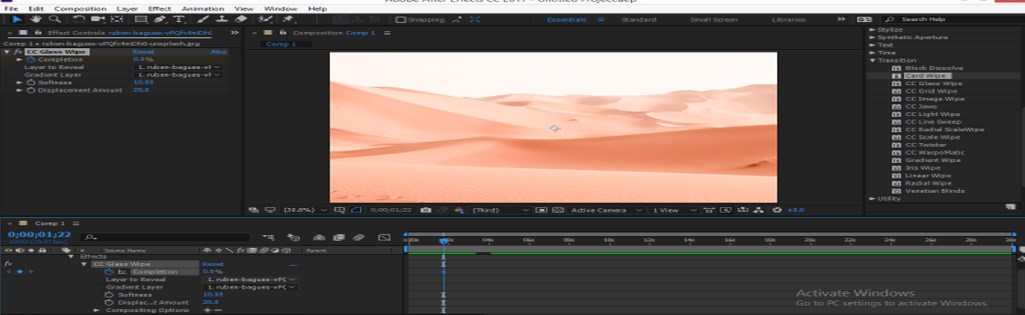
Step 21: Now, place the play head at 4 sec and add a new key in it by click on a key icon of this image. Now make the value of Completion up to 100%.

Step 22: You can animate other properties of this effect in the same way according to you.
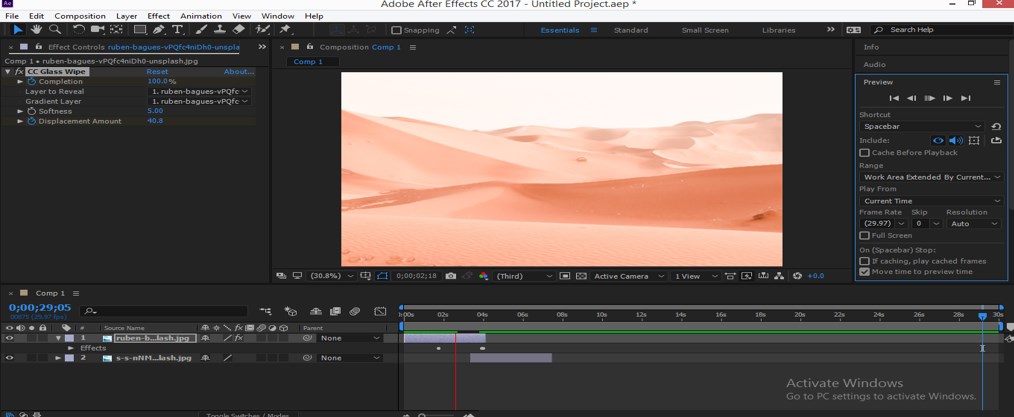
Step 23: Now, when you play the transition, it will look like a glassy effect on the image.
- In this way, you can make Transition in Adobe After Effect by using a different type of effect of transition option. You can use a combination of effects for getting the best result in the transition of any image or footage.
Conclusion
Now, after this article, you can easily understand ‘What is Transition in After Effect?’ and how you can use its parameter for making a highly professional Transition of images or footage. You can use your own idea for making Transition by using exciting features of this option.
Recommended Articles
This is a guide to After Effects Transitions. Here we discuss an introduction and a simple example to creating a transition in After Effect in a step by step manner. You can also go through our other related articles to learn more –
