Updated August 21, 2023
Excel Print (Table of Contents)
Introduction to Print in Excel
Print in Excel is used to print out the data therein spreadsheet but to the width allowed for selected and available pages in the printer setting. We can print the current sheet, active sheet, entire workbook, selected table, or customized worksheets. When we are about to print, we should have all the necessary columns under the print preview section. We can even give the border using print gridlines without bordering the worksheet’s data.
How to Set Printing Properties in Excel? Print Command (Keyboard shortcut):
Press Ctrl+P and click the Print button (or Enter) to print the workbook.
Set printing properties in Excel is very easy. Let us understand this by looking at the following examples.
Example #1
How to Print an entire workbook with N number of copies in MS Excel
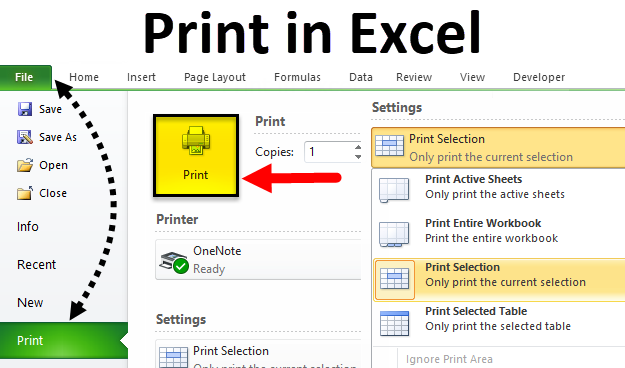
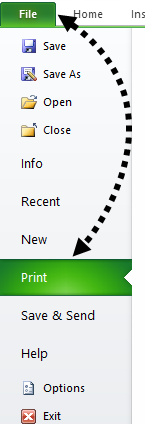
Step 1: Go to Excel Sheet which a user wants to print. Open the File menu bar and click on print

Step 2: Now, the Print setting will open, then under the Setting section, select ‘Print Entire workbook’

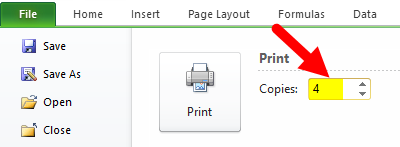
Step 3: Now click on the number of copies needed by the user
Step 4: To print the workbook, click on the print button.
Summary: As the user has given instructions in the print command, it will print the no of pages with an entire workbook.
Example #2
How to Print selected area workbook with the page orientation in MS Excel
Step 1: Go to Excel Sheet, which a user wants to print, and select the area that needs to be printed.
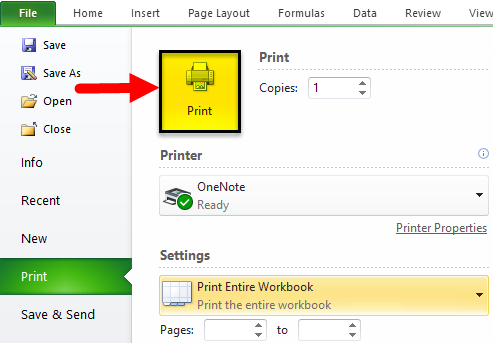
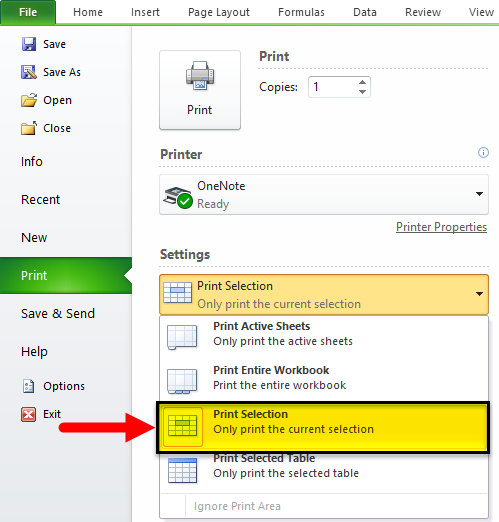
Step 2: Open the File menu bar and click on the Print tab.
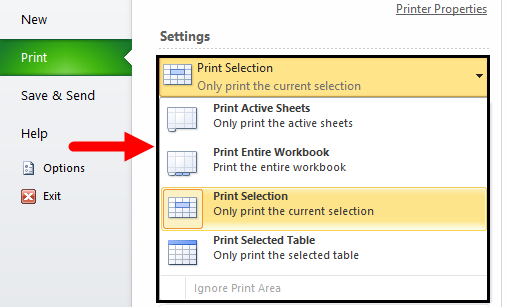
Step 3: Now, the Print setting will open, then under the Setting section, select ‘Print selection
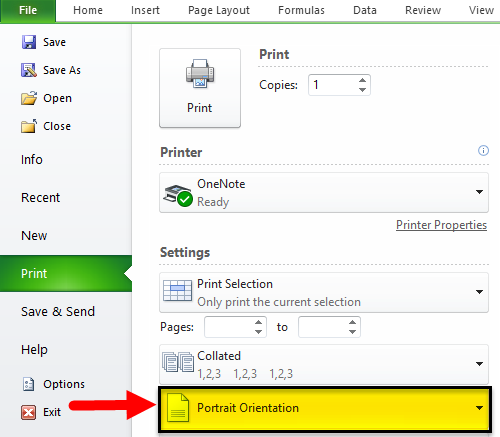
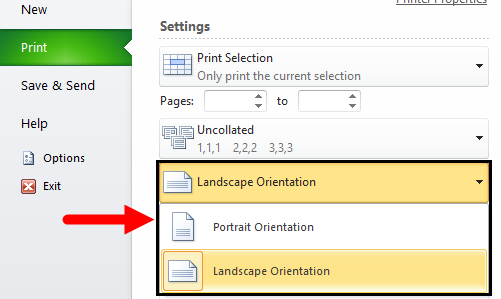
Step 4: Now click on the page’s orientation the user needs.
Step 5: Click the print button to print the workbook per the setting.
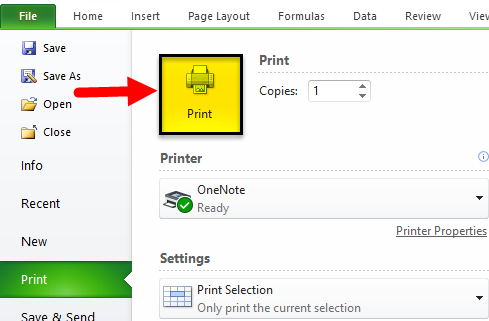
Summary: As per the instruction in the print command, it will print with the selected area only in landscape orientation.

Print Settings
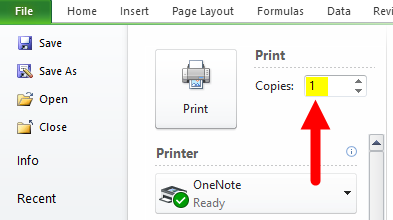
Multiple Copies: If a user wants to print more than one copy, he just needs to count how many copies he wants to print in the Copies section.
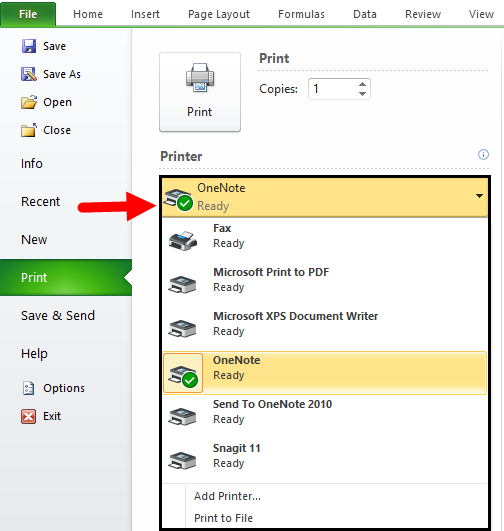
Select Printer: There are multiple options to save the workbook; as per the user’s need, he can select options in the added printer, save as PDF, OneNote, XPS document writer, send FAX or add any new printer.
Print selection: This option will print only the current selection in the print command.
Print Active Sheets: This option will print only the active sheet in the workbook.
Print Entire Workbook: This option will print all the workbook pages.
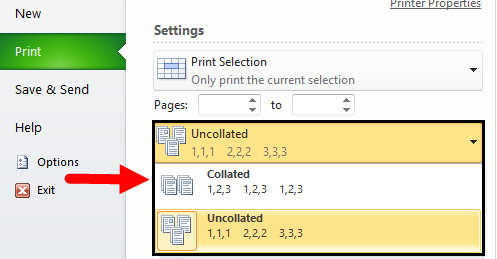
Collated: If a user’s workbook contains multiple pages, there is an option to switch between Collated and Uncollated for a print command.
For example, if the user wants to print 10 copies from a workbook, Collated prints the entire first copy and then the entire second copy.
Or if the user is selecting Uncollated, prints 10 copies of page 1, 10 copies of page 2, etc.
Orientation: A user can switch between Portrait Orientation (best when there are more rows but fewer columns on a page) and Landscape Orientation (best when there are more columns but fewer rows on a page).
Page Margins: If a user wants to adjust the page margins, he can do so by following the below steps.
Step 1 – Select one of the pre-defined margins (Normal, Wide, or Narrow) from the Margins drop-down list.
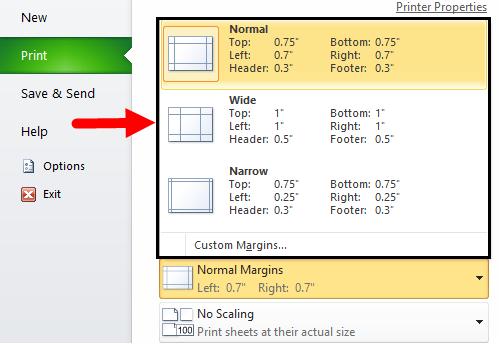
Step 2 – Click the ‘Show Margins’ icon at the bottom right of the window. Now a user can drag the lines to change the page margins manually.
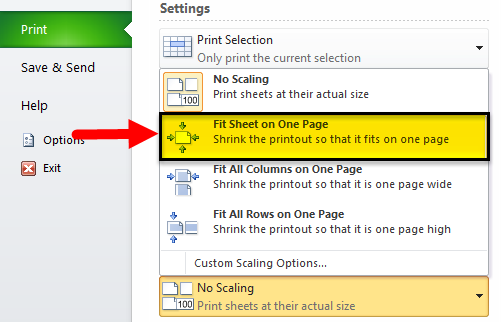
Scaling: If a user wants to fit more and more data on a single page, then he can fit the sheet on one page. To get these settings, he needs to follow the below process.
- Select ‘Fit Sheet on One Page’ from the Scaling drop-down list.
Limitation of Excel Print
- Excel doesn’t warn a user when your printout becomes unreadable.
- It is very challenging to adjust the margins from the Preview Pane.
- When a user prints a worksheet or a table without gridlines, it will be difficult to distinguish cell boundaries.
Things to Remember About Excel Print
- If a user does not want to print some page, he can do from settings where he will get an option of the page and give. Ex- 2 to 10 (Here home page will not be printed)
- In the Print setting, a user can ignore the print area selection as required.
- If a user sets any print area in Excel, then only that area will be printed, which the user has selected, and a print area will be saved when a user saves the workbook.
- Users can also shrink the printout to one page wide or one page high. He just needs to select Custom Scaling Options and manually enter a scaling percentage or fit the printout to a specific number of pages wide and tall. Be careful.
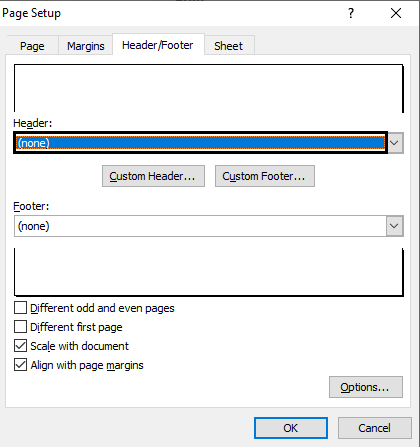
- Under the Header/Footer tab, a user can determine what will be in the header part and the footer of each of the printout pages.
- Suppose a user doesn’t want a header or a footer. Select the first option, “none”, from the list of the predetermined options.
Recommended Articles
This has been a guide to Print in Excel. We have discussed how to Print the entire Excel workbook with N number of copies and print a selected area workbook with the page orientation, printing settings, properties, and practical examples. You can also go through our other suggested articles –
