Updated June 28, 2023
Excel VBA Print Function
We all know that Microsoft Excel is used for creating formulae, easy calculations, and multiple databases. Much of such data is used by large organizations in their day to day work. In the world of computers and the internet, everything is digitized. However, we frequently use the Print function to take out hard copies of the data and work on it. Have we ever considered creating an automated Print format for any workbook?
How to Use Print Function in Excel VBA?
We know the Print function, which forms part of the tab File – Print. However, today we will learn to insert the print function with the help of VBA. To make our understanding better, we have explained the process with the help of different examples to use VBA Print.
VBA Print – Example #1
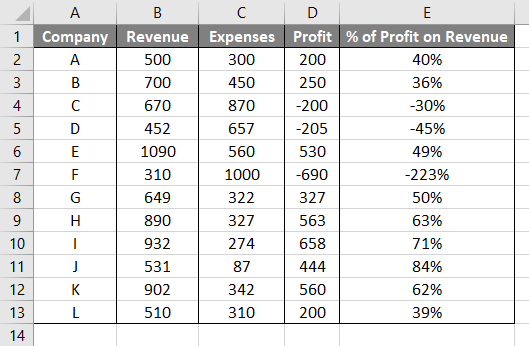
We have the following data of several companies with details of Revenue, Expenses, Profit, and percentage of profit on Revenue.
To print the above, we need to have a printer added to our computer/ laptop, and we can directly print the above data by going to File—Print.
Like the above, we also have such options in VBA with advanced features. It is called VBA Print.
However, we first need to create a Macro to make a VBA Print function work properly. A Macro is generally created for ease of access to data. It is usually created as a shortcut to a large volume of data.
Follow the below steps to use the Print function in Excel VBA.
Step 1: Create a Macro as follows
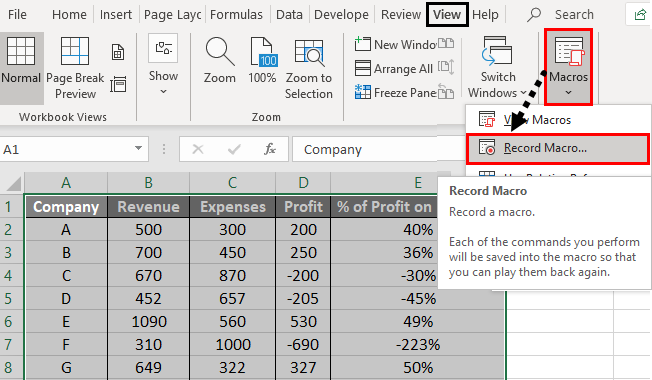
Select the Data—View—Macros – Record Macro.
As soon as we put this option, we get the below-mentioned screen.
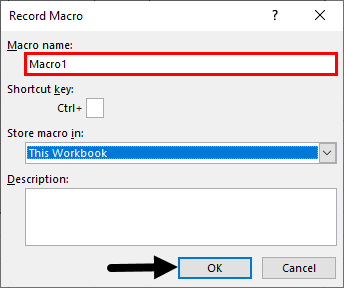
Step 2: Name the Macro
In the present case, we have kept the name of our Macros as “Macro1,” a default name provided. Once the Macro is created, we can create the Print option.
Step 3: The Developer option.
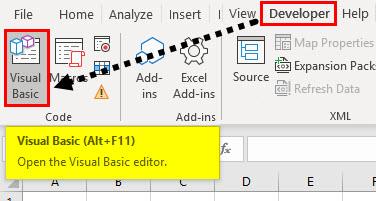
The Print function can be used in VBA with a Developer option’s help. To get the option on Excel, we need to follow the instructions: Click on Developer’s tab, then click on Visual Basic to get into VBA.
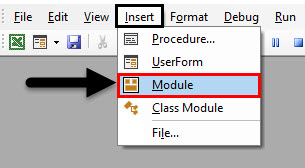
Step 4: Once in VBA, we need to insert a module to write code. Do as follows,
Go to the Insert tab and click on Module.
Step 5: Now, let us start writing the code. To do that, we need to name the Macro first as follows; The subject shall start with the command “Sub- Print1 ()” since the information database is taken from Macro1, which we created in Step 2. The function is written as follows:
Code:
Sub Print1()

End Sub
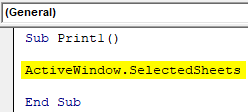
Step 6: The first command is the source data mentioned as Macro1. The command “Selected Sheets” denotes that the same data has been copied from the source sheet where the data is mentioned.
Code:
Sub Print1()

ActiveWindow.SelectedSheets

End Sub
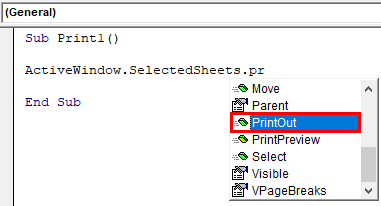
Step 7: We have to use the “Printout” option in VBA, which appears on the screen.
Code:
Step 8: After putting the “Printout” option, we select the number of copies in the argument.
Code:
Sub Print1()

ActiveWindow.SelectedSheets.PrintOut copies:=1

End Sub
For instance, in our example, we have mentioned “Copies=1″. But we can also modify the details, like 2 or 3 copies if required. We can customize it based on the number of copies we need to print.
Step 8: The next argument is the “Collate” function. We ensure the data is composed in the sheet by inputting the “Collate _:=True” function. In the above function,
Code:
Sub Print1()

ActiveWindow.SelectedSheets.PrintOut copies:=1, collate:=True

End Sub
Step 9: We have also mentioned “Ignore print areas” because we have only 1 sheet to print, which is well within the ambit of Print areas. But we can customize this option also, if necessary.
Code:
Sub Print1()

ActiveWindow.SelectedSheets.PrintOut copies:=1, collate:=True, IgnorePrintAreas:=False

End Sub
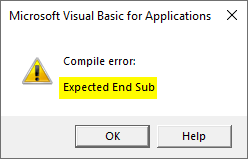
Step 10: To end the command, enter “End Sub”. Unless we enter this command, the arguments are considered incomplete.
In case we do not enter the command mentioned above, the following message displays while execution—
Step 10: We can execute directly by pressing F5 or clicking the play button.
When we press the Execution command, the document area is automatically taken to the Printer for Printing.
VBA Print – Example #2
In the same way, we have one more function related to Print called Print Preview in VBA. This helps us look at the data and how it will appear at the time of Print before moving ahead with the execution. To explain the Print preview function in VBA, we have used the same data as used in the previous example as follows:
Step 1: In the VBE, write the Macro and define the variable name.
Code:
Sub Print2()

End Sub
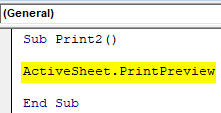
Step 2: In this, the function “Printpreview” is used.
Code:
Sub Print2()

ActiveSheet.PrintPreview

End Sub
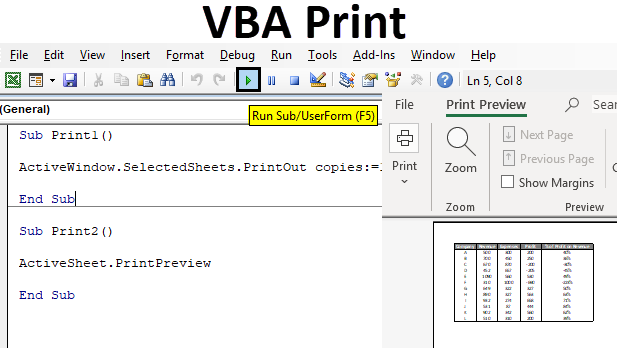
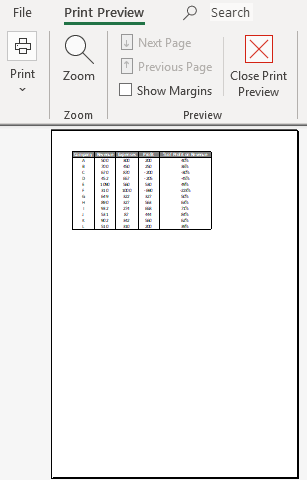
Step 3: Run this code by hitting F5 directly or manually hitting the Run button on the upper left panel. As soon as we execute the command, the following screen automatically appears.
The Print Preview helps us look through the data before proceeding with the Print.
So, this is how VBA Print’s functions use to perform Printouts directly. I hope we now have a better understanding and implementation of the function.
Things to Remember
- The VBA function becomes accessible after creating Macros for the source data. We have learned in the first few steps how to create Macros.
- We should always remember not to provide spaces between the functions.
- VBA function can direct accesses by Alt+F11 instead of going through Developer mode.
- Remember, when you are typing the Active sheet function, as you can see in Step 2 of Example 2, make sure that your cursor (click) before executing the command is on the same sheet whose Print you require.
Recommended Articles
This is a guide to VBA Print Function. We discuss using Print Function in Excel VBA, practical examples, and a downloadable Excel template. You can also go through our other suggested articles –

