Updated August 16, 2023
Print Area in Excel
Print Area in Excel helps the user print only select areas. We can restrict the area we want to see in our print preview. For example, a worksheet has 4 columns and 20 data-filled rows. But if we want to print only the top 3 rows, go to the Page Layout menu ribbon and select Print Area under the Page Setup section. Now from the Set Print Area, choose the area we want to print. Later we can clear the area.
How to Set a Print Area in Excel?
It is very simple and easy. Let’s understand the working of the print area with some examples.
Example #1
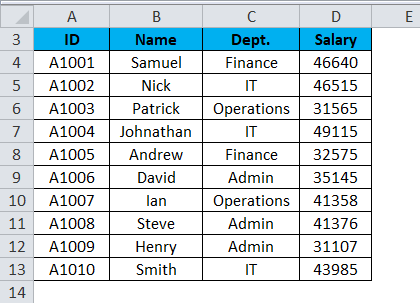
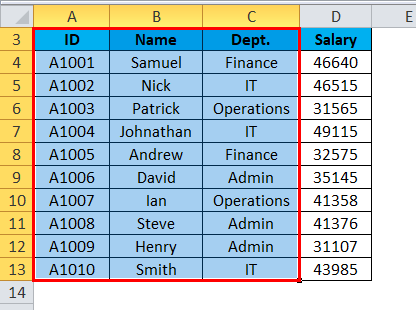
We have given some employee data, and we want to print the whole data, excluding the employee’s salary.
For setting up the print area in the Excel worksheet, follow the below steps:
- Select the range of cells you want to print or set as the print area in that worksheet. Refer to the below screenshot.
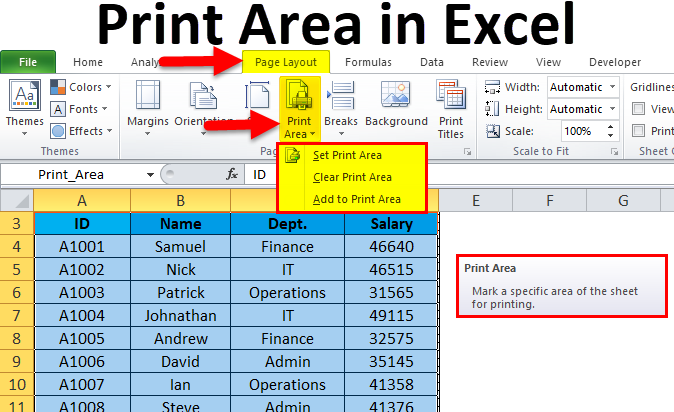
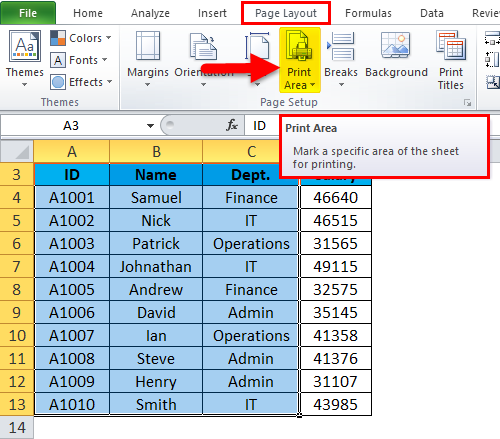
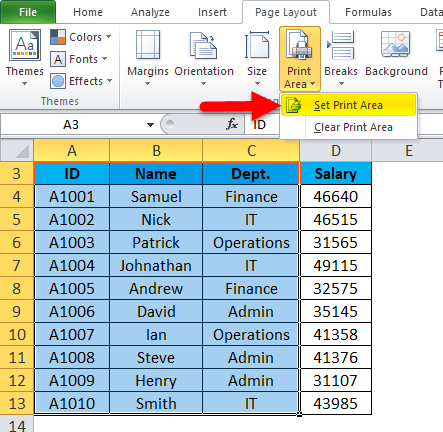
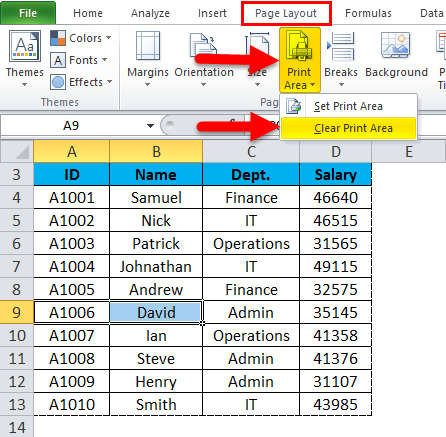
- Go to the Page Layout tab.
- Click on the Print Area option under the Page Setup section, as shown in the below screenshot.
- It will open a drop-down list of options.
- Click on the Set Print Area option, as shown in the below screenshot.
- This option would set the selected range of cells or area as Print Area and also give that area’s name under Name Box. Refer to the below screenshot.
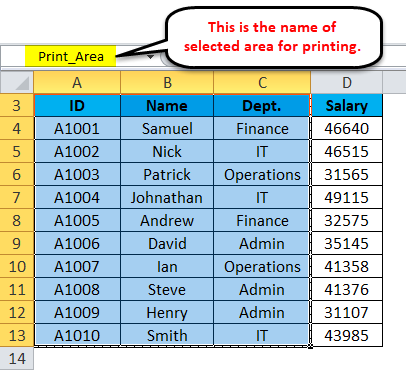
- You also can change the name of the Print Area as required.
Only the set print area will be printed when you give the print command.
How to Make Changes in the Print Area in Excel?
If you have already set the print area, but after some time, you realize that you need to include more data in the report, then you need to make some changes in the print area setting.
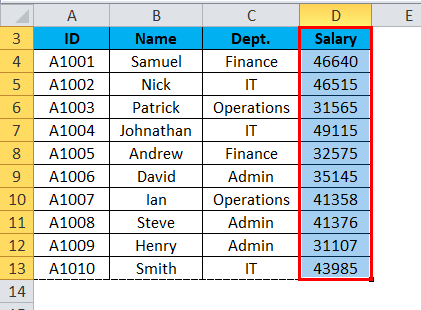
Suppose in the above example, we want to include the Salary field.
To add more areas for printing, follow the below steps:
- Select the cells you want to add to the already set print area. Refer to the below screenshot.
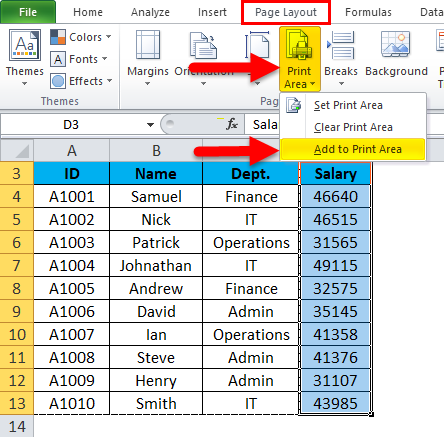
- Go to Page Layout.
- Click on Print Area under the Page Setup section. Refer to the below screenshot.
- Choose the Add to Print Area option, as shown in the below screenshot.
And this would add that selected range of cells in the Print Area.
How to Remove/Clear the Print Area in Excel?
To clear the print area, follow the below steps:
- Click on any cell in the worksheet in which you want to clear the print area.
- Go to Page Layout.
- Click on Print Area under the Page Setup section.
- It will open a drop-down list of options.
- Click on Clear Print Area from the list, as shown in the below screenshot.
These steps will clear all the print areas from the worksheet.
Things to Remember
- You can define more than one print area in the worksheet by providing different names to that area.
- Those areas will print separately.
- When you save the workbook, it saves the Print area as well.
- While adding more area under the print area, and if those cells or area is adjacent to the existing print area, it would be merged and printed.
- If that new area is non-adjacent to the existing print area, it will create a new print area and print on a different page.
Recommended Articles
This has been a guide to Print Area in Excel. Here we discuss how to set a Print Area in Excel, practical examples, and a downloadable Excel template. You can also go through our other suggested articles –
