Updated May 29, 2023
Definition of Name Box in Excel
The box on the left side of the formula bar, which addresses the selected cell or group of cells in the spreadsheet, is called the Name box. In the below screenshot, highlighted with a red color box is the Name Box in Excel.
This Name box helps to address the group of cells with a name instead of addressing rows and columns combination. This tutorial will cover creating a Name box and using it while working with data.
How to Give Name in Name Box?
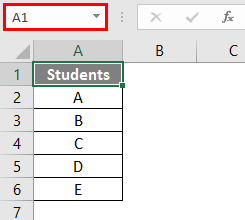
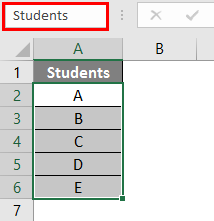
Consider a small example of student data like the one below. In the below, screenshot Name box represents the selected cell A1.
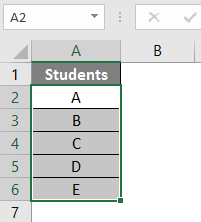
Now we will select the student data from the table, excluding the header “Students”.
After selecting the data, go to the name box and type the name to name the data range. Here I am giving the data range name “Students”. After Inputting the name Press Enter Key, and it will create the name.
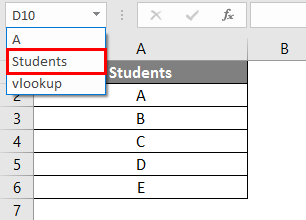
Now, whenever we want to select the student’s data range, we can select from the Name box drop down as below.
If we add the marks data of the students as below.
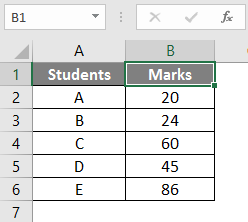
We already gave the name “students” to column A data. Still, we can give the name to the combined data of students and marks as “Smarks”.

How to Edit and Delete the Name of the Data Range?
We have seen how to give a name to the data range. Now, we will see how to edit and delete the name.
#1 – Edit the Name of the Data Range
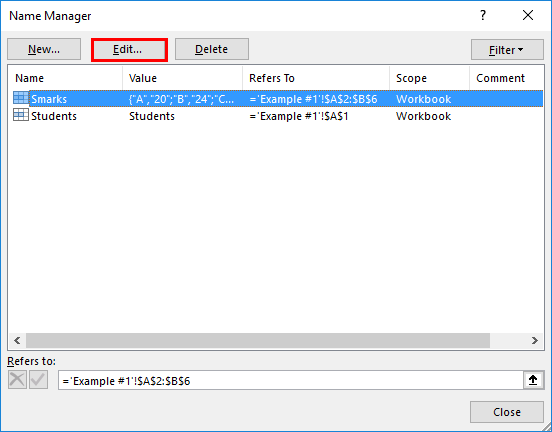
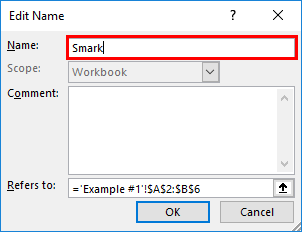
In case we incorrectly input the name or want to change the name. We incorrectly gave the name “Smakrs” for the student data range, which should be “Smarks”. We will change the name from “Smakrs” to “Smarks.”
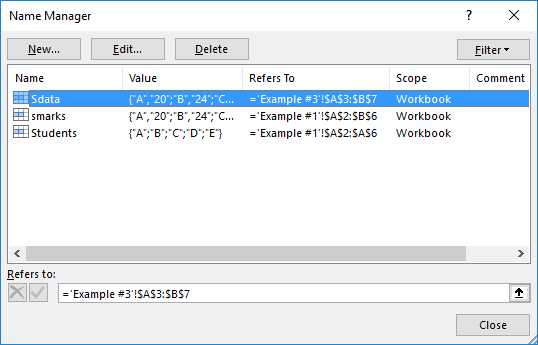
The name box does not have the option to edit the given name; we should change the name in “Name Manager” under the “Formulas” menu. Click on the “Name Manager” to view the available names.

Click on the option “Edit” at the top.
So that we will get the below “Edit Name” box.
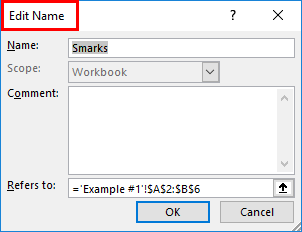
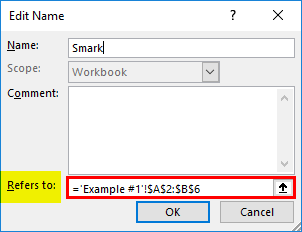
Edit the name to “Smark” as required.
In case we want to increase or decrease the range of cells, we can change in “Refers to” option.
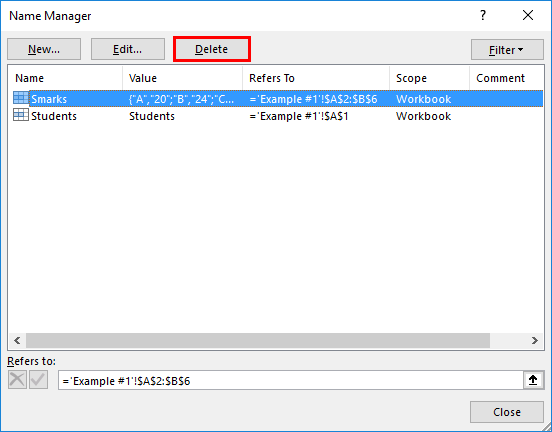
#2 – Deleting the Name of the Range
It is similar to how we edit the name. Click on the “Name Manager”. Select the name of the range which we want to delete. Click on the “Delete” option at the top.
This is how we create, Edit, and Delete the Name in the name box.
How to Use the Name Box in Excel?
Let us understand how to use the name box with a few examples.
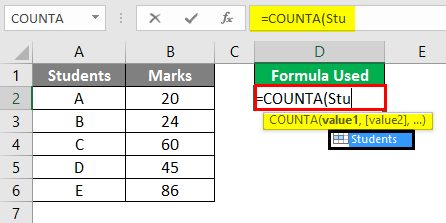
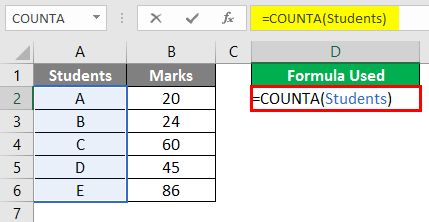
Example #1 – Count Formula with Name Box
Suppose we want to count the students from the student’s table. We can use the count formula with the name of the range. Select the name and close the formula. In the below screenshot, we input only the half name of the range then the system displays the name automatically.
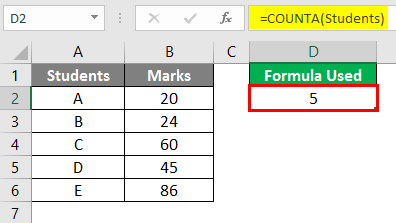
Below you can see the output.
As the number of students is five, it should display 5. Remember, it is not COUNT; it is the COUNTA formula.
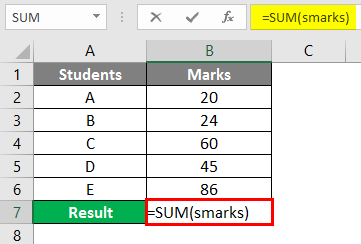
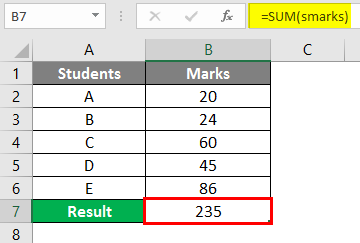
Example #2 – SUM with the Name Box
Now we will see how to perform the SUM operation using the name feature. Our task is, to sum up the marks of all the students. In the SUM formula, we will give the range name “Smarks”, which we created earlier, instead of the range B2 to B6.
After using the formula, the output is shown below.
So, to replace the range address, we can use the range’s name. The name range will also pop up if we input the first few letters of the name range.
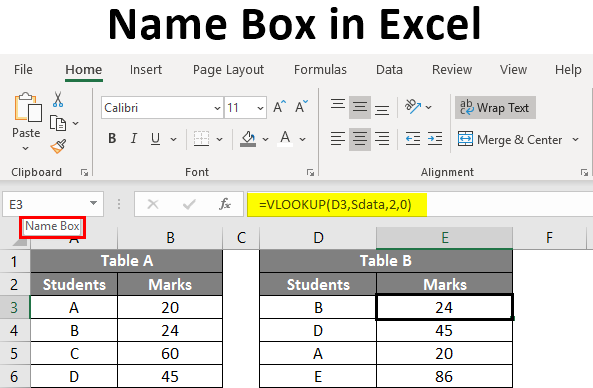
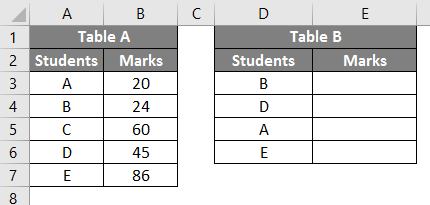
Example 3 – VLOOKUP with Name Box
We have to perform VLOOKUP for Table B to find the marks from Table A.
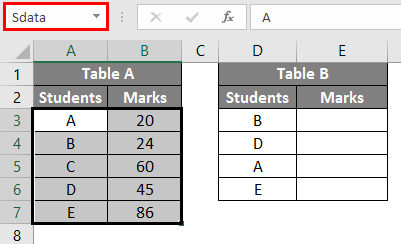
Create a name “Sdata” for data in Table A as below.
Now input the VLOOKUP Formula in Table B.
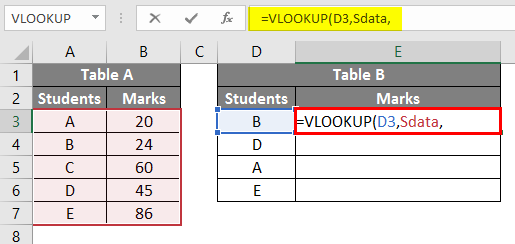
Once you select the “lookup_value” as E3, give the table array as “Sdata”, which is the name of the data range from Table A as the range has 2 columns, input column index as 2, then input zero(for True).
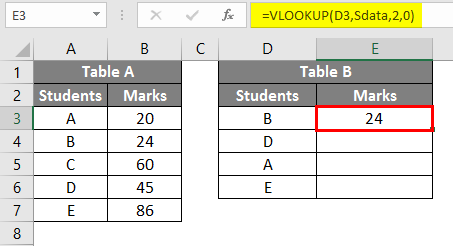
Expand the formula to get marks for other students.
Example #4 – Excel Name for Constant
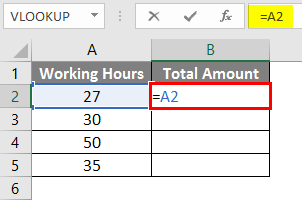
We can use the Excel name feature for creating constants, also. We will see one example of this to understand in a better way. Consider a table having data on the number of hours of employees as below.
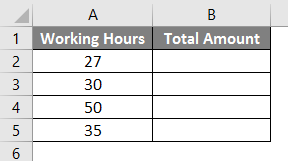
The charge per hour will be 20 rupees. So, we will create a constant with the value 20. Click on the Name Formulas menu.
Click on the Name Manager, and the below window will appear.
Click the “New” option to take you to the screen below.
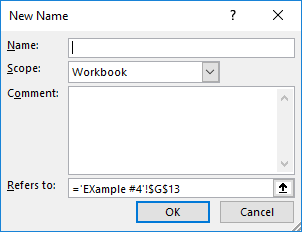
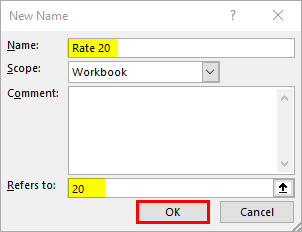
Give the name as Rate 20, and in “Refers to,” give constant value 20 as below and click on OK.
Now go to our table and input the formula for multiplication using the name constant. Start the formula with the Equal symbol and select the number of hours option.
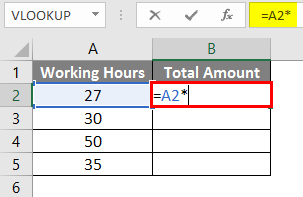
Add a Multiplication symbol.
Now give the constant name we created.
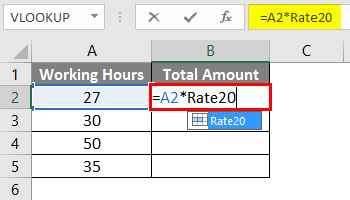
Select the Rate20 and Press Enter Key. It will multiply the number of hours by 20.
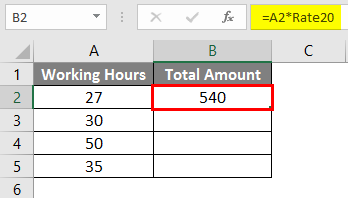
Drag the formula from cell B2 to B5.
Things to Remember About Name Box in Excel
- While giving the name for a range, ensure there should not be any spaces as it will not take if we input any spaces in between.
- Don’t include punctuation in the name.
- The name will be case sensitive; hence, whether we give the name “Hai” or “hai” will be the same. While calling the range, you can use any case letters.
- The name should start with a letter or Backslash “\” or Underscore “_”. Other than these, if the name starts with any other letter, Excel will throw you an error.
- The name can be applicable at the sheet or workbook levels; it depends on our selection while creating the name in the name manager.
- The name should be unique, as it will not allow duplicate values.
- The name can be a single character Eg: “A”.
Recommended Articles
This is a guide to Name Box in Excel. Here we discuss how to use the Name Box in Excel, practical examples, and a downloadable Excel template. You can also go through our other suggested articles –
