Updated August 28, 2023
Introduction to Pen Tool
Pen tool usually we see in photoshop which helps us to create a path and select the characters. The pen tool is one of the great performance tools in after effects also; with the pen tool, we can draw a shape easily and create different masks; masks are used to merge the multilayers in after effects. With the help of the pen tool, we can draw shapes and create the path to animate; we can do animations, text animation, and shape animation with pen tool Now, let’s see some of the animations with the help of the pen tool.
Using Pen Tool in After Effects
First, we see how to draw a line with the pen tool and animate a line.
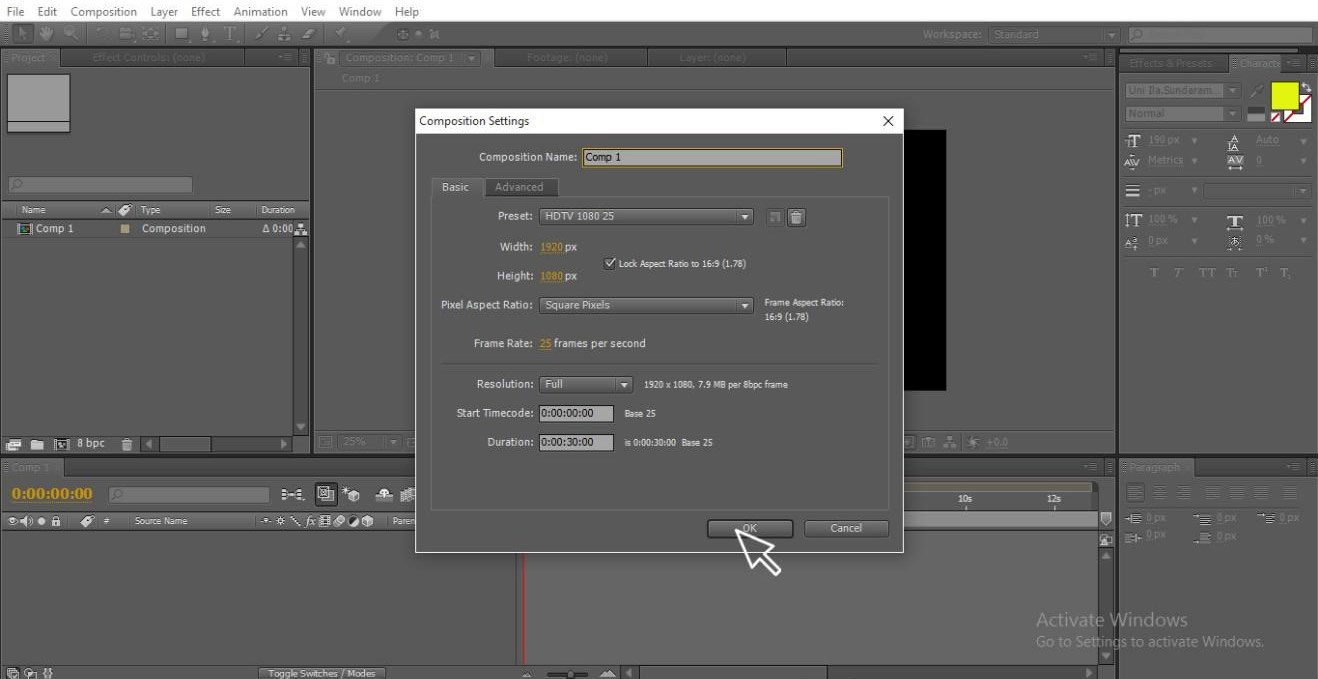
Step 1: Create a New Composition.
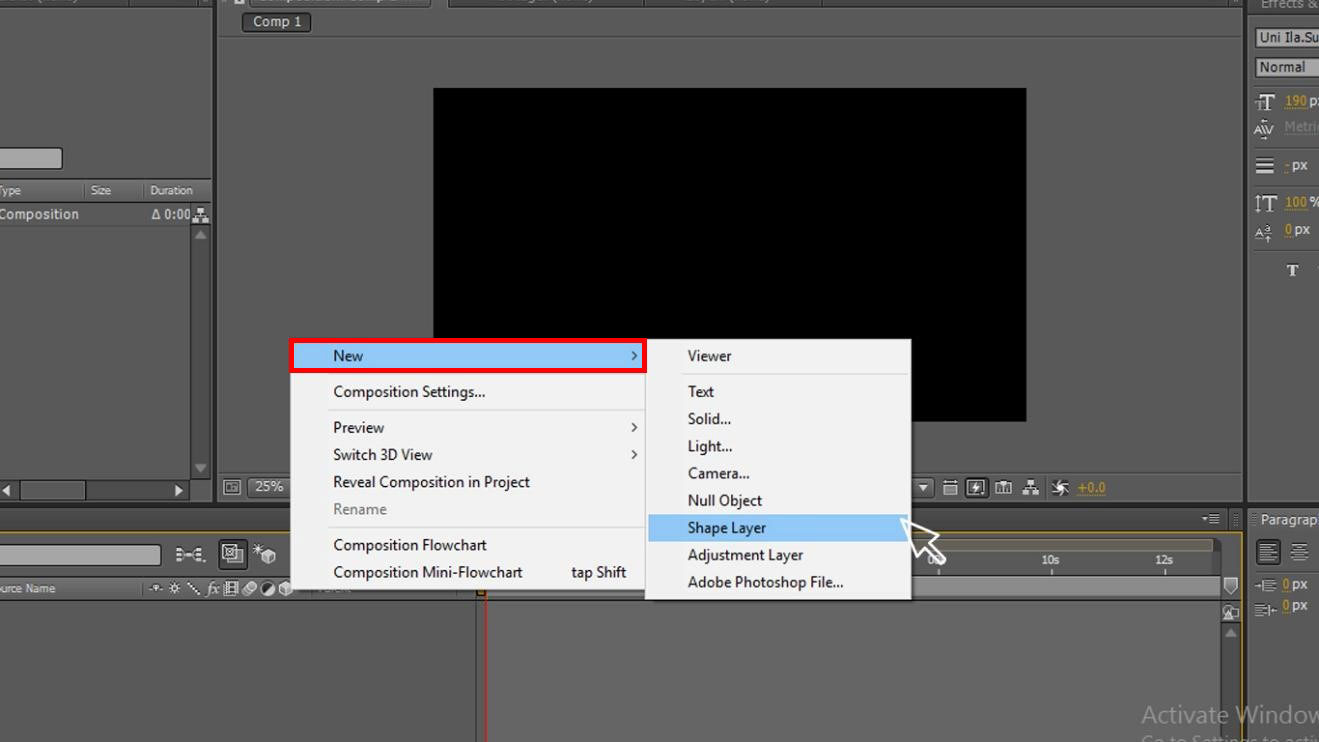
Step 2: Create a Shape layer where we can draw the shape of the line and animate it.
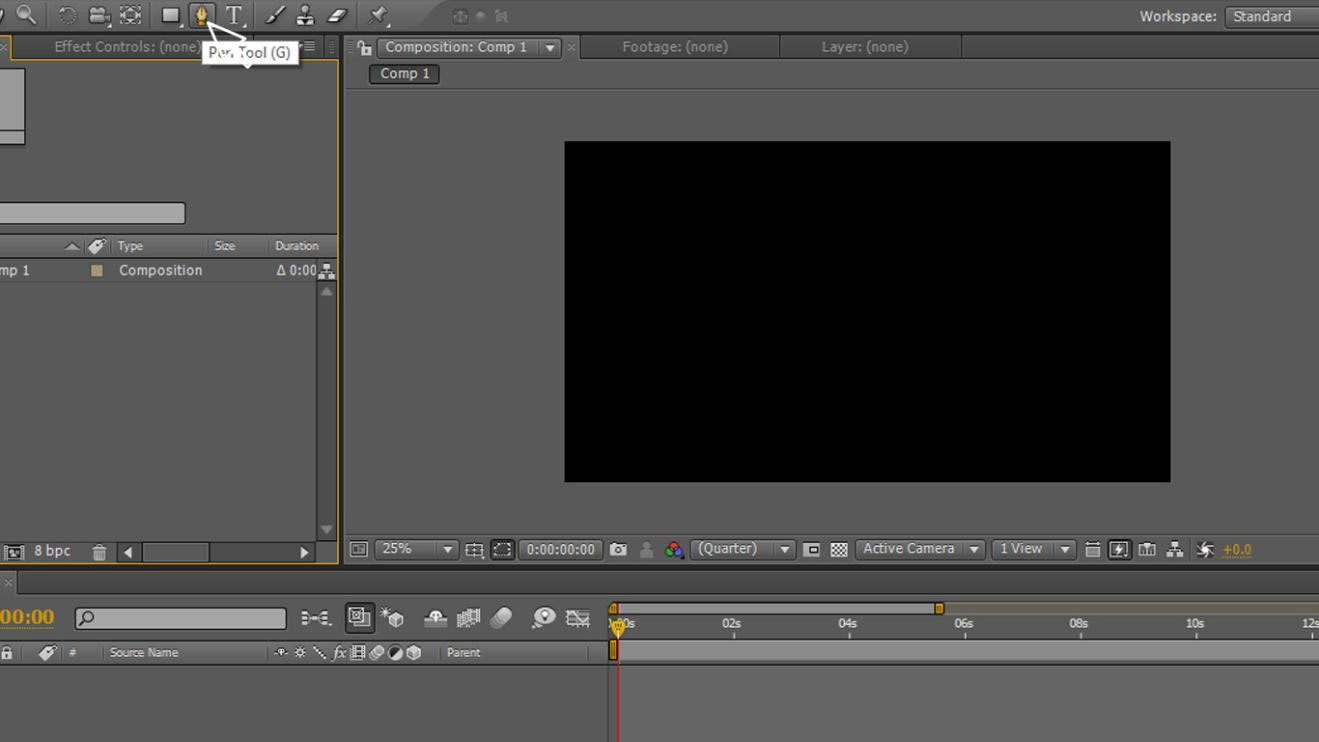
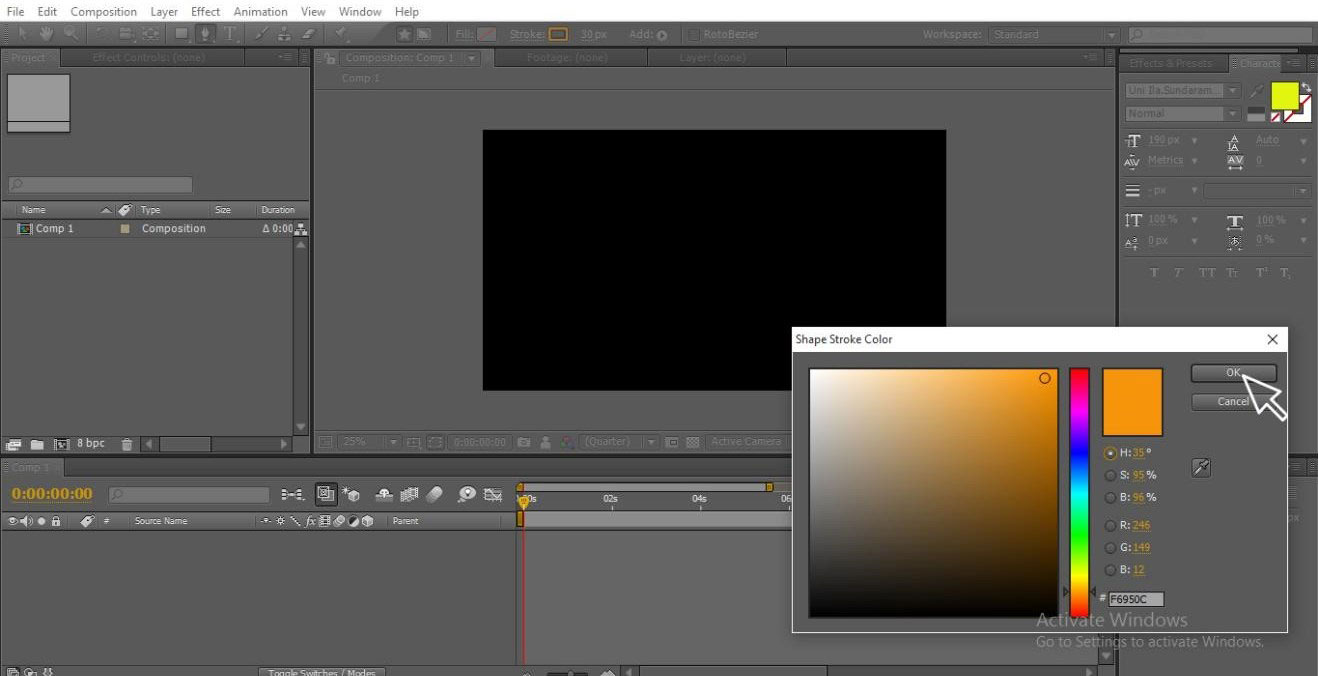
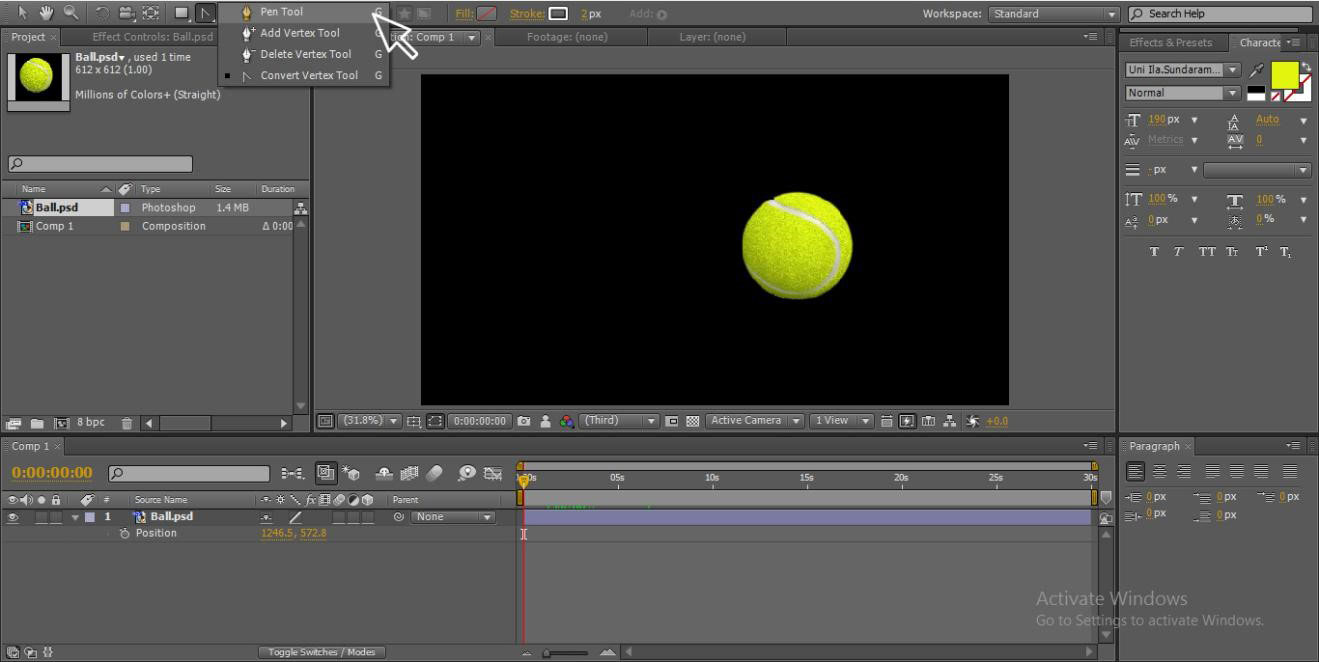
Step 3: Select the Pen Tool, and here we do not need the fill because we are drawing only a shape, fill will be used in masking cases, here are two options one is masking, and another one is drawing a shape, so we select shape option.
Step 4: Select the Stock of color which you like; always select an attractive color because it gives beauty to the animation.
Step 5: Now here we go with the drawing, draw a shape of your wish with the help of a pen tool, draw a line like a curve’s no issues even you don’t get the correct shape because we have another option to correct the shape we can see that in the next step.
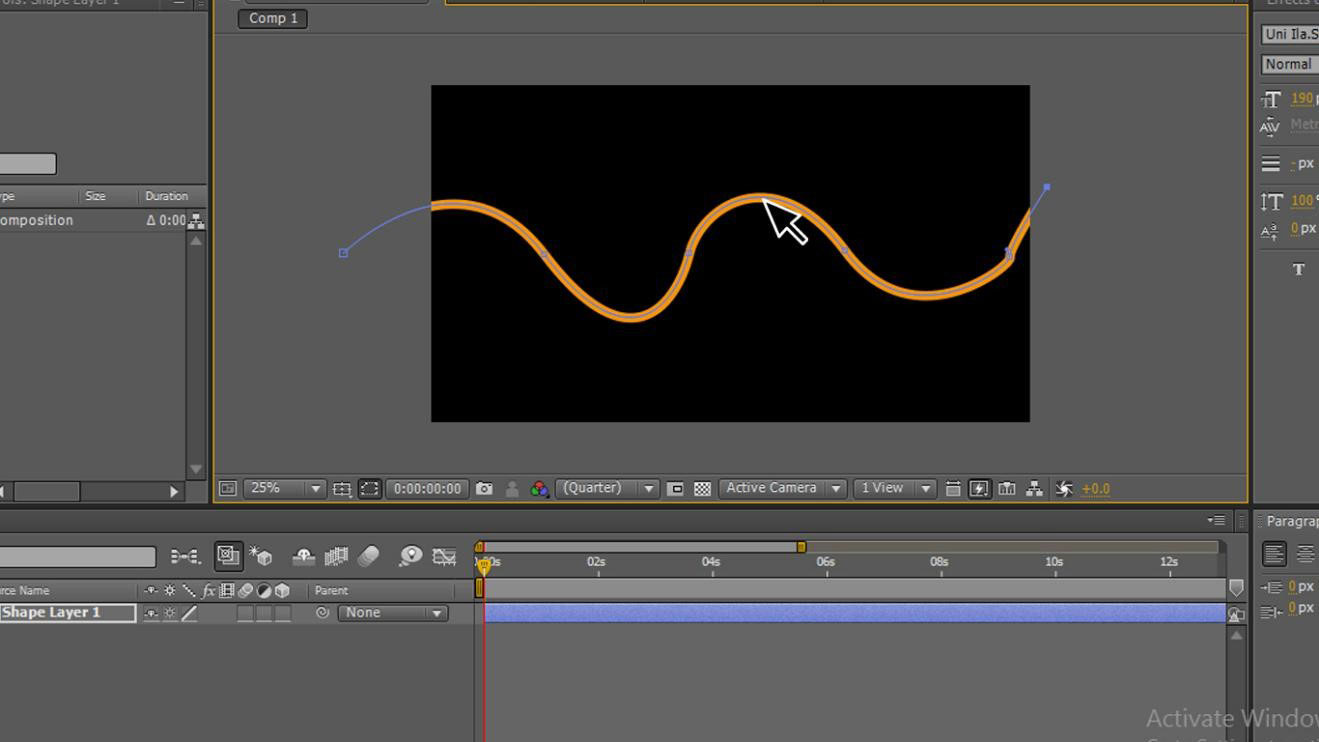
Every time we will not get a good drawing, however, we use the pen tool; while using the pen tool, in some places, we cant manage the curves and shapes; in such cases, we have an option to correct the shape and curves; let us see how
Step 6: Go to the shape layer, content, shape. Select the path as shown in the below image. Once we select the path, we can find the points in our drawing.
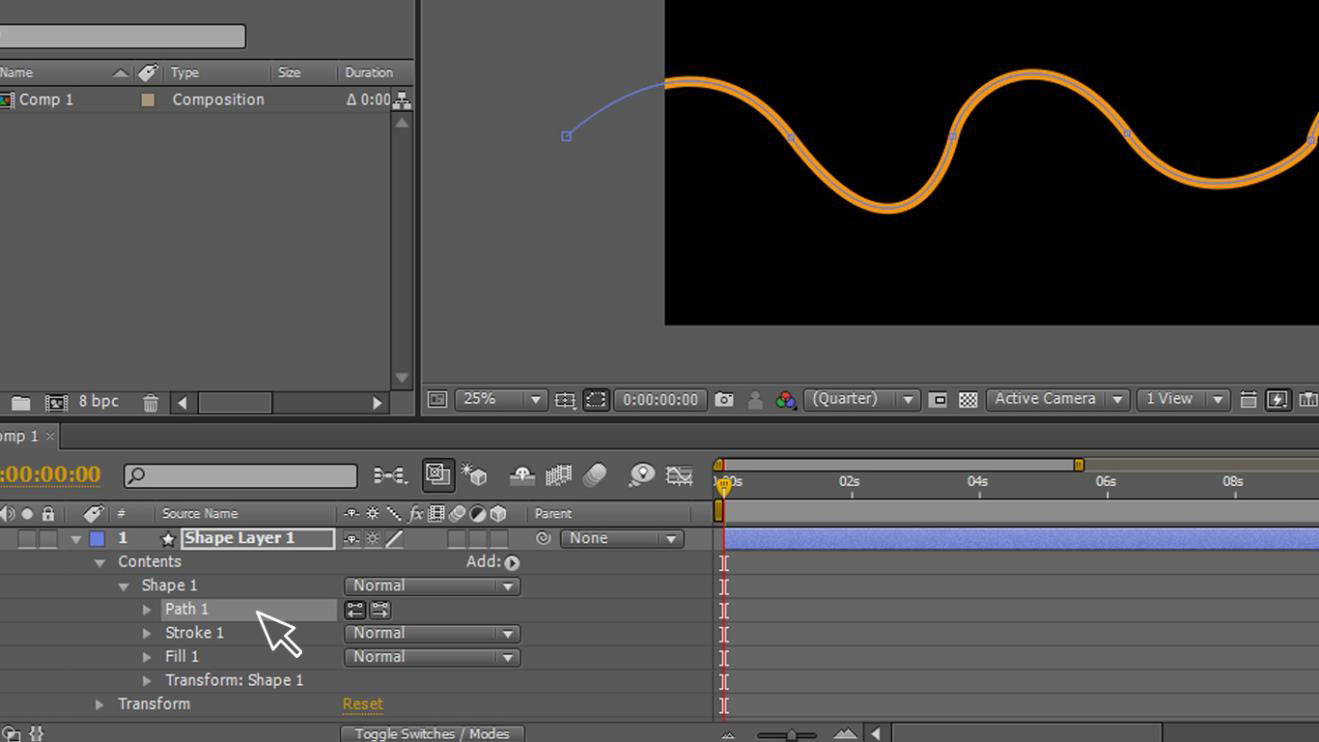
Step 7: Now, select the selection tool to adjust the points in the drawing; by adjusting that points, we can bring the shapes according to us to get good shapes.
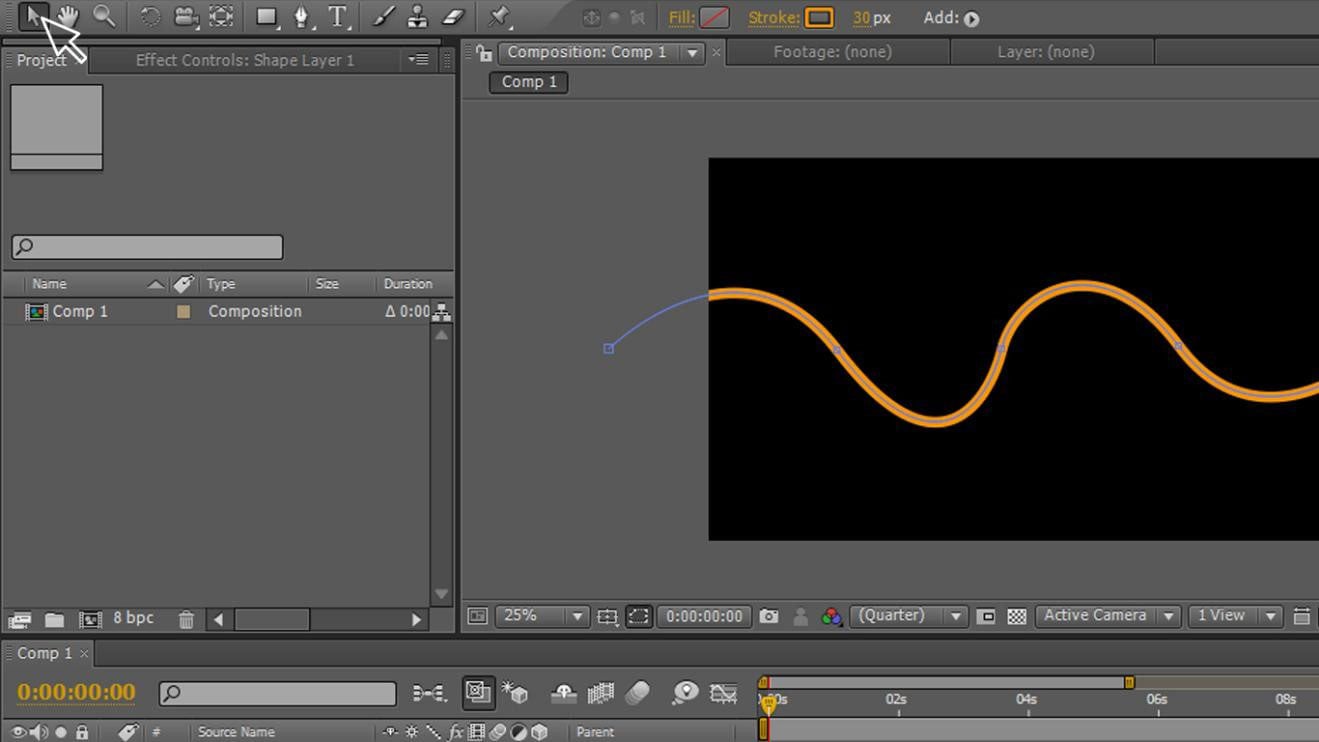
Step 8: We can see the anchor points in the drawing now; we can select every point and adjust the drawing.
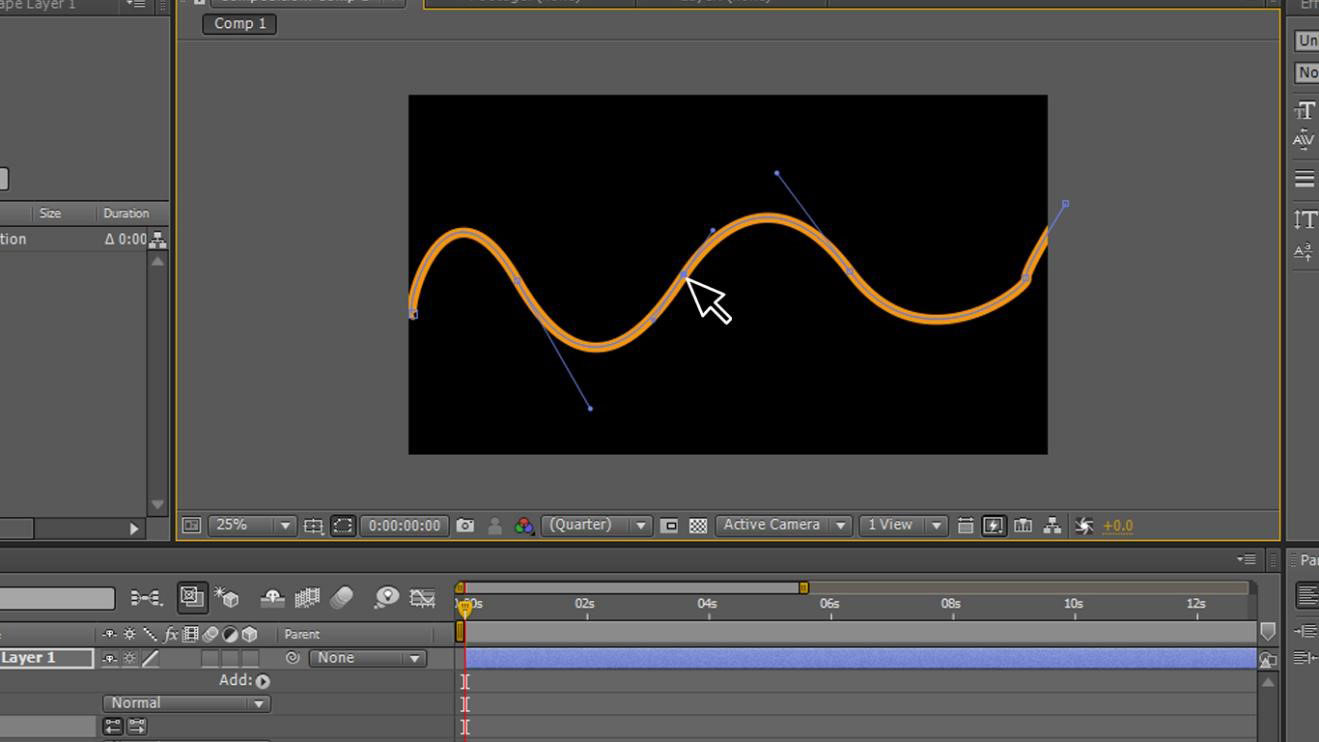
Step 9: By adjusting the points, we can get our shapes.
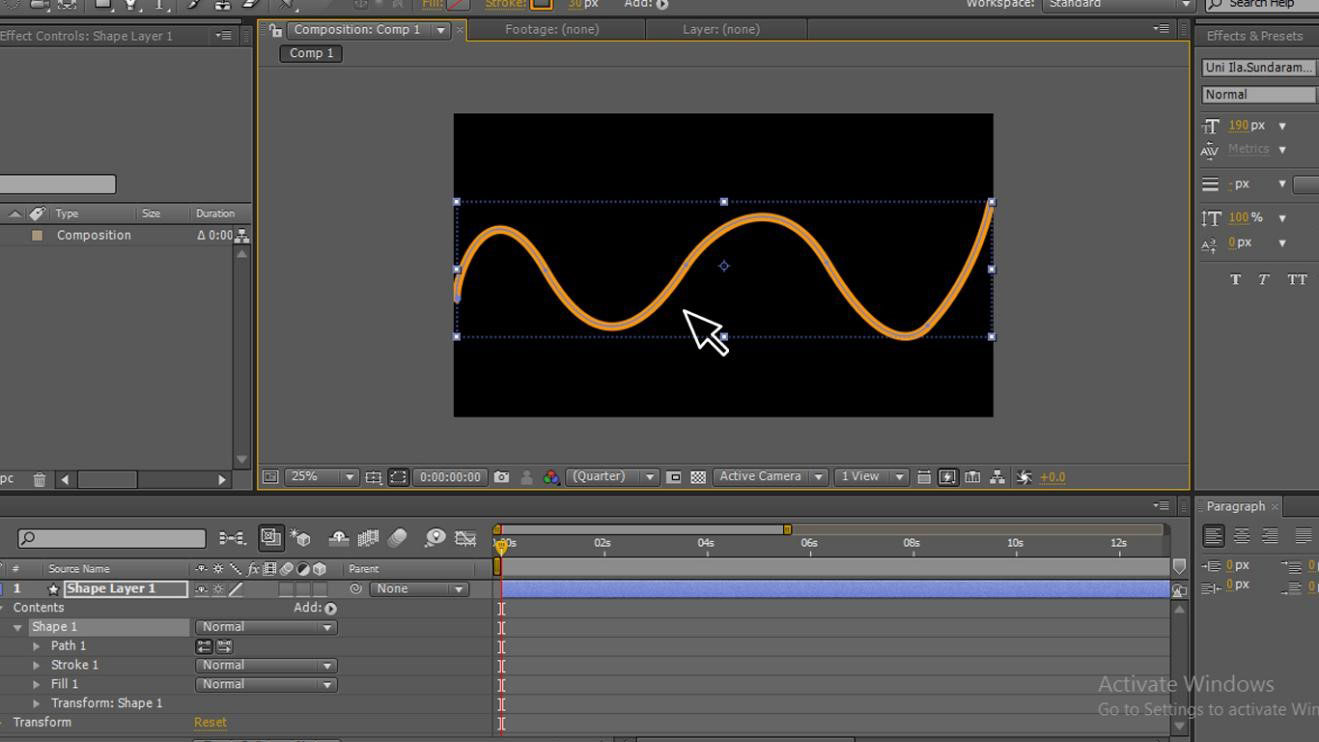
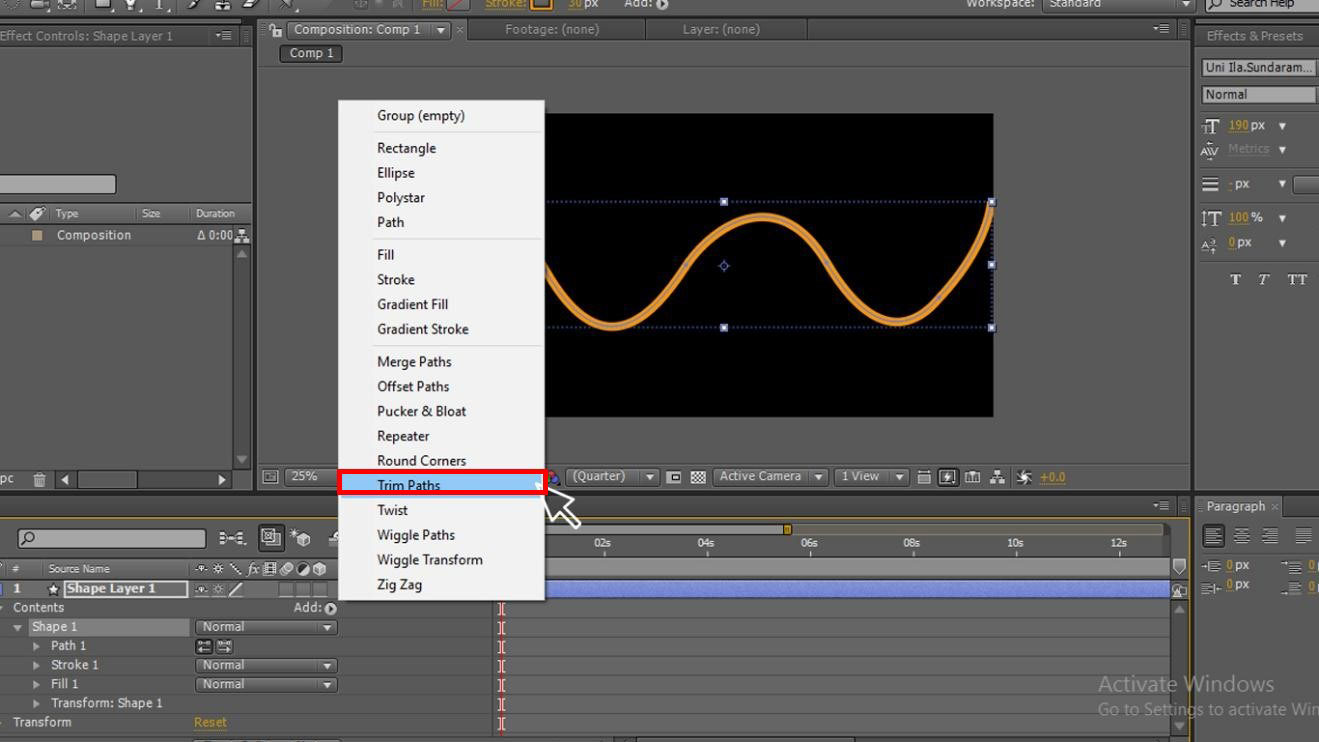
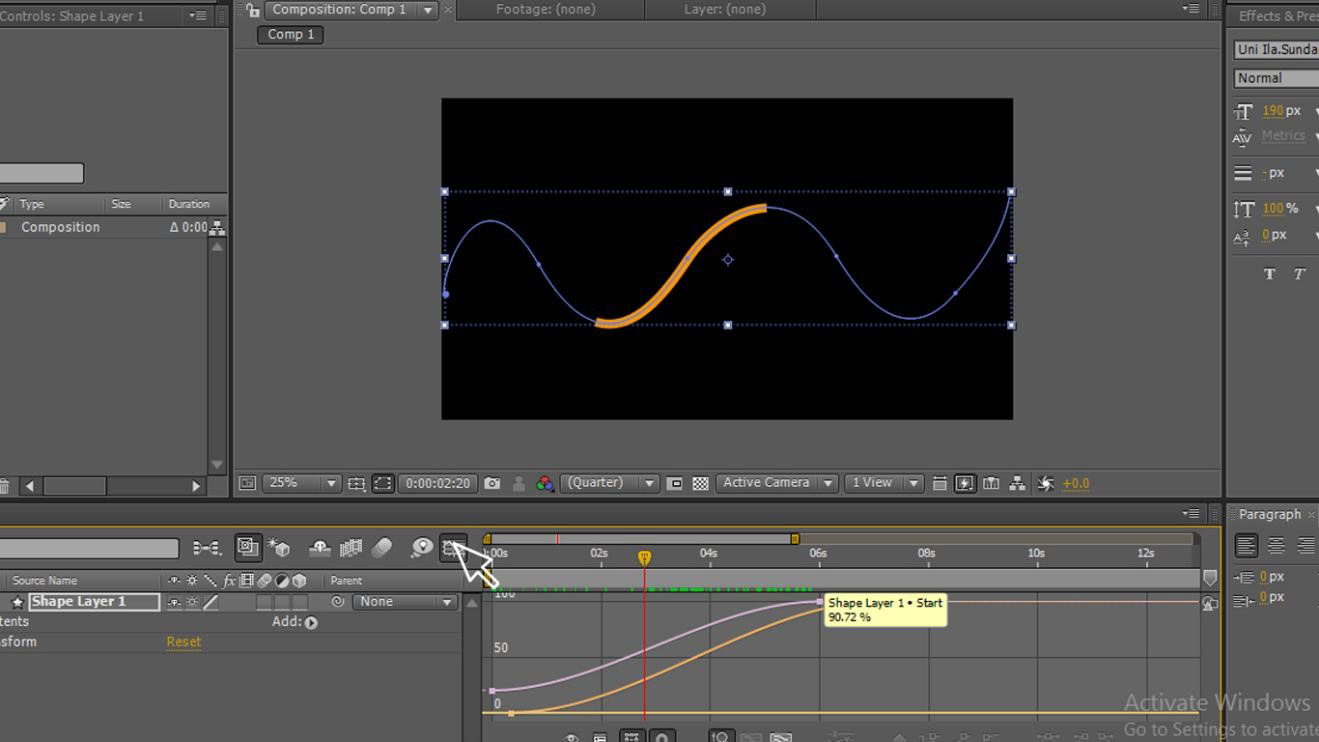
Step 10: In this step, I am going to explain very important and useful option Trim paths; let me tell something about the trim path; some of the users who use aftereffects rarely may don’t know about this because it hides under the shape submenu, this tool allows you to adjust the layer paths. We can do multi animations with this trim path like Map route, infographic, text stroke, text box, circle bursts.
Step 11: In this Trim path, there are two main options start and end.
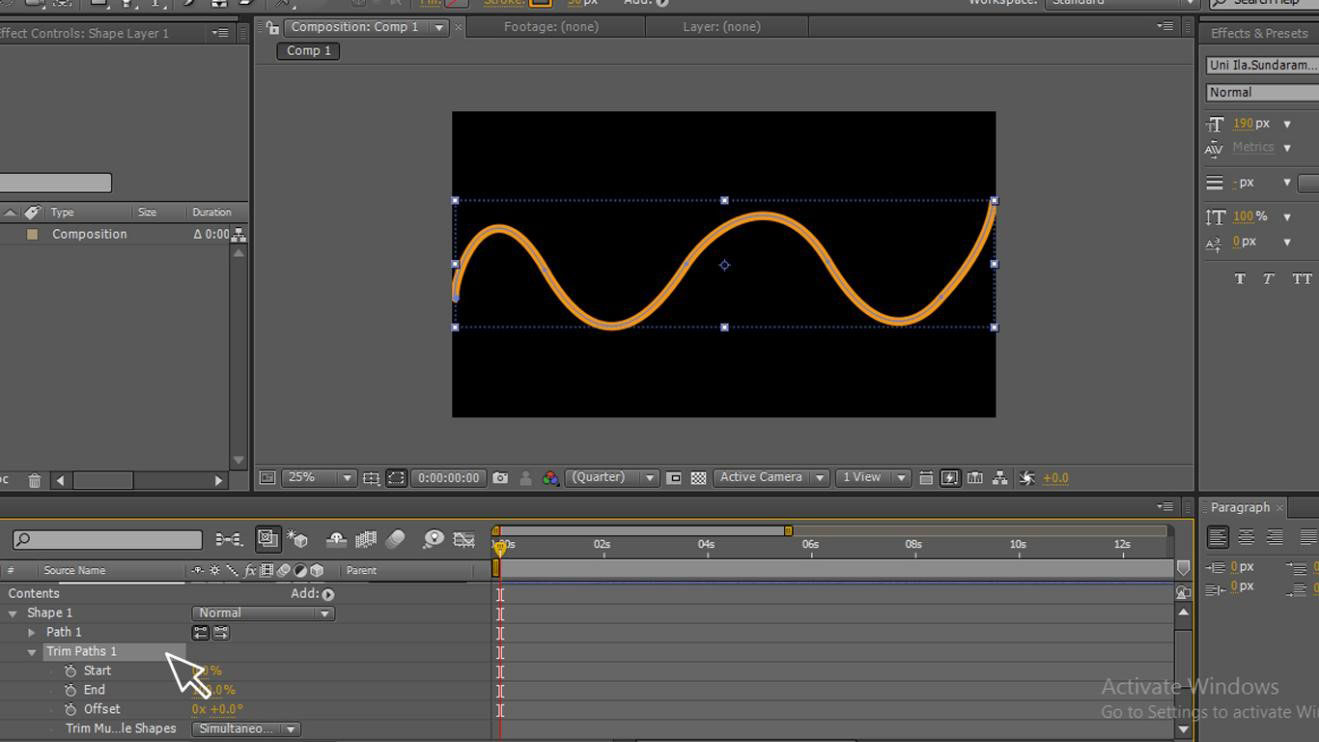
Step 12: Now, change the values of start and end.

Step 13: Here, we change the values of start and end.
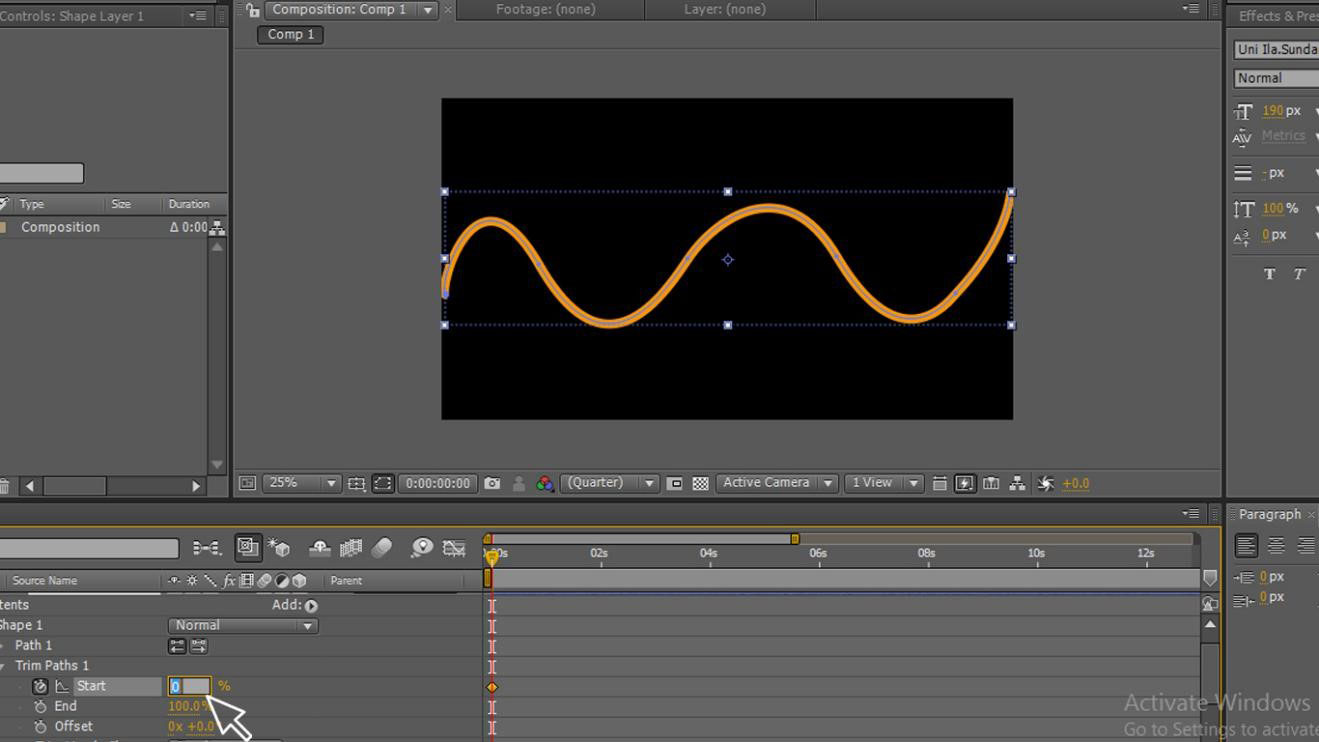
Step 14: Here, we need to start the animation by applying it to the start and ending points. The first start is with 0,0 in the start, and end values go to the next point where ever you need and give the value of 100,100 in start and end values.
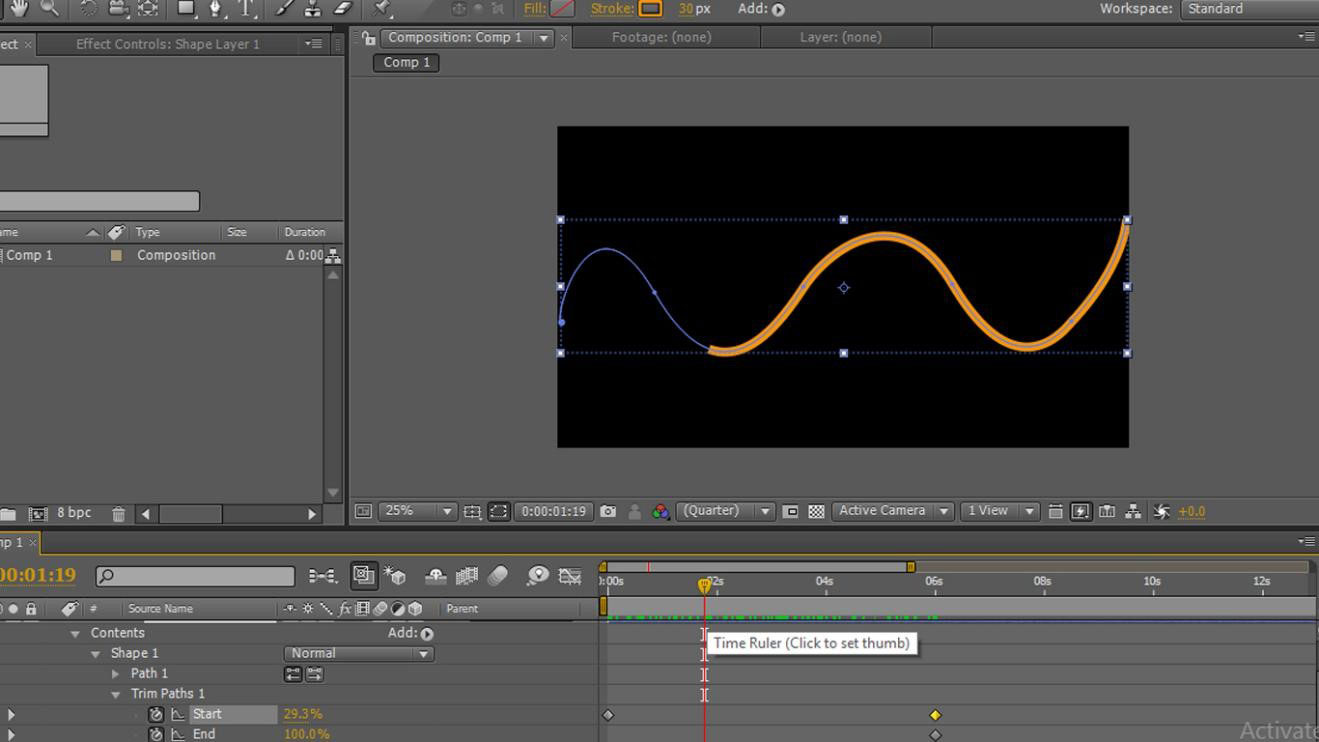
Step 15: At the starting point, increase the value of End to 20 now; we can find a small line.
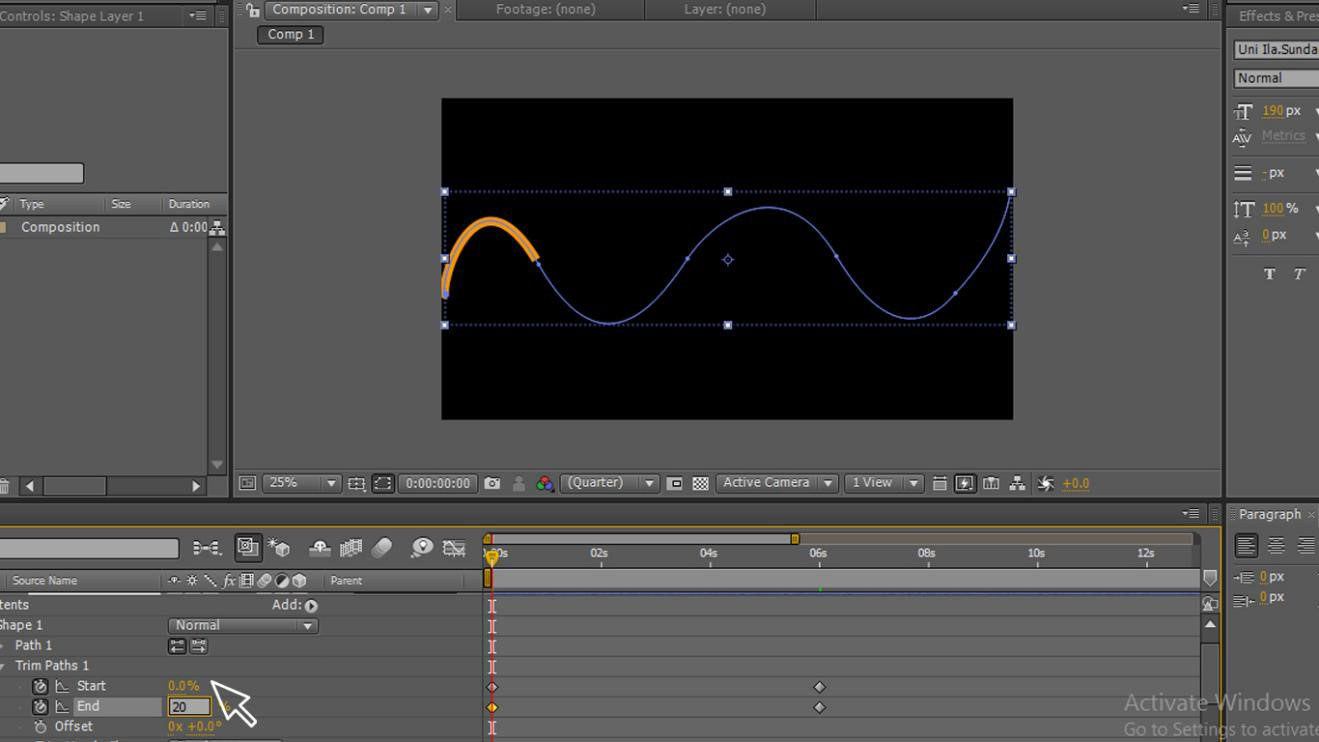
Step 16: When we move from start to end position, we can see the animation of the line moving from starting to end like a snake.
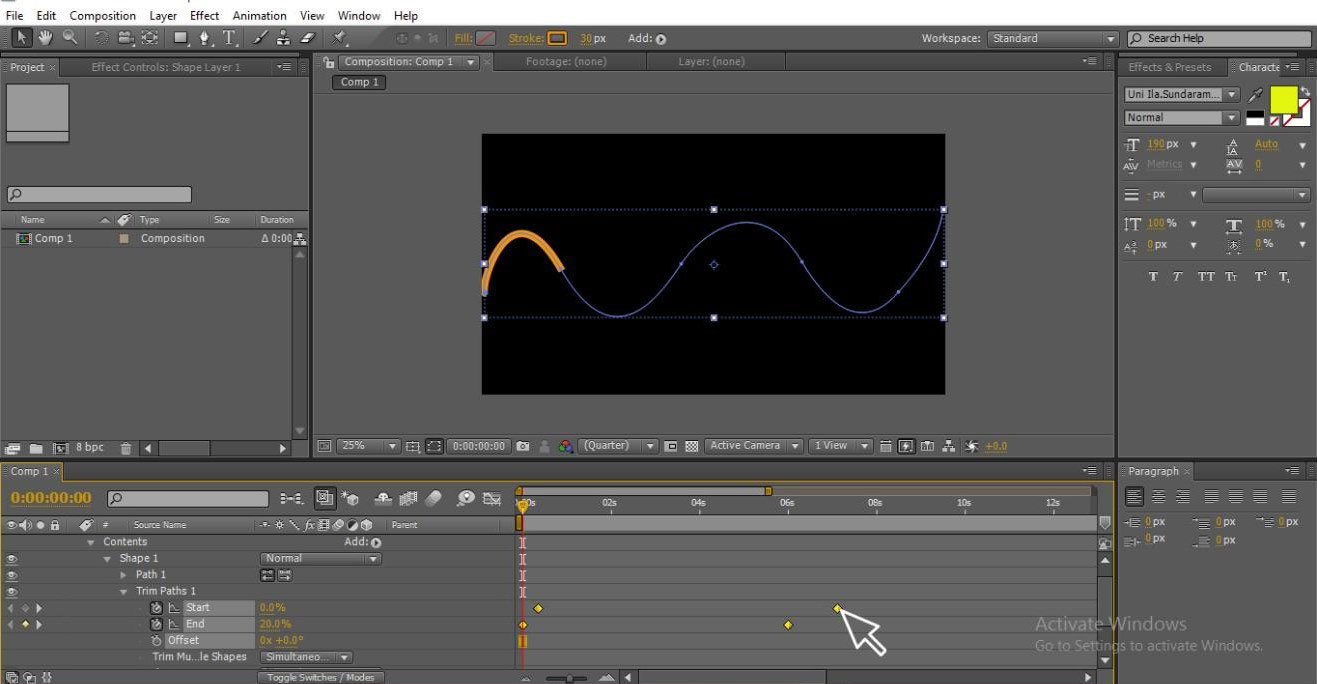
Step 17: Here, we have the vector mode to edit the values to make our animation smoother.
- In this process, we saw how a shape is animated with the help of a pen tool, here we draw a line with a pen tool; with the help of a path, we create a shape, and we use trim paths to animate that line by changing starting and ending points. Not the only shape we can animate a particle with the help of a pen tool.
Particle Animation with Pen Tool
Following are the steps of creating animation with the pen tool.
Step 1: Import any of the objects which you willing to animate; here, I am importing a ball.
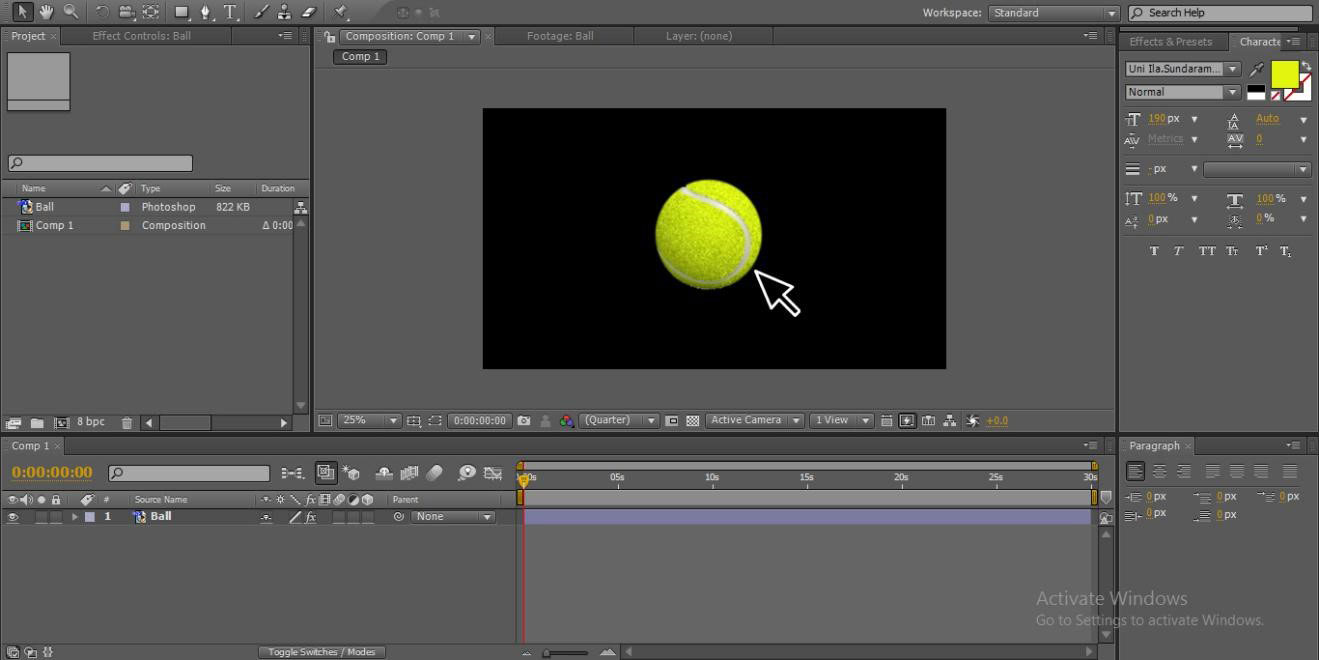
Step 2: We can animate the object with keyframe animation by changing the start and end position; it’s a basic normal process anyone can do.
But if you need to do something different or creative animation, just go through the pen tool.
Step 3: Select the shape layer where we are going to draw a path for our animation.
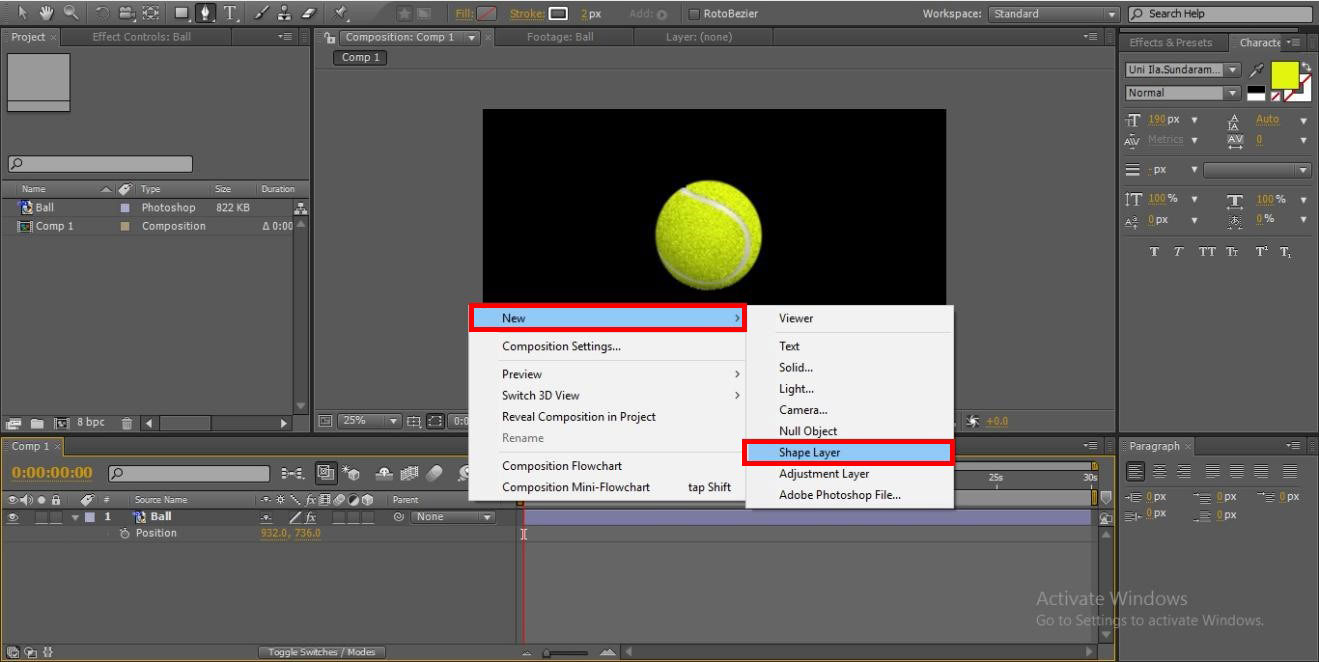
Step 4: Select the pen tool to draw the shape.
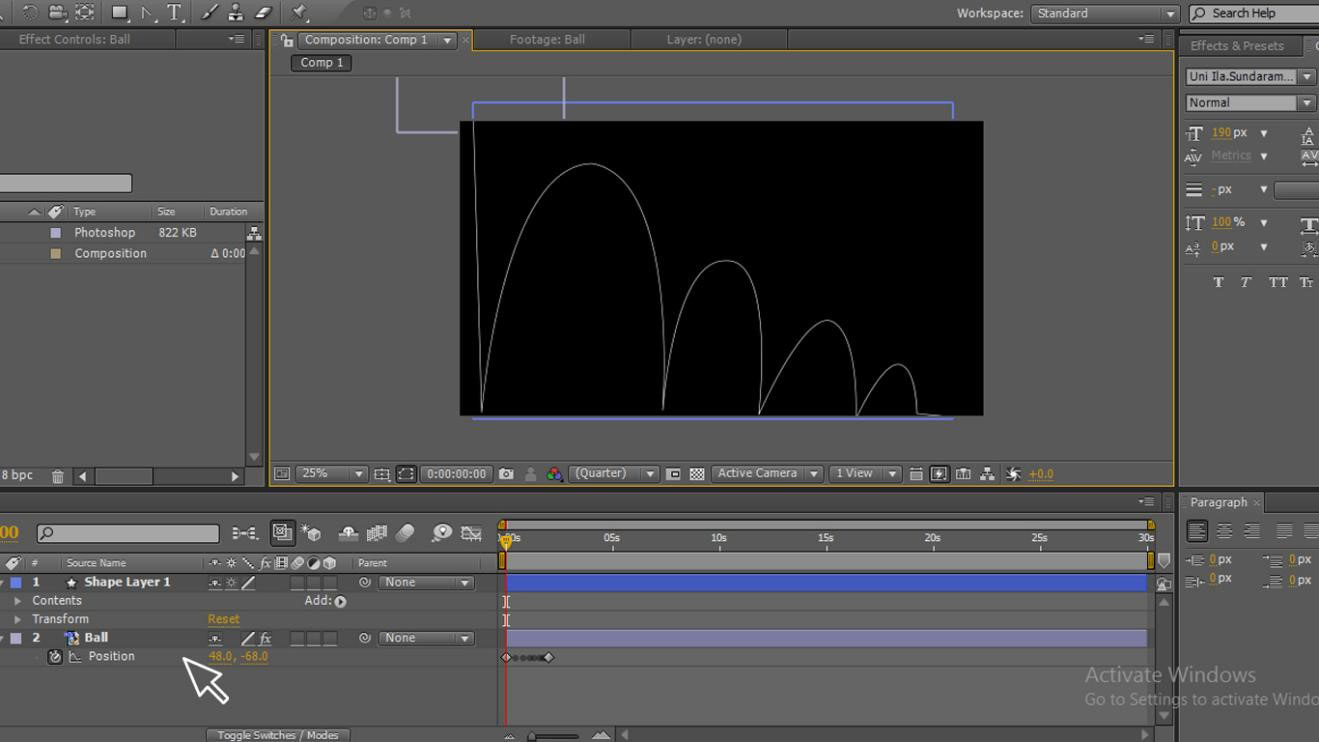
Step 5: Now draw a shape according to our animation requirement, we have imported a ball object, so I draw a shape of up and down because I feel that the ball need to fall from up to down and jump step by step so I started the first point at the top and draw an up and down shape and ends at a corner where the ball needs to stop.
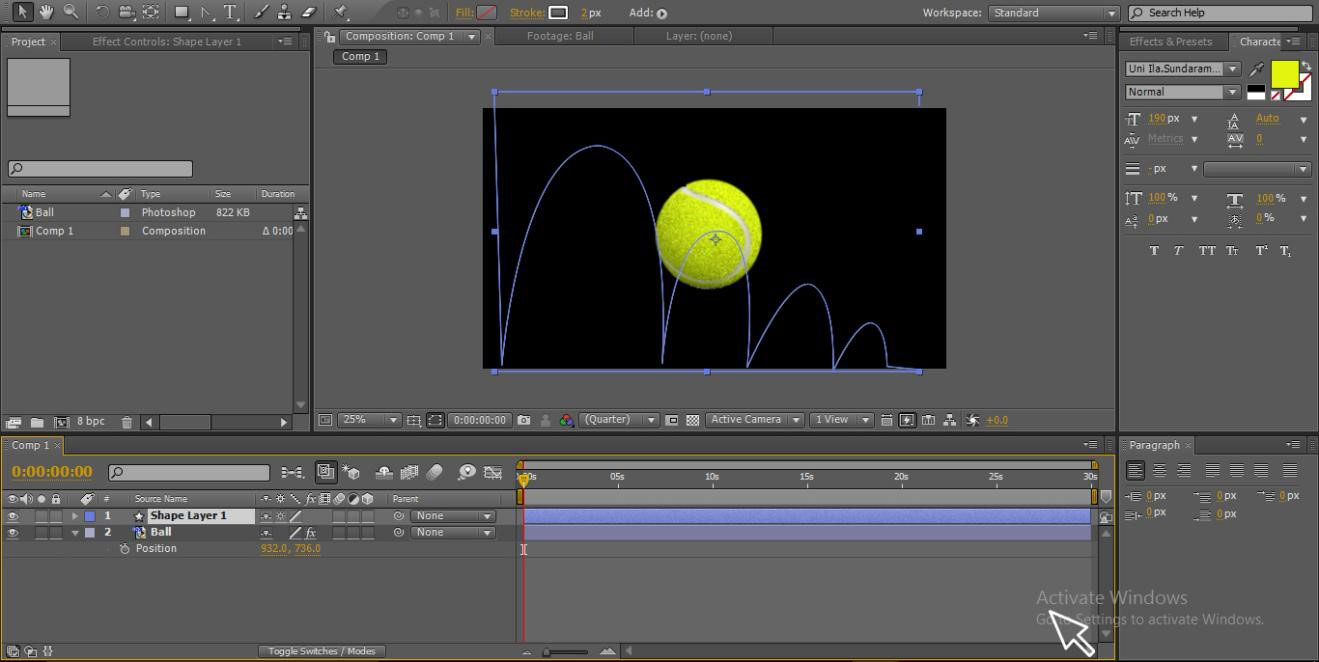
Here you can see how the shape is; in this shape, the ball is going to travel, you can find the first point out of the screen where the ball travels from out of the screen.
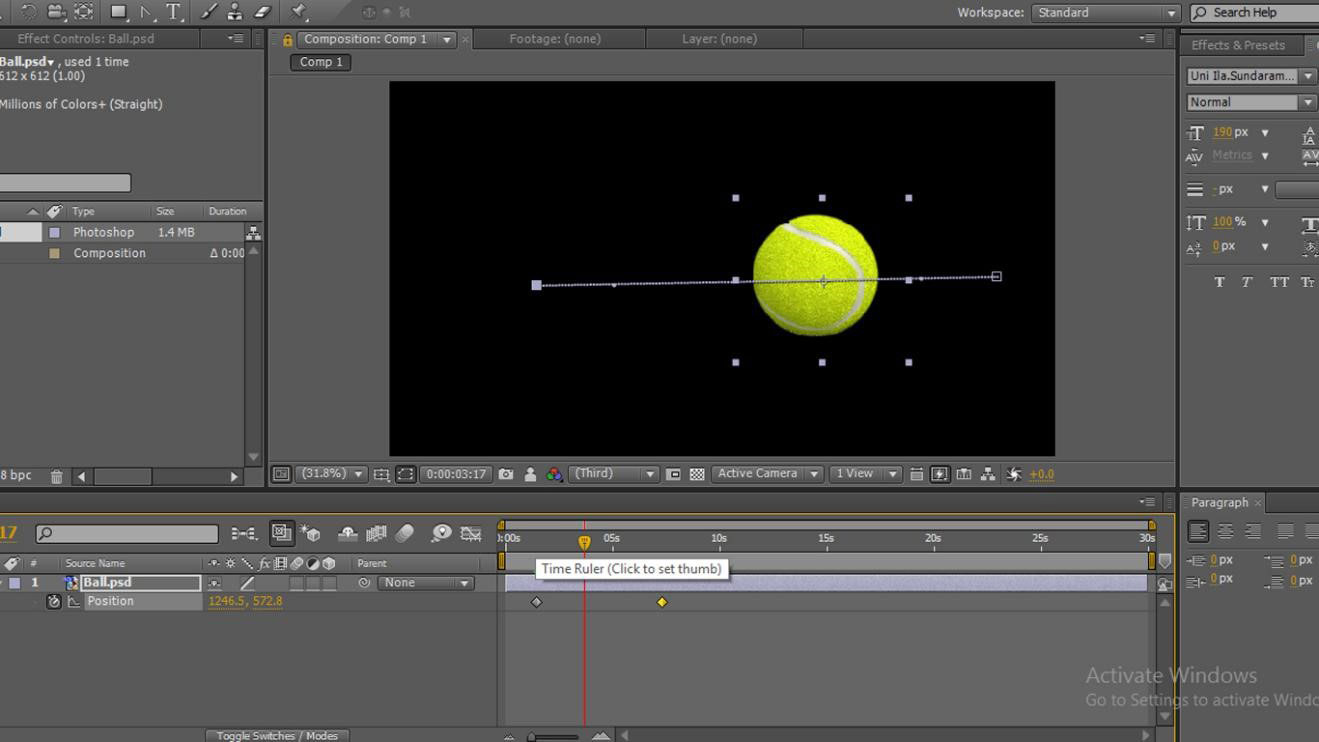
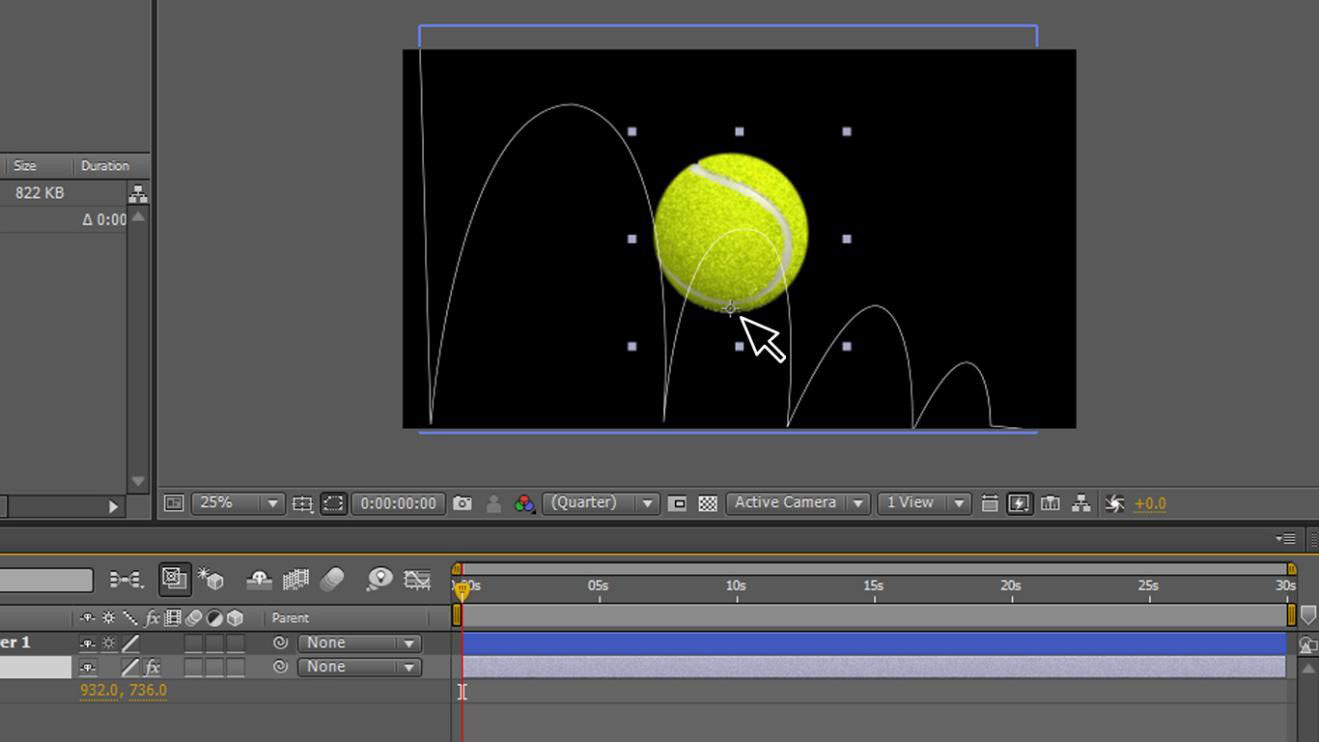
Step 6: For every object, there will be a centre point; in this process, we need to change the centre point to the bottom because we have an object ball; if the ball has a center point in the middle while touching the ground, its center point will meet the ground where it won’t look professional, so I changed the center point if we have any other object we can change the center point according to the requirement.
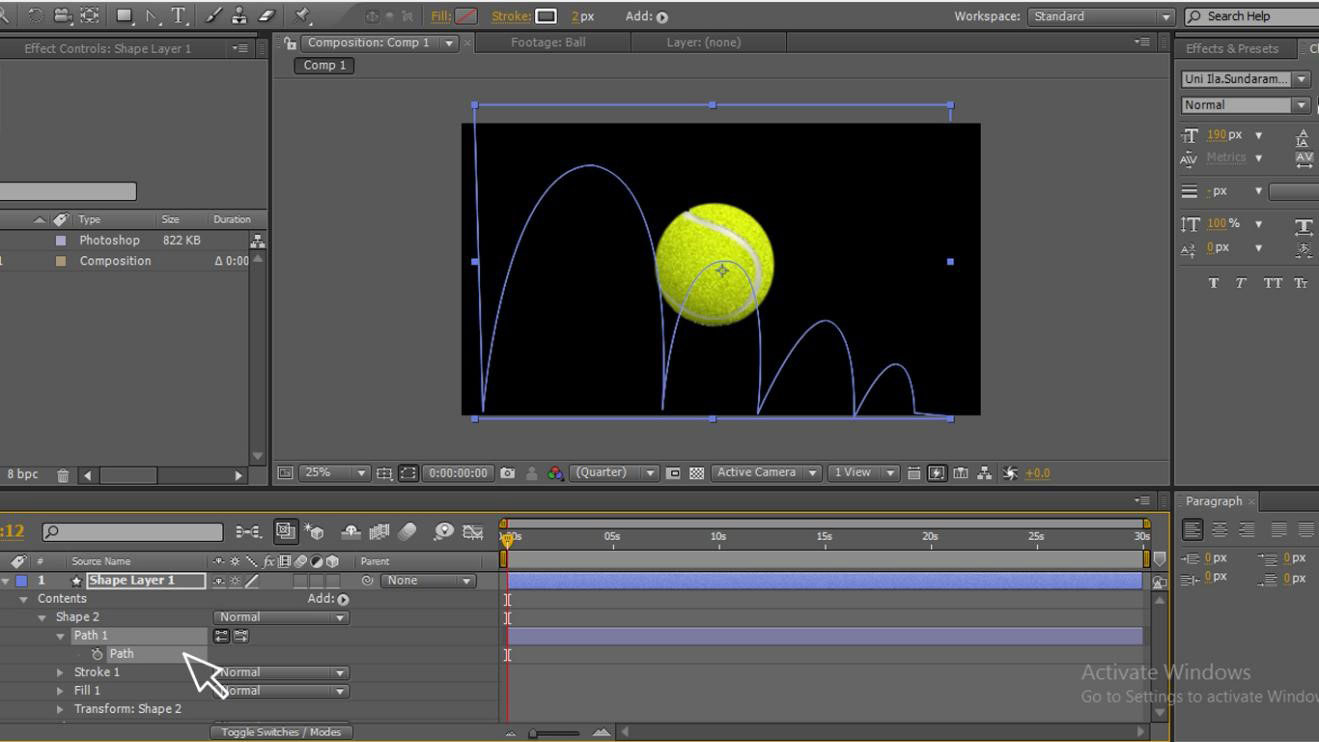
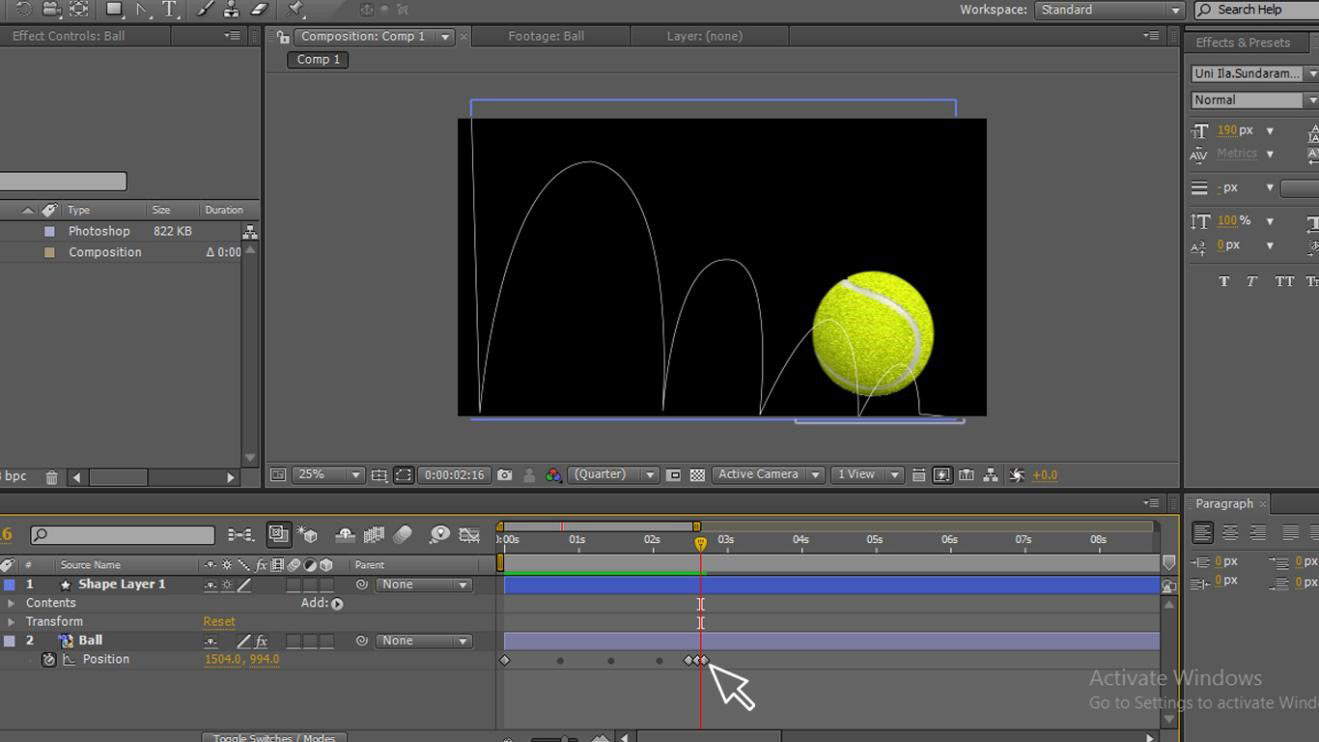
Step 7: Go to the Shape Layer, Contents, shape – Path 1 – Path. Select the path and copy, make sure both the path is selected while copying.
Step 8: Go to the object (ball) and select the position by clicking (p) on the keyboard and paste.
Now the ball is hidden because while applying the path copy to position to the ball, it moves in that path.
Step 9: By adjusting the key points in the timeline, we can manage the animation like fast starting and slow at the end.
Conclusion
In this process, we animate a ball using the pen tool; we draw a shape and create a path and copied the path from the shape layer and pasted in the object position by that the object follows the shape positions. By using this as a sample, we create many other animations. Like ways, we can animate any object by using the pen tool.
Recommended Articles
This is a guide to Pen Tool in After Effects. Here we discuss how to use Pen Tool in After Effects with practical examples. You can also go through our other related articles to learn more –
