EDUCBA

EDUCBA

MENUMENU
  • Free Tutorials
  • Free Courses
  • Certification Courses
  • 280+ Courses All in One Bundle
  • Login
Home Design Design Tutorials After Effects Tutorial After Effects Timeline
Secondary Sidebar
After Effects Tutorial
  • Effects
    • Crop in After Effects
    • Color Grading in After Effects
    • Text Effects in After Effects
    • After Effects Templates
    • After Effects Bounce Expression
    • Time Remapping After Effects
    • After Effects Gradient
    • After Effect Font
    • After Effects Duplicate Composition
    • After Effects Expressions List
    • After Effects Green Screen
    • After Effects Loop Composition
    • Drop Shadow in After Effects
    • Background in After Effects
    • Blur in After Effects
    • After Effects Freeze Frame
    • After Effects Move Anchor Point
    • After effects?Quicktime
    • Text in After Effects
    • Motion Blur in After Effects
    • Mask in After Effects
    • Color Correction in After Effects
    • Blending Modes in After Effects
    • Track Matte in After Effects
    • Transparent Background in After Effects
    • Slow Motion in After Effects
    • Animation in After Effects
    • Text Animation in After Effects
    • Logo Animation in After Effects
    • 2D After Effects Animation
    • 3D Effects in After Effects
    • 3D Text in After Effects
    • After Effects 3D Objects
    • Shape Layers in After Effects
    • Export in After Effects
    • Morphing in After Effects
    • Twitch in After Effects
    • Snowfall in After Effects
    • Rain in After Effects
    • Masking Layers in After Effects
    • Group Layers in After Effects
    • Glitch Effect in After Effects
    • Ripple Effect in After Effects
    • Composition in After Effects
    • After Effects Transitions
    • Typography in After Effects
    • Slider Control After Effects
    • Motion Graphics in After Effects
    • Wiggle in After Effects
    • After Effects Portable
    • Wiggle Expression in After Effects
    • Keylight in After Effects
    • Rotoscoping in After Effects
    • After Effects Render
    • After Effects Expressions
    • After Effects Presets
    • Duik After Effects
    • After Effects Split Clip
    • Trapcode in After Effects
    • Plexus After Effects
    • Logo Reveal After Effects
    • Mocha in After Effects
    • Twixtor in After Effects
    • Lens Flare in After Effects
    • After Effects Particles
    • After Effects Timeline
    • After Effects Tracking
    • Camera Tracking in After Effects
    • After Effects Repeater
    • After Effects Cartoon
    • After Effects Loop Expression
    • After Effects?Optical Flares
    • Glow in After Effects
    • After Effects GIF
    • After Effects Motion Tracking
    • After Effect Kinetic Typography
    • Cut Clips in After Effects
    • Lower third after effect
    • Masking Layers in Adobe After Effects
  • Basic
    • What is After Effects
    • After Effects Versions
    • After Effects Software
    • After Effects Shortcuts
    • Adobe After Effects Plugins
    • How to Use After Effects
  • After Effects Tools
    • After Effects Tools
    • After Effect Hologram
    • Pen Tool in After Effects
    • Puppet Tool in After Effects
    • KeyFrames in After Effects
    • Adding Keyframes in After Effects

Related Courses

After Effects Training Course

Adobe Premiere Pro Training Course

Design Training Course

After Effects Timeline

By Preeti PrajapatiPreeti Prajapati

After Effects Timeline

Introduction to After Effects Timeline

After Effects is one of the most important graphics editing and designing software of Adobe systems that works on editing video graphics, we have different types of sections on the working screen of this software, making our work easy in this software. Each section has a different purpose. Timeline is one of the important sections of this software. This section helps us in the monitoring of keys and frames of any video footage or any animation with its different handling parameters. Here we will understand the reach points of the Timeline sections of this software with an example. So let us start our discussion.

How to Use Timeline Sections in After Effects?

Timeline is an important section of this software, so we will discuss it in a very good manner along with the layer section of this software because these two panels work together. But before discussing them, let us have a look at sections of this software.

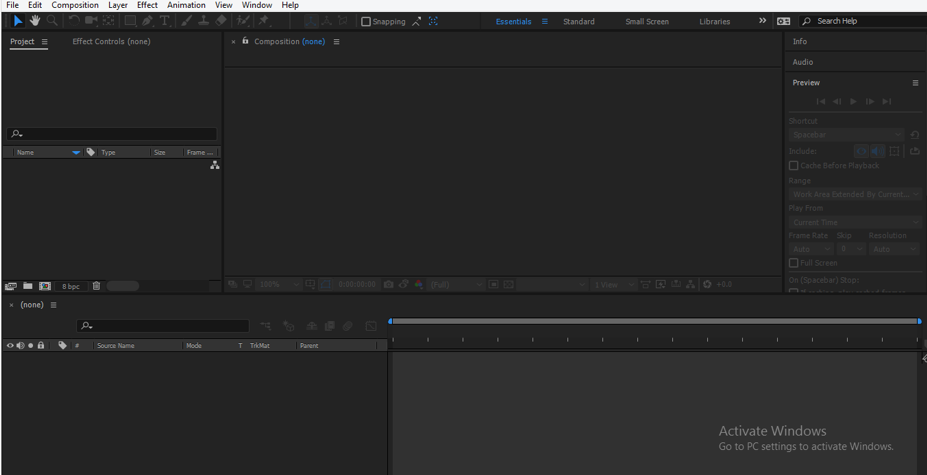
Step 1: At the top of the working screen, there are two ribbons; one is the Menu bar, and the other is Toolbar; below this, there are three sections that are Project panel at the left side of the working screen, the Composition window at the center of the working screen and Parameter sections at the right of the working screen, below these sections there are two sections that are Layer panel at the left side of bottom screen and Timeline panel at the right side of bottom end. You can make your working screen by adjusting the place of these sections according to your requirements.

working screen

Start Your Free Design Course

3D animation, modelling, simulation, game development & others

Step 2: Let us now have a New Composition for our learning. For ‘New Composition, go to the Composition menu of the Menu bar, which is at the top of the working screen. A drop-down list will be open once you click on this sub-menu; click on the ‘New Composition option of the drop-down list.

New Composition

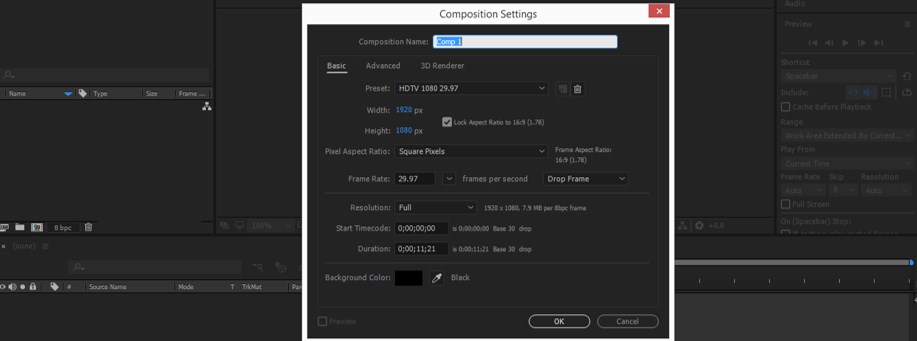
Step 3: Once you click on this option, a Composition settings dialog box will be open. Make your desired settings here in this box and press the Ok button of this dialog box for applying the settings.

Composition settings

Step 4: Now, let us take an Ellipse tool from the tool panel of this software by click on it with the mouse button.

Ellipse tool

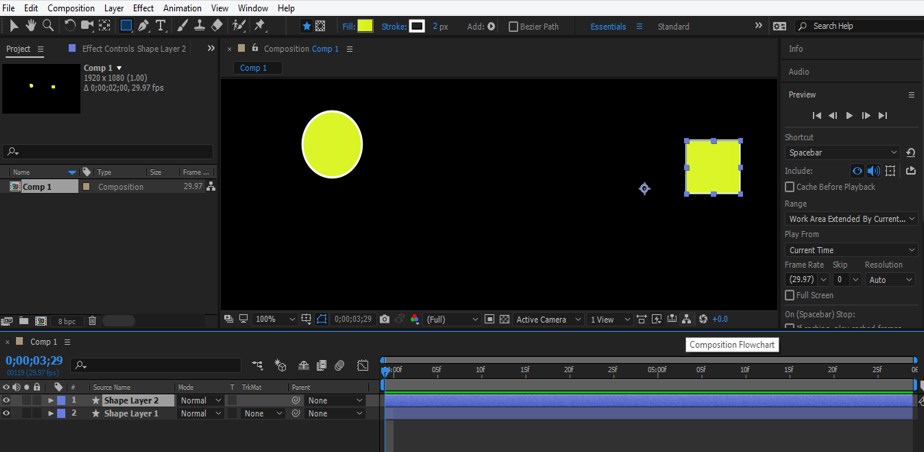
Step 5: And draw a circle like this with this tool.

draw a circle

Step 6: Now, take the Rectangle tool from the tool panel of this software by click on it and draw a rectangle in a new shape layer like this with this tool.

Rectangle tool

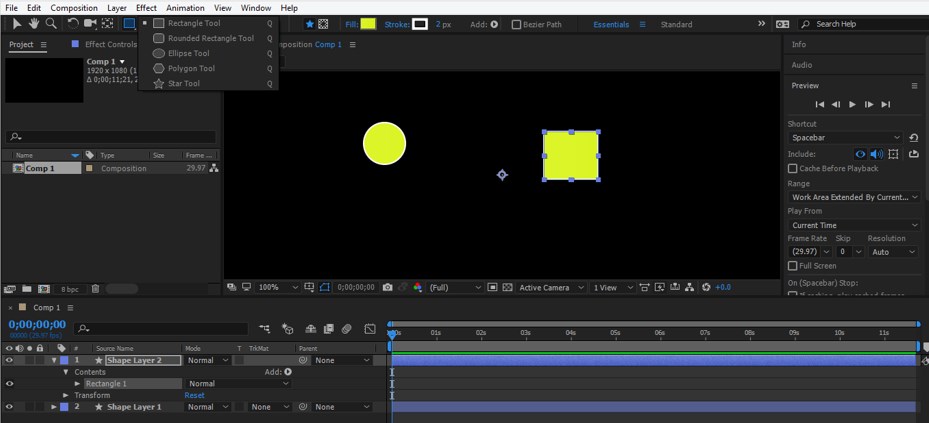
Step 7: Now, come to the Layer panel; we have two layers in the layer panel of this software, which is at the bottom end of this software, and Timeline at the right side of this Layer section.

Layer panel

Step 8: This is the Timeline indicator through which we set time, frame, and key for animating properties of our object or for editing our video footage.

Timeline indicator

Step 9: This ruler is known as the Time ruler, which shows you the time and frame rate of animation made by you.

Time ruler

Step 10: This bar shows you the working area of your animation and the last end of this ruler called Work Area End.

Work Area End

Step 11: You can adjust it by dragging the arrow indicator by the mouse button when the arrow indicator comes at the end of this ruler.

After Effects Timeline - 11

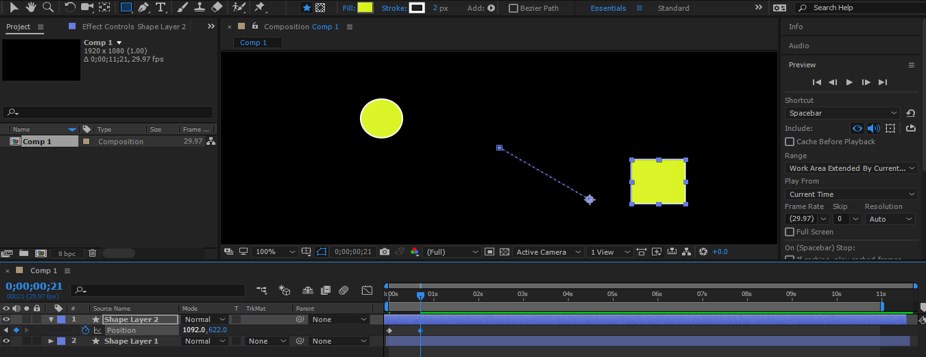
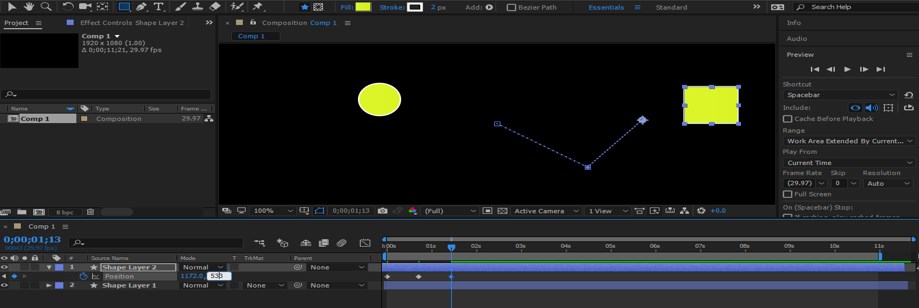
Step 12: You can add a key in the timeline section of animating your object by click on the small arrow icon of the shape layer like this.

After Effects Timeline - 12

Step 13: Now, I will press P from the keyboard of opening the Position property of this layer and then place the Time indicator head at some seconds and change the value of the Position property of this layer.

After Effects Timeline - 13

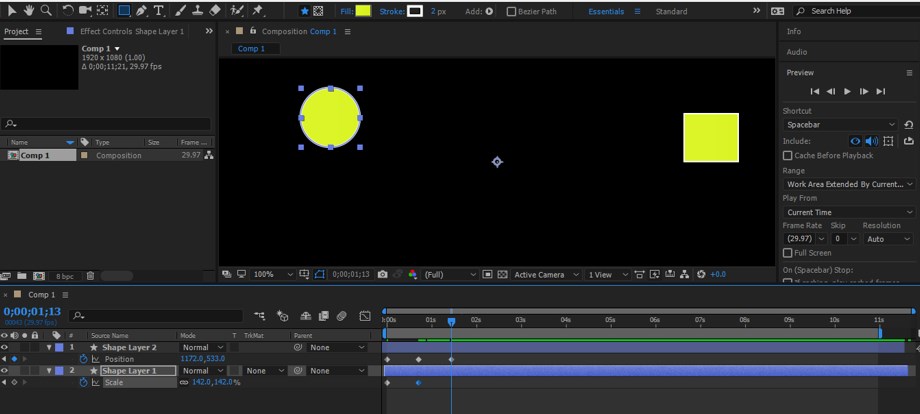
Step 14: In the same way, you can add more and more key for animating the object.

After Effects Timeline - 14

Step 15: Same as you can add keys in another layer of this composition.

After Effects Timeline - 15

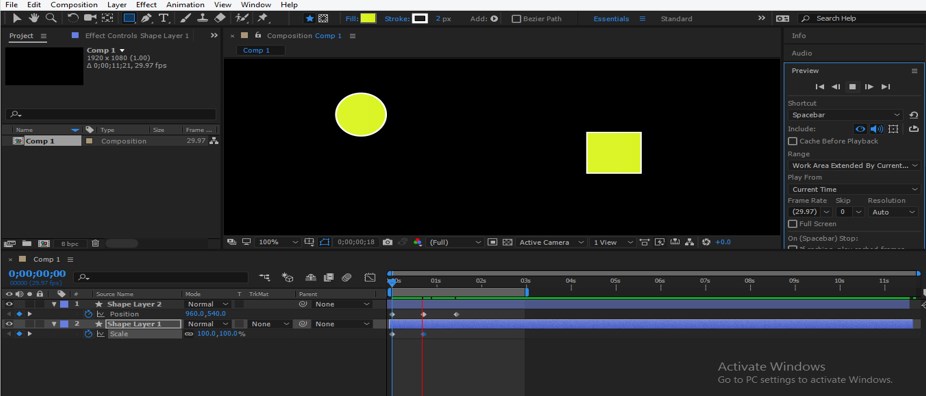
Step 16: Now, you can see the animation by playing it. For playing it, press the keyboard’s Space bar, or you can go to the Preview tab of the Parameters section of this software for playing the animation.

After Effects Timeline - 16

Step 17: You can zoom out or zoom in the Timeline work area by dragging this bar with the mouse button.

After Effects Timeline - 17

Step 18: If you want to start the first layer from 3 sec, then place the time indicator head at 3 sec, select this first layer, and then press the ‘[‘ button from the keyboard.

After Effects Timeline - 18

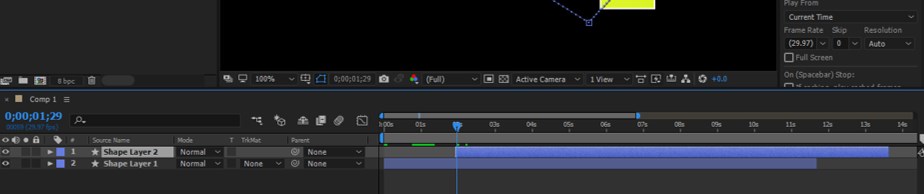
Step 19: You want to end that layer at 3 sec then press the ‘]’ button from the keyboard.

After Effects Timeline - 19

Step 20: Or you can simply hold the bar of this layer with the mouse button and drag it to that place where you want to place it.

After Effects Timeline - 20

Step 21: If you want to trim any layer in two parts, then selected that layer and press Ctrl + Shift + D button from the keyboard. Once you press these buttons, then the layer will be trim like this.

After Effects Timeline - 21

Step 22: You can select any one of the trim parts and delete it if you don’t want it by pressing the Delete button from the keyboard.

After Effects Timeline - 22

Step 23: If you want to start your work area from any particular frame, then it is very simple; for example, I want to start my work area from 3 sec in the timeline, then I will place the time indicator at 3 sec and press the B button from the keyboard.

.After Effects Timeline - 23

Step 24:  Opposite to this, if I want to end my work area at 3 sec, then I will place the time indicator at 3 sec and press the N button from the keyboard.

After Effects Timeline - 24

Step 25: Now, if you want to expand your selected work area, then make right-click on that area with the mouse button. A drop-down list will be open like this; choose the ‘Trim Comp to work area’ option of the drop-down list.

After Effects Timeline - 25

Step 26: And your selected area will be expanded like this.

After Effects Timeline - 26

These are all about the Timeline panel of After Effects software. You will get more knowledge about this panel slowly once you start working on this software.

All in One Design Bundle(280+ Courses, 100+ projects)
AutoCADHoudiniAdobe Premiere ProPhotoshop
SolidworksVFX Visual EffectsCorelDrawUnreal Engine
Price
View Courses
280+ Online Courses | 100+ projects | 2000+ Hours | Verifiable Certificates | Lifetime Access
4.6 (64,783 ratings)

Conclusion

Now, after going through this article, you can understand ‘what is Timeline in After Effects software’, and you can analyze different features of this section of After Effects software by practicing on it. You must know all about the Timeline panel of this software because it is very important to base part on this software’s working.

Recommended Articles

This is a guide to After Effects Timeline. Here we discuss an introduction, how to use Timeline in After Effects in a step by step manner. You can also go through our other related articles to learn more –

  1. Keylight in After Effects
  2. Background in After Effects
  3. Export in After Effects
  4. Photoshop Font Effects
Popular Course in this category
After Effects Training (3 Courses, 3+ Projects)
  3 Online Courses |  3 Hands-on Projects |  25+ Hours |  Verifiable Certificate of Completion
4.5
Price

View Course

Related Courses

Adobe Premiere Pro Tutorial (4 Courses, 7+ Projects)4.9
All in One Design Bundle (280+ Courses, 100+ projects)4.8
0 Shares
Share
Tweet
Share
Primary Sidebar
Footer
About Us
  • Blog
  • Who is EDUCBA?
  • Sign Up
  • Live Classes
  • Corporate Training
  • Certificate from Top Institutions
  • Contact Us
  • Verifiable Certificate
  • Reviews
  • Terms and Conditions
  • Privacy Policy
  •  
Apps
  • iPhone & iPad
  • Android
Resources
  • Free Courses
  • Photoshop Tutorial
  • 3ds Max Tutorial
  • All Tutorials
Certification Courses
  • All Courses
  • Design Course - All in One Bundle
  • Photoshop Course
  • Maya Course
  • Unreal Engine Course
  • Unity Course
  • DaVinci Resolve Course
  • Pro Tools Course

ISO 10004:2018 & ISO 9001:2015 Certified

© 2022 - EDUCBA. ALL RIGHTS RESERVED. THE CERTIFICATION NAMES ARE THE TRADEMARKS OF THEIR RESPECTIVE OWNERS.

EDUCBA
Free Design Course

Banner Creation, Object Selection, Sky Replacement, Advance Filters & others

*Please provide your correct email id. Login details for this Free course will be emailed to you

By signing up, you agree to our Terms of Use and Privacy Policy.

EDUCBA Login

Forgot Password?

By signing up, you agree to our Terms of Use and Privacy Policy.

EDUCBA
Free Design Course

3D animation, modelling, simulation, game development & others

*Please provide your correct email id. Login details for this Free course will be emailed to you

By signing up, you agree to our Terms of Use and Privacy Policy.

EDUCBA

*Please provide your correct email id. Login details for this Free course will be emailed to you

By signing up, you agree to our Terms of Use and Privacy Policy.

Let’s Get Started

By signing up, you agree to our Terms of Use and Privacy Policy.

This website or its third-party tools use cookies, which are necessary to its functioning and required to achieve the purposes illustrated in the cookie policy. By closing this banner, scrolling this page, clicking a link or continuing to browse otherwise, you agree to our Privacy Policy

Loading . . .
Quiz
Question:

Answer:

Quiz Result
Total QuestionsCorrect AnswersWrong AnswersPercentage

Explore 1000+ varieties of Mock tests View more