Updated March 16, 2023
![]()
Introduction on Mantis Bug Tracker
It is a software product that is used for defect lifestyle or bug tracking progression. It allows a user to add a number of plugins for adapting various functionalities of the application subjected for testing. Mantis provides project-level access to the bugs which are being worked on the tool and also supports all the major system platforms, such as Windows, Android, iOS, etc. The installation process for Mantis Bus Tracker is uncomplicated in comparison to other tools.
How to Use Mantis Bug Tracker?
Mantis is very easy and user-friendly to use. Let’s understand the step by step procedure of working on Mantis bug tracker as a beginner:
1. How to Add Project in Mantis Bug Tracker?
The first and foremost task to do after logging in to the Mantis Bug Tracker is to add a project to it. There are 3 simple steps that need to be followed to add a project in Mantis:
Step 1: Navigate to the Manage Projects sections by clicking on the Manage tab present on the left panel of the screen.
![]()
Step 2: Add the Project details by clicking on the Create project button. In the Project details, fill the following fields:
– Project Name.
– Status of the project, which can be development, release, stable, Obsolete.
– View Status, which can be Public or Private.
– Project Description.
![]()
Step 3: After entering all the project details, click on the Add Project button present at the bottom to complete the project creation. We can see the above newly added project under the Manage -> Manage Projects section. ![]()
2. How to Manage Users in Mantis Bug Tracker?
For an administrator, it is important to manage the various users working on a project. Following steps need to be followed in order to Manage different users in Mantis:
Step 1: Navigate to the Manage Users sections by clicking on the Manage tab present on the left panel of the screen.
![]()
Step 2: After all the users are displayed in the Manage Users section, various filters can be applied to it in order to manage users in different ways:
- Filtering the users by typing the username, real name or email in the search box.
![]()
- Filtering the disabled and Inactive users by checking the ‘Show Disabled’ and ‘Hide Inactive’ checkbox.
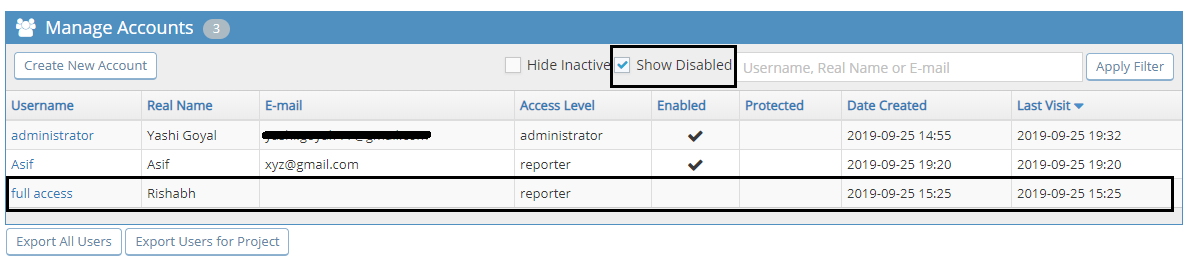
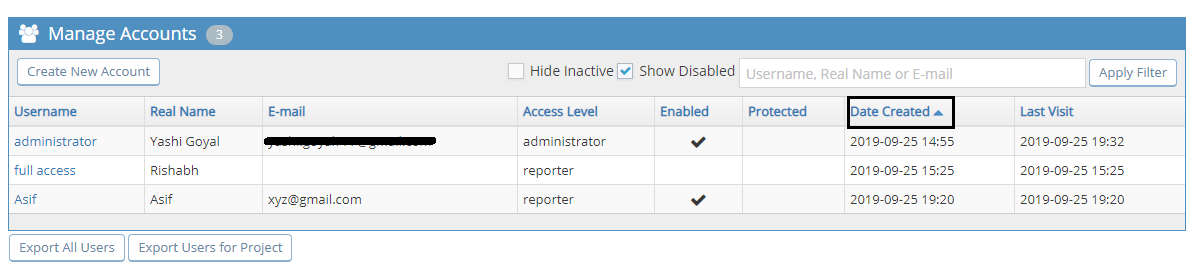
- Filtering the users by on the basis of ‘Date Created’ in ascending or descending order by clicking on the ‘Date Created’ heading.
- Filtering the users on the basis of ‘Last Visit’ in ascending or descending order by clicking on the ‘Last Visit’ heading.

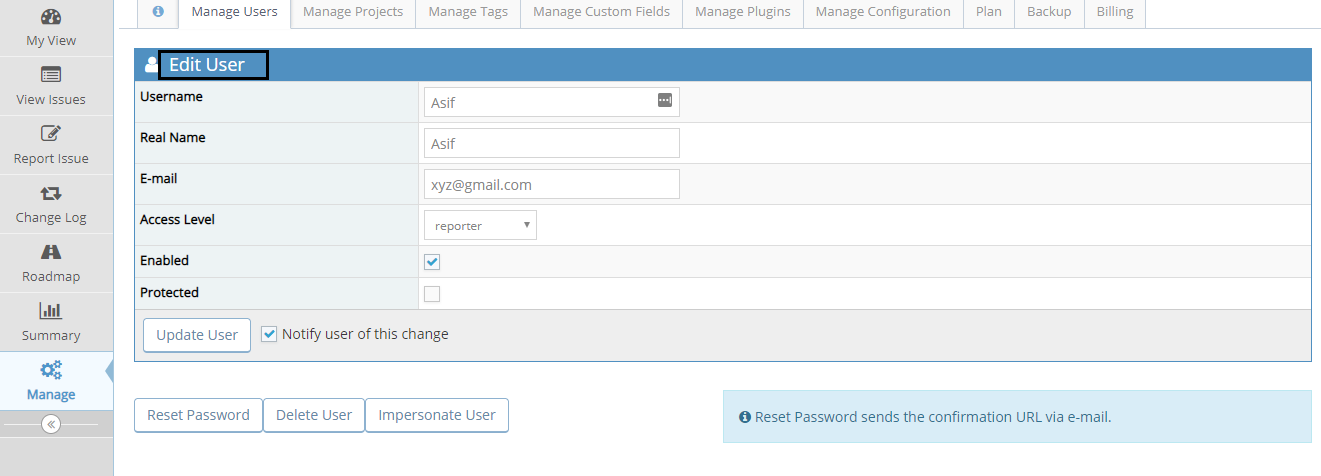
Step 3: The administrator can also make any changes in any user by clicking on the Username of the user. Admin is redirected to the ‘Edit User’ profile of the respective user and can make any changes required.
3. How to Report an Issue in Mantis Bug Tracker?
The main task for which mantis is used for reporting and tracking the bugs. As the bug template differs from one project to another, we can modify that by adding the Custom Fields in the bug template according to the requirements. Logging a bug in Mantis is very easy as it is very user-friendly. All the fields or the tasks which need to be done are shown clearly on every web page. Let us understand the step by step procedure of reporting a bug in the mantis bug tracker:
Step 1: First and foremost step before logging any bug or doing anything in mantis is to login using valid credentials.
Step 2:In order to log the big, click on the ‘Report Issue’ icon present on the left corner of the Home page of Mantis.

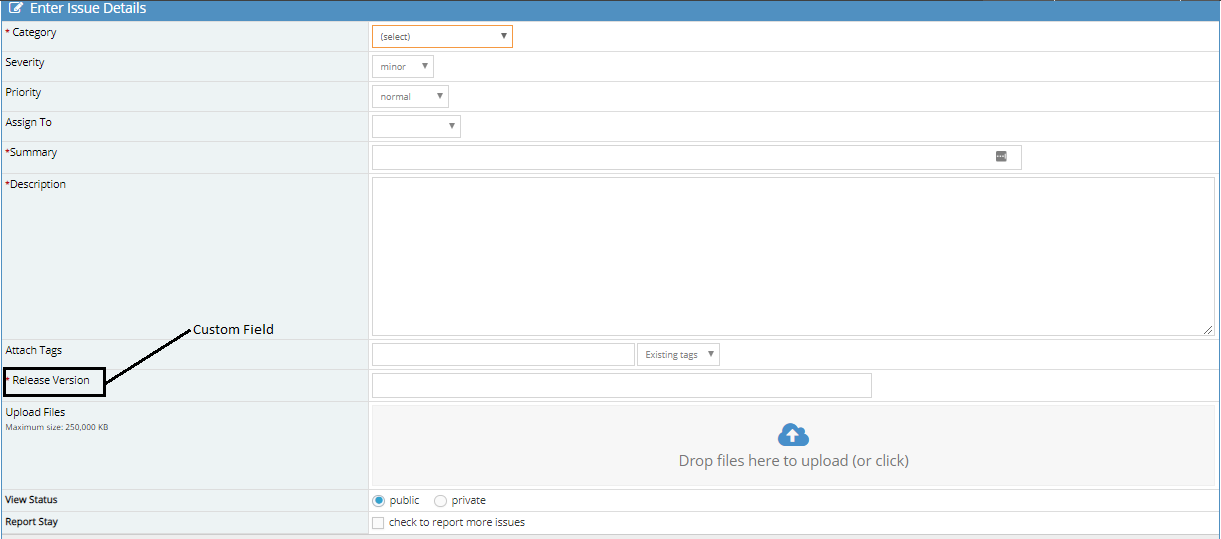
Step 3: ‘Enter Issue details’ page is displayed to the user, and the user can enter the details of the bug with the following fields:
- A category which can be deployment, development or General. We can also add the values of Category under the Manage tab according to the project requirements. In the case of an e-commerce application, Category values can also be WebUI, database, etc.
- Severity: Values can be major, minor, trivial, block, crash, etc., depending on the severity of the bug reported.
- Priority: Values of this can be normal, high, urgent, immediate. Defining the priority of a bug is very important while logging it.
- Assign: To have the list of people who can be assigned to task actions for the logged bug
- Summary: Short and descriptive summary of the bug
- Bug Description: Enhanced description, including steps to reproduce to describe the bug.
- Tags: Tags helps to easily identify the bugs. We can create custom tags according to the project requirements by navigating to the Manage -> Manage Tags section.
- Files to be attached: Any screenshots, recording, pdf needs to be attached related to the bug.
- View Status
Click on the ‘Submit Issue’ button present at the bottom of the web page in order to submit the above bug with the details provided.
This bug template may differ from one project to project. In case your template is different, there is no need to worry; check for the Custom Fields from Manage -> Manage Custom Fields in order to add/delete the custom fields.
Step 4: After submitting the issue with all the details provided, the user is redirected to the ‘View Issue Details’ page, in which the user can view all the details related to the above issue.
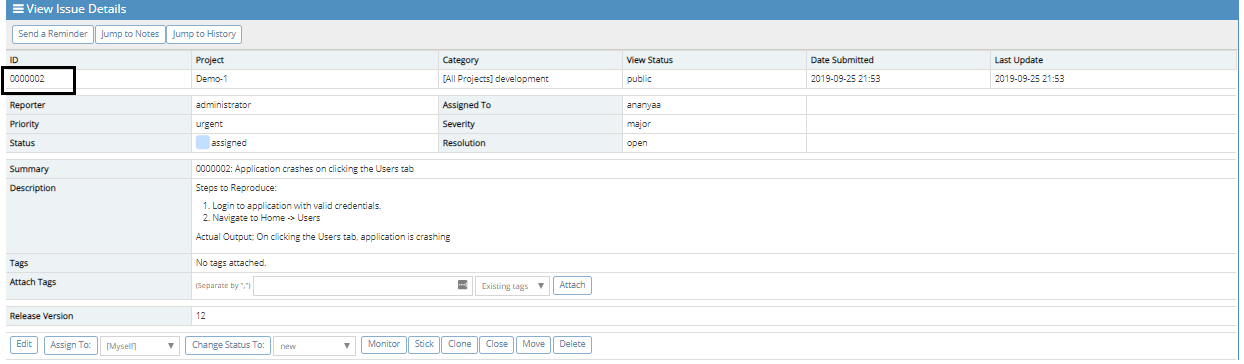
Step 5: Now, more details can be added to the above-created issue, like changing the status. Consider a case in which the tester mistakenly reported an issue that is a duplicate of the already present issue; he/she can mark Close or Delete whatever they feel like according to the situation.
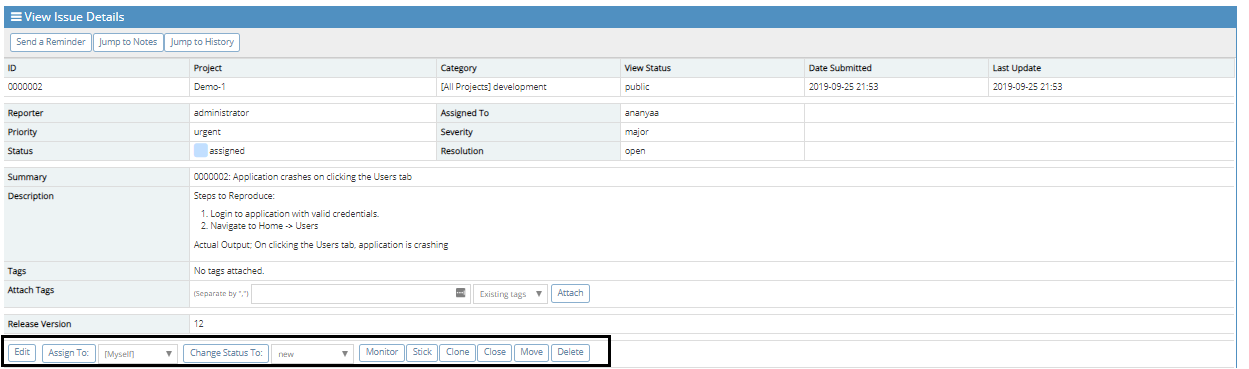
Step 6: ‘Add Note’ section is also displayed to the user if the reporter or the assigned person wants to add something regarding the above issue.

Step 7: ‘Issue History’ section is displayed in order to check the history of the above issue. It shows every single detail of the task which is done by any of the people on the issue.

Step 8: All the created issue by a particular user is displayed on the timeline of the user with all the details, User can view the timeline by clicking on the ‘My View’ tab.
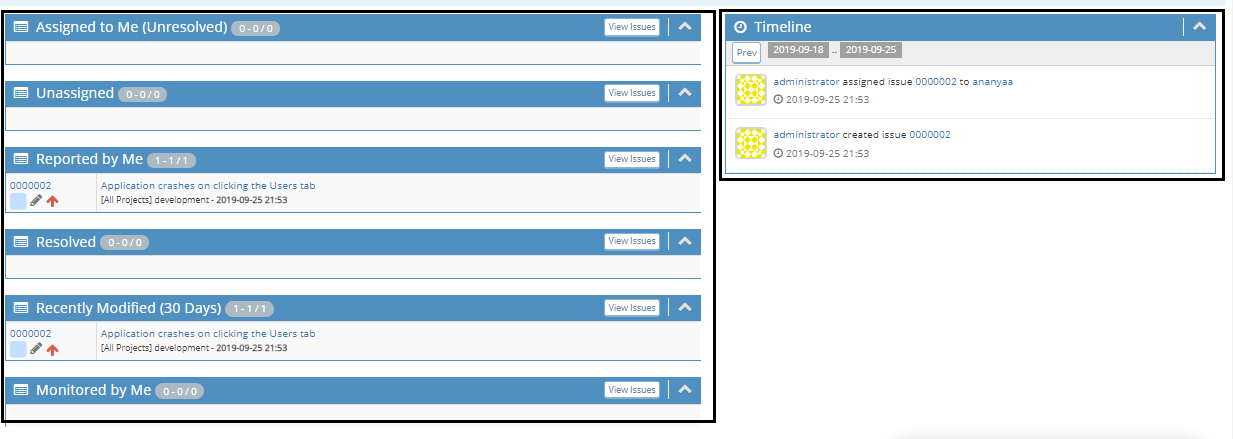
Otherwise, if logged in via administrator, having permission to view all the issues reported by all users. Issues are displayed under the ‘View Issues’ tab. Users can even download the issues in various formats like CSV, Excel, etc.
Step 9: Clicking on the Issue_Id attached automatically with the above-created issue is displayed as a link, and clicking on which opens the issue and shows all the details related to the above issue.

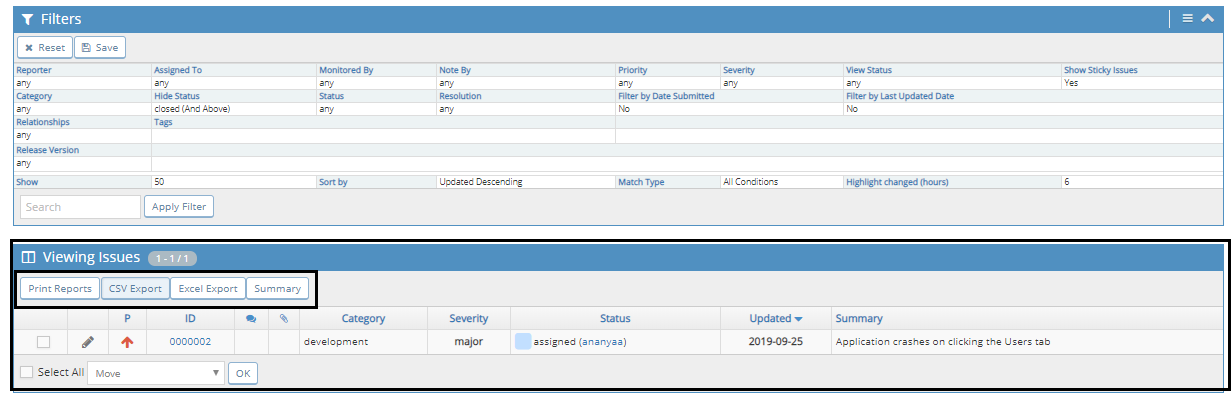
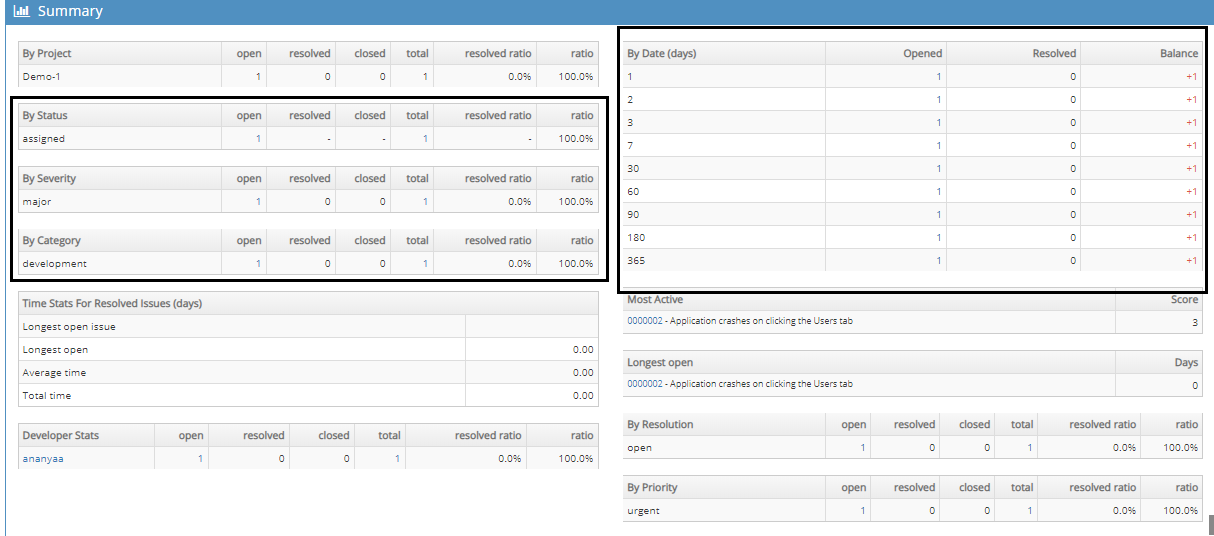
Step 10: In order to view the status of the bugs reported or the summary of the project, a detailed summary is displayed by clicking on the ‘Summary’ tab present on the left panel of the webpage.
The Summary tab shows each and every detail related to the project like:
- Number of bugs on the basis of various categories
- Status of the various bugs.
4. How to Create a New User in Mantis Bug Tracker?
It is very important to create users in the MANTIS, which will be working on the software. These users can be developers, testers or the product owner having different permission according to their roles. Below mentioned steps need to be followed in order to create a new user in mantis:
Step 1: Navigate to the Manage Users sections by clicking on the Manage tab present on the left panel of the screen. Click on the ‘Create New Account’ button present on the page.

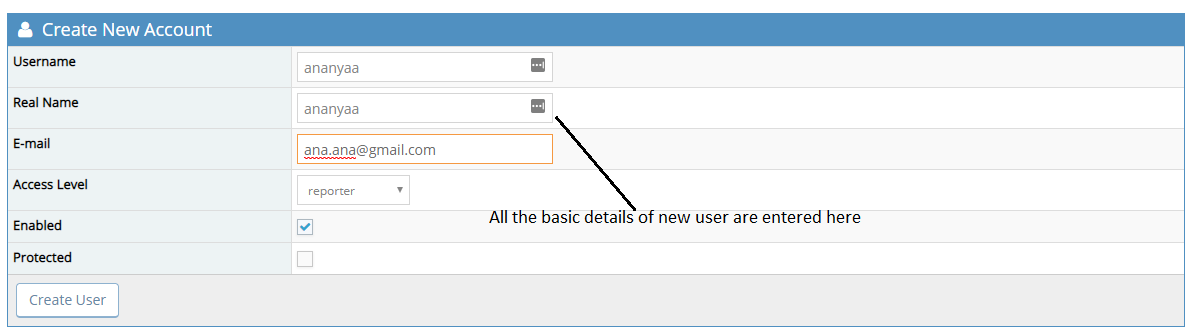
Step 2: After clicking on the button of ‘Create New Account’, a new web page is displayed asking the user to enter the details of the new user. The details include:
- Username
- Realname
- Email Address
- Access Level, which can be a Reporter, updater, developer, manager or administrator.
- Enabled
- Protected
After filling in all the details of the new user, click on the ‘Create User’ button present at the bottom.
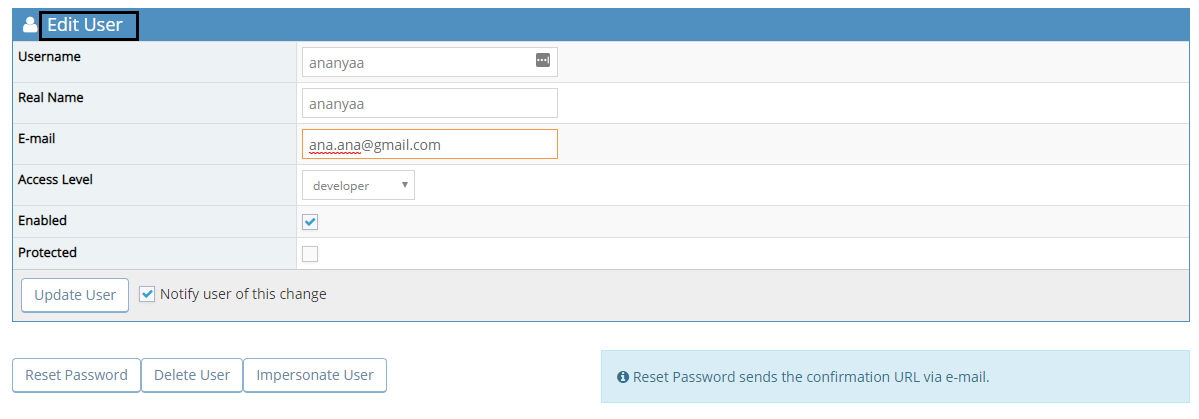
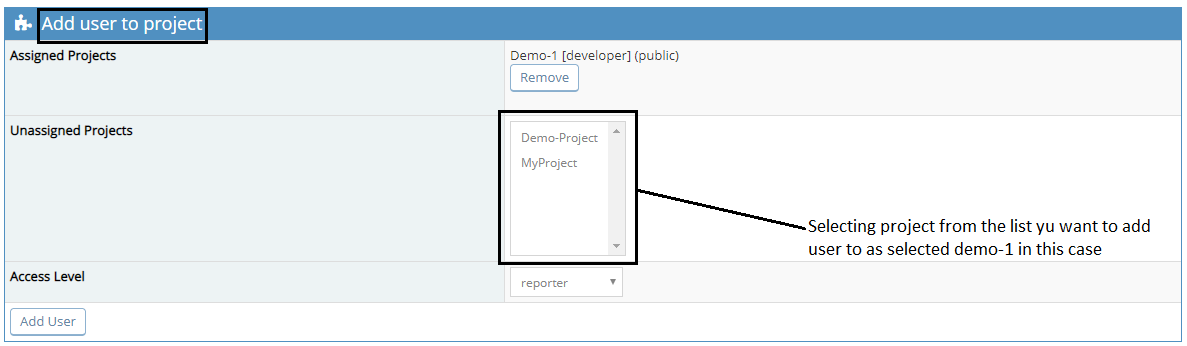
Step 3: A user is created with the basic details provided above. Now the ‘Edit User’ screen is displayed in order to complete the advanced details of the above-created user. ‘Add User to Project’ panel is displayed asking for which projects available you want to add the user to. Select the desired project for which we want to add the user and click on the ‘Add User’ button present.
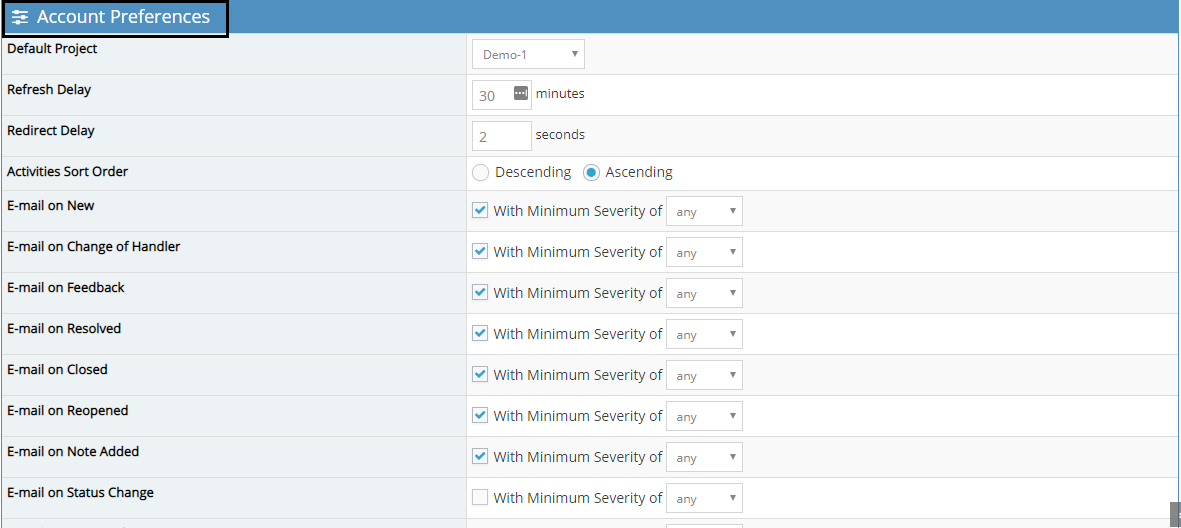
Step 4: In the ‘Account Preferences’ box, choose the preferences for the user like Default Project, Refresh Delay, Redirect Delay, Email on various statuses of a bug, etc. After updating all the preferences, click on the ‘Update Prefs’ button present at the bottom of the panel.
Step 5: Email is sent to the added user with the username and the link to set the password. User can click on the link and set the password he/ she wants and can start accessing the mantis bug tracker.
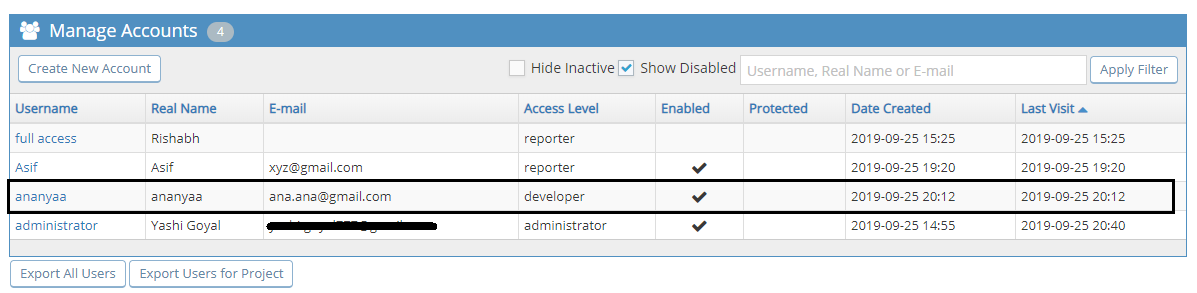
Step 6: The Newly added user is reflected in the Manager User screen of the administrator who has permission to view and manage all the users.
5. How to Create a Custom Field in Mantis Bug Tracker?
Adding a new custom field in the bug means adding any field extra in the default bug template in order to have the enhanced details of the bug. In every organization, infact, for every project, there is a different template of bug according to the requirements of the project. This template is initially decided by all the team members before the testing and bug logging procedure. Suppose in an Agile project we want a bug reporter, either tester or developer needs to mention the release or Sprint number in the bug as a mandatory field. For this purpose, we will add a custom field in the Bug layout and make it mandatory so that whosoever will be filing the bug requires to enter that field.
Below given steps are followed in order to add a custom field in the Mantis bug tracker:
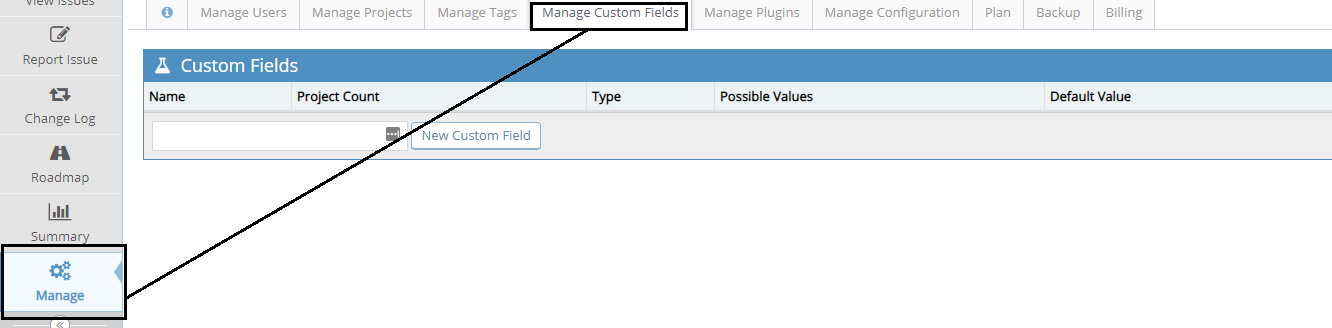
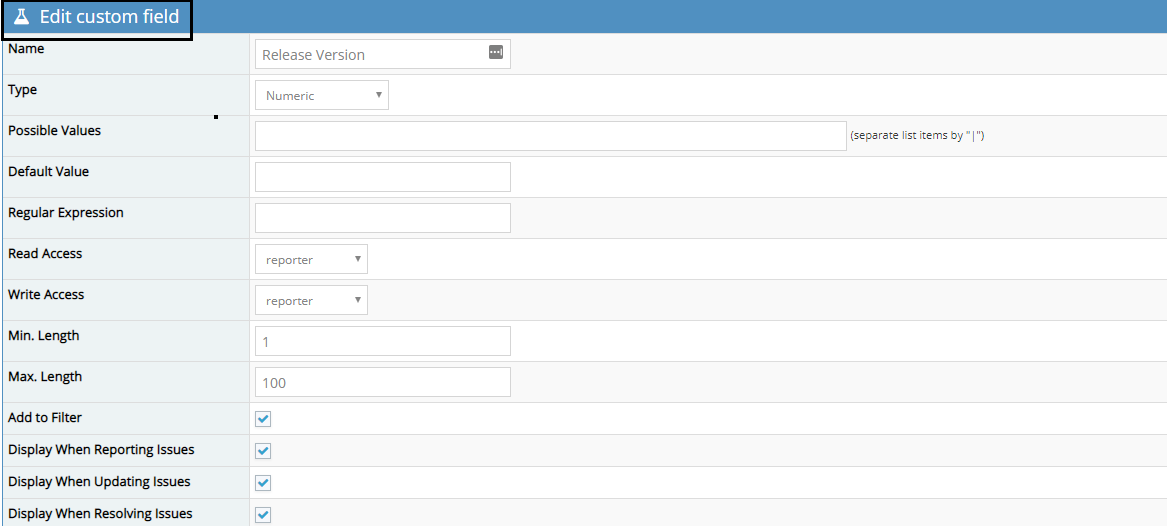
Step 1: Navigate to the Manage Custom Fields sections by clicking on the Manage tab present on the left panel of the screen.
Step 2: Enter the name of the Custom field you want to add in the text box given and click on the ‘New Custom Field’ button.

Step 3: ‘Edit Custom Field’ screen is displayed to the user in which the user needs to enter the details of the custom fields like Field Type, max length, minimum length, and the checkboxes when that particular field should be displayed. After entering all the details of the Custom Field according to the requirements, click on the ‘Update Custom Field’ button present at the bottom.
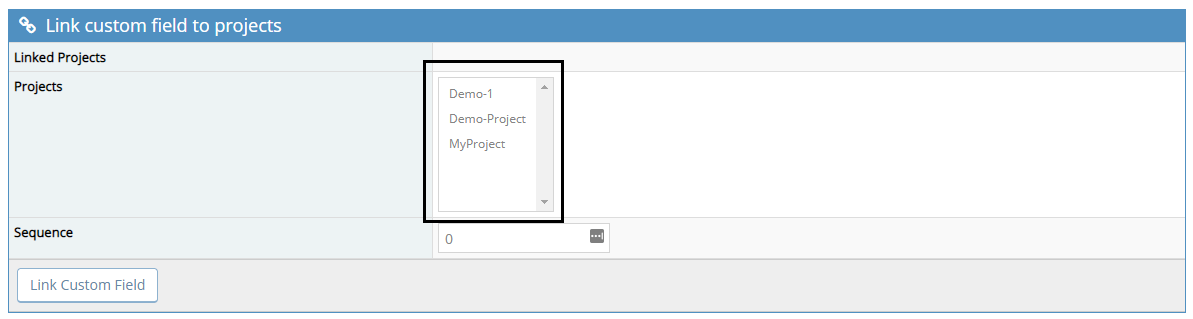
Step 4: After entering all the values of the Custom Field according to the requirements, the next important step is to link the Custom Field with the project. Linking the field with the project means in which the project’s bug template we want that field to be added. Because as mentioned earlier, fields are specific to the projects and not necessarily all the projects would need the above added Custom Field.
Not only we can define the project of the Custom Field, but we can also enter the sequence in which we want that field to appear in our bug template. Click on the ‘Link Custom Field’ button in order to complete the linking process.
Step 5: We can see that the above created Custom Field is displayed in the Custom Field Section under the Manage tab.

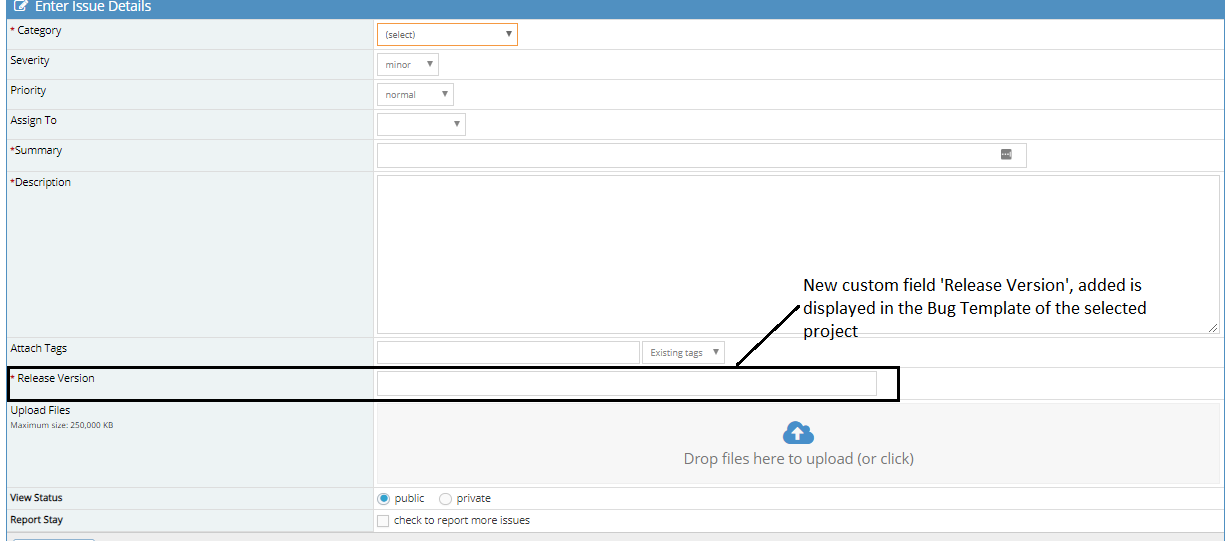
Step 6: Above created Custom Field will be clearly visible in the bug template when we report the bug by clicking on the ‘Report Issue’ tab.
Conclusion
There are various actions that can be performed in the Mantis Bug Tracker in order for the smooth access and working of a Bug tracking system. Apart from the above actions mentioned, there are many options available to customize the view, reporting and creating a template of bug.
Recommended Articles
This is a guide to Mantis Bug Tracker. Here we discuss the basic concept with How to Add, Manage, Create and Use Mantis Bug Tracker. You can also go through our other suggested articles –
