Updated March 13, 2023
Introduction to Install SVN
SVN is a valuable tool developed by Apache, used in the world of programming for software versioning and revision. It is an open-source centralized system. SVN comes in handy when multiple developers are working on an application, and they want to maintain their code at a place along with the track of versions created against each file, the commit history of each file.
If your client wants some documents/ progress in your code or is looking to export your code to client locations, this is probably the easiest platform to manage all those things. You can create any number of repositories based upon your content type or other distinguishing criteria specifically. You can create any number of folders in that repository branch, and hence clarity prevails too.
Benefits of SVN
- SVN deals with a repository, primarily a place where your committed piece of code along with version history rests. The repository normally relies on a file server that runs the Subversion server program and supplies content to Subversion clients.
- Looking to add code on the same file/ service class/repository? Just complete your part of the code and commit/push at SVN. Once you do this, a tracking version will be assigned to the respective files, and other developers can update that they have checked out codes from the SVN repository so your work doesn’t get hampered any longer.
- Working on different modules and want to merge code later? Well !! SVN provides branches for that; you can cut a branch from the main branch and place your modules/set of code into it. Branches come in handy when you are looking to deliver parts of code in multiple sprints (an agile paradigm).
- Developers actually take check out from a directory where main development happens, and it’s called ‘Trunk’.
Key Point of SVN
- While working with repositories, remember to take the regular backup so that if a server fails, you can access the recent version of your files.
Kindly run the following command for back-up creation.
svnadmin hotcopy path/to/repository path/to/backup
Steps To Install SVN
Let us discuss the steps required to install SVN are as follows.
Step 1: Go to https://tortoisesvn.net/downloads.html and download the appropriate version among the shown options, as below (please select the stable release appearing at a time you are going to download this):

Step 2: Mark the folder where you want to create a repository by using the following steps
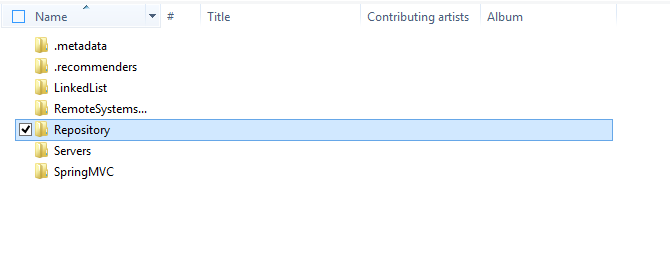
Now right click at the Repository -> TortoiseSVN -> create repository here
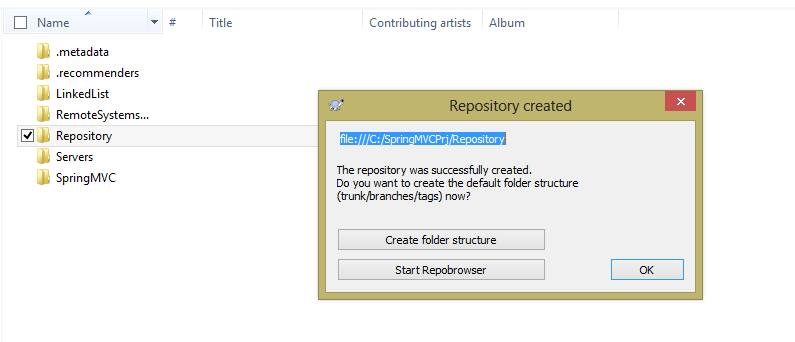
Step 3: Once you mark the folder for repository creation, there appears a dialog box; make sure to copy the URL in blue at your sticky notes for later references.
Step 4: Now select your intended project folder, which must be tracked, right-click on that and click on the SVN checkout option. By doing this, you are telling SVN to keep track of changes we are about to do in our code.
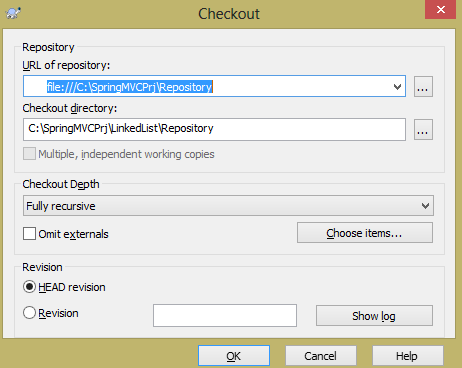
Make sure to keep the radio button ‘Head revision’ selected; once you press ok after this, you get the following dialog box:
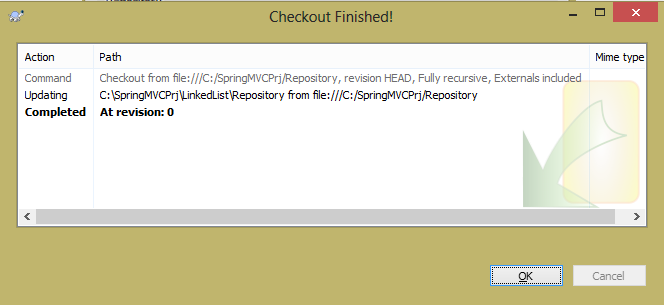
So you can see here that the revision number appears to be 0; also, you will see that a .svn folder will get created in the checked-out folder.
Step 5: Now, let’s look to integrate with eclipse; if eclipse doesn’t contain the plug-in, then subclipse has to be installed as per the following navigation path:
Go to Help -> Install new Software… http://subclipse.tigris.org/update_1.10.x.
Click on Add option; once you do this, a checkbox for Subclipse would appear ( as named by you while adding the above URL), finish the process. This makes the eclipse gets integrated with SVN.
To check the same, please follow the given steps :
“Window” – > “Open Perspective” – > “Other…”, an option of a name will start appearing here now.
Step 6: Creating an SVN repository with eclipse
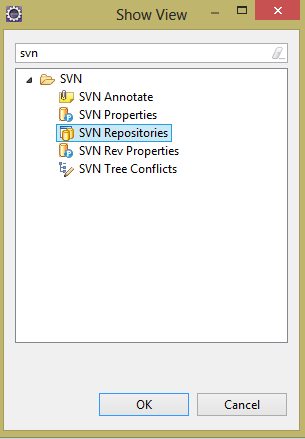
Go to Windows -> Show view -> search for SVN and then select SVN Repositories option.
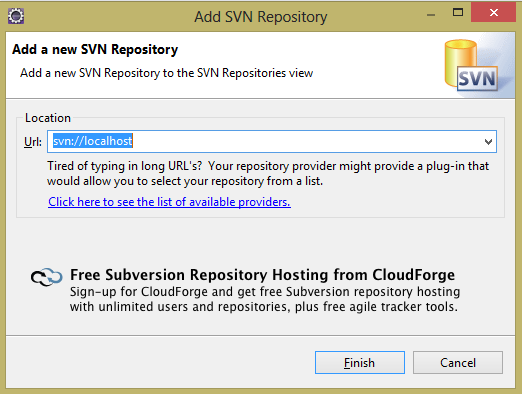
Step 7: Inside the SVN Repositories window, appearing as shown, do the following steps

Right-click, then select New -> Repository Location, then in the URL box type svn://localhost, as shown below, then click on finish.
In case you get some error after doing this (i.e. if any error appears at the eclipse console), then make sure to handle the proxy settings ( for references, just search the error at stackoverflow.com).
Step 8: After doing this, go to navigation pane, right-click on project -> Team -> Share Project, then select SVN -> Next -> Finish. Once you click the Finish button, you will see that SVN is installed in your system
Step 9: Now you can keep on editing your program files, and eclipse can keep track of those, to track the changes done, right-click on the “Project” in Project Explorer of an eclipse, then go to “Team”, then select “Synchronize with repository”. It will give all the changes appearing there, and for the first time, you can simply select the files among the set to be committed and then SVN will generate a revision number against the same.
Please make sure to commit the files using this way only because whenever you commit bulk files/folders, then a revision number is generated.
Let’s make it a little clear with an example:
In case you are developing a module containing 10 files, and they are correlated such that they are planned to be delivered in the same release, then make sure to commit all of those in one revision head so that in case your client tells to revert the changes than simply by reverting that revision number you can feel assured that everything associated was reverted.
Step 10: SVN also provides the chance to find the history of a given file; you can directly replace your current code with those revisions also if you desire for the same.
Summing up here, the same way SVN can be integrated with IDE like Visual Studio code. So for parallel development, to satisfy agile-based work timeline constraints, SVN is a good centralization tool.
Recommended Articles
This has been a guide on how to install SVN. Here we have discussed the basic concept, steps to install SVN on our system. You may also look at the following articles to learn more –

