Updated March 13, 2023
How to Install Jenkins
The following article provides an outline for How to Install Jenkins. Jenkins is a Continuous Integration and delivery tool. It helps the developers in their development process. There is always a huge demand for improvement and multi-tasking applications. Jenkins is one tool that can help developers with code integration and delivery facilities.
So, as we know, developers are working on code development, and there is a repository allocated for their work to store and share among the team. This repository can be Git, VSO, Jira, or any other tool. Jenkins will make sure that whatever the latest commits that happen to the repository do not get spoiled; it runs then and checks if everything is fine or not. If any issue related to builds, it has a feature to report the concerned person via email notification. Jenkins is developed in Java, and it is an open-source tool. Users who want Jenkins in their system – download Java (either JDK or JRE) in your system before.
Let’s see some system requirements:
- A minimum of 256MB of RAM is good to start; I prefer more than the mentioned one.
- 1GB of hard disk space is the minimum requirement; I prefer more than this.
Steps to Install Jenkins
Let us discuss the steps required to install Jenkins.
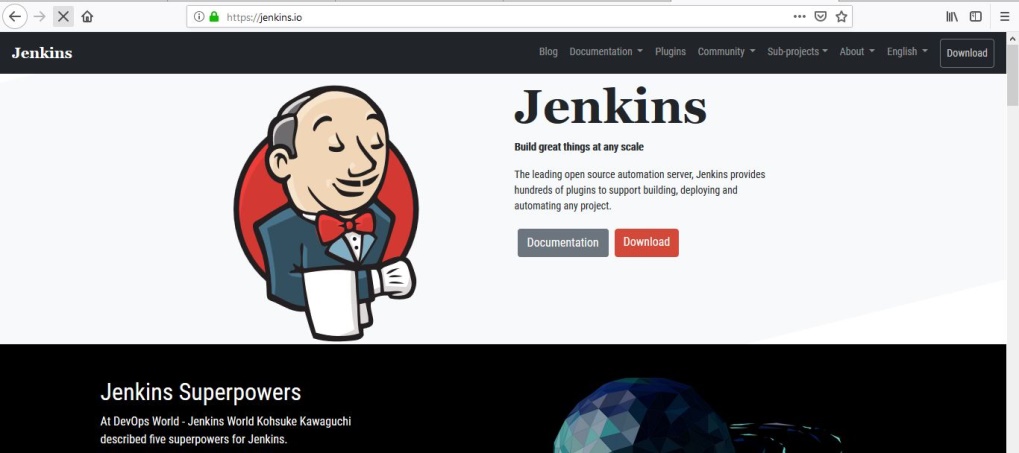
Step 1: You have to type ‘Jenkins’ on any browser; the first link that will appear contains the link for downloading Jenkins.io.
Step 2: Once you are on the Jenkins website, you will see the ‘Download’ option available in the dashboard. There are 2 types of releases available.
- Long-term support release
- Weekly release
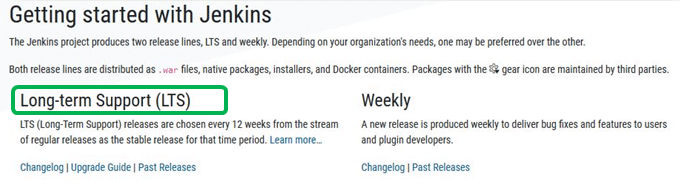
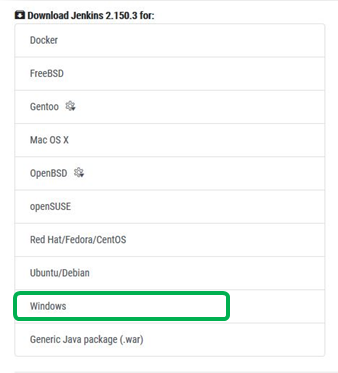
We will use the Long term support link for the Windows platform – the latest version is 2.150.3.
Note: One crucial thing to discuss with our readers is that there are two ways to install the Jenkins application.
- Run Jenkins as a service; this start without any user logging in. Windows installer is the preferred way and also the easiest way to do it.
- If you are an advanced user, you can also download the Jenkins war file and deploy it.
We will continue with the windows installer way – 1st one.
Once you click the ‘Download’ button, you will get the below screen, and the download process has begun. After completing the download, it navigates to the download location and runs the application.
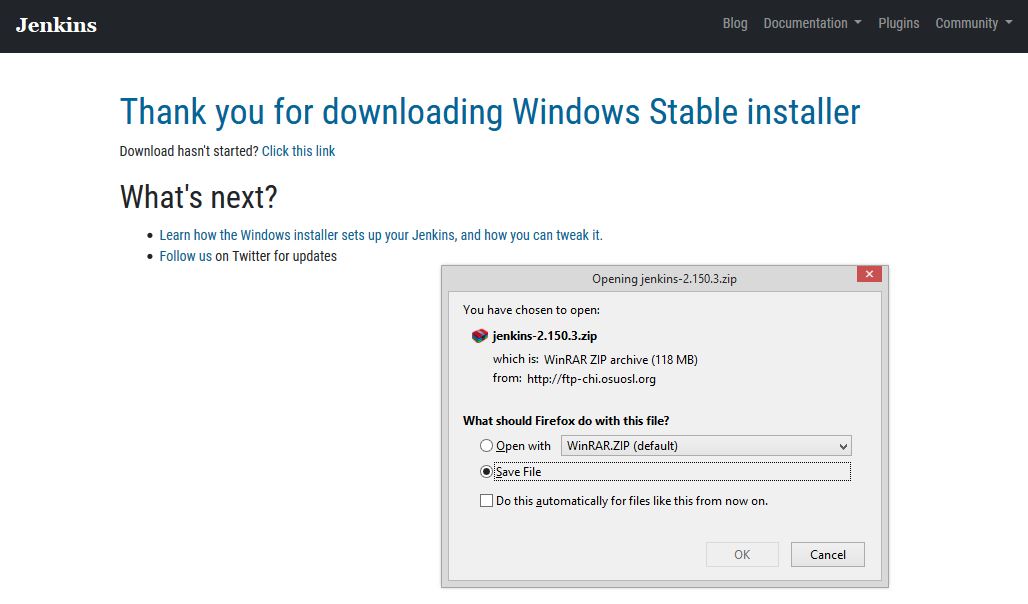
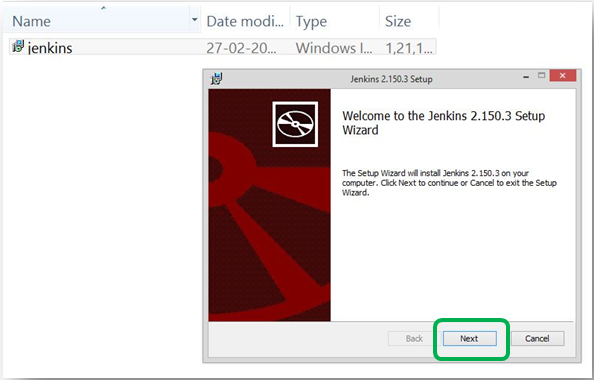
Step 3: Open the zip file, and you will see the windows installer package. Double click, and the installation process will start. You can see the Setup window with Jenkins 2.150.3. Follow the below-mentioned screen. Click on the ‘Next button.
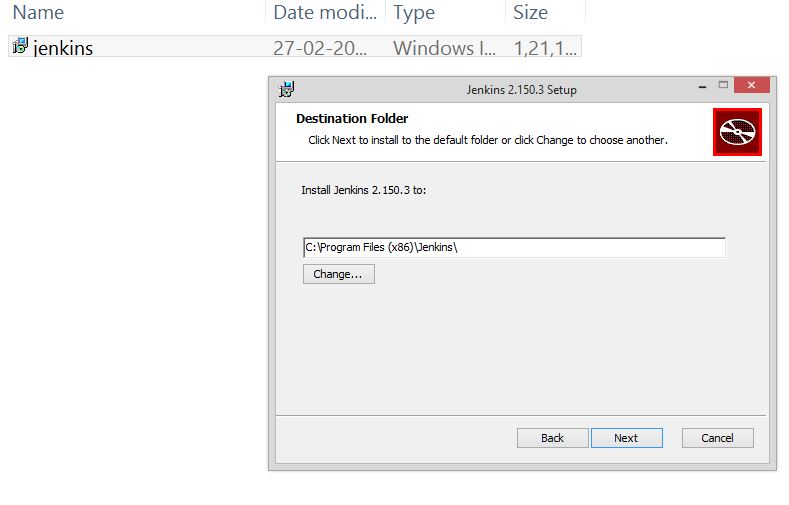
Step 4: Next screen asks you about the location to save the file. The default location is also mentioned on the screen. If you don’t have any specific reason to change, let it be as it is. Refer to the below-mentioned screen.
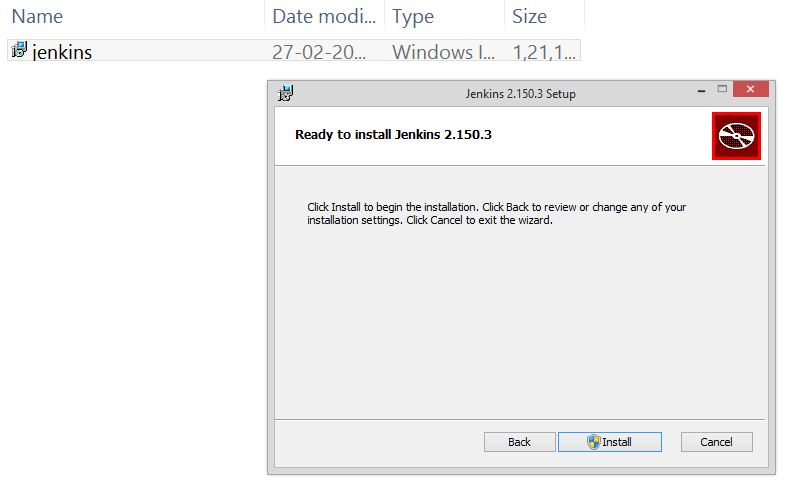
Step 5: Click the install button to run the process. Refer to the below screen.
Step 6: In the end, you will see the below screen, which says, ‘Completed the Jenkin2.150.3 setup. Click the Finish button to stop the installation process of Jenkins. After this, you will get an option to open your file; you have to open it via any browser.

And on port ‘localhost8080’, you will see the below screen. The first screen is of the localhost8080 address, and the second is the message you will get.
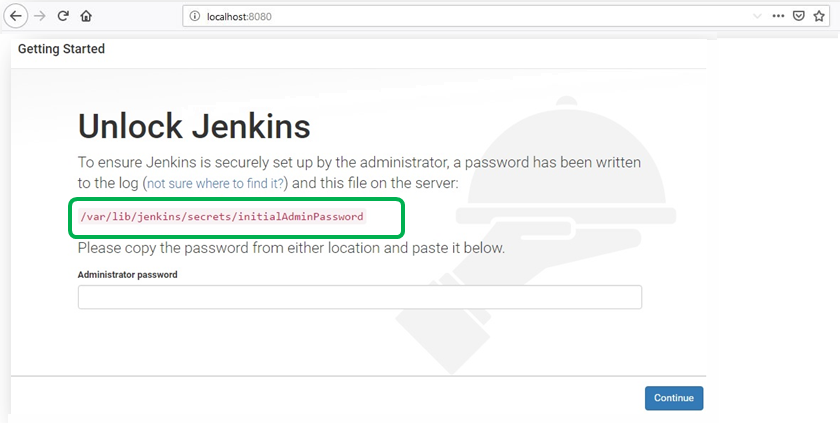
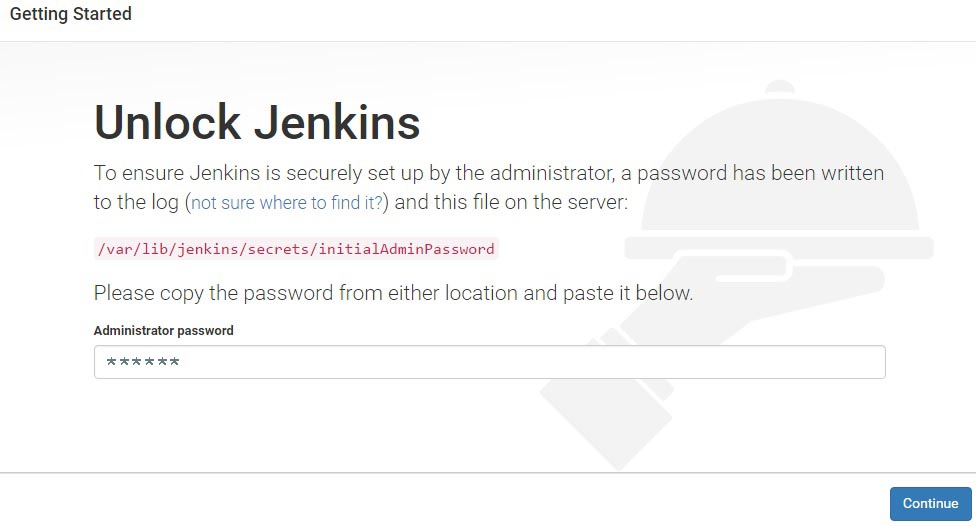
Step 7: Now the first thing to unlock Jenkins is ‘Password’; yes, you need to provide the initial admin password. So let’s see how we can do this. And the password is set in this directory.
Directory: /var/lib/Jenkins/secrets/initialAdminPassword
Just copy the following details and paste them into your folder explorer directory. Let’s see how we can do this. I have copied “/var/lib/Jenkins/secrets” and pasted it into the folder explorer. Follow the below screen for a better understanding.
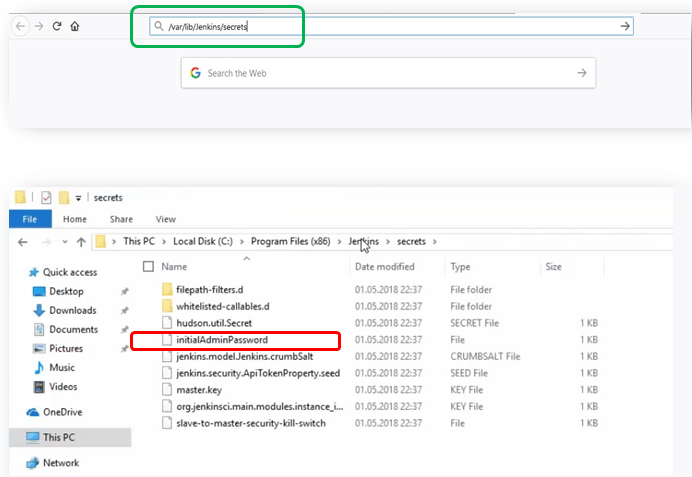
A user has to open the initialadminpassword by clicking on it. It is highlighted in the above screen with a red rectangle. Open it with your editor (like Notepad or Notepad ++). Follow the below screen.
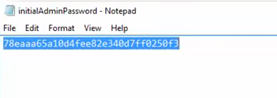
Step 8: Copy this password and paste it into the Jenkins window opened in the browser.
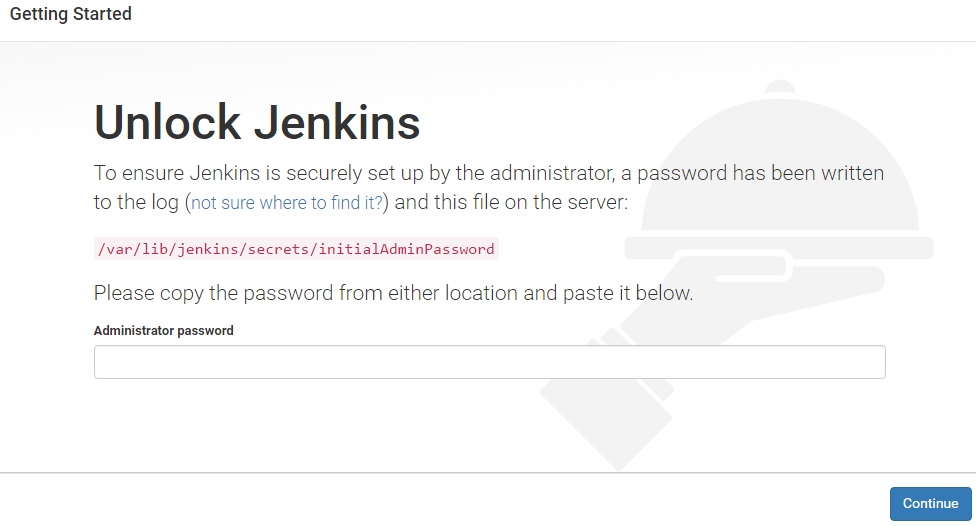
Paste the Password.
I have pasted my password and clicked Continue.
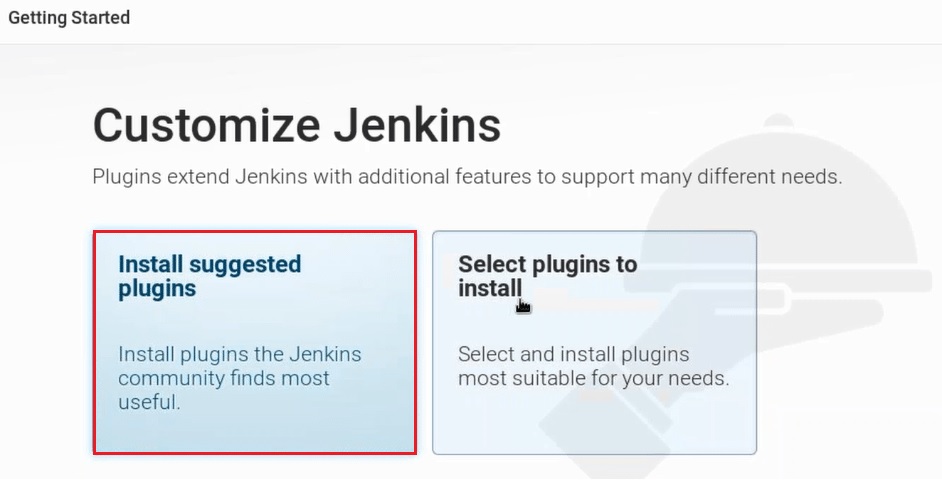
Step 9: Now, on the next screen, we will get the ‘Customize Jenkins’ screen. Again there are two options for the users to prefer.
- Install suggested plugins.
- Select plugins to install.
We will choose the first option, as it is the most used list of plugins preferred by the community members. Also, if you have any specific purpose, then only prefer the 2nd option.
With this, the recommended plugins will start to download. Let’s see the related screen.
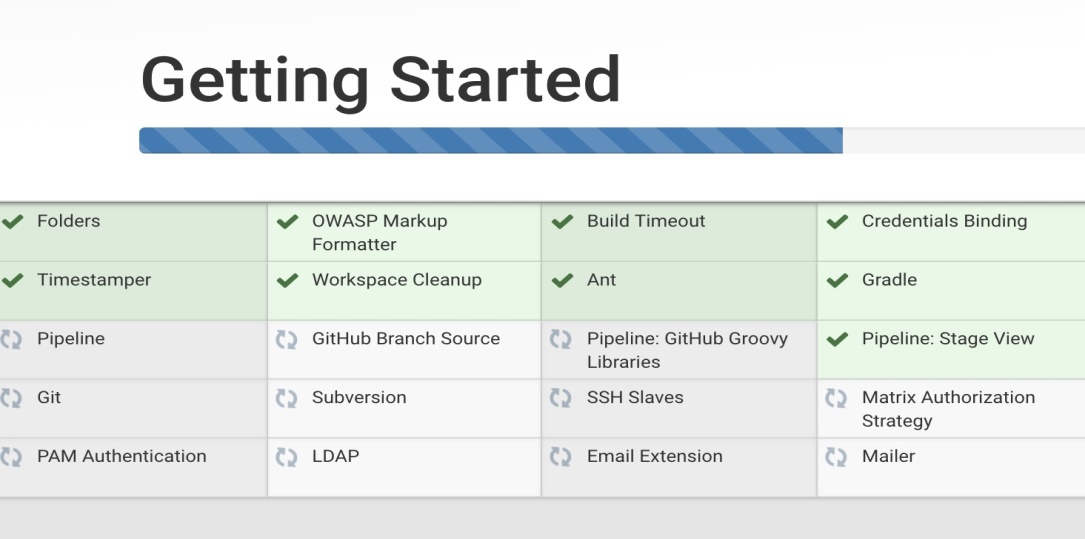
The above is the suggested install screen. We can see that there are so many useful things that are coupled together. It has plug-ins for Git, LDAP, and SSH Slaves. Once all the plugins are successfully installed on your Jenkins, you will be automatically redirected to the below-mentioned page.
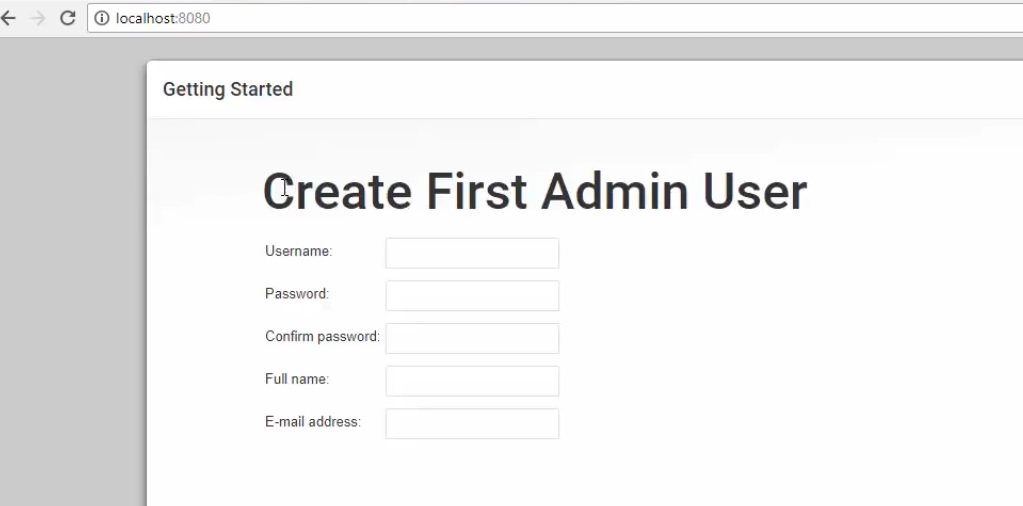
Step 10: Fill the following fields:
- Username
- Password
- Confirm Password
- Full Name
- E-mail address
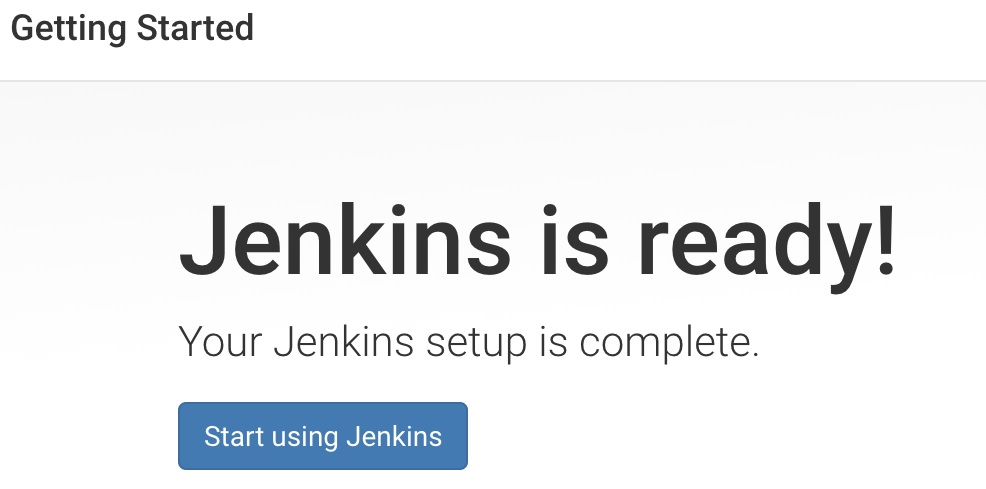
Once the details are provided, click on the ‘Save and Finish’ button, and you will get the below screen. This means Jenkins is installed properly and it is ready to start.
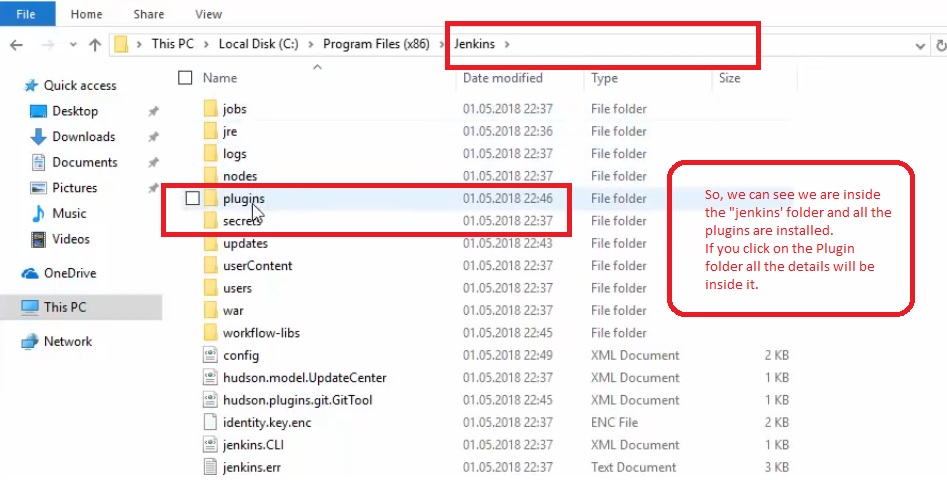
Step 11: A few last but crucial works have to be done. Once the above screen appears in front of you, you must open the folder where the Jenkins folder is present (in your local system). Go to C drive and Program file settings and search for the ‘Jenkins folder. Refer to the below screen for a better understanding.
This is how we will install Jenkins in our local system. Before we wrap this important discussion with our readers, let us see what Jenkins can do for its users. We have presented some key responsibilities of Jenkins.
- The inbuilt capability of internal hosting
- Open source
- A great tool to build, deploy and launch
- Highly rich set of plugins with complete documentation
- Hugs integrations available
- Easy setup
- Large user base
Recommended Articles
This has been a guide to How to Install Jenkins. Here we discussed the different steps to Install Jenkins in our window. You may also look at the following articles to learn more –

