Updated April 26, 2023

Introduction to Anaconda Python
The following article provides an outline for Install Anaconda Python. Anaconda is a popular tool used in machine learning and Data Science. It is a free and open-source distribution of Python and R language. It aims to simplify the management and deployment of packages, i.e. it gives you the liberty to create a separate environment with the packages that are needed in your project. You can create any number of environments based upon your projects with the required packages. Anaconda comes with a GUI Navigator known as Anaconda navigator, a graphical user interface to the conda packages. An anaconda prompt is the command-line interface of an anaconda navigator.
Steps to Install Anaconda Python
Steps to install the Anaconda distribution of Python on Windows 10 are as follows:
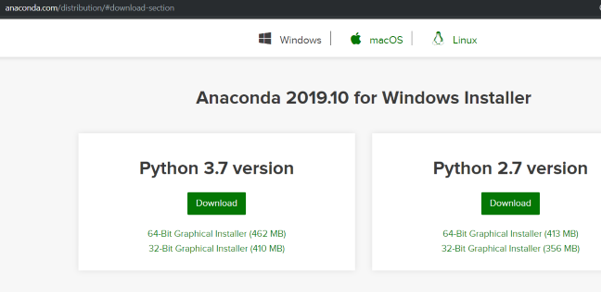
Step 1: Download Anaconda.
Go to Anaconda.com you will get the following page:
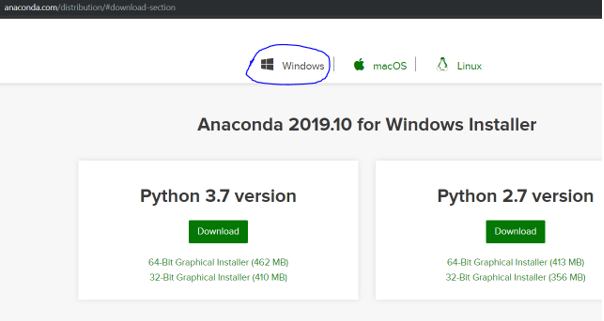
Step 2: Select Windows.
Make sure that the anaconda distribution is for windows by clicking on the Windows icon since we are downloading it for windows 10.
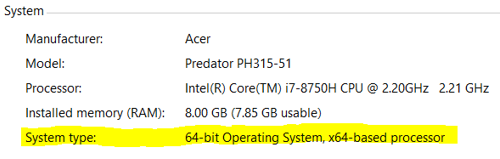
Step 3: Check Your System Type.
We need to know the system type so as to select the appropriate .exe installer for the system. If you already know your system type, you can go to step 4. Else follow the steps below:
- Right Click on My Computer
- Go to Properties
- In the System Section, Check the System type. For me, it is an x64 based processor. Following is the snapshot of how it will look:
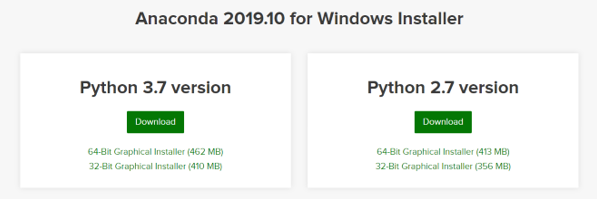
Step 4: Download the .exe Installer.
Download the most recent release of python. At the time of writing this post, it is python 3.7. The download file is around 462 MB, so it may take some time for Anaconda to download. If your system type is x64, directly click the download button; else, click on 32-bit Graphic Installer.
Step 5: Run the Downloaded .exe File.
After the file is downloaded, open and run the .exe installer, you will get a Welcome window.
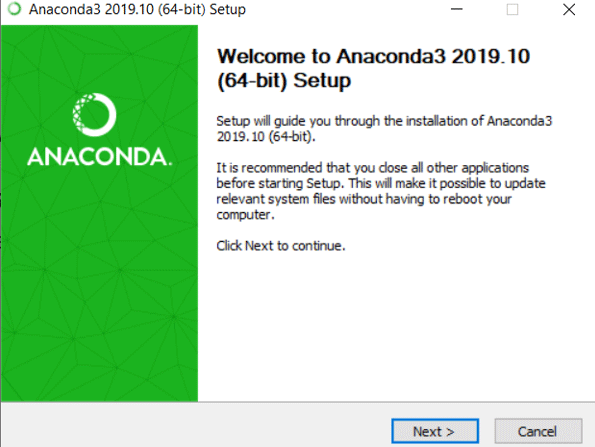
- Click on Next. You will get a window showing the License Agreement.
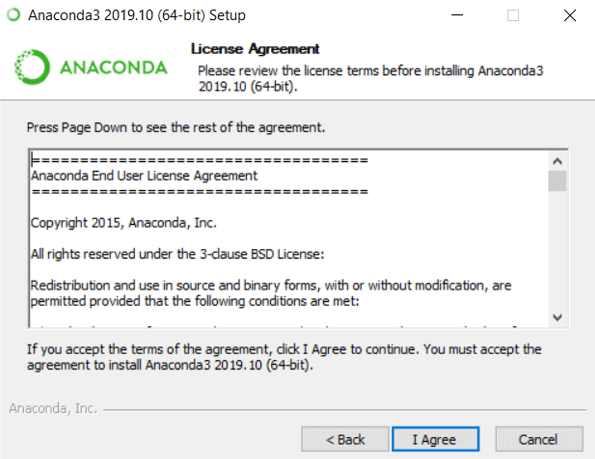
- Click on I Agree.

- All users is not recommended as most of the time; people don’t have the admin rights, so Select “Just Me” and Click Next.
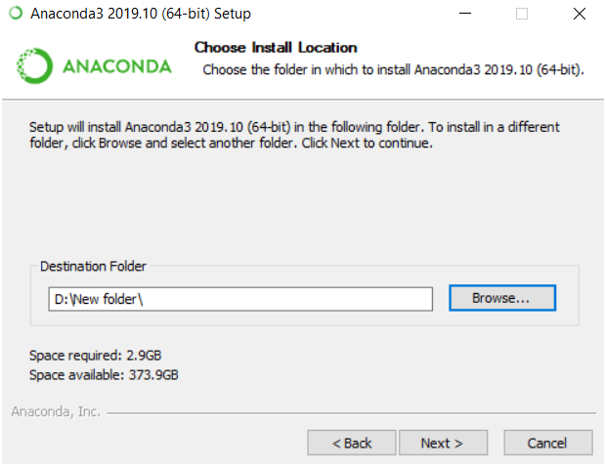
- Select the Destination Folder in which you want to install Anaconda distribution and Click Next.
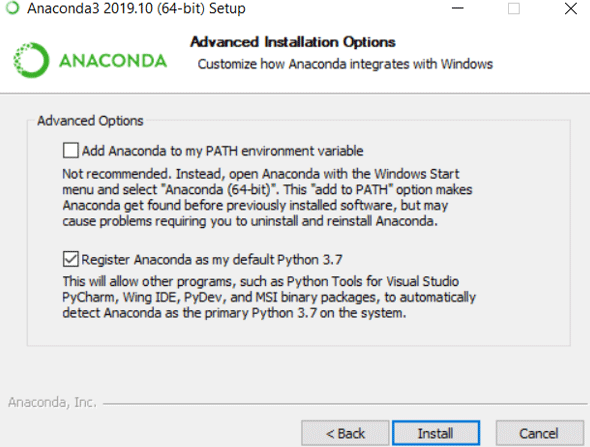
Do not select “Add Anaconda to my PATH environment variable ” as most of the user does not have administration rights. Select the checkbox “Register Anaconda as my default Python 3.7”. Click Install. This will install Anaconda in your system.
Step 6: Open Anaconda Prompt.
Once the installation of the anaconda is completed. Go to windows start and select the anaconda prompt.
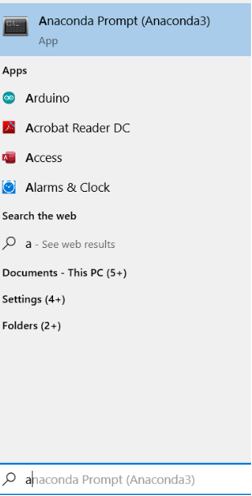
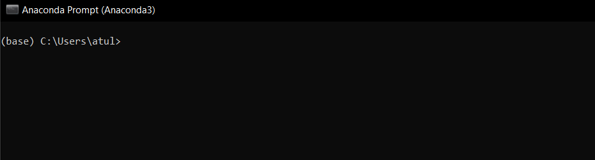
- This will start the anaconda prompt window, which looks like a black window, as shown in the snapshot below.
Note that you will see Anaconda and Anaconda Prompt. It’s important to know that Anaconda Prompt is a command-line shell while Anaconda is a python distribution GUI.
Step 7: Run the Python Interpreter.
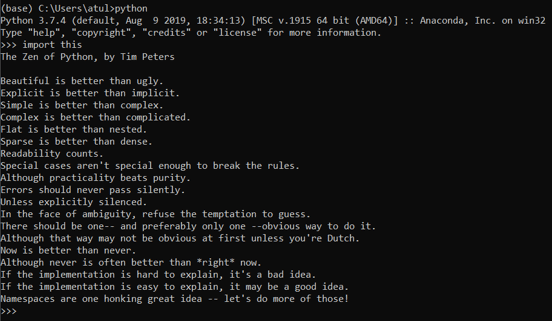
Type the python command in the anaconda prompt window and hit enter:

- Note the python version. For me, it is showing “Python 3.7.4”. The greater than symbols >>> indicates that the python interpreter is running.
- That’s it. Now you can run the python commands. Try to import “this” by typing. Import this on python interpreter. You should see the Zen of Python by Tim Peters.
- You can close the python interpreter by typing “exit()” and press enter.

- To close the Anaconda Prompt, you can either close it using the command exit or use the mouse to close.
- To Restart the Anaconda Prompt and use python, you can start selecting Anaconda Prompt and type the “python” command to start the python interpreter. If you have reached this step, then Congratulation; you have Installed Anaconda Python Successfully on your system.
- If you want to have another version of python, say python2.7, in your project, then you can create a separate environment with python2.7. To do so, use the following command.
![]()
- Running this will create a new env in anaconda named as “env_name” to start the environment type.
![]()
This will start the environment, which will have python 2.7. Since the conda environment is independent of each other, you create any number of the environment with different versions of python or any other packages.
Conclusion
This was a guide to install Anaconda distribution with python. Here we have seen the installation of anaconda python and seen how to have two different versions of pythons. Developers can install the anaconda prompt using the steps shown above and start working on their codes professionally by creating a separate environment for each project.
Recommended Articles
This is a guide to Install Anaconda Python. Here we discuss the various step to install anaconda python along with a detailed explanation. You can also go through our other suggested articles to learn more –

