
Introduction to GIMP Fonts
In this article, we are going to learn how to use fonts in GIMP. Now the first step of using fonts is to know how to install font and for that you should know where to find them. So first we will look at various websites where we can download the fonts and then how to install in GIMP. Technically you can use the fonts which are on the system but at times we need the fonts which are not on the system and we even might not have permission to install it system-wide, so in those cases, it is imperative to install fonts for GIMP.
Step 1: Let us start by first downloading fonts. There are many free and paid fonts sites from where you can download fonts. Some free websites are google fonts, dafont, urbanfonts, fontspace, etc. We will see how to download from google fonts website as shown. First, we will change the filters to display on sans serif and Display which will reduce the search result. We do not want serif which puts flare on top of letters. Also, we do not want handwriting which will be more like cursive and not the monospace which are the coding fonts.
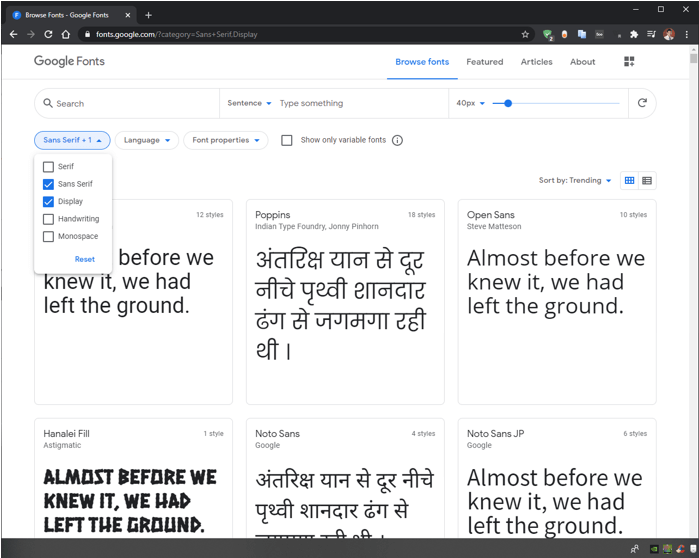
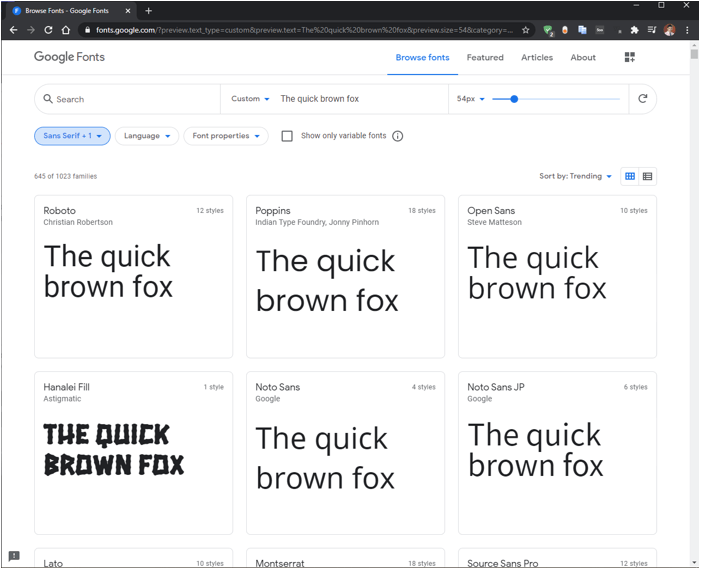
Step 2: Then we can customize the text if we want or we can select from the drop-down for sentence, alphabet, paragraph, or numerals.

Step 3: Next, we can change the size of the fonts using the slider
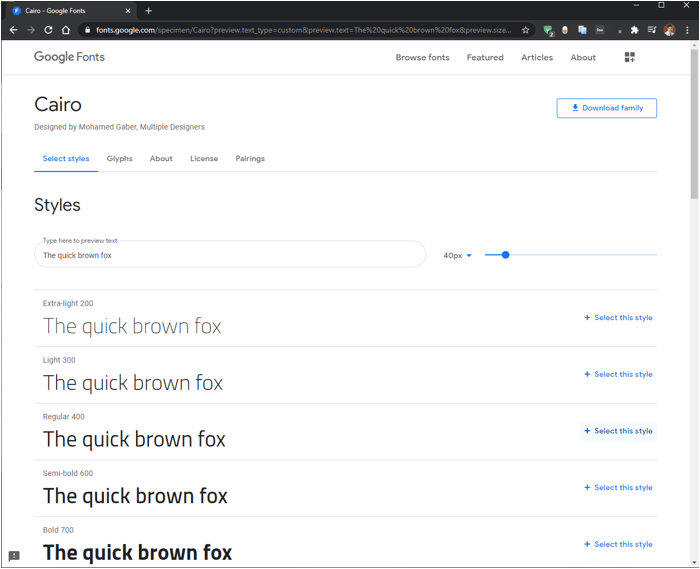
Step 4: Then we have selected a font named Cairo and we can see multiple options or styles are available. You can also see the type of glyphs the font has if you are looking for characters that are not standard. In About section, you can get bit of a history of the font and authors or designer information. Also, there is a licensing option if you are looking fonts for commercial purpose and the last option is pairings which is suggested by google if you want another font in combination with this font.
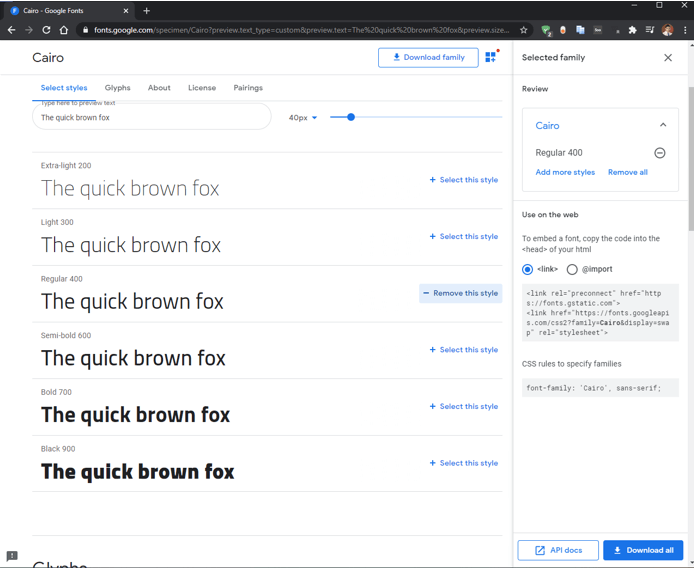
Step 5: Now we have selected the regular style. Here we have option the review the fonts we have selected and an option to embed the font if you are using on a website or for our purposes if we want to use with GIMP then we select download all. Also, there is an option to download family if you want to download all the font styles in this particular font.
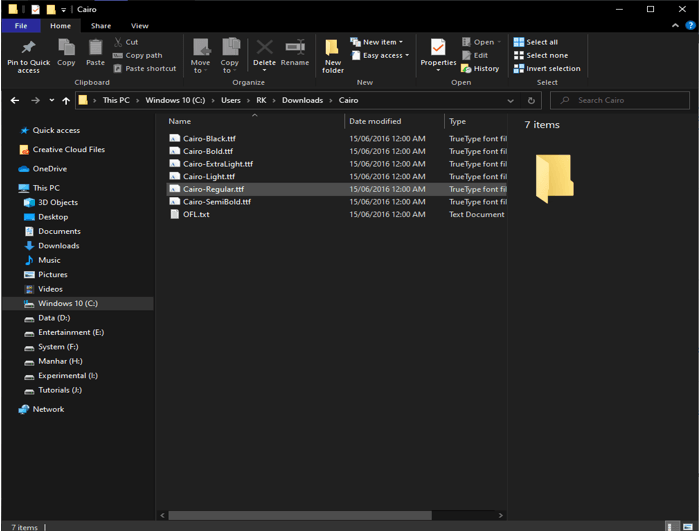
Step 6: A zip file will be downloaded on your computer which can be extracted by right-clicking it and all the fonts will be inside the extracted folder. This procedure will work on windows.
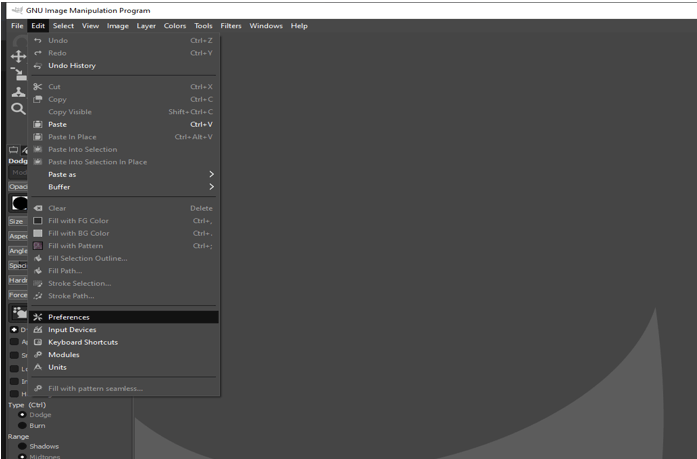
Step 7: Open GIMP and then go to Edit -> Preferences.
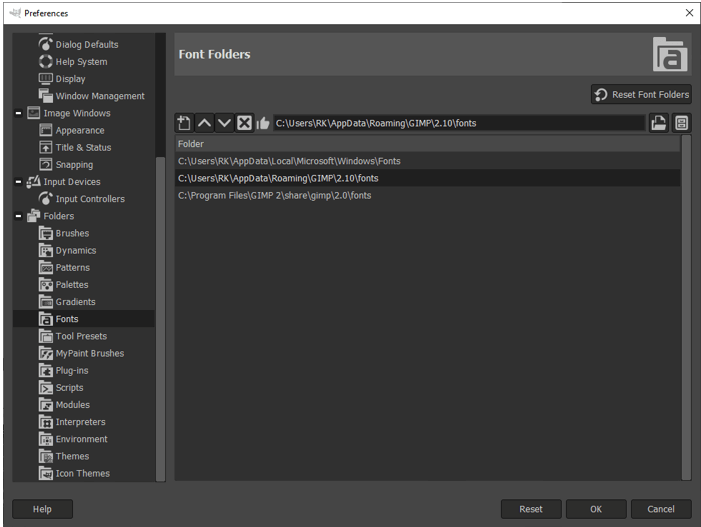
Step 8: Open the folder tab and go in the fonts section and select the path as shown then click on the button which indicates to show file location in the file manager.
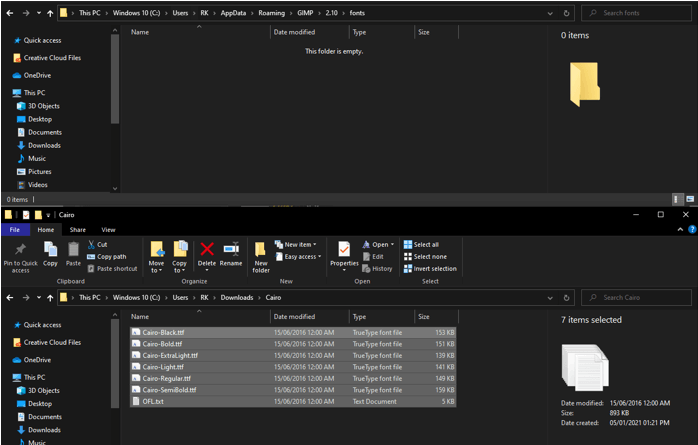
Step 9: This will open the location of GIMP where the fonts are stored. Now we will copy the downloaded fonts in this location.
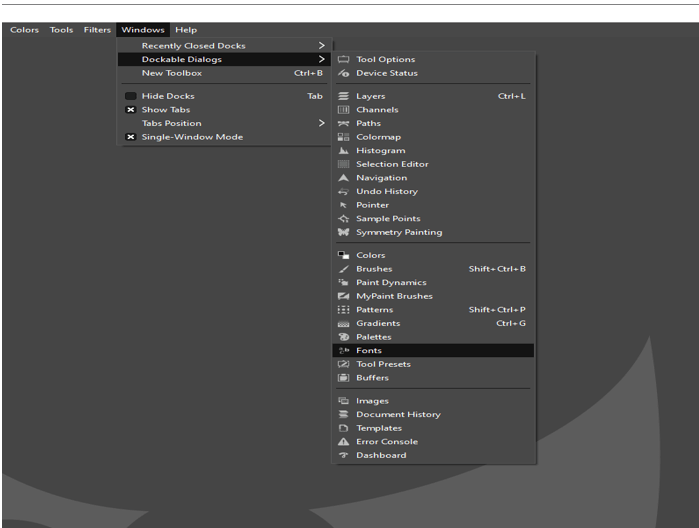
Step 10: Then exit out of the preferences window in the GIMP and then open the fonts panel from Windows -> Dockable Dialog -> Fonts. Click refresh button to load the fonts in the fonts panel.
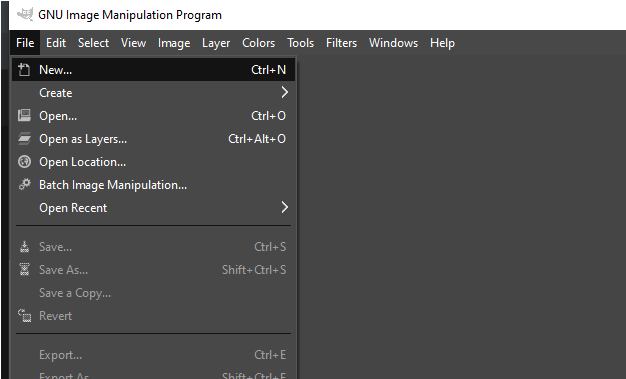
Step 11: Next, we will create a new document to test our fonts from the file menu.
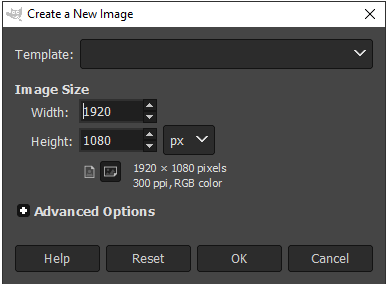
Step 12: We will keep all the default image size and press OK.
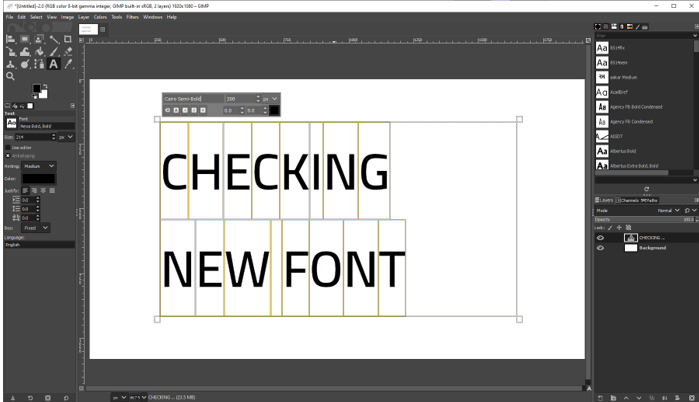
Step 13: Using the text tool just drag a rectangle and type a sample text and make sure that the font is Cairo which we have just installed.
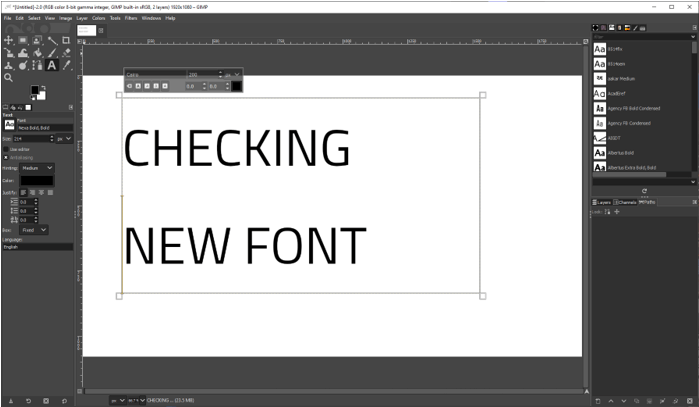
Step 14: Now press Ctrl + A to select all the text and then you can change the fonts to something like Cairo Semi Bold
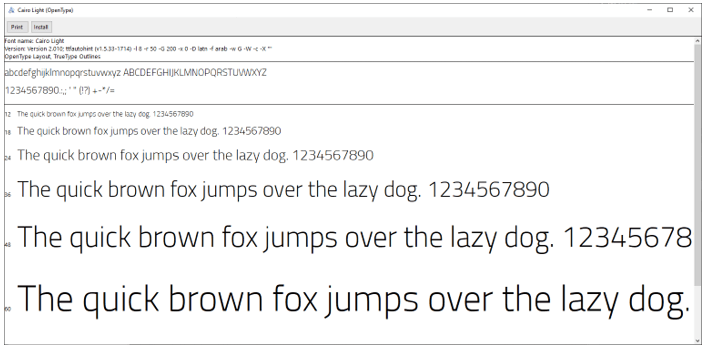
Step 15: Another method of installing fonts which is not specifically to GIMP but will be available to entire windows is that you can double click a font and a preview window will open up. There is an option to install by clicking the install button and it will be installed on windows. This method only works on Windows and not on Mac or Linux.
Step 16: In mac, if you want to install fonts then in finder Go -> Go To Folder… Then type /Library/Fonts and then click GO. Which will take you to the system folder and there you can drag the downloaded fonts. This will install the fonts system-wide.
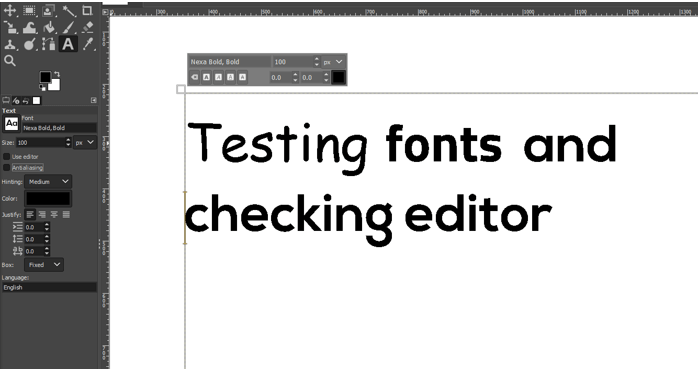
Step 17: Let’s see some basic use of how to use text tool which you can click to add a continuous text or click and drag to create a block of text. There is option to change the font from the text options on left and in that case, you do not need to select the text as the options apply to all text within.
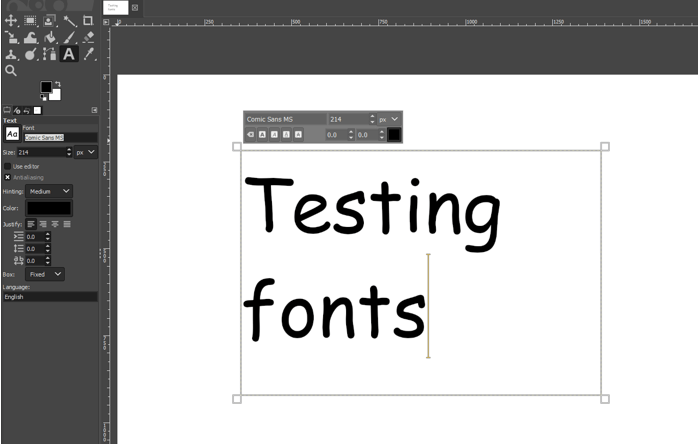
Step 18: While you can change the text from the floating option but that is specific to selection.
Step 19: Font size can also be changed from the floating menu.

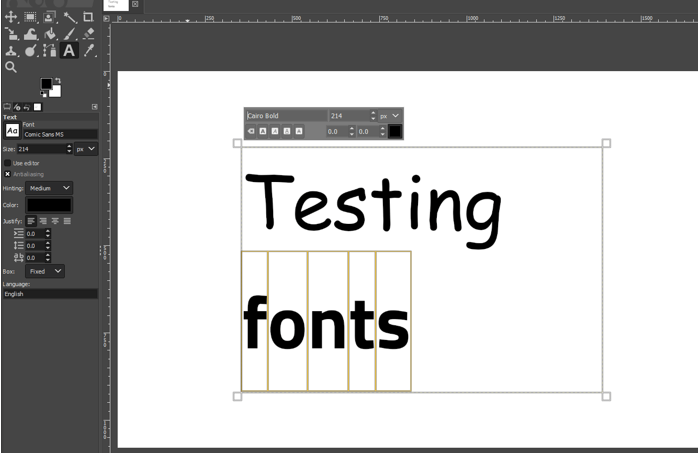
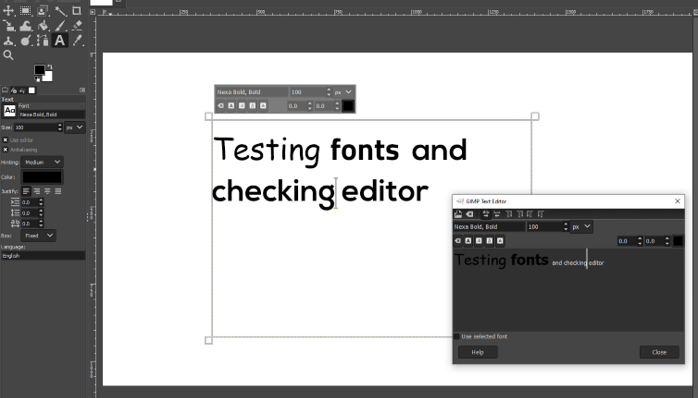
Step 20: Then there is option to use editor which opens a new window where you can add text and then format it but the preview will be shown in the main window except if you select use selected font if you prefer to work in that way.
Step 21: Next option is of antialiasing which should be always on for smooth fonts unless you are going for an artistic look. This option will reduce jagged edges. Also, keep hinting on which keeps the fonts readable at small font sizes. Then there are standard options of text color, justify and indentation and, line and character spacing.
Conclusion
In this article, we have seen how to use fonts in GIMP. First, we have seen how to downloaded if from google fonts and customize it according to our needs. Then we have seen how to install it in Windows and also some steps for mac. Then we have seen some basics of using Text tool to incorporate the fonts which we have downloaded.
Recommended Articles
This is a guide to GIMP Fonts. Here we discuss the introduction, how to use fonts in GIMP, and steps to use GIMP Fonts. You may also have a look at the following articles to learn more –
