EDUCBA

EDUCBA

MENUMENU
  • Free Tutorials
  • Free Courses
  • Certification Courses
  • 280+ Courses All in One Bundle
  • Login
Home Design Design Tutorials Design Basic Tutorial GIMP Layers
Secondary Sidebar
Design Basic Tutorial
  • GIMP
    • What is GIMP
    • GIMP Versions
    • GIMP brushes
    • GIMP line tool
    • GIMP blend tool
    • GIMP clone tool
    • GIMP magic wand tool
    • GIMP 3D Text
    • GIMP healing tool
    • GIMP Layers
    • GIMP Fonts
    • GIMP Toolbox
    • Blur Effect in GIMP
    • GIMP Change Background Color
    • GIMP Floating Selection
    • GIMP?batch processing
    • GIMP Crop
    • GIMP Filters
    • GIMP GMIC
    • GIMP?opacity
    • Animation in GIMP
    • GIMP import image
    • GIMP replace color
    • GIMP text outline
    • GIMP video editing
    • GIMP Alternatives
    • GIMP vector graphics
    • GIMP text shadow
    • GIMP resize image
    • GIMP pixel art
    • GIMP invert colors
    • GIMP GIF
    • GIMP move selection
    • GIMP normal map
    • GIMP remove background
    • GIMP rotate
    • GIMP grid
    • GIMP text effects
    • GIMP erase to transparent
    • GIMP resize layer
    • GIMP Patterns
    • GIMP extensions
    • GIMP blur background
  • Basics and Advanced
    • Pro Tools Version
    • What is Autodesk BIM?
    • Animation Character
    • Autodesk Pixlr
    • Sketch plugins
    • Graphic designer requirements
    • Online Gaming Platforms
    • InDesign eyedropper tool
    • InDesign rounded corners
    • InDesign align
    • InDesign resize image
    • InDesign scripts
    • InDesign export to word
    • InDesign newsletter templates
    • InDesign Magazine
    • InDesign Missing Fonts
    • InDesign line spacing
    • InDesign Fonts
    • InDesign Preview Shortcut
    • InDesign Extension
    • InDesign columns
    • InDesign overset text
    • InDesign data merge
    • InDesign grid template
    • InDesign layers
    • InDesign reset preferences
    • InDesign master pages
    • InDesign layout
    • InDesign portfolio template
    • InDesign invoice template
    • InDesign word count
    • InDesign underline
    • InDesign superscript
    • InDesign presentation templates
    • InDesign drop cap
    • InDesign how to add page numbers
    • InDesign resume template
    • InDesign import pdf
    • InDesign table of contents
    • InDesign change page size
    • InDesign book templates
    • InDesign link text boxes
    • InDesign vertical text
    • InDesign Bullet Points
    • InDesign center text vertically
    • InDesign newspaper template
    • InDesign shortcuts
    • InDesign gap tool
    • InDesign paragraph styles
    • InDesign Grid
    • InDesign margins
    • InDesign highlight text
    • InDesign Wrap Text
    • ZBrush ZRemesher
    • Animation Software
    • Principles of Animation
    • 3d Animation Software
    • 3D Modeling Software
    • 3D Software Design
    • 2D Animation Software
    • 10 Quick Tips For Adobe InDesign Users
    • ADOBE FLASH CS6
    • Affinity Photo Brushes
    • Adobe Lightroom For Free
    • Lightroom Background Color
    • Lightroom?Shortcuts
    • Lightroom XMP
    • Lightroom editing
    • Masking Layers in Adobe After Effects
    • Adobe Premiere Pro Plugins
    • Adobe Speedgrade
    • Install Adobe Creative Cloud
    • Install Adobe Premiere Pro
    • What is Adobe Creative Cloud
    • What is Adobe Illustrator
    • Adobe InDesign Templates
    • What is Adobe InDesign
    • Adobe Indesign Uses
    • InDesign Background Color
    • What is Adobe Lightroom
    • What is Adobe Muse
    • What is Adobe Prelude
    • What is Adobe Premiere Pro
    • Careers in 3D
    • Careers in 3D Modeling
    • Careers in 3D Printing
    • Best Editing Software
    • Video Editing Application
    • Video Editing Tools
    • Career In Designing
    • Careers in Game Development
    • 3D Printing Models
    • Adobe Editing Softwares
    • Types of Adobe
    • Types of Illustration
    • What is Graphic Design
    • Best Graphic Design Software
    • Best Photo Editors
    • Game Testing Interview Questions
    • VFX Softwares
    • Unity Scripting
    • Unity Principle of Design
    • Unity JSON
    • Unity webGL
    • Unity 2D
    • Unity 3D Games
    • VFX Companies
    • How To Use Indesign
    • New Features InDesign CS6
    • What is Houdini?
    • Advantages of 3D Printing
    • What is Autodesk
    • Autodesk Character Generator
    • Autodesk Vault
    • Autodesk Viewer
    • Autodesk Navisworks
    • Autodesk Desktop Connector
    • Designers and Architects
    • 2D and 3D Shapes
    • Keyboard Shortcuts for Premiere Pro
    • Unreal Engine Tutorial
    • Best Audio Editors
    • Digital Image Processing
    • What is Motion Graphics
    • What is Digital Design
    • Design Pattern Interview Questions
    • Graphic Design Interview Questions
    • UX designer Interview Questions
    • Is Unreal Engine Free
    • What Is Design Pattern
    • What is VFX
    • What is Audacity
    • What is Unreal Engine
    • What is CATIA
    • What is Blueprint
    • Sony Vegas Pro for Free
    • 3D Graphics Software
    • Best Online Photo Editor
    • Photo Editing App
    • Vector Graphics Editor
    • ArchiCAD
    • ArchiCAD Shortcuts
    • Audacity Keyboard Shortcut
    • Davinci Resolve Shortcuts
    • What is pixel art?
    • Picmonkey Alternatives
    • Adobe Flash Player Alternative
    • Pro tools shortcuts
    • Pro Tools Plugins
    • Architectural Design Software
    • Architectural Design Principles
    • Architecture Design Types
    • Architectural design tools
    • Application of Digital Image Processing
    • Digital Image Processing Fundamentals
    • OpenGL Versions
    • Revit Keyboard Shortcuts
    • Revit plugins
    • Indesign version
    • What is DirectX?
    • DirectX Versions
    • Cinema 4D Plugins
    • Cinema 4d shortcuts
    • Godot Engine
    • Godot tilemap
    • Krita Animation
    • Krita Software
    • Krita Shortcuts
    • Krita eraser
    • Krita brushes
    • Krita Pixel Art
    • Krita Plugins
    • Skencil
    • Fusion 360 Keyboard Shortcuts
    • Anim8or
    • Affinity photo plugins
    • What is Affinity Photo?
    • FL Studio Plugins
    • Vectorworks
    • Architectural Design Elements
  • Inkscape
    • What is Inkscape?
    • Inkscape layers
    • Inkscape Crop
    • Inkscape text
    • Inkscape G-code
    • Inkscape mirror
    • Inkscape rounded rectangle
    • Inkscape EPS
    • Inkscape image to vector
    • Inkscape unlock
    • Inkscape Curved Text
    • Inkscape laser cutting
    • Inkscape background color
    • Inkscape arrow
    • Inkscape vector
    • Inkscape animation
    • Inkscape 3D
    • Inkscape SVG
    • Inkscape Dark Theme
    • Inkscape trace bitmap
    • Inkscape gradient
    • Inkscape Greek Letters
    • Inkscape shadow
    • Inkscape snap to grid
    • Inkscape Fonts
    • Inkscape extensions
    • Inkscape PNG to SVG
    • Inkscape Art
    • Inkscape transparent background
    • Inkscape Alternatives
    • Inkscape Remove Background
    • Inkscape text to path
    • Inkscape logo
  • Figma
    • Figma Libraries
    • Figma fonts
    • Figma Plugins
    • Figma grid
    • Figma Alternatives
  • SketchUp
    • SketchUp Keyboard Shortcuts
    • SketchUp geolocation
    • SketchUp animation
    • SketchUp Change Dimensions
    • SketchUp Import
    • SketchUp 2D
    • SketchUp rendering
    • Sketch software
    • Figma Shortcuts
    • SketchUp Layers
    • SketchUp landscape design
    • SketchUp group
    • SketchUp intersect faces
    • SketchUp Rotate
    • SketchUp Architecture
    • SketchUp 3D Models
    • SketchUp Vray
    • SketchUp Units
    • SketchUp garden design
    • SketchUp Layout
    • SketchUp Mirror
    • SketchUp Extensions
    • SketchUp Unhide
    • SketchUp kitchen
    • SketchUp background
    • SketchUp library
    • SketchUp dynamic components
    • SketchUp CutList
    • SketchUp Array
    • SketchUp Woodworking
    • SketchUp resize component
    • SketchUp Ungroup
    • SketchUp Deck Design

Related Courses

Maya Course

Photoshop course

After Effects Course

GIMP Layers

GIMP Layers

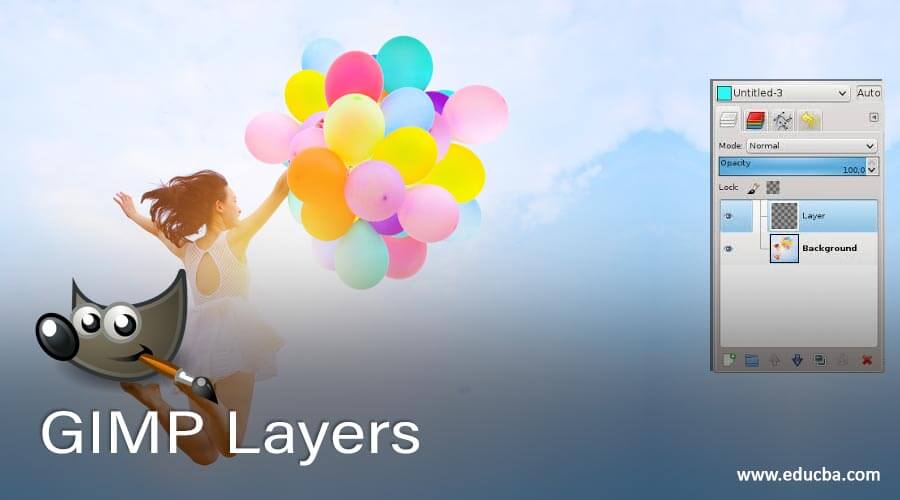
Introduction to GIMP Layers

Whatever you add in the document area of GIMP creates a layer in the layers panel of this software which means layers can be defined as slices of any paper of a project book that has a different document on each layer. In GIMP we can have an imported image layer, document layer, and shape layer & everything which we draw or create in this software will have a layer in the layers panel. You will learn some essential parameters of the individual layer from this article so that you can understand the mechanism of having a layers panel with a number of layers in this software.

How to use Layers in GIMP?

We can use layers for making adjustments to different features as well as in making changes in the parameters of the object of that layer. That object may be an image, document, shape, or any design. Before learning about how we can use layers let us have look at the location and recovery of the layers panel.

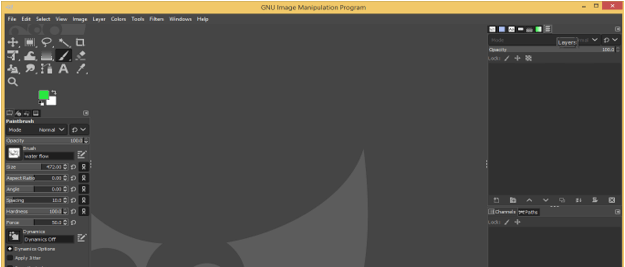
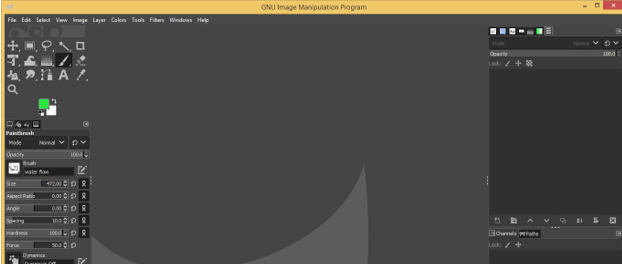
By default, you will find the layers panel on the right side of the User screen.

GIMP Layer 2

Start Your Free Design Course

3D animation, modelling, simulation, game development & others

Because of the dockable panel, you can place it anywhere in the user screen.

All in One Design Bundle(280+ Courses, 100+ projects)
AutoCADHoudiniAdobe Premiere ProPhotoshop
SolidworksVFX Visual EffectsCorelDrawUnreal Engine
Price
View Courses
280+ Online Courses | 100+ projects | 2000+ Hours | Verifiable Certificates | Lifetime Access
4.6 (64,914 ratings)

GIMP Layer 3

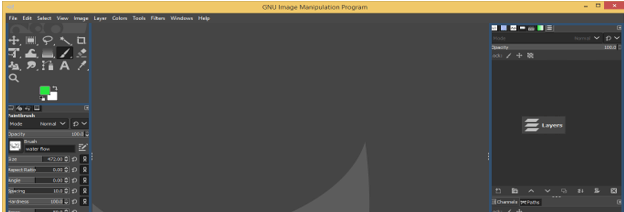
Or you can move it like this according to your suitability.

GIMP Layer 4

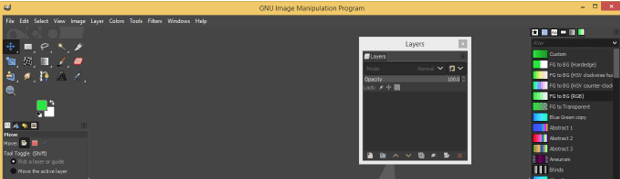
If you closed the layers panel by mistake then don’t worry, just go to the Windows menu and click on it. Go to Dockable Dialogs and click on the Layers option of the new list or press Ctrl + L as a shortcut key.

GIMP Layer 5

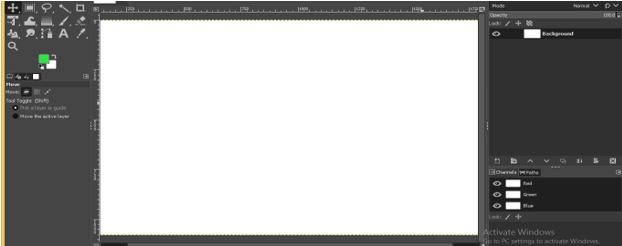
If you have nothing in the document area of GIMP then your layers panel will be empty and there will be no layer.

GIMP Layer 6

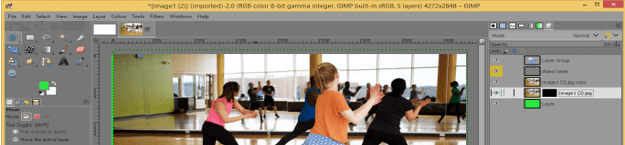
Now let us create a new document and once you create it, a layer of this document will add in the layers panel as a background layer. You can have a number of layers in layers panel because GIMP has limitless capacity having a layer in the layers panel and it just depends on your computer capacity.

GIMP Layer 7

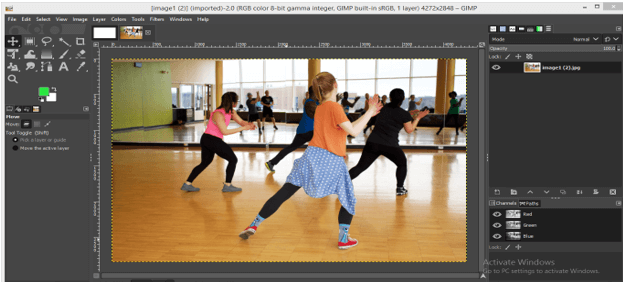
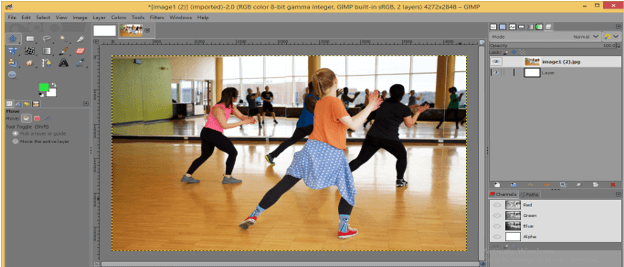
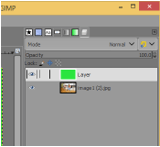
Same as if you open any image in GIMP it also has its layer in the layers panel.

GIMP Layer 8

You can change the name of any layer, just make double-click on the name of the layer and write your desired name.

GIMP Layer 9

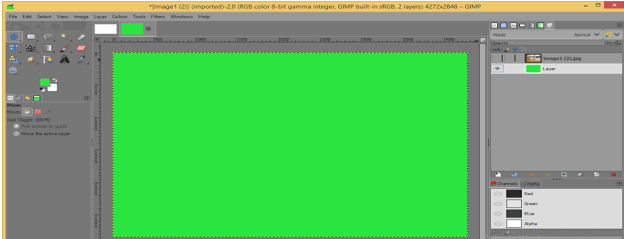
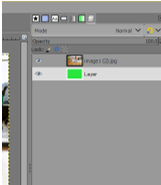
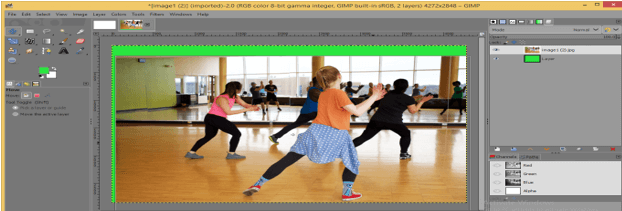
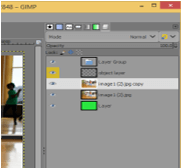
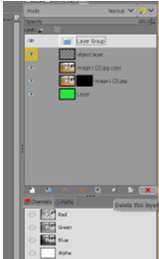
Let change the theme of the interface to grayscale for understanding the next option of the layers panel. Here we have to layers in the layers panel and you can see if you selected any layer it becomes highlighted.

GIMP Layer 10

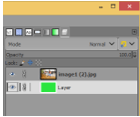
You will see the layer first which is top in layer sequence. Here we have the girl layer at the top so we can see this only and the layer below it can only see when there is any gap or the upper layer has less opacity value.

GIMP Layer 11

You can click on eye button of any layer for making it invisible.

GIMP Layer 12

Next is Link button if you enable it on both layer by click on it.

GIMP Layer 13

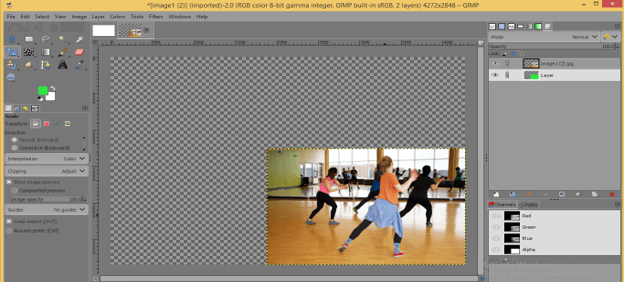
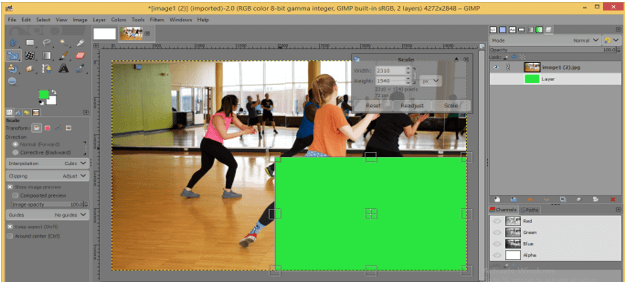
Then any transformation or change which you apply on any one of images will be applied on both layers. For example, I scale down this green layer.

GIMP Layer 14

And when I press enter for applying this scale transformation it will be applied on both layers.

GIMP Layer 15

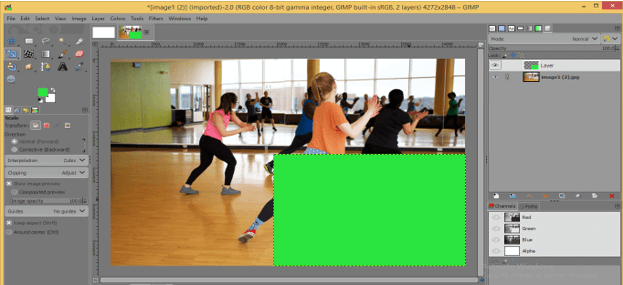
But if the link button is enabled on only one layer then it will lock that layer and you can make changes only on the unlinked layer. For example, I enabled the link button on the girl layer and then changed the scale of the green layer.

GIMP Layer 16

And after making enter there is scale transformation on the green layer only.

output 15

Next is the Lock pixels button.

lock pixel

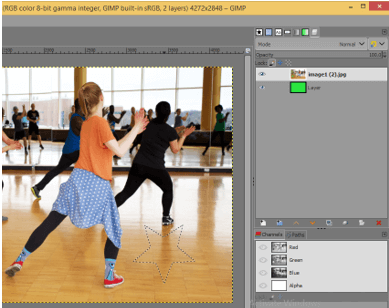
I take a Paint Brush tool and draw this star on the girl layer.

input 16

Now make the Lock pixel button enable and again draw the star with the brush tool on the girl image. You will find you cannot draw it. So if you enable the lock pixel button then you cannot draw anything on your selected layer.

output 17

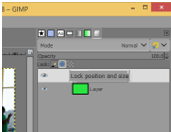
Next is the Lock Position and Size button. By enabling this button you will not able to move or resize your selected layer.

output 18

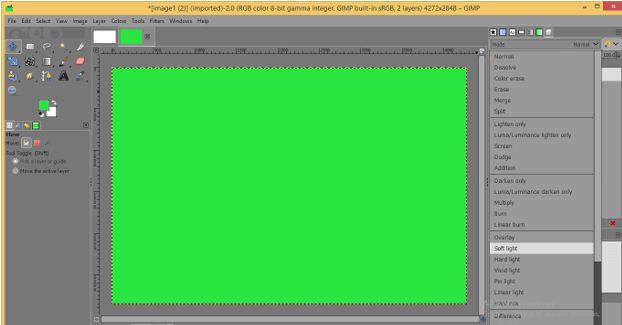
Now place the green layer above this girl layer by moving it with a mouse click.

output 19

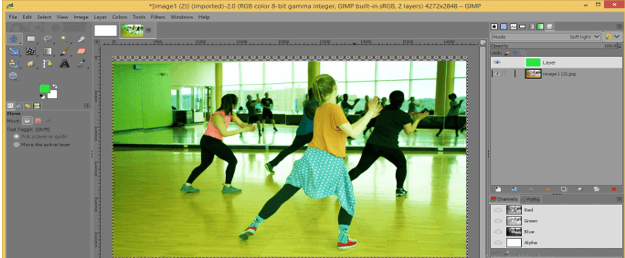
We have the Mode option here in the layer panel. Choose any one of the mode from this list. I will choose the Soft light option.

output 20

And your upper layer will blend with the below layer and give you a blending effect like this.

output 21

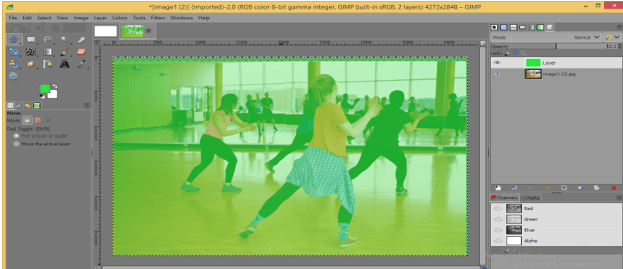
You can increase or decrease the opacity of any layer by changing the opacity value through the opacity option. Does opacity mean how opaque any particular thing is?

output 22

Move tool works on the upper layer first no matter which layer is selected in the layers panel. For example, if you select the bottom layer and then use the move tool for moving this layer.

output 23

Then it moves the upper layer by selecting it itself.

output 24

And once you did it automatically back your selection on your originally selected layer.

output 25

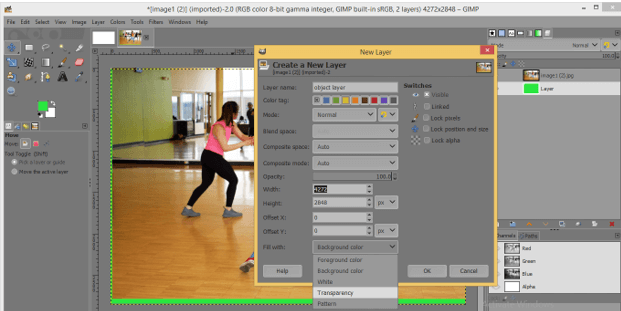
We have some tab or button at the bottom of the layers panel so let us discuss them too. The first tab is for creating a new layer.

gimp layer 27

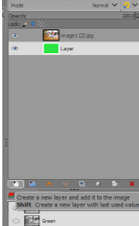
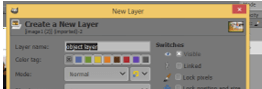
Once you click on this tab you will have this dialog box. Here you can name your layer.

gimp layer 28

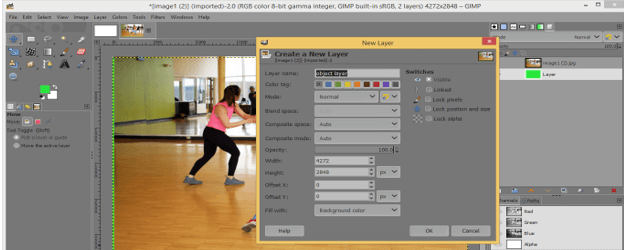
Choose the tag color of your layer by the Color tag option.

gimp layer 29

You can set the size of the layer here also according to your requirement during your work.

gimp layer 30

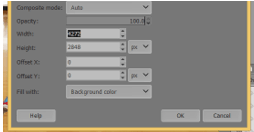
You can fill the layer with a different options. You can choose foreground color, background color, White color, any pattern or transparency for filling purposes.

gimp layer 31

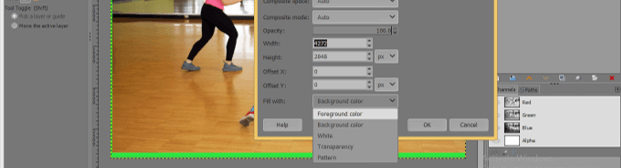
I will choose the Transparency option for having a transparent layer and hit Ok.

gimp layer 32

And you will have a new layer with your desired setting in the layers panel.

gimp layer 33

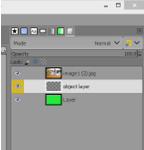
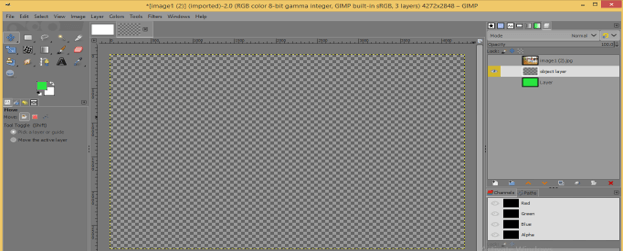
This is a transparent layer.

layer

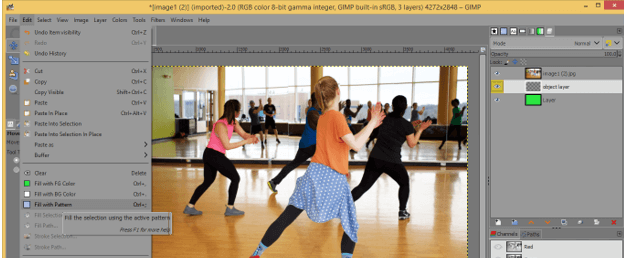
If you want to fill color in it then go to the Edit menu and click on any filling option.

fill color

If you want to make a duplicate copy of any layer then click on this button.

layer 1

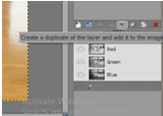
And you will have a copy of your selected layer.

selected layer

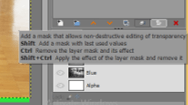
For adding a mask to any layer click on this button.

selected layer 1

Once you click you will have this dialog box, make your desired settings here, and click on the Add button.

output 26

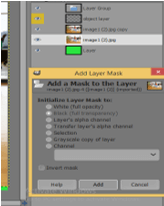
And mask will add to your selected layer.

output 27

You can delete any layer just select that layer and click on the delete button.

GIMP Layer 1

Conclusion

We have discussed all the important parameters and features of the layers panel of GIMP software and now you can understand how much it is important to understand the layers panel of GIMP. Now you can easily use the function of layers panel for handling your work in better ways.

Recommended Articles

This is a guide to GIMP Layers. Here we discuss the introduction and How to use Layers in GIMP?. You can also go through our other related articles to learn more –

  1. MP4 to GIF Photoshop
  2. Photoshop Gold Gradient
  3. Night Effect in Photoshop
  4. Perspective Correction in Photoshop
Popular Course in this category
Maya Training (10 Courses, 7+ Projects)
  10 Online Courses |  7 Hands-on Projects |  100+ Hours |  Verifiable Certificate of Completion
4.7
Price

View Course

Related Courses

Photoshop Training (10 Courses, 12+ Projects)4.9
After Effects Training (3 Courses, 3+ Projects)4.8
0 Shares
Share
Tweet
Share
Primary Sidebar
Footer
About Us
  • Blog
  • Who is EDUCBA?
  • Sign Up
  • Live Classes
  • Corporate Training
  • Certificate from Top Institutions
  • Contact Us
  • Verifiable Certificate
  • Reviews
  • Terms and Conditions
  • Privacy Policy
  •  
Apps
  • iPhone & iPad
  • Android
Resources
  • Free Courses
  • Photoshop Tutorial
  • 3ds Max Tutorial
  • All Tutorials
Certification Courses
  • All Courses
  • Design Course - All in One Bundle
  • Photoshop Course
  • Maya Course
  • Unreal Engine Course
  • Unity Course
  • DaVinci Resolve Course
  • Pro Tools Course

ISO 10004:2018 & ISO 9001:2015 Certified

© 2022 - EDUCBA. ALL RIGHTS RESERVED. THE CERTIFICATION NAMES ARE THE TRADEMARKS OF THEIR RESPECTIVE OWNERS.

EDUCBA
Free Design Course

Banner Creation, Object Selection, Sky Replacement, Advance Filters & others

*Please provide your correct email id. Login details for this Free course will be emailed to you

By signing up, you agree to our Terms of Use and Privacy Policy.

EDUCBA Login

Forgot Password?

By signing up, you agree to our Terms of Use and Privacy Policy.

EDUCBA
Free Design Course

3D animation, modelling, simulation, game development & others

*Please provide your correct email id. Login details for this Free course will be emailed to you

By signing up, you agree to our Terms of Use and Privacy Policy.

EDUCBA

*Please provide your correct email id. Login details for this Free course will be emailed to you

By signing up, you agree to our Terms of Use and Privacy Policy.

Let’s Get Started

By signing up, you agree to our Terms of Use and Privacy Policy.

This website or its third-party tools use cookies, which are necessary to its functioning and required to achieve the purposes illustrated in the cookie policy. By closing this banner, scrolling this page, clicking a link or continuing to browse otherwise, you agree to our Privacy Policy

Loading . . .
Quiz
Question:

Answer:

Quiz Result
Total QuestionsCorrect AnswersWrong AnswersPercentage

Explore 1000+ varieties of Mock tests View more