Updated June 30, 2023
Introduction to Docker Stack
The ‘docker stack’ is a Docker command to manage Docker stacks. We can use this command to deploy a new stack or update an existing one, list stacks, list the tasks in the stack, remove one or more stacks, and list the services in the stack. Stacks can only be deployed in Docker swarm mode, which comes bundled with the Docker engine, eliminating the need for additional package installations.
Syntax:
docker stack [OPTIONS] COMMAND
Options:
–orchestrator: It specified which orchestrator to use (swarm|kubernetes|all)
Commands:
- deploy: It is used to deploy a new stack or update an existing stack
- ls: It is used to list stacks
- ps: It is used to list the tasks in the stack
- rm: It is used to remove one or more stacks at the same time
- services: It is used to list the services in the stack
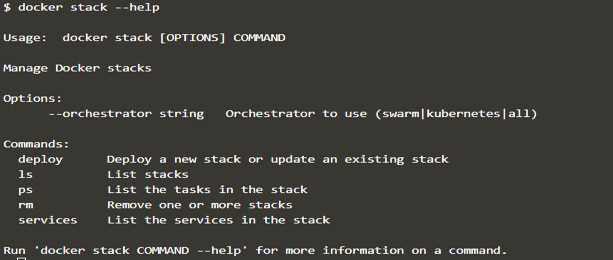
We can use the ‘–help’ option to learn more about this command, as shown below:
docker stack --help
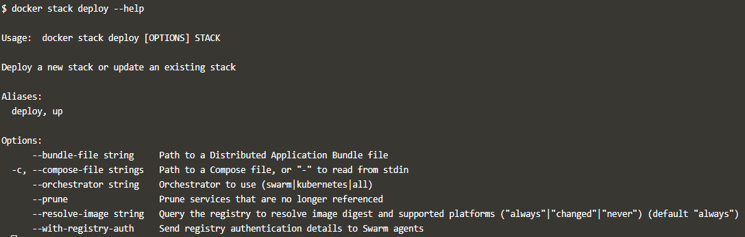
We can get more information on any of the above commands using the ‘–help’ command as shown below: –
docker stack deploy --help
How Stack works in Docker?
We must pass a ‘docker-compose.yaml’ file as an argument to the ‘docker stack deploys’ command using the ‘–compose-file’ or ‘-c’ option. The ‘docker-compose.yaml’ file comprises services, volumes, networks, and other necessary configurations to launch a comprehensive application. The Docker daemon adds a stack name before service, volume, or network names.
The Docker images mentioned in the compose file are either available on any Docker registry, it might be a private or public registry, or available on all nodes in that swarm, otherwise, container creation will fail.
Examples
Let’s create a simple Python application and deploy it in a Docker Swarm.
- First of all, create a local Docker register running as a service using the below command:
docker service create --name my-registry -p 5000:5000 registry:2

Note: We need to initialize the Docker swarm (if not initialized already) using the ‘docker swarm init’ command before running the above command.
- Now, let’s verify that the service is running fine and the registry is accessible, as shown below:
docker service ls
curl http://localhost:5000/v2/

Explanation: We can see that the service is replicated and can access the local host successfully.
- Let’s work on the application now; we are going to create a Python application with the code mentioned below, however, we can use any application: –
test-app.py
Code:
from flask import Flask

from redis import Redis

app = Flask(__name__)

redis = Redis(host='redis', port=6379)

@app.route('/')

def hello():

count = redis.incr('hits')

return 'Hi, You have visited {} times\n'.format(count)

if __name__ == "__main__":

app.run(host="0.0.0.0", port=8000, debug=True)
- We have used Flask and Redis in our Python application, so we need those packages to run the application, so here is the requirement.txt file that we are going to use while building the Docker image.
requirements.txt

- Here is the snippet of Dockerfile to build a Docker image: –
Dockerfile
FROM python:3.10.0a1-alpine

ADD . /test-app

WORKDIR /test-app

RUN pip install -r requirements.txt

CMD ["python", "test-app.py"]
- Let’s build the Docker image now and push it to the local registry as shown below: –
docker build –t localhost:5000/test-app.

docker push localhost:5000/test-app
![]()
![]()

- Let’s create the ‘docker-compose.yml’ file with two services: ‘web’ and ‘redis’.
docker-compose.yml
version: '3'

services:

web:

image: localhost:5000/test-app

ports:

- "8000:8000"

redis:

image: redis:alpine
- Finally, deploy our first Docker stack using the above ‘docker-compose.yml’ file and name it ‘my-first-stack’ as shown below: –
docker stack deploy --compose-file docker-compose.yml my-first-stack

The given example shows that the services and networks have been labeled with the stack name.
- Let’s check if it is deployed successfully using the ‘docker stack ls’ command as below: –
docker stack ls

In the above example, we can see that the ‘my-first-stack’ has 2 services, and the orchestrator is Swarm, as we have not specified any other orchestrator while deploying the stack.
- We can use the below command to know more about services running under this stack: –
docker stack services <stack_name>

docker stack services my-first-stack

In the above snapshot, we can see that 1 replica is running out of 1 for both services. Suppose there is 0 replica showing, which means that the service is not deployed successfully. Check the containers and their logs to troubleshoot.
- In order to check the status of the containers, we have to use ‘docker stack ps <stack_name>’ as shown below: –
docker stack ps my-first-stack
![]()
In the above example, we can see that both containers are running; we can see the error in the error column if any occurs or use the ‘docker logs <container_ID>’ to know more about the error.
- Let’s test the application by connecting to it as shown below: –
curl http://localhost:8000
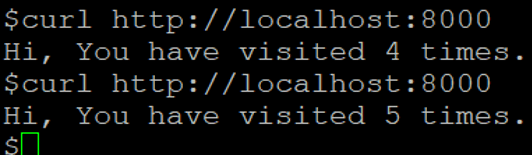
Hurray, we are able to access our application. Let’s do other ‘docker stack’ commands.
- If there is any requirement to destroy the stack, we can do that by running ‘docker stack rm <stack_name>’ as shown below: –
docker stack rm my-first-stack

Based on your description, in the provided snapshot, it appears that all services and networks created during the deployment of the stack are being removed.
Advantages
- It makes it easier to manage all components of an application.
- We can deploy a highly available application using the Docker stack as it works in Swarm mode.
- We can use different orchestrators like Kubernetes as well.
Conclusion
We use ‘docker stack’ most of the time while deploying applications in production to make them highly available. It only works in Swarm mode, so we must have to activate or initialize Swarm mode.
Recommended Articles
This is a guide to Docker Stack. Here we discuss the introduction to Docker Stack and How Stack works in Docker. You may also have a look at the following articles to learn more –

