Updated May 23, 2023

Introduction to Docker Hosts
Docker Hosts are the machines on which Docker daemon runs as a process, allowing us to run the application as a container. Those machines can be physical or virtual machines running Linux or Windows OS. In other words, the device on which we install Docker becomes Docker Host; for example, if we install Docker on our laptop, that laptop works as a Docker Host now, and we can create Docker images, containers, volumes, and networks on that laptop. It allows us to run multiple containers and provides isolation among them. Each container has its namespace, cgroup, network configuration, etc.
How do Docker Hosts Work?
Any workstation on which we install Docker becomes Docker Host. It provides a platform on which the Docker daemon runs. We then run containers and build images, volumes, networks, etc., from Docker CLI. It is underlying hardware.
As we know, it is a physical machine or VM on which the Docker daemon is installed; we need the Docker client to interact with the Docker daemon running. We can install Docker CLI or Docker client on Docker Host or any remote computer. When we run any container on the Docker Host using Docker CLI, it gets executed as below:
- When we hit enter after typing the command, CLI makes a REST API call to the docker daemon in JSON format.
- Docker daemon checks for the Docker image that is mentioned in the command locally, and if it does not find the image locally, then it goes to the Docker registry and searches there; if it finds the image over there, it first pulls that image locally and then starts the container.

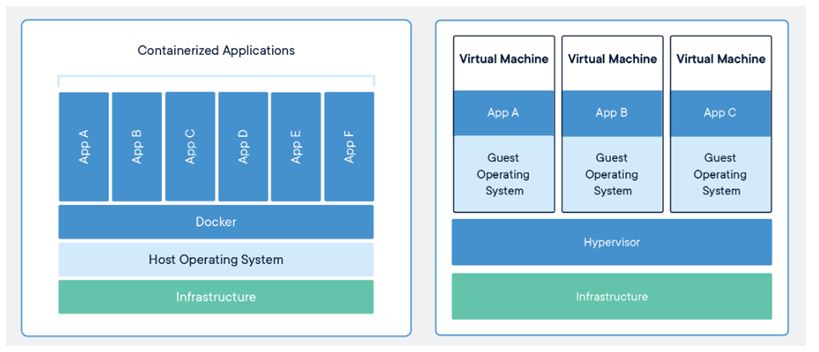
When we talk about containers, it looks similar to VMs however, the main difference is containers do not have a full-blown operating system. It uses Docker Host’s kernel to access the resources. Also, all the required binaries or libraries to run an application are encapsulated in an image called Docker image.
Creation of Windows Docker Host
Given below shows the creation of Windows docker host:
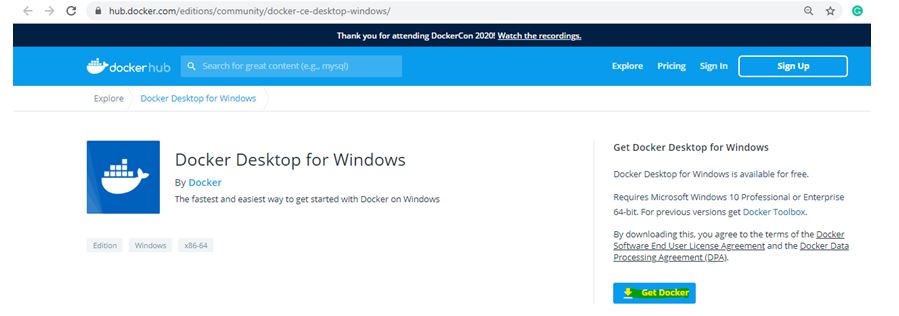
1. First, we have to download the installation package from hub.docker.com.
Source Link: https://hub.docker.com/editions/community/docker-ce-desktop-windows/.
2. Go to this link and click on ‘Get Docker’.
3. Once you downloaded the installation package, double-click on the package to execute it, and click on Run when prompted.
We get the below window:

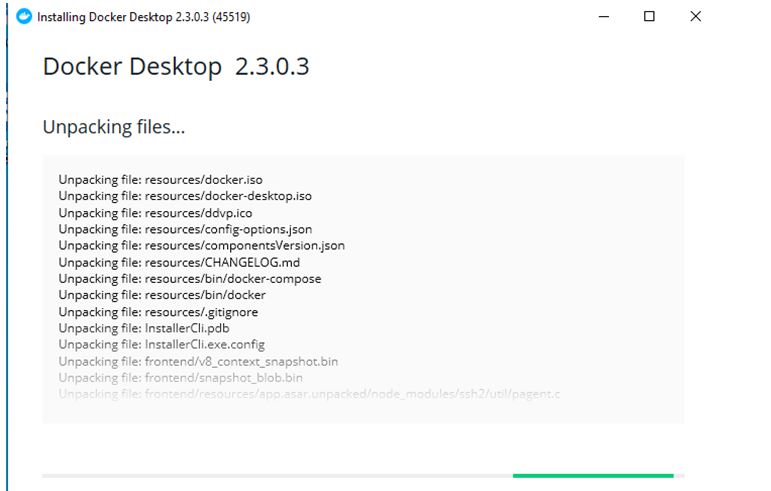
4. It will take few minutes as per network speed and once completed.
We get below window:
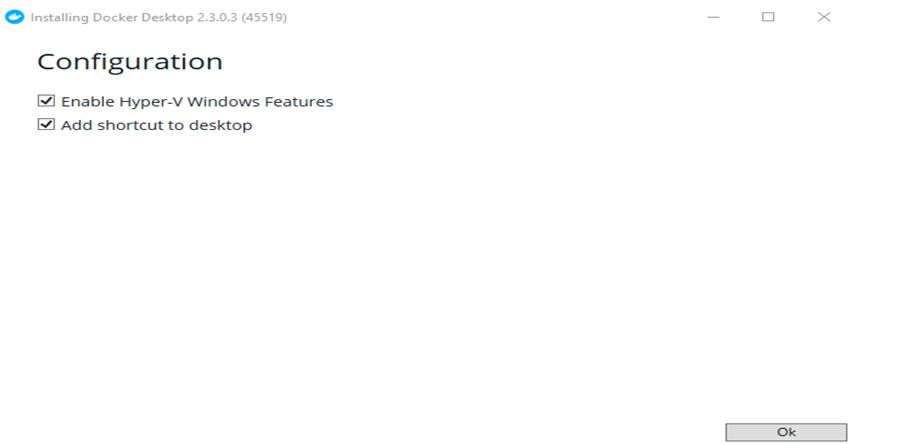
5. Installation starts as soon as we press the ‘Ok’ button.
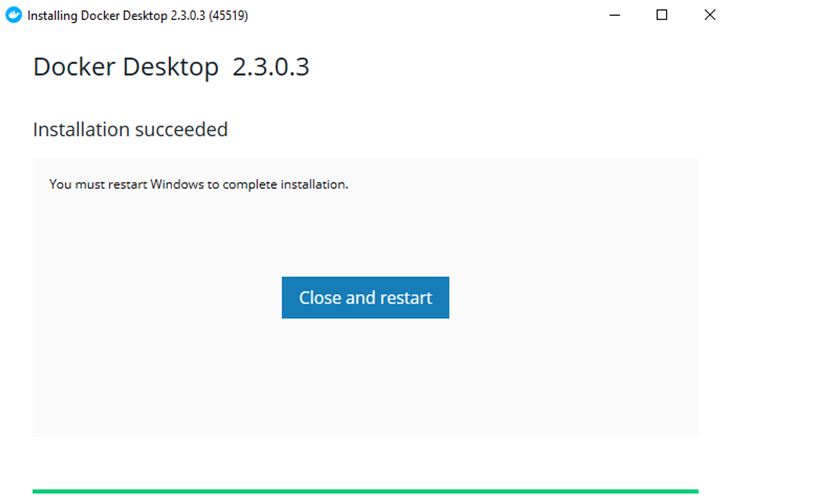
6. Once the installation has been completed, we get the below window to restart the host.
7. After the restart, we see the shortcut ‘Docker Desktop’, and if we check the hidden icons, we can see services are getting started.

8. Now, open PowerShell and run the command below:
Code:
docker --version
Output:

9. We can now create containers, images, volumes, etc. On this newly created Docker Host, however, we can manage this as well.
It is a standalone Docker remote Host, and it is good for testing purposes and development. In production, we need to initialize swarm mode to use multiple Docker Host that creates Docker Swarm or cluster.
Creation of Linux Docker Host
We will install Docker on Cent OS7 to make it Docker Host.
1. First, we need to install the below packages as device-mapper is the default storage driver for CentOS7 and earlier.
Code:
$sudo yum install -y device-mapper-persistent-data lvm2
Output:
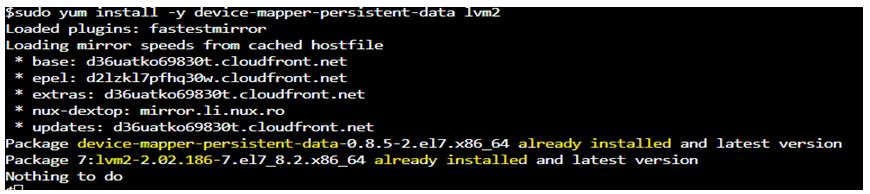
In the above snapshot, we see that those packages are already installed.
2. Now, add the Docker repository using the below command.
Code:
$sudo yum-config-manager \

--add-repo \
Source Link: https://download.docker.com/linux/centos/docker-ce.repo
Output:

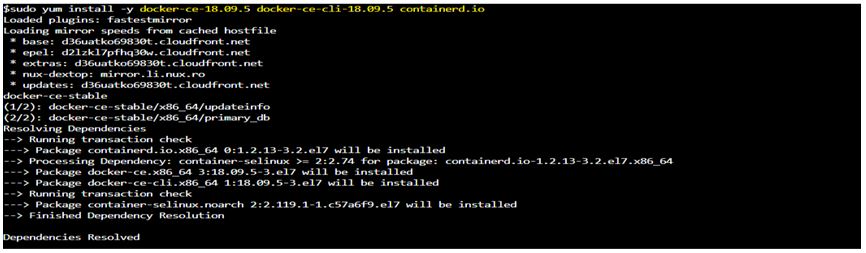
3. Below is the command to install Docker CE i.e. Community Edition, Docker CLI i.e. Docker client, to communicate with Docker daemon and contianerd.io.
Code:
$sudo yum install -y docker-ce-18.09.5 docker-ce-cli-18.09.5 containerd.io
Output:


4. After the installation, we must start the docker service and enable it so we do not have to start it if the server gets rebooted.
Code:
$sudo systemctl start docker

$sudo systemctl enable docker
Output:

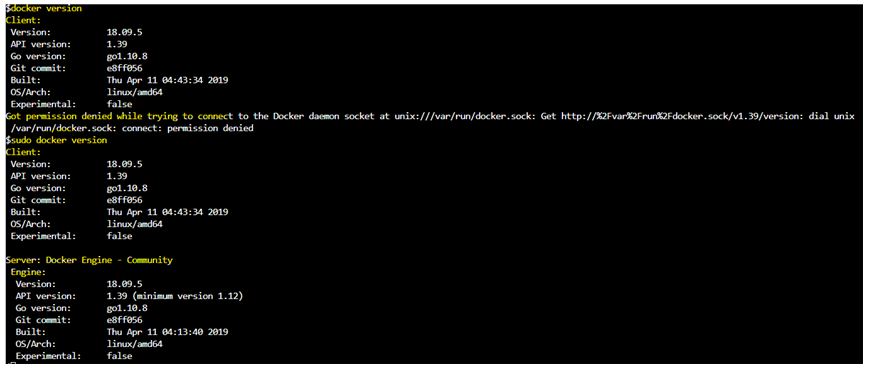
5. In the end, we need to add the user who is going to execute the Docker commands to the ‘docker’ group otherwise, we have to use ‘sudo’ in every command.
Code:
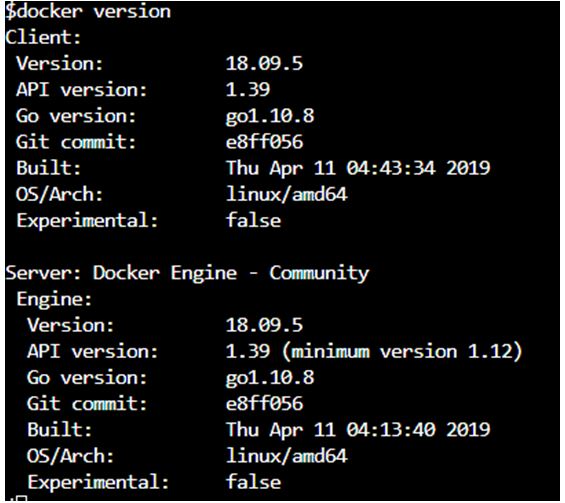
$docker version

$sudo docker version
Output:
6. Let’s add the user to the ‘docker’ group using the below command.
Code:
$sudo usermode -a -G docker <user_name>
7. Now, run the docker commands without sudo.
Code:
$docker version
Output:
8. That’s it; we have successfully converted CentOS 7. Now, we can run all the docker commands.
Advantages of Docker Hosts
Given below are the advantages mentioned:
- We can easily convert our normal computer as a Docker Host to run Docker commands for testing or development purposes.
- It is independent of OS and platform, which means we can create a running Windows, Linux, or Mac, and from normal computer to VM hosted on public clouds like AWS, Azure, GCP, or any public cloud environment.
- It provides isolation between containers which means containers do not have knowledge about other containers on the same host.
- It provides better resource utilization as compared to VM.
- If an application is running as a container, it gives us a guarantee that it will run exactly the same on others as well without any error.
Conclusion
It is nothing but any bare metal server or VM running on any server or hosted on a public cloud with Docker daemon running on it. It refers to a node in a Docker swarm or cluster. We cannot run Windows containers like IIS servers on Linux Docker Host. However, we can run Windows containers and linux containers on Windows Docker Host.
Recommended Articles
We hope that this EDUCBA information on “Docker Hosts” was beneficial to you. You can view EDUCBA’s recommended articles for more information.

