Updated June 20, 2023
Introduction to Tkinter PhotoImage
The Tkinter PhotoImage is a built-in method that allows you to add user-defined images to your application. It serves as a keyword that is typically used with the file parameter where the image file is specified. The image file can be stored in the specified path, and you can also use the data parameter to directly embed the image data as a byte data type object. The PhotoImage method creates an image object that can be utilized wherever it is needed, such as in other widgets like labels.
Syntax:
The Tkinter’s most powerful GUI-based widget has the most advanced library methods in the Python programming language. It has its own syntax and default parameters.
from tkinter import * //import all the library of the tkinter module
from PIL import Image, ImageTk
variable name=Tk()
variable name=PhotoImage(file="")
variable name.mainloop()
The above codes are the basic algorithm for creating the geometry function in the tkinter library, and these modules will utilize all other widgets for presenting the desktop application as more secure and powerful.
How does Photoimage Work in Tkinter?
Basically, we want to decorate the UI with has textbox, labels, buttons, views, scroll boxes, etc most buttons will be the UI area to navigate the web pages. Once we click the button, it performs the application logic and works in the backend areas. We can call the photoimage method using a file path, and the path will be any of the local machine URL paths. It will be either the grayscale method or some other true-color images, which have been the base64-encoded format of the gif, jpg, and some other image file formats. We used a different set of methods in the code along with inside of the UI-related functionalities like iframe, and it will cover the entire window frame. Each frame has a different set of patterns for creating a normal and complex layout screen. It forms the group for including along the widgets functions like Extra frames etc.
While we using the photoimage(), the images are read using the Python imaging library(pil). This library will be applicable for loading the images, and it is a more required and available module for the Pypi package manager in the Python language. And these libraries must support the file formats like PPM,PNG,GIF.JPG, JPEG, BMP, etc these formats are included in the library package with the help of UI widgets like Label. These images have occupied the areas in the application window.
Constructor
Rows and Columns have a set of values, and these arguments should be passed along the runtime.
from Tkinter import *
from PIL import Image, ImageTk
class classname(tk.Tk):
def _init_(variable name,first arguments,second arguments)
variable name= ImageTk.PhotoImage(fileurl)
The above codes will be used to create and pass the arguments in the file image, and this PhotoImage constructor helps to create the object. It needs to call the other default methods. It needs to be more presentation and customized images.
Methods
We already discussed in the previous paragraphs the photoimage() method and its default behavior and attributes. And these package managers will always use default options like fill, side, expand, etc.
variable name=PhotoImage(file=””)
variable name.pack(fill=BOTH,expand=2)
Examples of Tkinter Photoimage
Lets us discuss examples of Tkinter Photoimage.
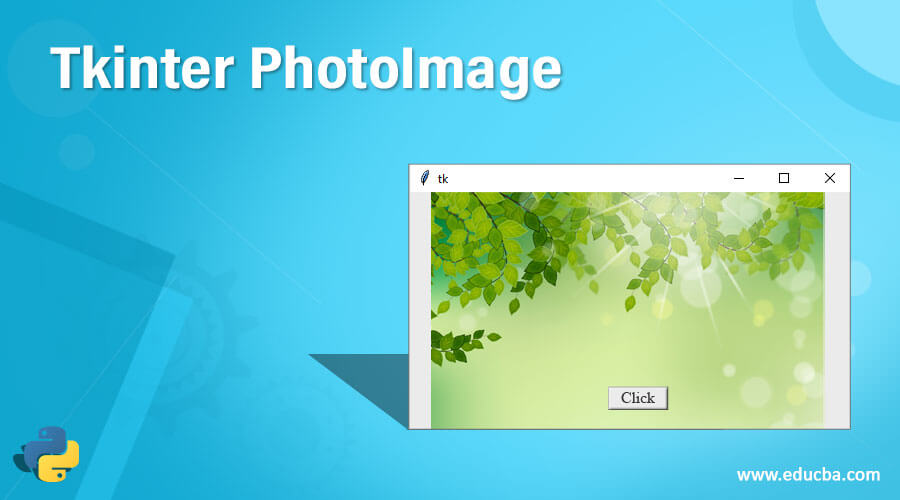
Example #1
Code:
from tkinter import *
from tkinter.ttk import *
first = Tk()
Label(first, text = 'Welcome To My Domain', font =(
'Verdana', 17)).pack(side = LEFT, pady = 11)
imge = PhotoImage(file = r"C:\Users\Kripya-PC\Downloads\MicrosoftTeams-image (11).png")
Button(first, text = 'Have a Nice Day !', image = imge).pack(side = LEFT)
mainloop()
Output:
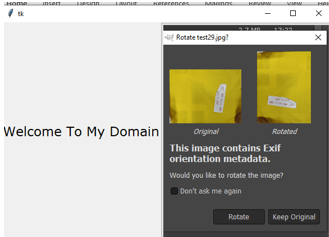
Example #2
Code:
from tkinter import *
import tkinter as tk
from tkinter import ttk
first = Tk()
first.geometry("132x110")
frm = Frame(first)
frm.pack()
frm1 = Frame(first)
frm1.pack(side = RIGHT)
frm2 = Frame(first)
frm2.pack(side = LEFT)

butn = Button(frm, text="Welcome", fg="pink",activebackground = "green")
butn.pack(side = LEFT)

butn1 = Button(frm, text="To", fg="orange", activebackground = "red")
butn1.pack(side = RIGHT)

butn2 = Button(frm1, text="My", fg="green", activebackground = "violet")
butn2.pack(side = RIGHT)

butn3 = Button(frm2, text="Domain", fg="blue", activebackground = "yellow")
butn3.pack(side = LEFT)
comb = tk.Label(first,
                    text = "Welcome Back",background = 'pink', foreground ="pink",
          font = ("Times New Roman", 17))
result = Button(first, text = "Have a Nice Day")
example = ttk.Combobox(first,
                            values=[
                                    "first",
                                    "second",
                                    "third",
                                    "four"])
imge = PhotoImage(file = r"C:\Users\Kripya-PC\Downloads\MicrosoftTeams-image (11).png")
Button(first, text = 'Have a Nice Day !', image = imge).pack(side = LEFT)

first.mainloop()
Output:
Example #3
Code :
from tkinter import *
import tkinter as tk
from tkinter import ttk
first = Tk()
first.geometry("132x110")
frm = Frame(first)
frm.pack()
frm1 = Frame(first)
frm1.pack(side = RIGHT)
frm2 = Frame(first)
frm2.pack(side = LEFT)
imge = PhotoImage(file = r"C:\Users\Kripya-PC\Downloads\MicrosoftTeams-image (11).png")
Button(first, text = 'Have a Nice Day !', image = imge).pack(side = LEFT)
labels=Label(first, image=imge, width=320, height=350)
labels.pack(side=BOTTOM)

btn1=Button(first, text=" +" )
btn1.pack(side=TOP)

btn2=Button(first, text=" - ")
btn2.pack(side=RIGHT)

first.mainloop()
Output:
Conclusion
The Photoimage method has a default pattern class that will read all types of image format files. And these files will convert the image into the binary source code, which has the readable format of the machine. The image library will include all the supported classes already defined in the Python library.
Recommended Articles
This is a guide to Tkinter PhotoImage. Here we discuss the introduction of Tkinter PhotoImage, and how to work PhotoImage with sample code for better understanding. You may also have a look at the following articles to learn more –
