Updated August 21, 2023
Introduction to Ratio in Excel
The ratio in Excel is a way to compare two data sets that allow us to get which data is greater or lesser. It also gives the portion between 2 parameters or numbers. By this, we can compare the two data sets.
Calculate Excel Ratio (Table of Contents)
How to Calculate Ratio in Excel?
Calculating the Ratio in Excel is very simple and easy. Let’s understand how to calculate ratios in Excel with some examples.
Calculate Ratio in Excel – Example #1
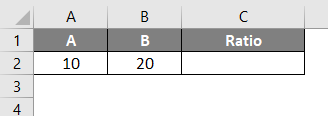
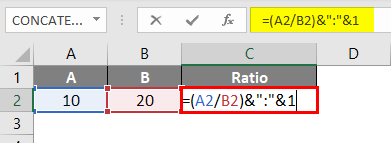
Calculating Ratio in Excel is simple, but we need to understand this logic. Here we have 2 parameters, A and B. A has a value of 10, and B has a value of 20, as shown below.
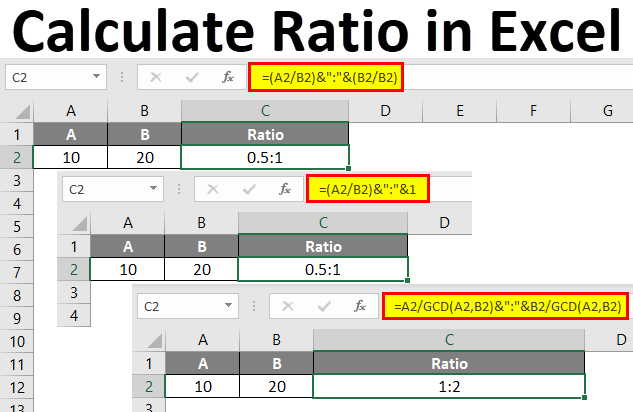
And for this, we will use a colon (“:”) as a separator. So for this, go to the cell where we need to see the output. And type the “=” sign (Equal) to go to the edit mode of that cell. In the first syntax, divide cell A2 with B2; in the second syntax, divide cell B2 with B2. Doing this will create the short comparative values with a short ratio value, as shown below.
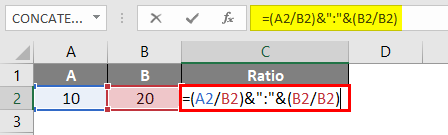
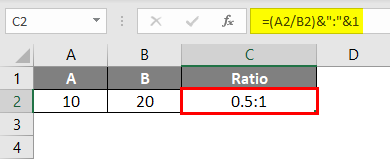
Once done with syntax preparation, press Enter to see the result below.
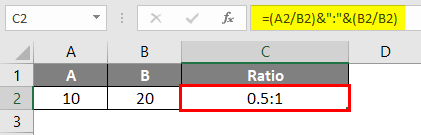
As we can see above, the calculated value of the Ratio is coming 0.5:1. This value can be modified to look better by multiplying the obtained Ratio with 2 to have a completely exact value, not in fraction or else. We can keep it in its original form.
Calculate Ratio in Excel – Example #2
There is another method of calculating the Ratio in Excel. We will consider the same data which we have considered in example-1. If we see the syntax used in example-1, we have divided cell B2 into B2.

By dividing cell B2 with B2 or any cell with the same value, that cell gives the output as 1. The obtained Ratio in example-1 is 0.5:1, where value 1 is a division on 20/20 if we mathematically split the syntax. And 0.5 is the division of 10/20. This means if we keep 1 by default in the second syntax (Or 2nd half of the syntax), we will eventually get value 1 as a comparative of the First syntax (Or 1st half of the syntax).
Now, let’s apply this logic to the same data and see what result we get.
For this, go to the cell where we need to see the output and type the “=” sign. In the first half of the syntax, divide cell A2 with B2, and in the second half, put only “1,” as shown below.
As we can see in the above screenshot, we have kept “1” in the second half of the syntax, creating the same value as example-1. Now press Enter to see the result.
As we can see in the screenshot below, the obtained result is the same as in example-1.
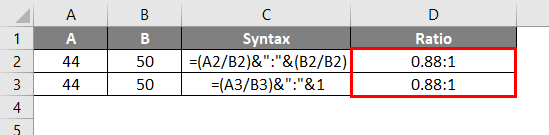
Now verify both the applied formulas in example-1 and example-2; we will test them with a different value in both syntaxes. For testing, we kept 44 in cells A2 and A3 and 50 in cells B2 and B3. And in both ways of calculating the Ratio, we are getting the same value in Excel, as shown below.
Calculate Ratio in Excel – Example #3
There is another method for calculating the Ratio in Excel. This method is a little complex with short syntax. In Excel, there is a format for finding the Greatest Common Divisor, which means when we select two values and then compare them with the third one, it automatically considers the greatest value from which that comparative ratio value will get divided. This we have done manually in example-1 and example-2. We will also consider the same data we have seen in the above examples.

Now go to the cell where we need to see the result and type the “=” sign. Now select cell A2 and divide it with GCD. And in GCD, select both cells A2 and B2. The same procedure follows for the second half of the syntax. Select cell B2 and divide with GCD. And in GCD, select both cells A2 and B2 separated by a comma (,) as shown below.
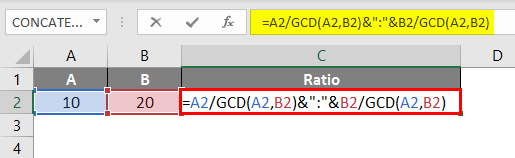
Once we do that, press Enter to see the result, as shown below.
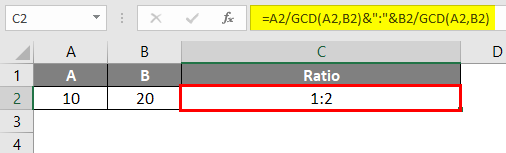
As we can see above, the calculated Ratio is coming as 1:2. The Ratio calculated in example-1 and example-2 is practically half of the Ratio coming in example-3 but has the same significance in reality. Both values carry the same features.
Not let’s understand the GCD function. GCD, or Greatest Common Divisor in Excel, automatically finds the most outstanding value to divide it with the value in the numerator. She eventually gives the same result in methods used in example-1 and example-2.
Pros
- The methods shown in all the examples are easy to use.
- It is easy to understand the syntax and value entered.
- We can modify the syntax as per our requirements.
- If there are more than three values, it needs to be compared, and for that, we can use the same formula.
- A good thing about calculating the Ratio with GCD in Excel is that it gives a result that looks good in terms of numbers, characters, and numbers.
Things to Remember
- Make sure the concatenation is done correctly to avoid errors.
- We can use the proper CONCATENATION formula instead of using & as a separator.
- A value obtained in example-1 and two and example-3 seems different, but technically there is no difference in all the ratio values.
Recommended Articles
This has been a guide to Calculate Ratio in Excel. Here we discuss calculating Ratio in Excel, practical examples, and a downloadable Excel template. You can also go through our other suggested articles –
