Updated February 14, 2023
Introduction to Nginx Server Block
The Nginx server block allows us to run multiple websites on a single machine. By using server blocks, we can specify the root site document, which was used to create a separate security policy for each site. We need to use a different SSL certificate for every site. The root document is the directory where domain name website files are stored and served in the request-response.

Overview
The Block of server is referred to as the virtual host of the nginx server and the feature of the nginx server, allowing us to host multiple websites on a single server. As opposed to setting up and configuring the server for every domain and hosting a number of websites on a single machine will save our money and time. Domains are isolated and separate from each other. The virtual host of nginx is faster on multiple websites on single machines. Each website contains the individual documentation of the site; we need to create directory structures that are individual for storing the data.
How to Install Nginx Server Block?
When we need to host more than one website or domain on our nginx server, for the same, we need to configure the server block to encapsulate all of our configurations of the domain. It will become synonymous with the virtual host files of apache; it will serve the same purpose.
A record is nothing but the record of DNS, which points to the domain’s name for the public server’s IP address.
Below steps shows how to install it:
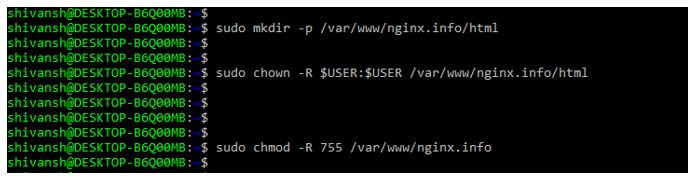
1. In the first step, we create the directory for our domain which contains all the settings which were related to our domain. After making the directory, we assign the ownership using the $USER variable of the environment. It will give the ownership of the directory to the currently logged user. After changing the ownership, we assign the appropriate permissions to the data directory for users and groups as follows. Finally, after correctly configuring the consent of the username, we use the same in the domain.
Code:
sudo mkdir -p /var/www/nginx.info/html
sudo chown -R $USER:$USER /var/www/nginx.info/html
sudo chmod -R 755 /var/www/nginx.info
Output:
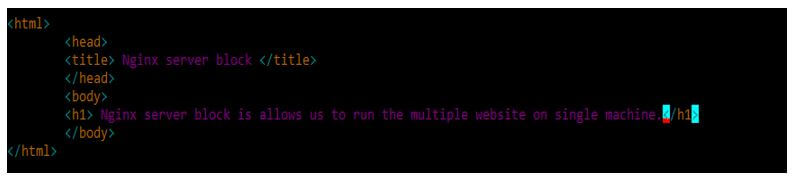
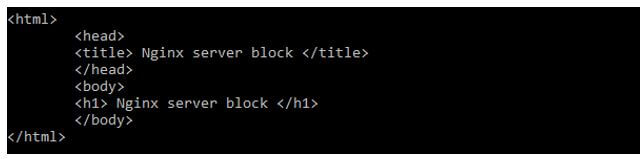
2. After creating the directory and providing the appropriate permission for the user directory, in this step, we make the html file for testing purposes; this file is used to serve the content used to display on the web browser when we are calling the browser.
Code:
<html>
<head>
<title> Nginx server block </title>
</head>
<body>
<h1> Nginx server block is allows us to run the multiple website on single machine.</h1>
</body>
</html>
Output:
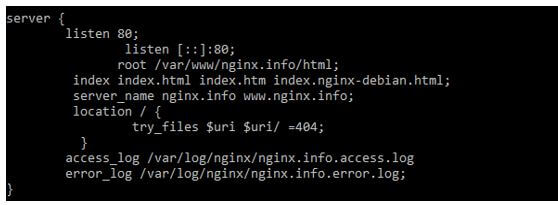
3. After creating the index.html file, we make the nginx server block in this step. The default server block of the nginx server is serving the default file of html. Therefore, we are creating a server block file as follows.
Code:
  server {
listen 80;
  listen [::]:80;
  root /var/www/nginx.info/html;
index index.html index.htm index.nginx-debian.html;
server_name nginx.info www.nginx.info;
location / {
  try_files $uri $uri/ =404;
}
access_log /var/log/nginx/nginx.info.access.log
error_log /var/log/nginx/nginx.info.error.log;
 }
Output:
4. After creating it in this step, we enable the nginx server blocks.
Code:
ln -s /etc/nginx/sites-available/nginx.info /etc/nginx/sites-enabled/Output:

5. After enabling the Block of the nginx server, we need to reboot the nginx server to take the effect of the changed port. Before restarting the nginx server, we execute the nginx –t command to check whether the nginx configuration file contains any error or not.
Code:
nginx –t
service nginx restart
Output:

Configuration
At the time of using it, we need to use the configuration of encapsulation details.
Below steps shows how to configure it:
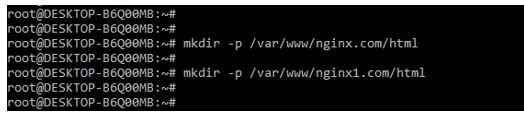
1. In the first step, we are setting up the root directories of the root document; by default, ubuntu has enabled the nginx block.
Code:
mkdir -p /var/www/nginx.com/html
mkdir -p /var/www/nginx1.com/html
Output:
2. After creating the directory, we change the ownership of the user and group, and also, we are changing the umask value for the specified directory.
Code:
chown -R $USER:$USER /var/www/nginx.com/html
chown -R $USER:$USER /var/www/nginx1.com/html
chmod -R 755 /var/www
Output:

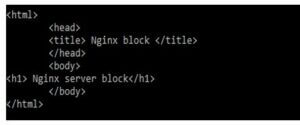
3. After defining the directory’s privileges and giving an umask in this step, we create the sample pages for each site. In the below example, we are making the index.html file as follows.
Code:
<html>
<head>
<title> Nginx server block </title>
</head>
<body>
<h1> Nginx server block </h1>
</body>
</html>
Output:
4. After creating the index.html file, we are making the server block files for every domain as follows. In the below example, we are building two server blocks as follows.
Code:
cp /etc/nginx/sites-available/default /etc/nginx/sites-available/nginx.com
cp /etc/nginx/sites-available/nginx.com /etc/nginx/sites-available/nginx1.com
Output:

5. After creating the server block in this step, we enable the server block for restarting the nginx server.
Code:
ln -s /etc/nginx/sites-available/nginx.com /etc/nginx/sites-enabled/
ln -s /etc/nginx/sites-available/nginx1.com /etc/nginx/sites-enabled/
Output:

6. After enabling the server block in this step, we check the configuration and restart the server.
Code:
nginx –t
service nginx restart
Output:

7. Now, we are configuring the host file as follows.

Example of Nginx Server Block
Different examples are mentioned below:
But first, we are creating the directory and permitting it.
Code:
mkdir -p /var/www/block.info/html
chmod -R 755 /var/www/block.info
Output:

1. Create the index.html file.
Code:
<html>
<head>
<title> Nginx block </title>
</head>
<body>
<h1> Nginx server block</h1>
</body>
</html>
Output:
2. Creating server block files.
Code:
cp /etc/nginx/sites-available/default /etc/nginx/sites-available/block.comOutput:

3. Enable the server block.
Code:
ln -s /etc/nginx/sites-available/block.com /etc/nginx/sites-enabled/Output:

4. Restart the server.
Code:
nginx –t
service nginx restart
Output:

5. Configure the host file.

Conclusion
For installing an nginx server block, records need to be defined in a domain name for the hosting provider. Block of server is referred to as the virtual host of the nginx server and the feature of the nginx server, allowing us to host multiple websites on a single server.
Recommended Articles
This is a guide to Nginx Server Block. Here we discuss the introduction and how to install the Nginx server block with configuration and examples. You may also have a look at the following articles to learn more –
