Updated February 20, 2023
Introduction to Logo in Maya
Logo created in Maya software is used in a variety of applications such as television programs, animated films, 3D cinematics. In this article, we will make a logo from the outline of the logo already created. We can use curve tools in Maya to create the outline, but we can make it more efficient in vector creating programs like illustrator. So, in this article, we will create a Subway logo. For the outline, we will need a .eps (encapsulated postscript) file, which can be created in any vector-based application.
For our purpose to get started, we will use a .eps file from the following link: https://www.brandsoftheworld.com/…
How to Create a Logo in Maya?
The following steps help us to create a logo in Maya software in a step by step manner:
Getting Started
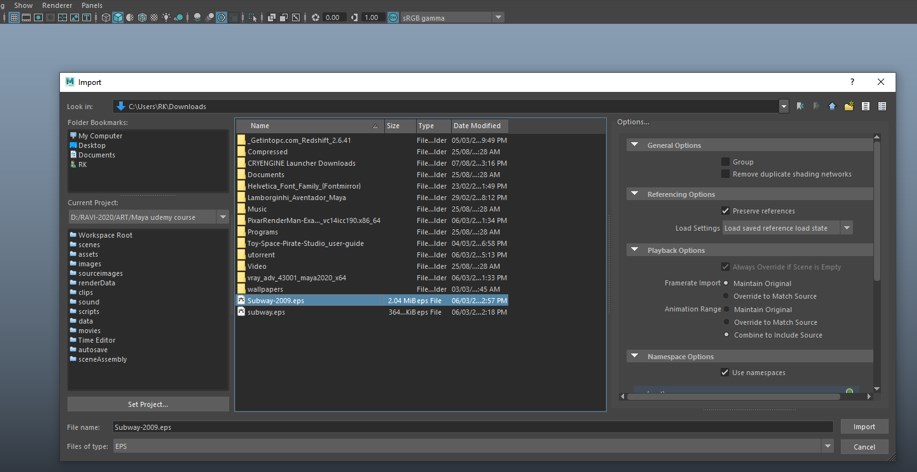
Step 1: After downloading the file from the link, the first step is to import the file. Go to File and Import.
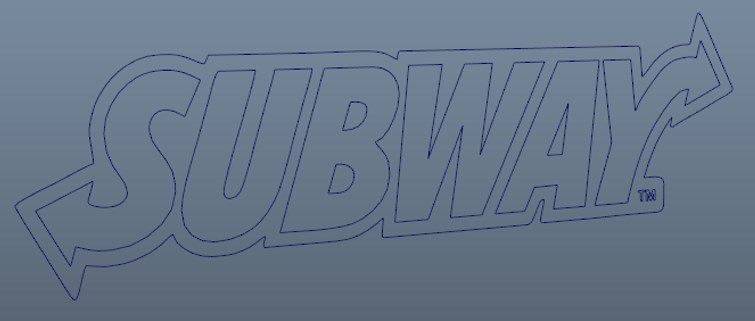
Step 2: Then select the downloaded .eps file and click import (If you do not find your file, then select eps in the files of type dropdown).
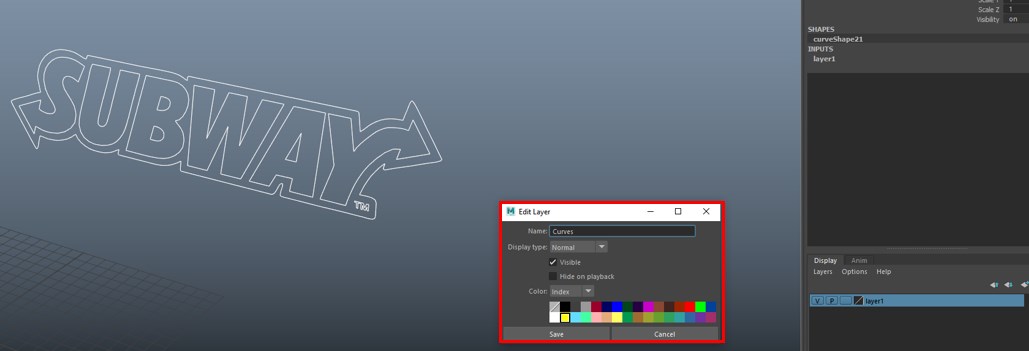
Step 3: A transform1 will be imported along with the curves. You can see it in Windows and outliner. Then we will create a new layer by selecting all and call it curves.
Modeling
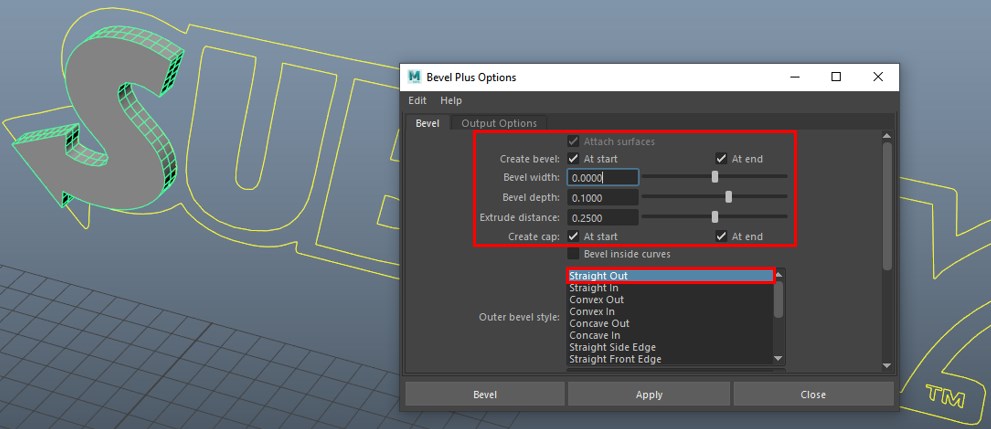
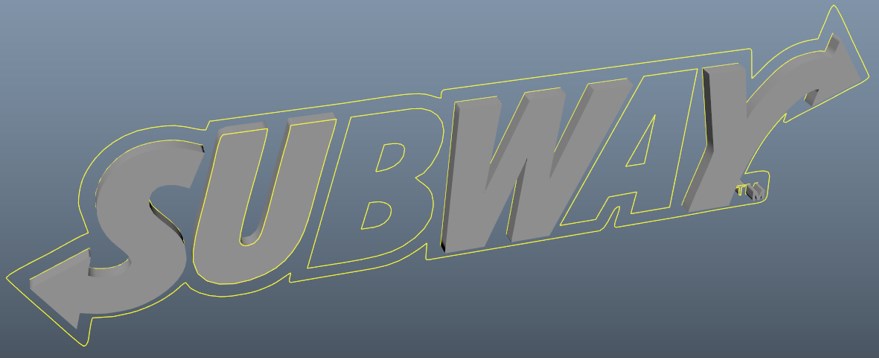
Step 4: Then, we will create a bevel plus by selecting Surface, then Bevel Plus and set bevel width to 0 in the options.
Step 5: We will repeat the same procedure for the letter U, W, and Y. You can follow the same procedure above for those letters, or if you want a shortcut hit hotkey “G” this will repeat the previous command with the selected options.
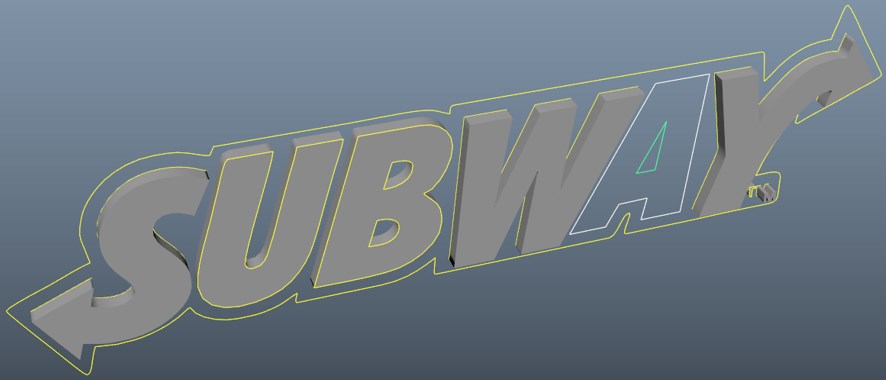
Step 6: For letters B and A, we have to select the inner curves before using bevel plus, as shown below.
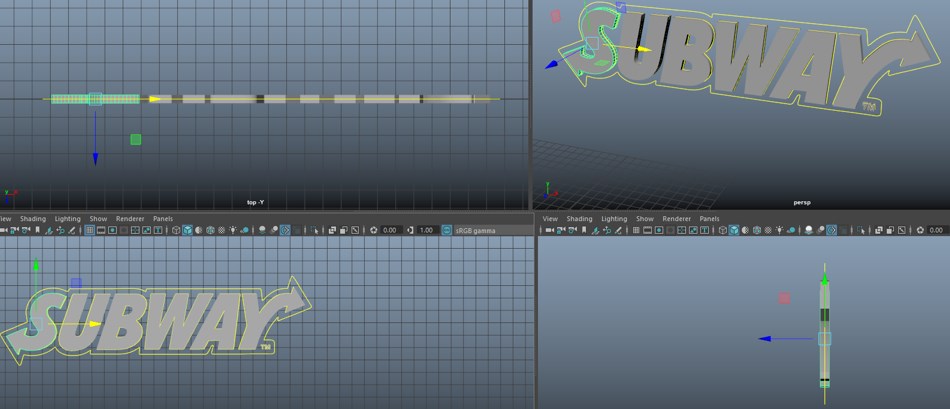
Step 7: Now go to the top view and align all the letters and curves to the grid as shown. You can eyeball it or press hotkey “X” to align the pivot the axis precisely. Also, look at the front view if they are aligned with the curves.
Step 8: Now, select the curve which surrounds the text and create a bevel plus.
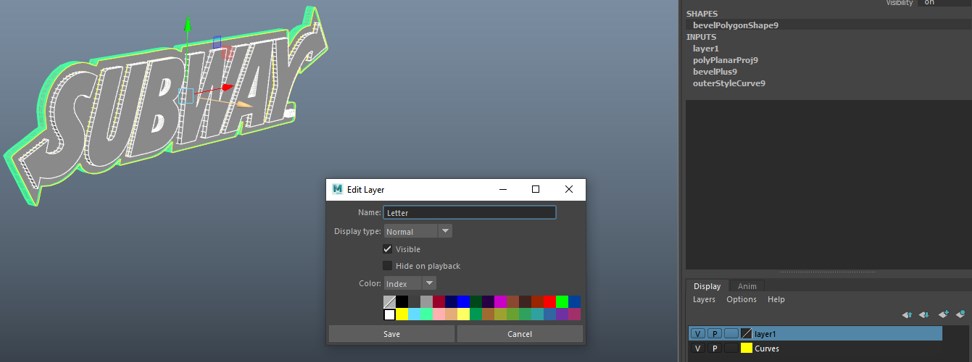
Step 9: Now select all the letters except curves and create a new layer named Letter so we can hide the curves and apply textures and materials to the letter layer.
Material and Textures
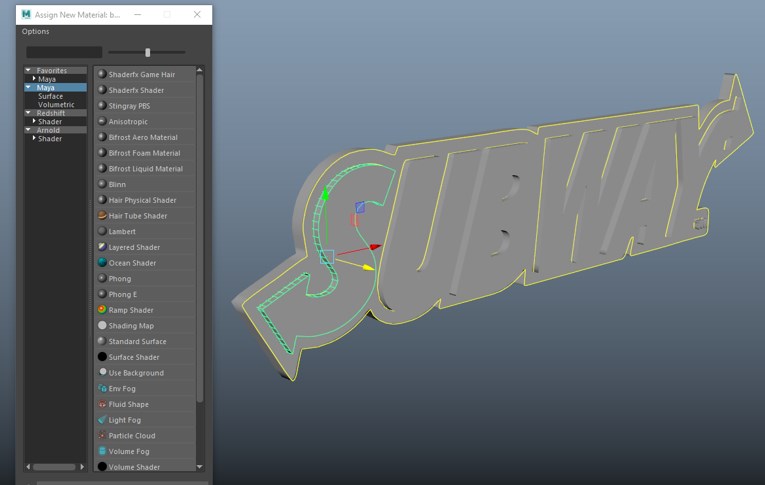
Step 10: Now, we will assign a lambert material to letter s and name it white. As we will assign white to sub, yellow to way and green to background.
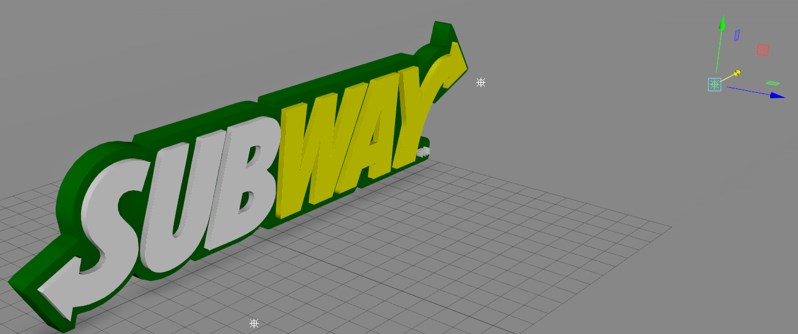
Step 11: After assigning all the materials, we will get the following output.
Step 12: At this point, we will hide the curves as we will not need them anymore by clicking the V, which will toggle the curves.
Step 13: Now, we have created all the basic shapes and materials. We will now create a background plane on which this logo will rest and create appropriate lighting for the rendering.
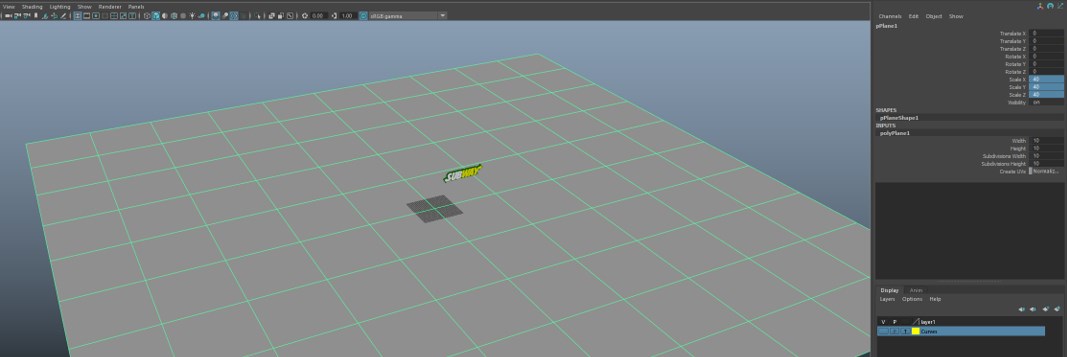
Step 14: Go to the poly modeling shelf and select the plane tool.
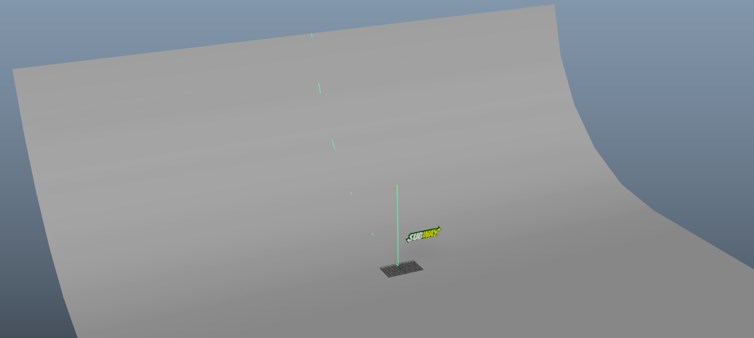
Step 15: Now we have to tweak its input, so go to channel box / Layer editor, and in the inputs, select polyPlane1. Here set the width and height to 10 and the subdivisions to 10. Also, set the scale in x, y, z direction to 40.
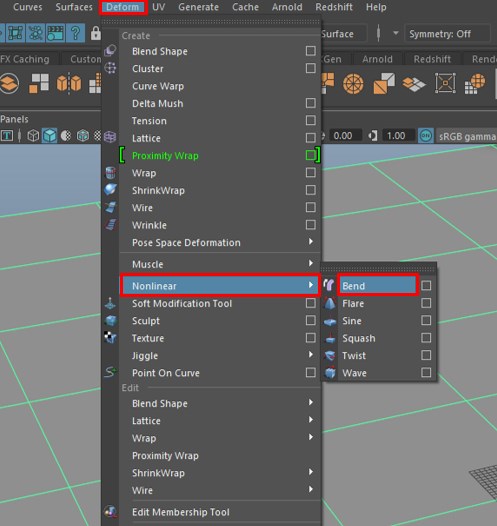
Step 16: Now, we will deform the plane by adding a nonlinear bend deform by going in the deform menu. If you cannot see the deformer handle, make sure that the viewport Show > Deformer is on.
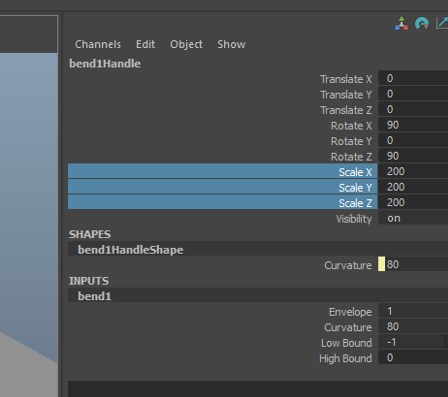
Step 17: After adding the deformed, set the following properties. Mainly the rotation and curvature are set to get the desired effect.
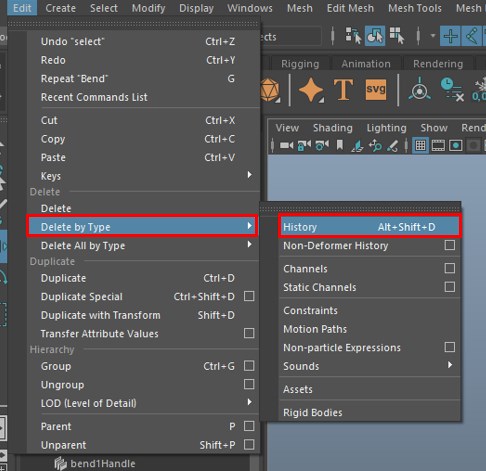
Step 18: Then delete the history of the plane so we can adjust its transform; alternatively, we can also press Alt + Shift + D after finalizing to remove the history.
Step 19: After creating the plane, put it on a separate layer and call it as “Background”, and make it as a reference, so we do not accidentally select it and also assign a darker lambert material.
Lighting and Rendering
Step 20: Since we have completed the design, materials and texturing now, before rendering, we have to add some lights to our scene. To Illuminate our logo, we will use 3-point lights and then render using Arnold renderer in Maya.
Create then Light and Point Light.
Step 21: As shown, we have selected point light for which color and intensity can be set.
- While rendering, we will use light from all three sources but depending on the angle of render; we will set the shadow. Since we are using 3-point light at a time, we will enable shadow from only one light source. To disable shadows, go to the Arnold section in the pointLightShape tab and disable Cast Shadows and Cast Volumetric Shadows.
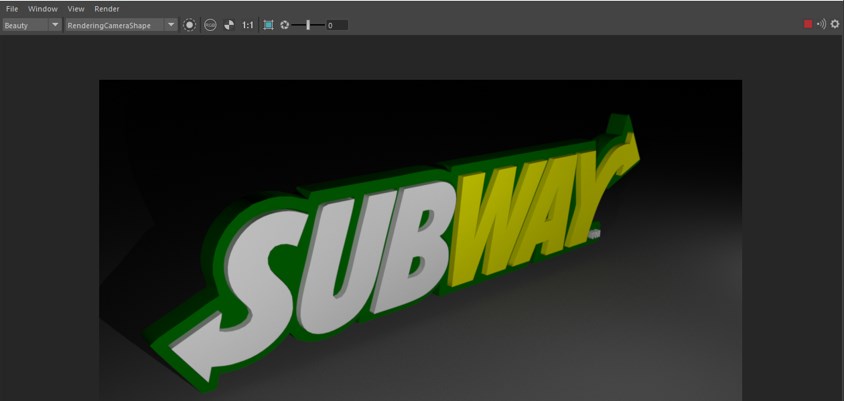
Step 22: Now our light is set up, so we can now do rendering with Arnold renderer.
- If you cannot see the Arnold menu, then you can enable it from Windows and Settings/Preferences then Plugin Manager. Enable mtoa.mll and select autoload if you want to load it at the startup of Maya.
Now let’s look at some of the settings which are specific to Arnold Renderer.
- Sampling: Higher the value of sampling, the lower is the noise in the images. But increasing sampling also increase render time as you gain more quality.
- Ray Depth: It specifies the ray recursion and its properties like diffuse, specular, transmission, volume and transparency depth. Higher value increase renders time.
- GPU Settings: You can select render device, whether it is GPU or CPU. Though GPU rendering is faster than CPU rendering in CPU, you have more fine-tuning options.
The above-given options are few options to get started in rendering; refer to Click Here for more information.
Step 23: For rendering, we will create a new camera, so if we make any changes in our perspective view, then rendering will not be affected.
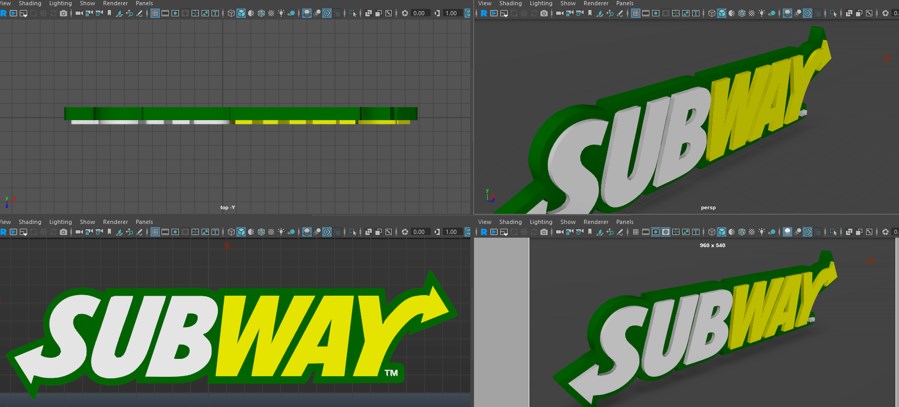
Step 24: In the bottom-right view, we selected our RenderingCamera and enabled the resolution gate, which shows our render resolution and the bounding limit.
Step 25: To render, select Arnold and Open Render View. In the dropdown, select the rendering camera instead of the perspective camera and keep the ratio 1:1
Recommended Articles
This is a guide to Logo in Maya. Here we discuss the Introduction and how to create a logo in Maya and rendering the logo with Arnold renderer. You can also go through our other related articles to learn more –
