
Introduction to lightroom watermark
Lightroom Watermark is a very good feature of this software, and we can understand it as apply text or graphics on our manipulated photos so that we can create copyright on our photos. Watermark can be your name, trademark, or logo, and in Lightroom, we can do this by just making some adjustments in some of the parameters. Not only text or logo, but we can also use images as watermark, and it may be in the file format of png or jpge. Here in this article, I am going to tell you how you can create, apply or add a watermark to your manipulated photos. So let us start our discussion in step by step manner.
Let us start with how we can create a watermark in Lightroom and what are the parameters through which we have to go for doing this.
Create Lightroom Watermark
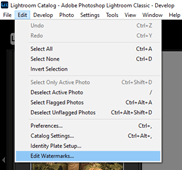
You can create a watermark of any text or graphics, and I will explain both ways here. For this purpose, first, go to the Edit menu. Here you will have the Edit Watermarks option. So click on it.
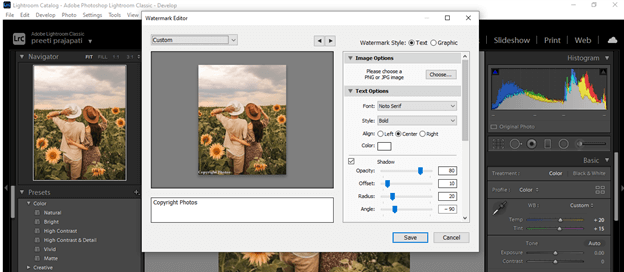
Once you click on it, you will have an Edit Watermark dialog box.
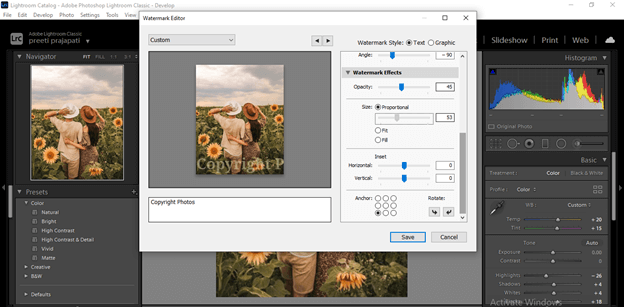
At the bottom left corner of this dialog box, you will have a text box. Here you can type a text which you want to use as watermark text. I will type here a text as ‘Copyright Photos’ just as an example. You can see this text is on this photo at the bottom left corner.
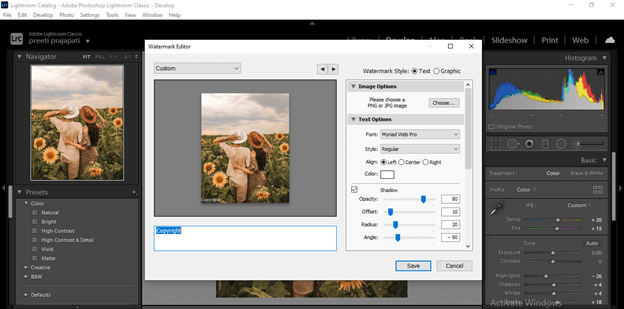
You can type text here only if you have Text radio button enabled in the Watermark Style option.
In the Text Options, you can choose the Font of the written text.

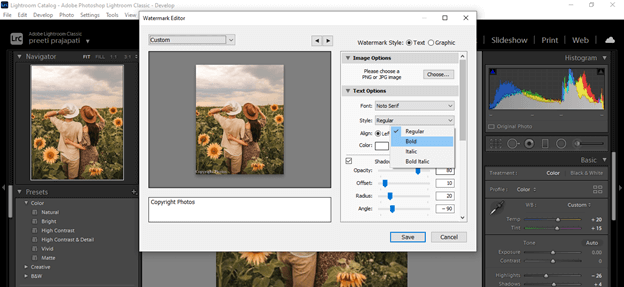
Can change Style of written text from Style option as per your choice.

Can align text into text frame box in which it is such as Left, right, or center of the text frame box if you want.
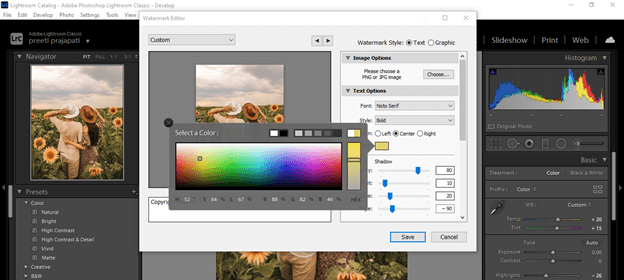
You can also change the color of text by choosing your desired color from the Color box of this dialog box.
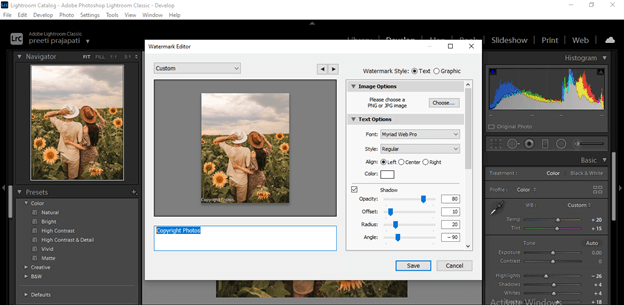
Let me increase the size of this watermark so that we can see shadows with it. You can adjust the opacity of shadow by changing its value on the slider of the Opacity option.
Distance of shadow can adjust from the text by making variations in Offset value. Same as these two parameters, you can play with other parameters of the Shadow option for having different variations with shadow.
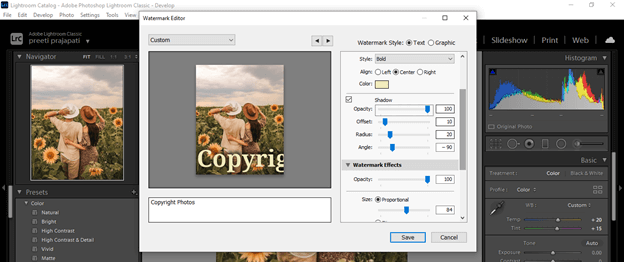
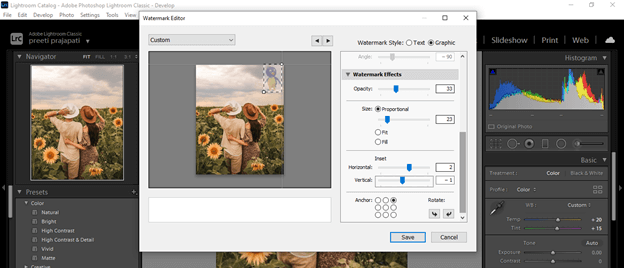
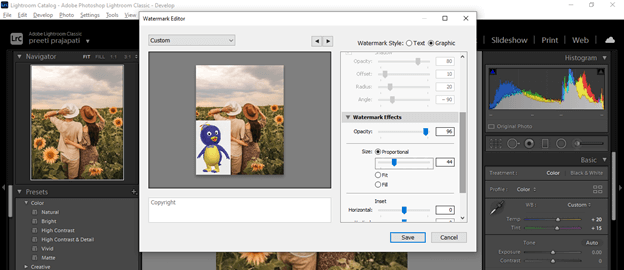
When you scroll down in this dialog box, you will have the Watermark Effects option, and here you can change the visibility or transparency of the watermark by changing the value of opacity on the opacity slider.
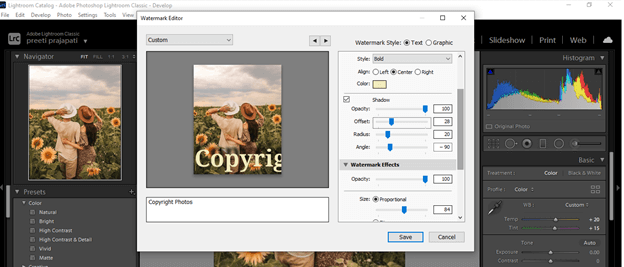
you can also change the size of the watermark such as if you have enable the Proportional option, it will change the size by maintaining the width and height of the watermark in the same proportion.

If you choose the Fit option, it will fit the water mark the entire photo size.
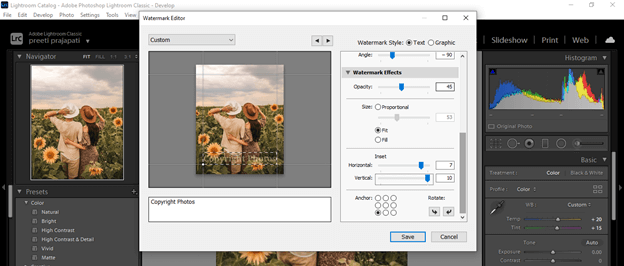
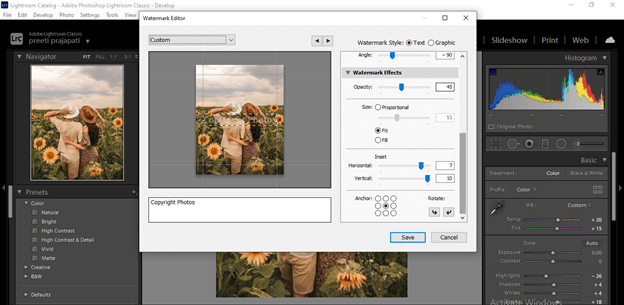
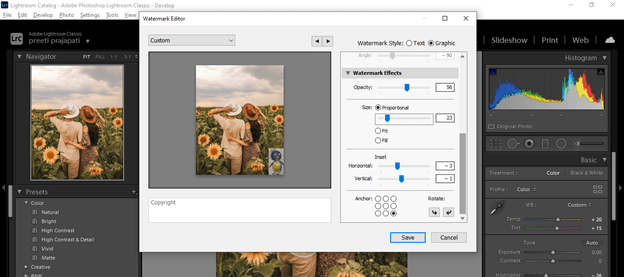
The next option is Insert, and here we have two sliders. One is Horizontal, which is for adjusting the position of the watermark on horizontal direction, and the second is Vertical which is for the vertical direction.

At the bottom of this dialog box, we have an Anchor option from which we can place a watermark at the center, corner, or side of the image. So, for example, if we enable the center radio button of the Anchor option, then it will place a watermark at the center of this image.
If you want, you can also rotate your watermark by clicking on rotate buttons of Rotate option.
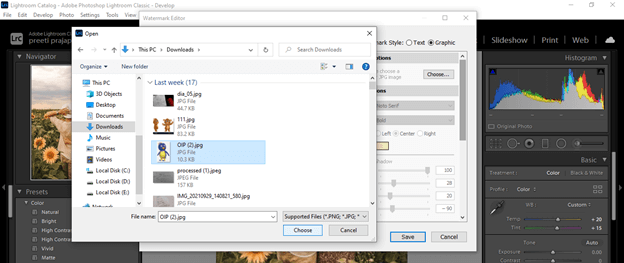
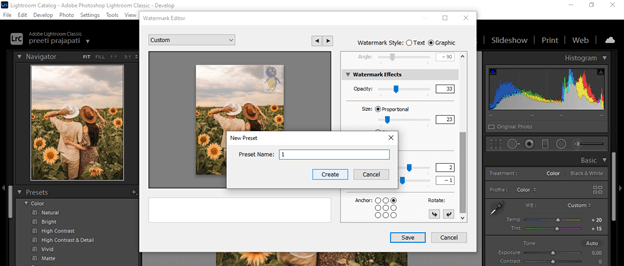
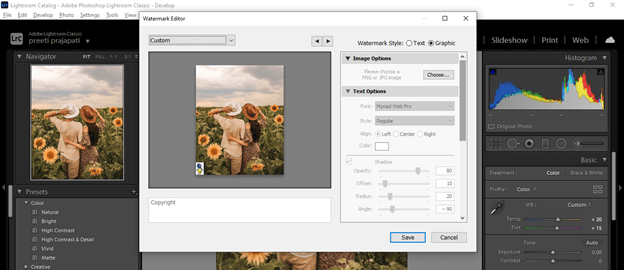
If you enable the radio button of Graphic in the Watermark style, then you can choose any graphics from your computer. For example, I will choose this cartoon graphics.

And same as text watermark, you can make a setting in it also.
Now I will click on the save button and save it as the name ‘1’.
How to add a Watermark in Lightroom?
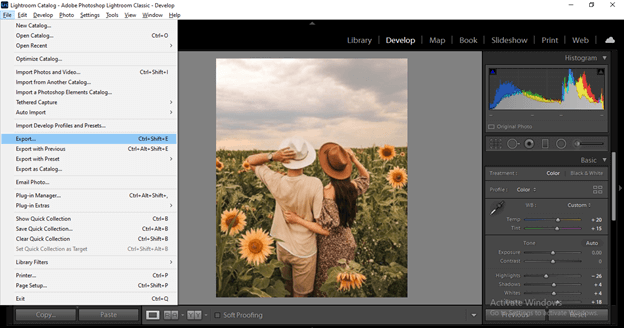
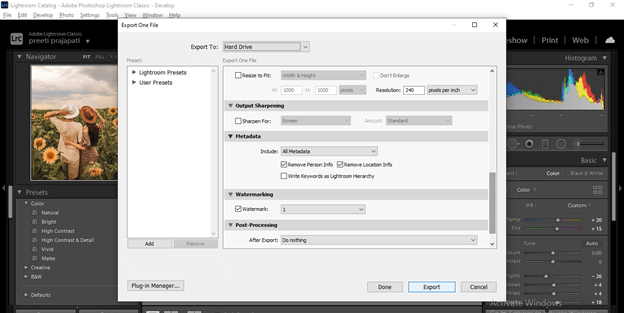
To add a watermark to your photos, go to the File menu and click on the Export option.
Once you click on the Export button, we will have this dialog box.
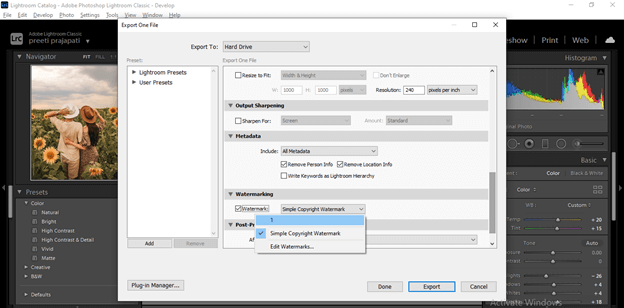
When you scroll down, you will have Watermarking.

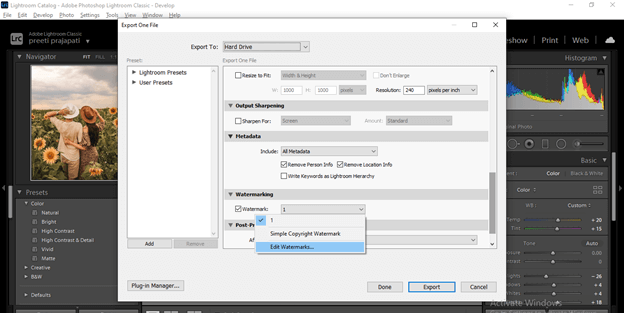
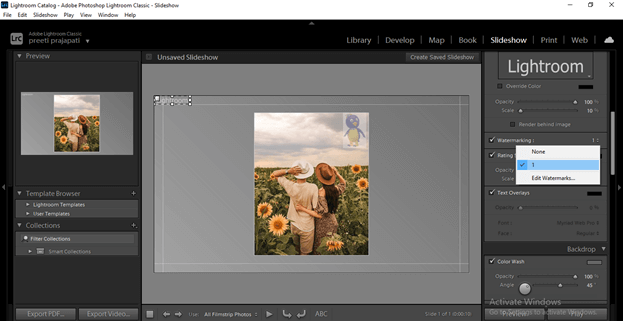
For choosing your desired watermark, first, enable the check box of the Watermark option, then click on the down arrow button to choose your desired one.
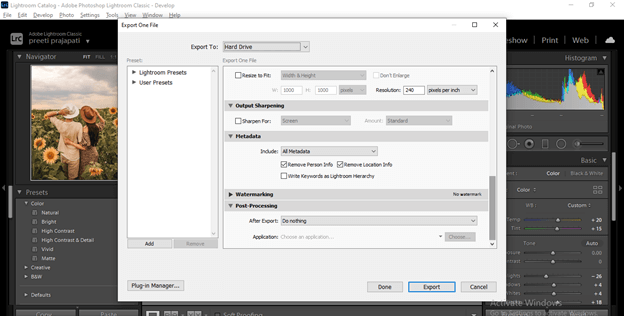
If you haven’t saved any watermark, then you can go for the Edit Watermark dialog box from here also.
And after this, you can click on the Export button, and your image will be saved with your chosen watermark.
Apply Watermark in Lightroom
After creating a watermark, we need to apply it on different platforms such as on the web, for print, or for a slideshow, and you can do it very easily.
For applying watermark in slide show of your photos, go to the Slideshow tab.
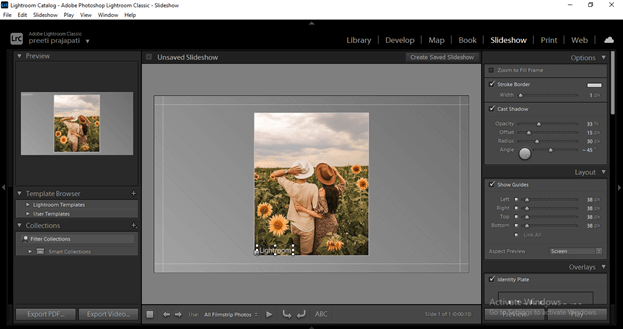
And when you scroll down its panel, you will have Watermarking option here.
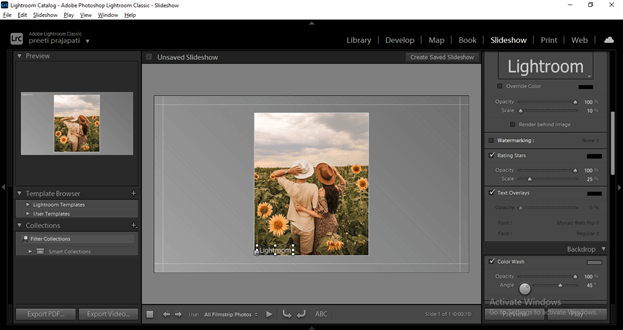
Please enable it, then choose your desired saved watermark, or you can create a new one.
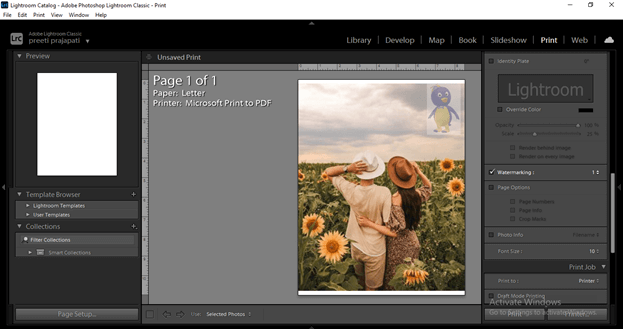
Same as Slideshow, you can apply watermark during the printing process by enabling watermarking option here also.
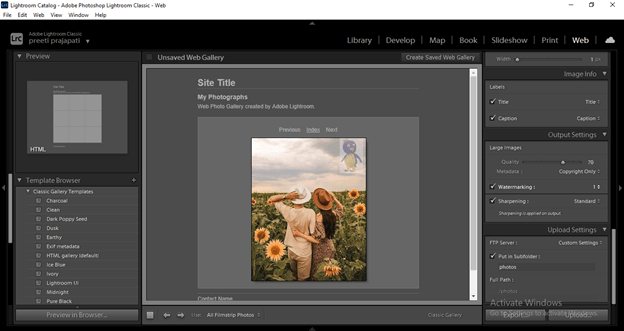
The same watermarking option is also available in the Web tab for applying watermark during using your photos on the web platform.
How to apply images Watermark Lightroom?
Same as text and graphic watermark, we can apply images to our photos as watermarks. Just click on Choose button of Image Options, and you will have a dialog box for choosing your desired image. Image can be Png or Jpg. I will choose this image again.
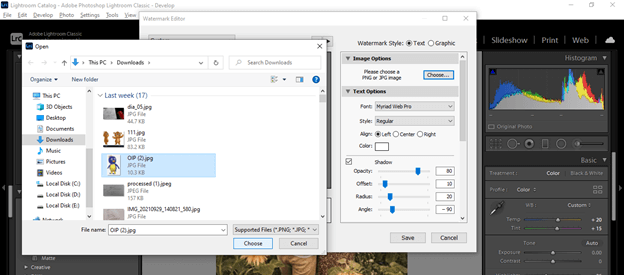
Once you choose an image, all the text parameters will become disable.
But you will have graphics parameters which you can set for having your desired watermark effect with the chosen image.
You can make any settings as per your choice like I have done here and just save it for using it as a watermark.
Conclusion
Now I am sure you have a good understanding of all important aspects of the watermark in Lightroom. You can easily handle parameters for creating and applying a watermark to your photos. You can go with any type of watermark, whether it is text or graphic, and place it anywhere on your photos.
Recommended Articles
This is a guide to lightroom watermark. Here we discuss the all-important aspects of the watermark in Lightroom, and you can easily handle parameters. You may also have a look at the following articles to learn more –
