
Introduction to Lightroom CC
Lightroom CC is a creative image organizer as well as manipulation software that is part of the Adobe family and developed by Adobe Inc. You can find it in the Creative Cloud desktop app subscription of adobe. It has its compatibility with Microsoft Windows, Mac OS, iOS, Android, and tvOS, which makes it easy to use software and more handy. It has many good features such as saving, importing, viewing, tagging, editing, organizing, and many other features that work to enhance digital image properties. In addition, there are many functions that are used for performing a number of tasks, such as white balance, tone curve, HSL, Presence, color grading, and so on.
So let us go through the very interesting analysis of this software for understanding more things about it. Here I will tell you something about presets, which is an important part of their work.
How to add presets to Lightroom CC?
Many times, we find a number of presets work effectively to enhance digital image quality and appearance, and for that, we want to use external presets with our edited image. So for that, we need to add preset to Lightroom, and I am going to tell you how you can do it in step by step manner.
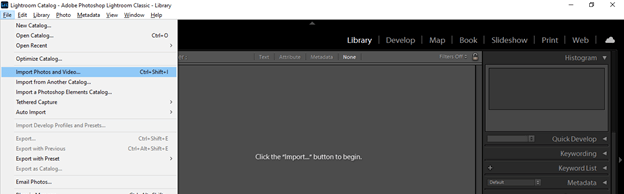
I will first import an image here for which we are going to add preset here. So go to the Import Photos and Video option of a scroll-down list of File menu.
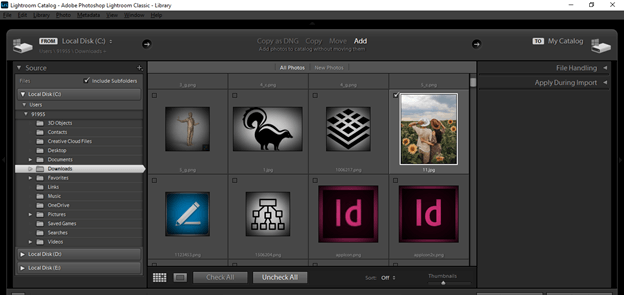
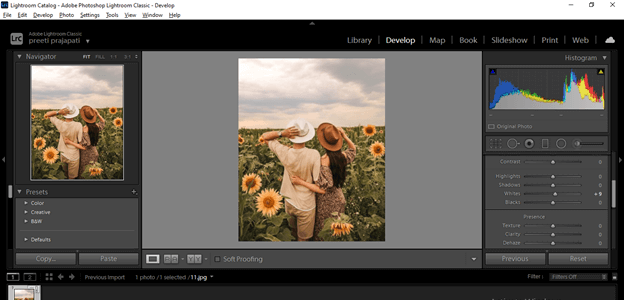
I will navigate the location where I have saved my photo. Uncheck all other photos that you don’t want to import. I will select this 11.jpg image only.
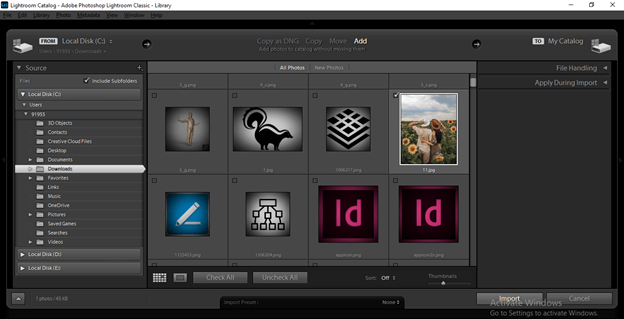
Now click on the Import button to import this photo.
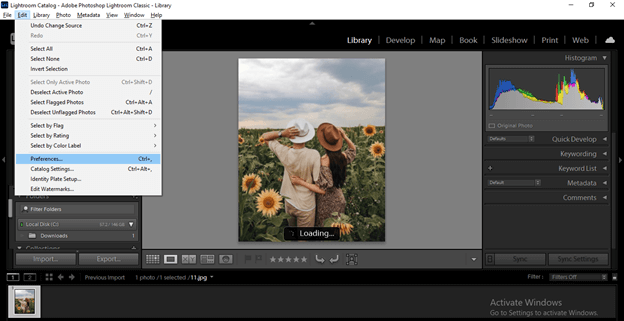
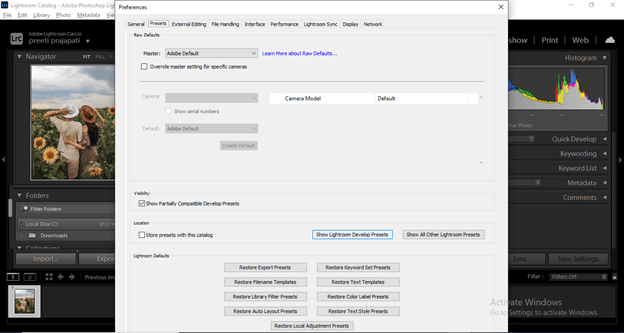
Now for installing preset into this software, go to the Edit menu of the menu bar and click on it. From its scroll-down list, choose Preferences option, or you can press the Ctrl + button of the keyboard as its shortcut key.
Once you click on it, a dialog will be open. Go to Presets tab of this dialog box.

Now there are two options for installing preset into this software. One is ‘Lightroom Develop Presets .’ The next one is ‘Other Lightroom Presets.’ Develop Presets is for the LRTemplates file and Other Presets are for the XML file format. So, according to your preset installation file, you can go with anyone.
If we go with Develop presets, then we have to click on the ‘Show Lightroom Develop Presets’ button of this dialog box.
And it will take us to the Settings folder of Lightroom.
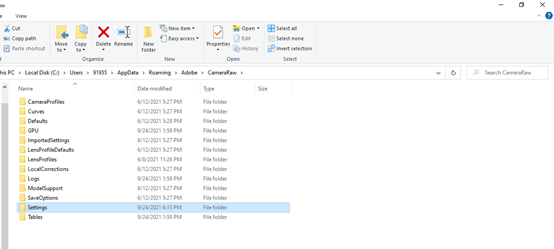
Open this folder, and you can paste your LRTemplate file here.

Or if you go with the ‘Show Other Lightroom Presets’ button and so click on it.

And it will take us to the Lightroom folder.
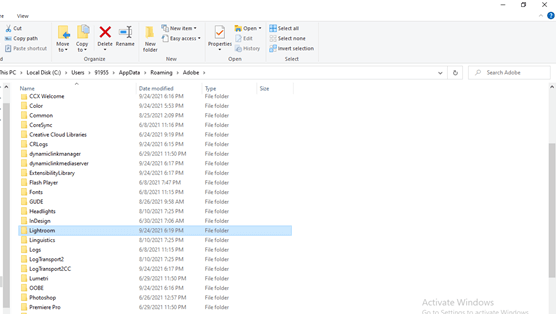
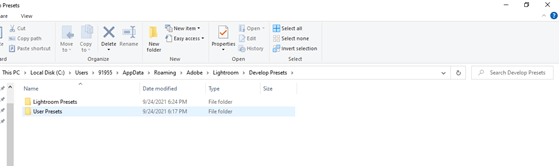
Open it, then go to Develop Preset folder.

And then, open the User presets folder, and in this folder, you can paste your XML file.
And after installing the preset by any of the two methods, you have to restart Lightroom to use installed presets.
Advantages of Lightroom CC
After having a good discussion about how you can add preset to Lightroom, I must say you have some idea about why it is so helpful to raster images editors, but I will tell you some of the advantages of it too, which are as follows:
- The very first thing is you can have it on your mobile for doing a great job in photo editing with lots of effective presets, and the best thing is that the mobile version of Lightroom is for free to use.
- If you go with the desktop version of it, you will benefit from online storage of your work, which is 1TB. In addition, you can have it in Cloud storage form.
- Once you sync your photos with the cloud server, it allows you to edit them on your mobile devices, which is quite a good feature.
- You can edit raw files with a smooth workflow environment that means you can directly import your raw photos from the camera and start editing them on your tablet or mobile devices.
There are many more advantages of this software, but I told you just a few of them give you an overview of how it helps you.
Now let me tell you how you can create your own presets with our desired parametrical settings.
Create your own presets in Lightroom CC
Same as we use presets of external sources for getting our desired manipulation for our image, we can create our own preset that we can use with our other images. So let me tell you about how you can do this.
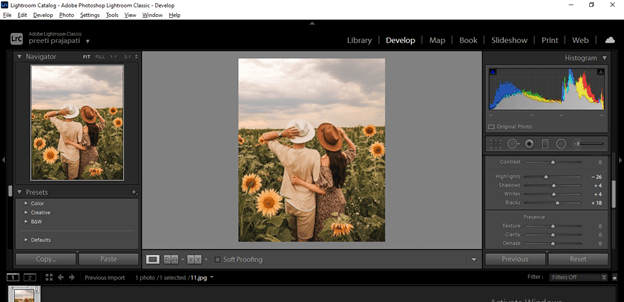
I will make some changes to this image, and for that, I will click on Develop button, which is at the top of the user interface of this software.
And make changes in the values of White Balance, Shadow, and Highlights, and so on.
Once you are satisfied with your adjustments, go to the Presets tab, which is on the left side of the user screen of this software, and click on its plus button.
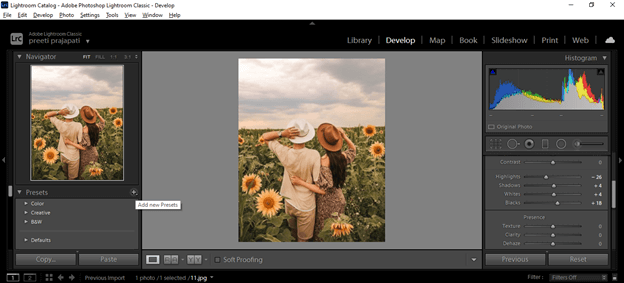
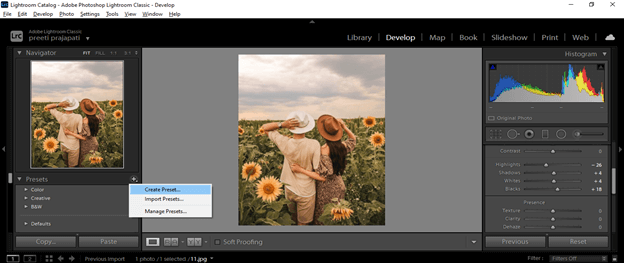
Some options will pop up once you click on it, so click on the Create Presets option.
And name it as per your choice. I will name it as White Balance.
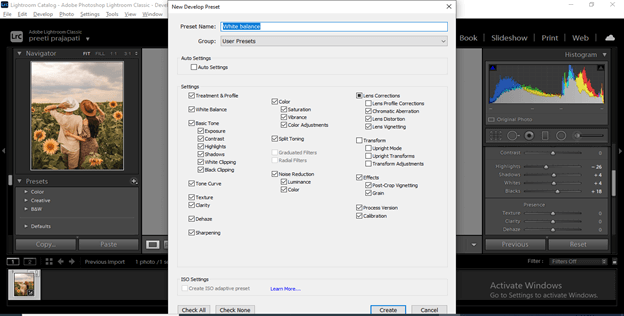
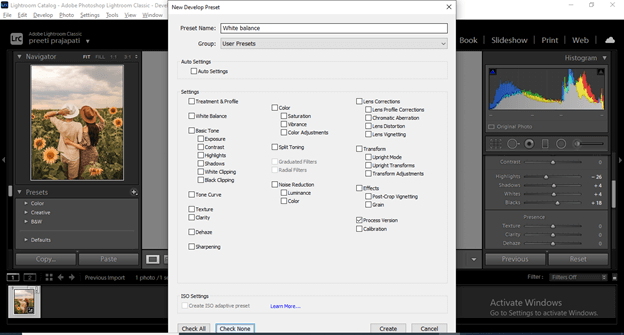
Uncheck all the settings by clicking on the Check None button of this dialog box.
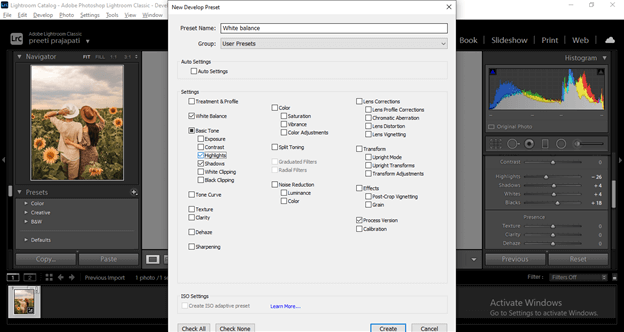
And check those settings you have made. For example, I will check highlights, shadows, and white balance and then click on Create button.
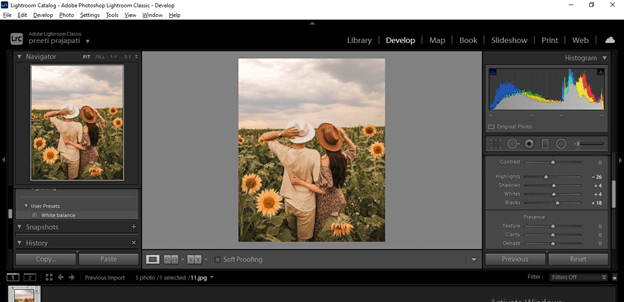
And you can check it will save in the tab of User Presets. So now you can use it with other photos in just one click.
So you can go with presets to try something new.
Conclusion
I am sure it was good for you to go through this article to understand what Lightroom CC is and how it uses presets to add more details to our photos. Now you also know that Lightroom CC is compatible with mobile devices, and you can sync your photos for editing them on both mobile and desktop.
Recommended Articles
This is a guide to Lightroom CC. Here we discuss Lightroom CC and how it uses presets to add more details to our photos. You may also have a look at the following articles to learn more –
