Updated March 17, 2023

How to Install Oracle?
The following article provides an outline for How to Install Oracle. An Oracle database is a collection of data that is treated as a unit. It was created by Oracle Corporation. It was the first database that was designed for enterprise grid computing. It acts to be flexible and effective in terms of cost and performance. It also manages all information and applications together. This entire system is built around a relational database framework. The data stored here can be assessed by different users through Structured Query Language (SQL). It is completely scalable and is used by many global enterprises that manage and process the data.
Steps to Install Oracle
Let us see the steps required to install Oracle as follows:
Installation on Linux:
Step 1: Create a dba group and operating system groups and users.
# groupadd –g 700 dba
Step 2: Copy the Oracle 11g software in the stage area and change its ownership.
Step 3: Perform the pre-installation tasks and check for the size available on the RAM.
Step 4: Check the compatibility with Linux and other software requirements.
Step 5: Once this is done, configure the kernel parameters and add the below parameters to /etc/sysctl.conf.
Fs.file-max = 76800

Kernel.shmall = 2097152

Kernel.shmmax  = 2147483648(half of the ram size)

Kernel.shmmni  =  4096

Kernel.sem = 250  32000  100 128

Net.ipv4.ip_local_port_range  =  1024     65000

Net.core.rmem_default = 4194304

Net.core.rmem_max = 4194304

Net.core.wmem_default = 262144

Net.core.wmem_max  =  262144
Step 6: Now change the current values of kernel parameters as # /sbin/sysctl –p.
Step 7: After all these tasks, restart the server and reboot and then re-login as a root user and run this command to enable the graphical mode: xhost +.
Step 8: Once this is done, login as an oracle user and add the following environment variables in a .bash_profile file.
$vi .bash_profile

Export  oracle_base=/opt /oracle

Export oracle_home=/opt/oracle/product/11.1.0

Export oracle_sid=orcl

Export path=$oracle_home/bin:$path:.

:wq (save & quit)
Step 9: Run the .bash_profile by using: .bash_profile and then extract the oracle11g zip file.
$ cd /opt

$ ls –lrt

$ unzip oracle11g.zip

$ ls –lrt
Step 10: Now run the installer after moving the directory and execute.
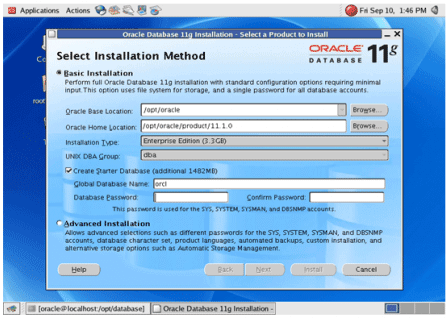
Step 11: Set the path where you want to install Oracle.
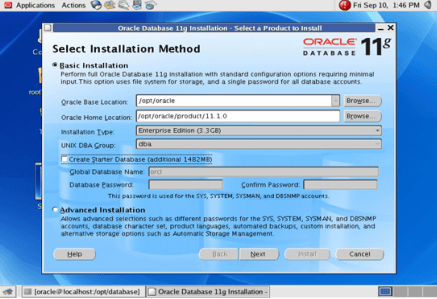
Step 12: Disable the Create Starter Database.
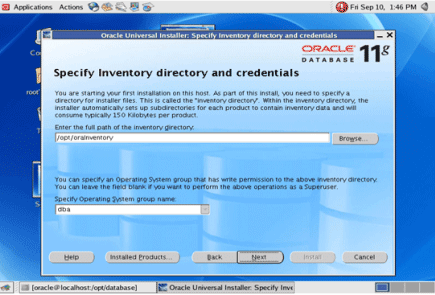
Step 13: Now specify the inventory directory and credentials.
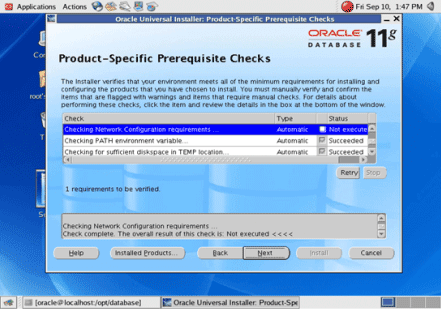
Step 14: Specify the needed prerequisite checks and specifications that you want.
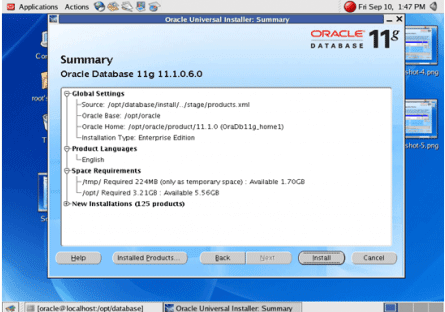
Step 15: Once this is done, you will get the Install option.
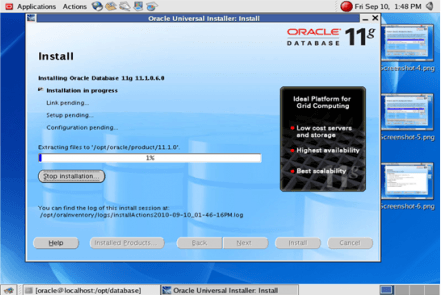
Installation starts once you click on Install. Once this is done, open a new terminal.
Step 16: Login as a root user and execute the below two scripts.
#/opt/orainventory/orainstroot.sh (press enter)

#/opt/oracle/product/11.1.0/root.sh (press enter)
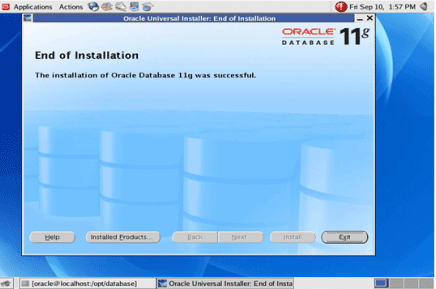
Installation is now complete.
Install Oracle on Windows
Step 1: To install Oracle on your Windows first, download the software from the Oracle website as per your system requirements.
Step 2: Once the download is complete, unzip the downloaded file and run the setup.exe file. Right-click on this file and ‘Run as Administrator’.
An installer pop up window will appear as below.
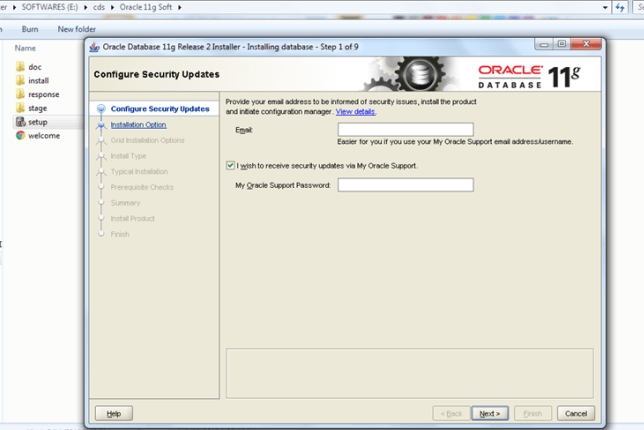
Step 3: Skip the ‘Configure Security Updates’ option and click on ‘Next.
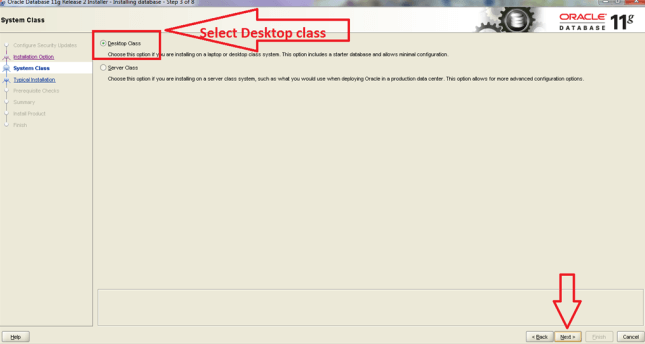
Step 4: Once this is done, choose the System class of your choice. Preferably choose a desktop class for beginners and then click on Next.
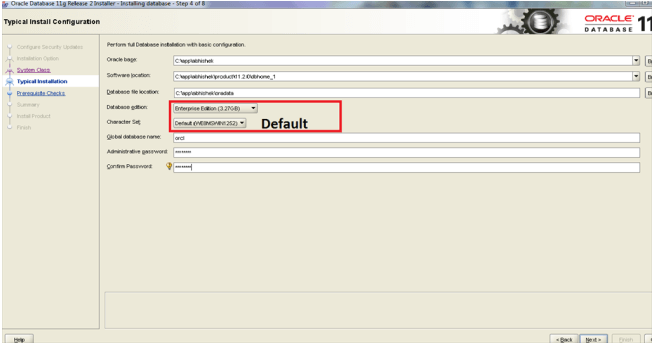
Step 5: Choose the path wherever you want to install Oracle on your system. If you wish to change the drive from C:\ to D:\, you can choose it, and all options should be left the same as usual. Choose a standard password and name the global database as ‘orcl’.
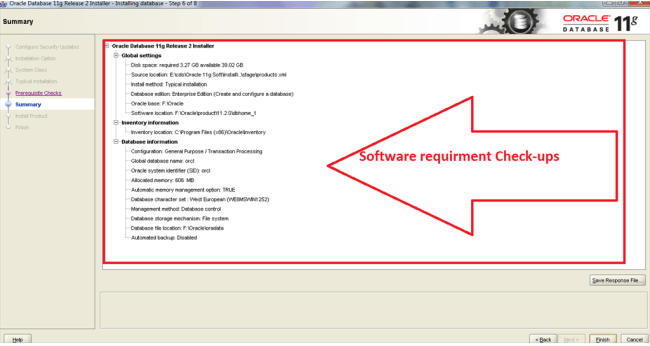
Step 6: Once this is done, Oracle will check for the software requirements and will provide you with an installation summary. If the summary is good, then the installation proceeds further.
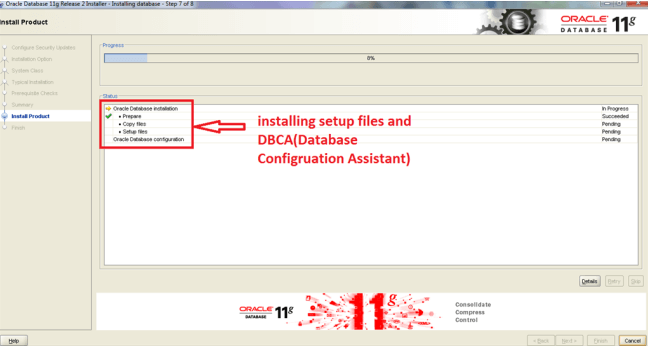
Step 7: Now, Oracle will start installing the following products in your system. These will include setup files and Database Configuration, assistant.
Step 8: Allow the firewalls when it pops up in your system.
Step 9: Once this is done, you can see DBCA that is Database Configuration is Installing.
DBCA is a tool that helps to create and manage Oracle databases with the help of the Graphical User Interface.
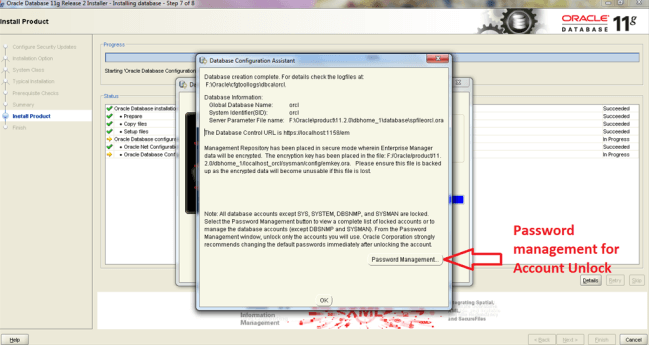
Step 10: When this DBCA installation completes, then a pop-up window will open. Set the password for the particular database accounts by taking the help of the Password management tool.
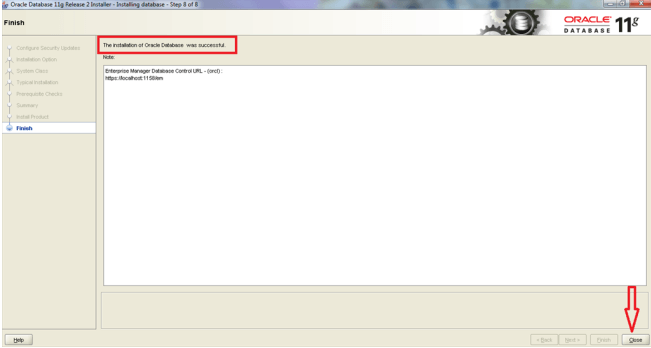
Step 11: After this, you should be able to see the installation successful message window. You can close this window.
Step 12: After complete installation, you can now go ahead and test the installation was proper or not; in order to do this, open the cmd prompt as administrator.
You can run the below commands
set oracle_sid=orcl

Sqlplus / as sysdba
After running these commands, you will observe that Oracle Database 11g Enterprise is now connected. You can now start working and using Oracle Database 11g Enterprise.
Install Oracle on MAC
In order to install Oracle on MAC, you need to find a consistent resources online. You may even have the hands-on binaries compilation and package transfers.
Follow the below steps to install Oracle on MAC:
Step 1: Setup VirtualBox.
This is one of the simplest ways of getting Oracle installed on MAC. You can download the x86 version.
Step 2: Getting the VM file.
The ova VM file is large and better to start with. You can download it on a browser and then integrate it with Firefox. This VM was initially created for developers, and it gets frequent updates with the latest Oracle Clients and other tools.
Step 3: Starting the VM.
Start the VM and insert oracle/oracle when the user is prompted for username/password once the VM boots are ready to go.
Step 4: Making Oracle DB visible – Internet Connectivity and Firewall.
On the top right-hand side of VM, you should see an icon about Internet Connectivity. The default for this is disabled, and you can connect with it as long as your Host OS has internet connectivity. By default, the firewall is already activated in VM.
Step 5: You can start using IntelliJ, and it successfully connects to Oracle.
Conclusion
Hence Oracle can be installed on all major operating systems. It provides database management capabilities that help in managing data well. Using Oracle managing, altering, and creating data is very easy. It is hence used prominently by all organizations. It is completely scalable and is used by many global enterprises which manage and process the data. As it is scalable with all operating systems, it is famous among its consumers.
Recommended Articles
This has been a guide to how to install Oracle. Here we have discussed the meaning and different steps to install Oracle on operating systems like Linux, Windows, MAC. You may also look at the following articles to learn more –
