
Overview of How to Install Kubernetes Dashboard
The following article provides an outline for installing Kubernetes Dashboard. Kubernetes is a container management tool. The main goal of this tool is deploying containers, scaling and descaling containers, and balancing container load. It is not based on the containerization platform; it provides solutions for managing multiple containers. Various cloud and bare-metal environments are supported by it. It is 100% Open source, written in Gonne. Google pushed Kubernetes to open source two years ago. One of its key selling points is that it has been used to run Google’s massive systems for so long. Kubernetes Dashboard is a Web-Based User Interface for Kubernetes Clusters.
Kubernetes provides a dashboard for users to interact with Kubernetes and perform some tasks. The Kubernetes dashboard allows users to troubleshoot their applications, add the containerized application to the Kubernetes cluster, and manage them efficiently. It also gives an overview of all the applications running on the Kubernetes. Kubernetes dashboard shows the state of all the resources running on the cluster, and if some error occurs, it shows that information. In this article, we will see the Kubernetes dashboard’s installation process.
Steps to Install Kubernetes Dashboard
To install the Kubernetes dashboard, follow the below steps carefully:
Run the following command if you have a $HOME/.kube/config file not listed in the Kube Config environment variable.
Code:
export KUBECONFIG=/etc/kubernetes/admin.confStep 1: How to Deploy the Kubernetes Dashboard?
To deploy the Kubernetes Dashboard, run the following command:
Code:
kubectl create -f https://raw.githubusercontent.com/kubernetes/dashboard/master/src/deploy/recommended/kubernetes-dashboard.yamlThen the output will be as follows:
secret/kubernetes-dashboard-certs created
serviceaccount/kubernetes-dashboard created
role.rbac.authorization.k8s.io/kubernetes-dashboard-minimal created
rolebinding.rbac.authorization.k8s.io/kubernetes-dashboard-minimal created
deployment.apps/kubernetes-dashboard created
service/kubernetes-dashboard created
Step 2: How to verify Dashboard Service is Running?
After creating the Dashboard, verify the svc/deployments are up and running.


Step 3: How to describe the Install Kubernetes Dashboard?
To view the svc info, Run the following command.
Code:
kubectl describe svc/kubernetes-dashboard -n Kube-systemAfter that, to verify the Kubernetes dashboard pods are up and running, the run command is given below:
Code:
kubectl get pods --all-namespaces
You can permit full admin privileges to Dashboard’s Service Account. To do this, you have to create the below ClusterRoleBinding.
Code:
cat dashboard-admin.yaml
apiVersion: rbac.authorization.k8s.io/v1beta1
kind: ClusterRoleBinding
metadata:
name: kubernetes-dashboard
labels: k8s-app: kubernetes-dashboard
roleRef: API groups: rbac.authorization.k8s.io
kind: ClusterRole
name: cluster-admin
subjects: - kind: ServiceAccount
name: kubernetes-dashboard
namespace: Kube-system
Copy the YAML file based on the installation method and save that file as the given name: a dashboard-admin.yaml
Use the command which is given below to deploy it.
Code:
kubectl create -f dashboard-admin.yamlThe output will be as follows:
clusterrolebinding.rbac.authorization.k8s.io/kubernetes-dashboard created

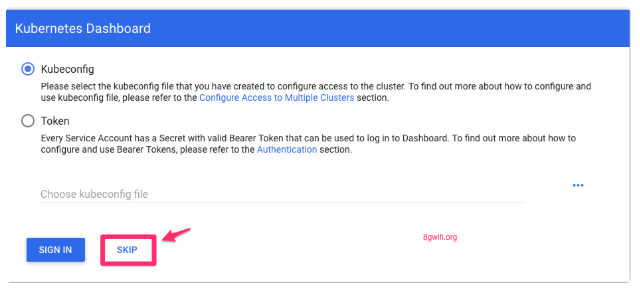
After that, you can access Dashboard via the Skip option on the login page.
Step 4: How to access the Installed Kubernetes Dashboard?
To set the proxy, run the following command:
Code:
kubectl proxy --address 0.0.0.0 --accept-hosts '.*'
Starting to serve on [::]:8001
To get access to the installed Kubernetes Dashboard, run the following command:
Code:
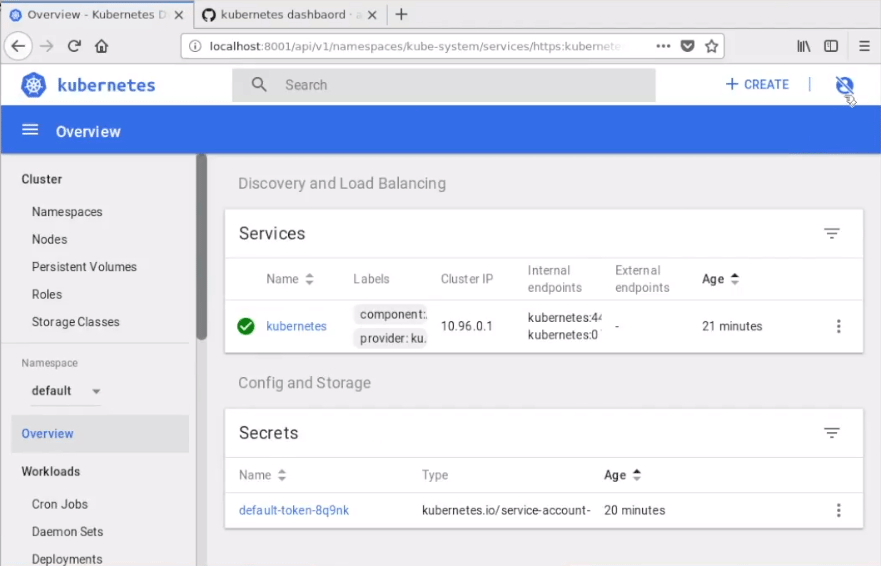
HTTP://<IP>:<PORT>/api/v1/namespaces/Kube-system/services/https:kubernetes-dashboard:/proxy/#!/loginAfter that, you can see the dashboard page.
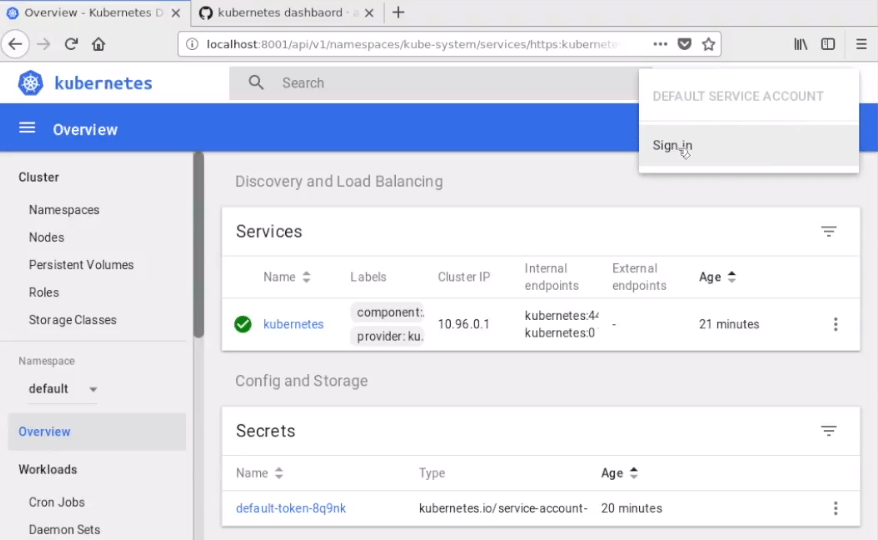
Afterward, go to the Control Panel on the dashboard page, and click sign in, as shown below.
Step 5: How do you Install Kubernetes Dashboard Authentication using a token?
i. Create a new ServiceAccount
For that, run the following command:
Code:
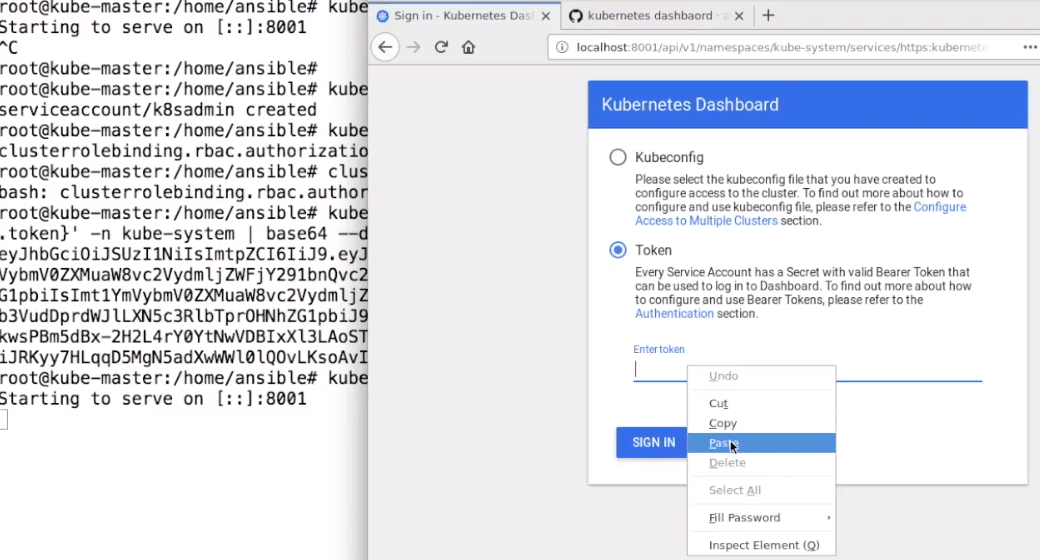
kubectl create serviceaccount k8sadmin -n Kube-systemThe output will be as follows
serviceaccount/k8sadmin created
ii. After that, Create a ClusterRoleBinding with Cluster Admin Privileges by Using the Following Command
Code:
kubectl create cluster role binding k8sadmin --clusterrole=cluster-admin --serviceaccount=kube-system:k8sadminthen the output will be as follows clusterrolebinding.rbac.authorization.k8s.io/k8sadmin created

![]()
To get the token, run the following command:
Code:
kubectl get secret -n Kube-system | grep k8sadmin | cut -d " " -f1 | xargs -n 1 | xargs kubectl get secret -o 'jsonpath={.data.token}' -n Kube-system | base64 --decodeThen we will get the base64 decoded token as output which is as follows:
Code:
eyJhbGciOiJSUzI1NiIsImtpZCI6IiJ9.eyJpc3MiOiJrdWJlcm5ldGVzL3NlcnZpY2VhY2NvdW50Iiwia3ViZXJuZXRlcy5pby9zZXJ2aWNlYWNjb3VudC9
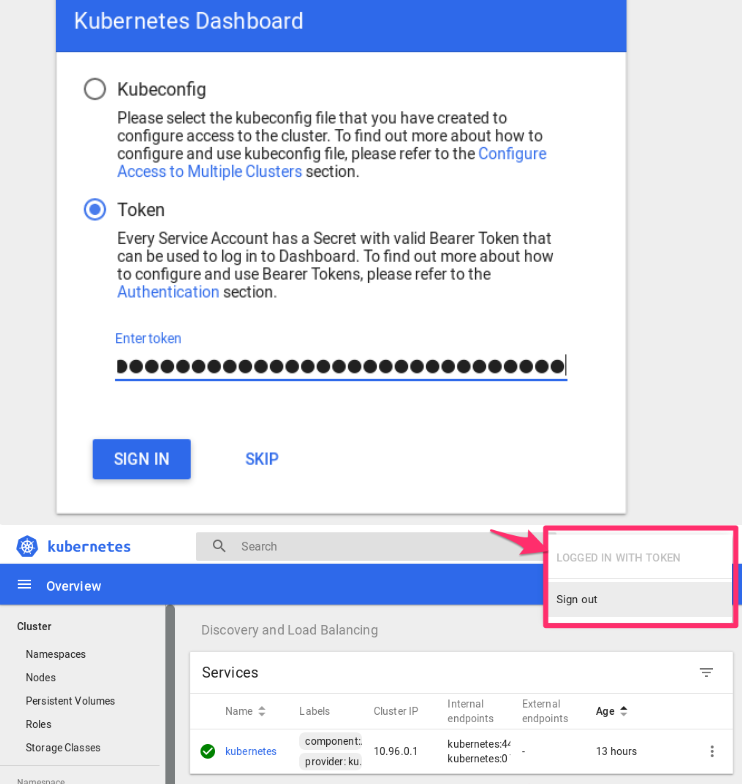
Copy this token and paste it under the token button.
Now you have Logged in to the Kubernetes dashboard.
Step 6: How to Delete Kubernetes Dashboard Services?
To delete the Kubernetes dashboard Services, 1st check where the services present that we want to delete. i.e., the path of those services.
To check that, run the given command:
Code:
daemon sets,replica sets,services,deployments,pods,RC --allAfter that, we can delete services with their paths
kubectl delete replica sets/kubernetes-dashboard -n Kube-system
kubectl delete svc/kubernetes-dashboard -n Kube-system
kubectl delete deployments/kubernetes-dashboard -n Kube-system
kubectl -n Kube-system delete $(kubectl -n Kube-system get pod -o name | grep dashboard)
Step 7: How to Edit Kubernetes Dashboard Services?
To Edit Kubernetes dashboard Services, run the given command:
Code:
kubectl edit svc/kubernetes-dashboard -n kube-systemRecommended Articles
We hope that this EDUCBA information on “Install Kubernetes Dashboard” was beneficial to you. You can view EDUCBA’s recommended articles for more information.

