Introduction to InDesign Align
InDesign Align is a very helpful and necessary feature of this software that helps us properly align elements of the content of the design layout. We do two types of alignment in this software first one is aligned design element for create effect layout design, and the second one is to align text content for managing space as well as arranging text in a good manner. InDesign offers us a whole panel of Align with some adjustable parameters option, and it also offers a Text Frame Option that allows us to align text along with the frame of that text. So today, in this article, i will tell you both ways through an example.
How to use Align in InDesign?
Align in Indesign can be a useful feature for you because it saves lots of time for properly aligning elements during arranging them. It also helps us maintain equal distance among the elements. So let me tell you all the important aspects and points of this align feature of InDesing.
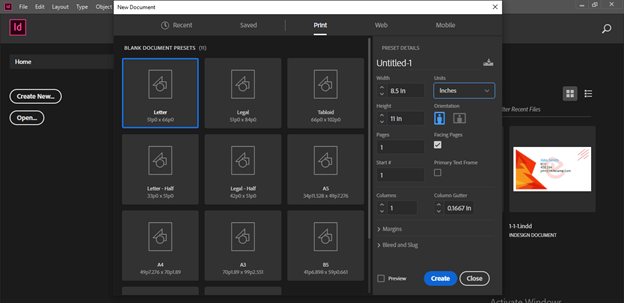
Let us take a new document first, and for that, i will choose the Letter size page from the New Document dialog box.
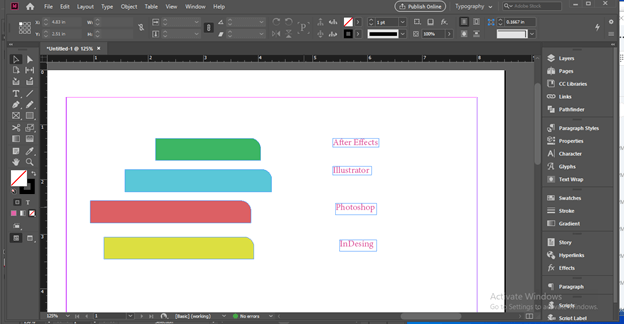
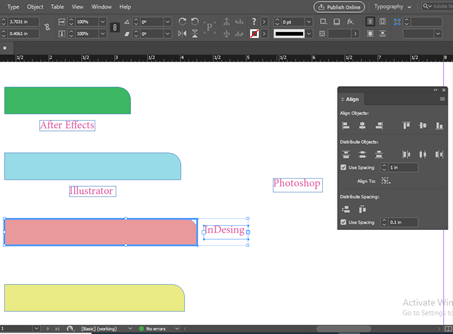
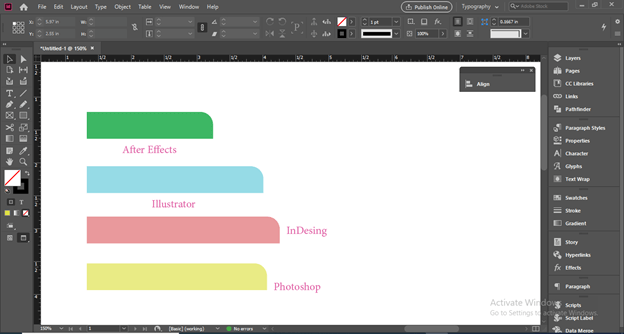
I have created these shapes for examples about this topic. I have drawn these shapes with the help of the Rectangle tool of the tool panel and just turn one corner of these rectangles into a round corner. If you want to know how to round corners in InDesign, you can go to my article “InDesign Round Corners”. I also typed some text here by using the Type tool of the tool panel.
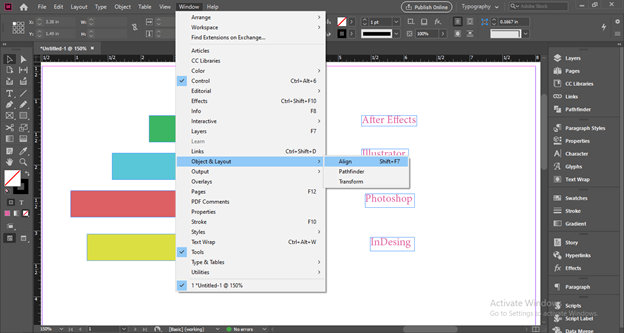
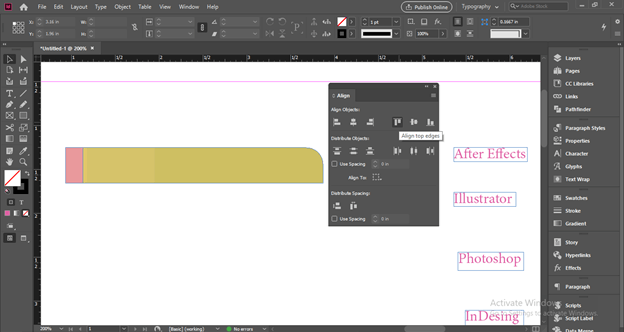
Now i will open Align panel to explain about align. If you haven’t aligned the panel on your user screen, you can go to the Window menu of the menu bar, and here in the scroll-down list of it, go to the Object & Layout option. In the new scroll-down list of this option, we have Align option. By clicking on it, we can enable its panel on our working screen, or we can simply press Shift + F7 as its shortcut key.
This is the Align panel, and we have a number of parameters in it. So let us discuss each one by one.

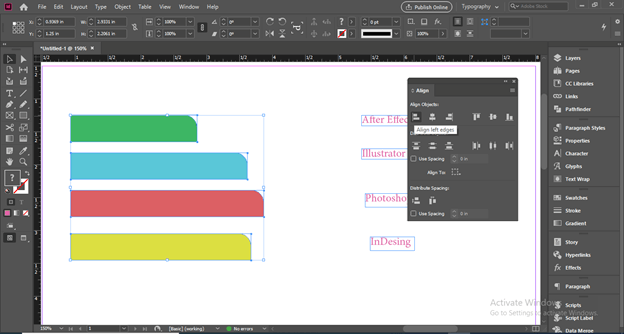
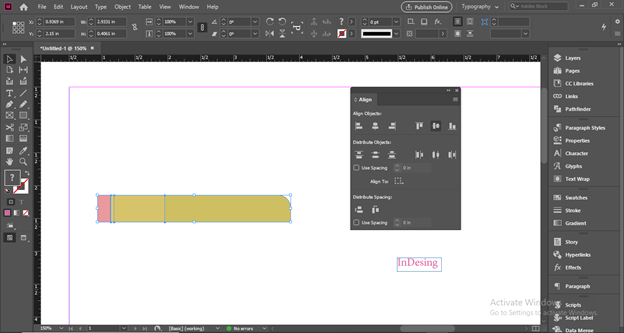
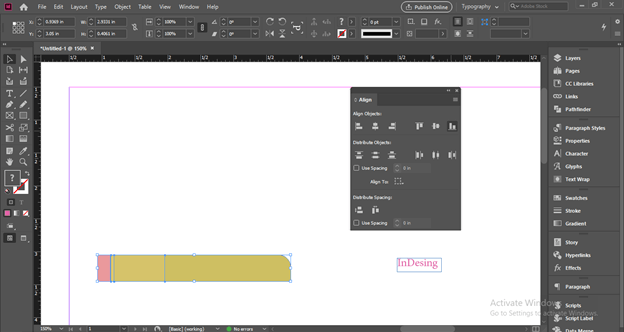
You have to select those elements which you want to align. For example, I want to align these rectangular shapes, so i will select them all and click on the ‘Align Left Edges’ option of the Align panel. It will align the left edges of all the elements.
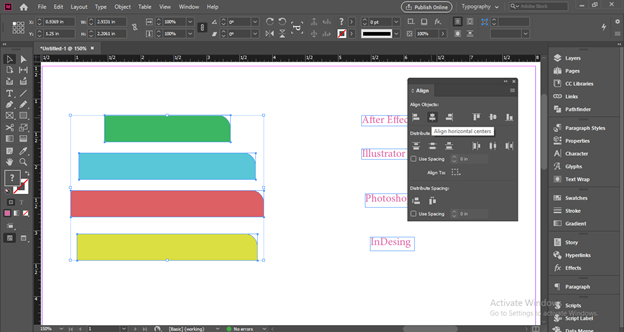
The next option is ‘Align Horizontal Centers,’ which means it will align horizontal centers of the elements, or you can say it will align elements from their centers.
Same as left edge align, we can align the right edges of elements by clicking on this option of Align panel.

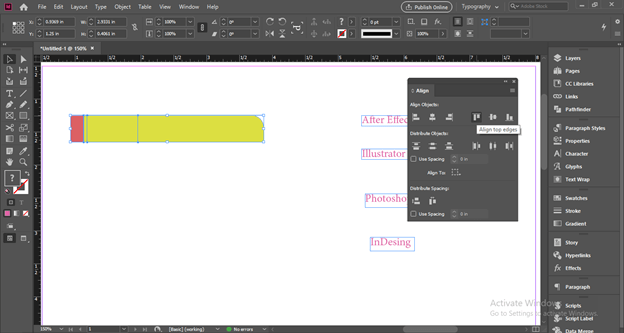
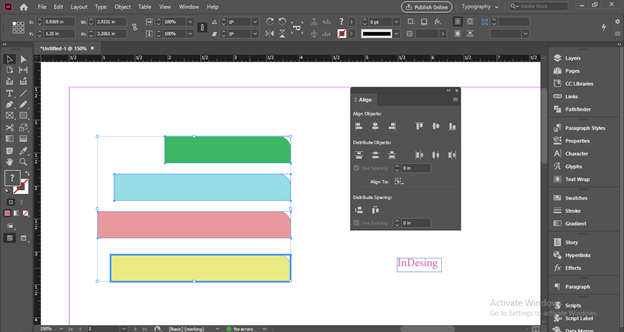
If we click on the ‘Align Top Edges’ option, then it will align all the top edges of elements. Here the top element is not visible to you because it is on the bottom layer.
Let me down the opacity of these three shapes a little bit.
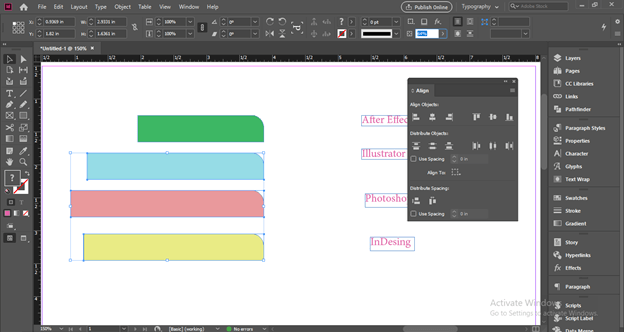
And align them again, and you can see all the elements align from the top edge.
Same as we can align from the center by the next option.
Or align them from the bottom from the next option of center option.
If you want, you can assign any element as a key element that means all the other objects will align according to the chosen key element. So, for example, first, select all the elements which you want to align, then make click on the element which you want to make a key element. Once you make a click, you will have a blue rectangular selection around the key element.
Now i will choose the first align option, and it will align all other elements with the left edge of the chosen key element.
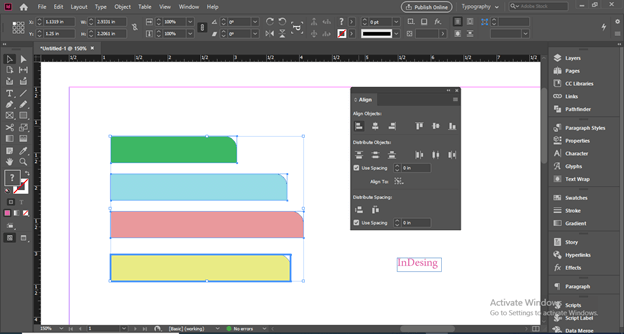
Now i will place these elements at a different distance.

After selecting them, i will click on the ‘Distribute top Edges’ option.
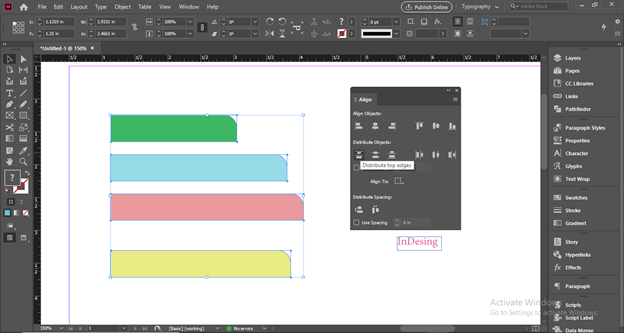
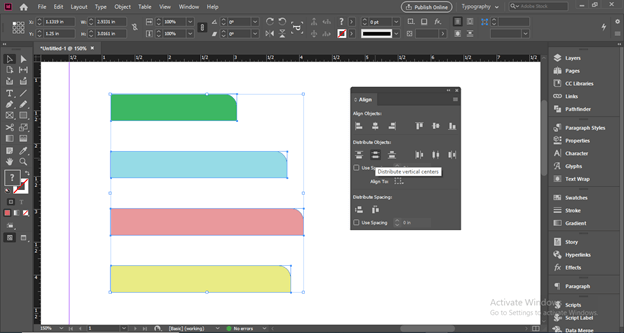
And it will align all the top edges of elements at equal distance. If we choose ‘Distribute Vertical Centers’, then it will align the center of elements at equal distance.
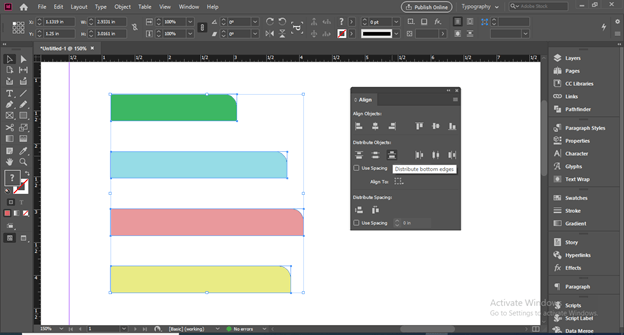
Same as ‘Distribute bottom edges’ will align bottom edges of elements at equal distance.
Now i will arrange these elements horizontally.

So after selection, i will click on the ‘Distribute Left Edges’ option.

And it will distribute left edges at equal distances horizontally. So ‘Distribute Horizontal Centers will work the same as ‘Distribute Vertical Centers.

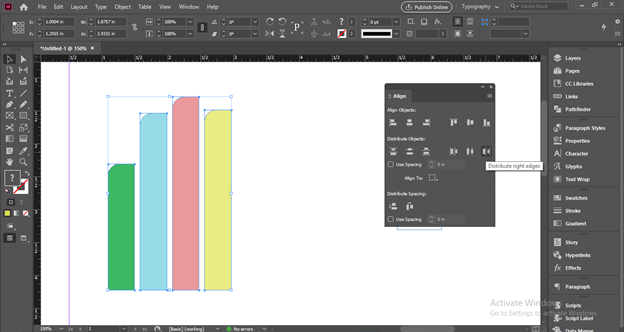
‘Distribute Right Edges’ will align right edges at equal distance horizontally.
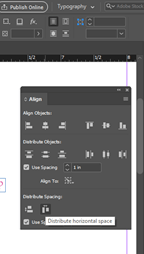
You can assign any value for distributing distance. For this, enable the ‘Use Spacing’ option by click on its check box and enter your desired value. For this time, i will enter 1 inch as its value.
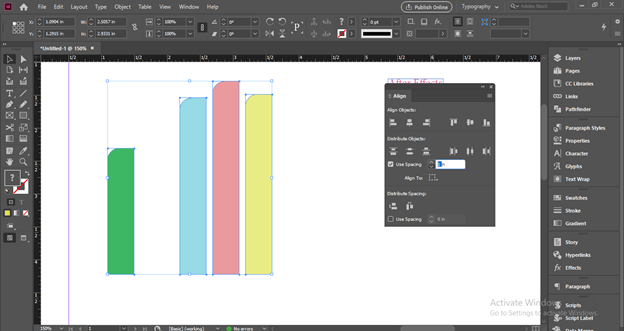
And now, if i click on any distributing align option. It will align them at a distance of 1 inch.

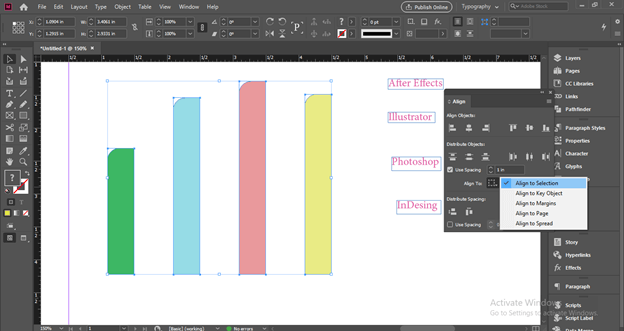
Here below to spacing option, we have the ‘Align To’ option, and through which we can choose according to which we want to align other objects.
Now i will select this text with this green shape and make this shape a key element.
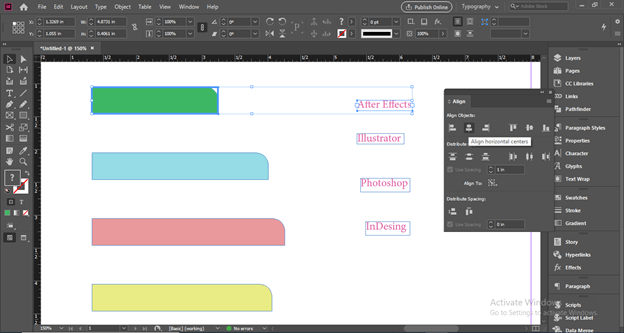
Then align this text at the center of this shape. After that, i will click on Distribute Vertical space option.
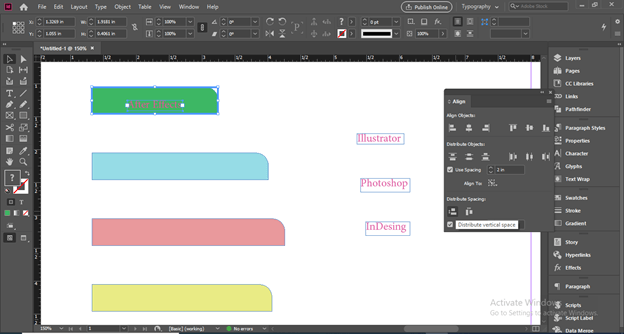
And it will align this text vertically at some distance of this shape.
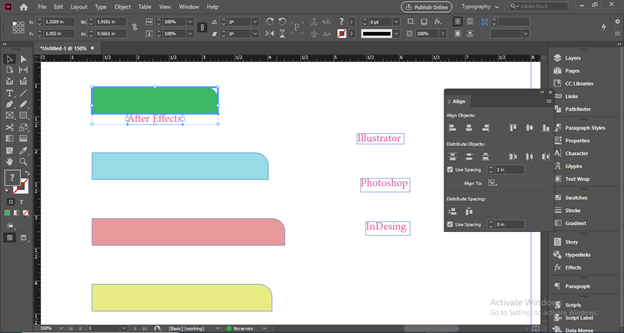
If i will enter some value for spacing here.
Then you can see if we repeat the same option, then it will align properly with our text at some distance.

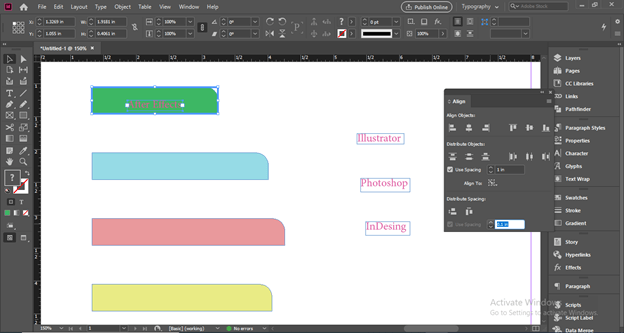
We have a horizontal spacing option for horizontal alignment.
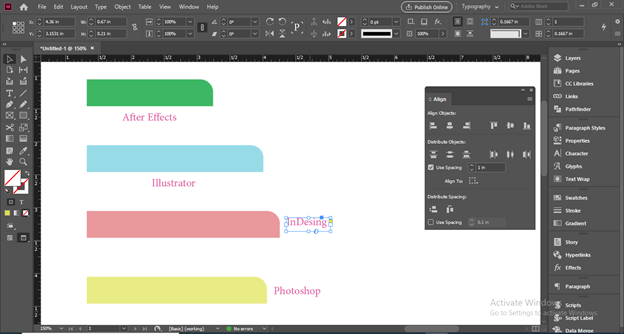
You can see the text is not perfectly aligned with the center of this pink shape. The reason is that text is not aligned with the text frame.
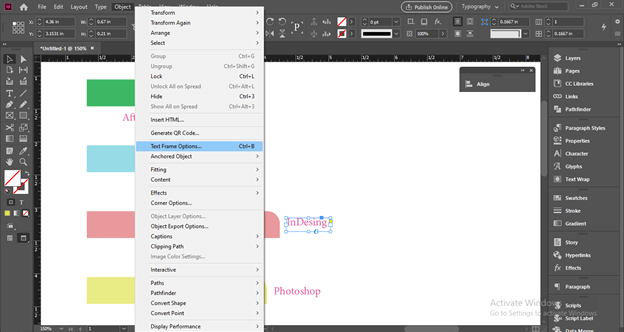
For this, choose Text Frame Options from the Object menu.
And choose the Center option from the Align option of this panel.
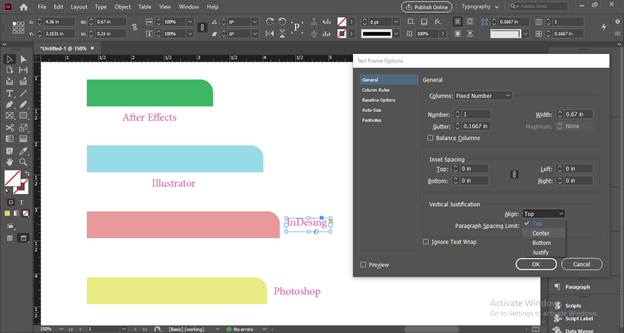
Make sure Preview is on.

This way, we can make a good alignment.
Conclusion
I am sure you have been analyzed these things which we have been discussed above about align in InDesign, and you have learned lots of techniques for align the content of the design layout. Now you can play with the parameters of align panel to have more commands on it.
Recommended Articles
This is a guide to InDesign align. Here we discuss How to use Align in InDesign and have learned lots of techniques for align the content of the design layout. You may also have a look at the following articles to learn more –
