Updated August 9, 2023

Introduction to InDesign Document Setup
The following article provides an outline for InDesign Document Setup. The core purpose of working on the InDesign document is typesetting, layout designing, and pre-press activities. The software is designed to handle the changing technologies in the publishing industry. Many young designers and freshers assume they can use InDesign for graphics creation. They often tend to misinterpret the software as other graphics designing tools like Photoshop, Illustrator, or CorelDraw. But InDesign doesn’t work that way, mainly when dealing with image files.
InDesign can handle all popular formats of images, such as JPEG, TIFF, EPS, PDF, and every Adobe image format. But what you believe is happening while you place an image on your InDesign document setup is entirely different from your perception. The image you just placed is not a copy of the image you created but a preview taken from the folder you obtained it from. This is one of the major differences between graphic designing software and publishing software. Unlike creating a copy image in designing counterparts, InDesign mirrors the image on its artboard.
Importing Images is a different process in InDesign compared to other designing software. We will discuss the methods of how to import the images in InDesign.
Before creating an InDesign document setup, you should remember that Adobe InDesign is software used for publication, and it is impossible to create high-end graphics with this software. Whatever image or graphic you want to place into the layout should be prepared in other software like Photoshop, Illustrator, or Coreldraw and brought into InDesign readily. So keep your images and graphics ready before you reach the layout stage.
Steps to Insert an Image in InDesign Document Setup
Given below are the different steps to insert an image in InDesign Document Setup:
Step 1: Place the Image into an InDesign Artboard
Placement of images into the InDesign artboard is the proper method. Placing is different from copying an image, and the activity doesn’t end by simply placing.
Copying an image creates a copy of the original image, which acts as an independent file from its creation. It doesn’t rely on any of its work on the original file, and it affects the parent image anymore.
Placing an image in InDesign works differently. When an image is placed into the artboard, it navigates the software to identify and create a mirror image of the parent file. Unlike the copy, which is independent, a mirror image is dependent on the parent file. If a parent file is moved or deleted from the original location, there are higher chances of losing the image in the output.
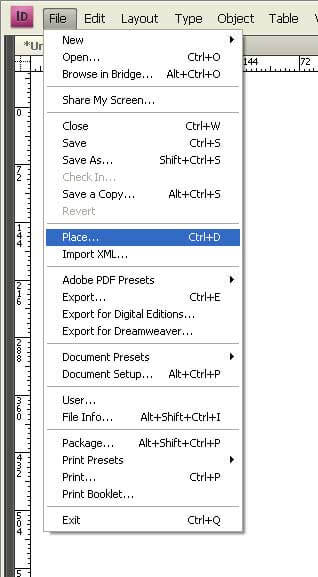
How to Place an Image?
You can place an image into the artboard in two ways.
- You can use the shortcut key Ctrl + D or by following through.
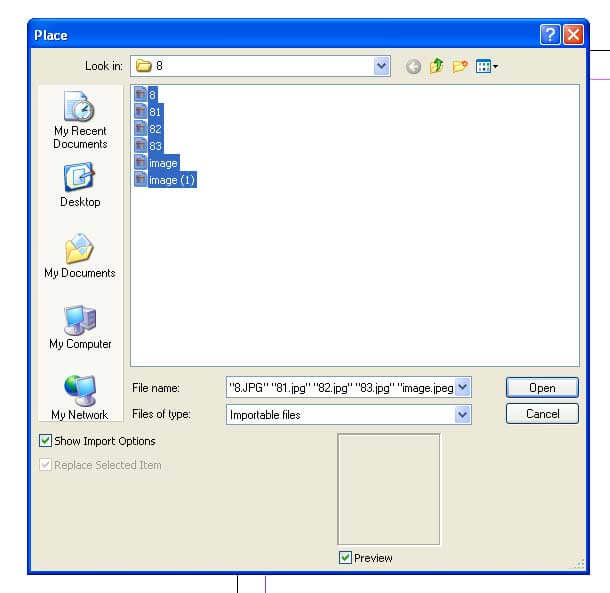
- File > Place. Navigate to the folder where your graphic is located.
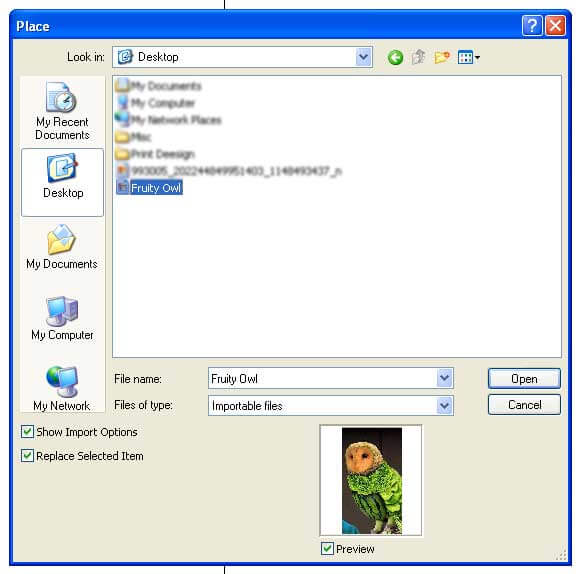
Once you locate the graphics file and double, click to place the file. You will see the cursor changes to a thumbnail image file. Click the icon where you want to place the image. The problem with this method is you have to resize the image if the original graphic is larger than the size of your layout.
In such a case, you can choose another method.
Locate the graphics file and double-click to place the file. You will see the cursor changes intention in a thumbnail image file. Click and hold the mouse button and drag the image into the layout as much as you want. This avoids the burden of resizing your image in the case of larger image sizes.
Step 2: Importing the Image into an Existing Frame
This method will work well when your graphics are created exclusively to suit the sizes of the layout. It happens mostly in the case of publications where the text and image frames are premeditated. The method saves more time, usually spent on resizing and adjusting the positions of the image.
When your image file should fit inside an existing frame, do the following:
Select the frame and go to File > Place.
Navigate to the image file and click ok.
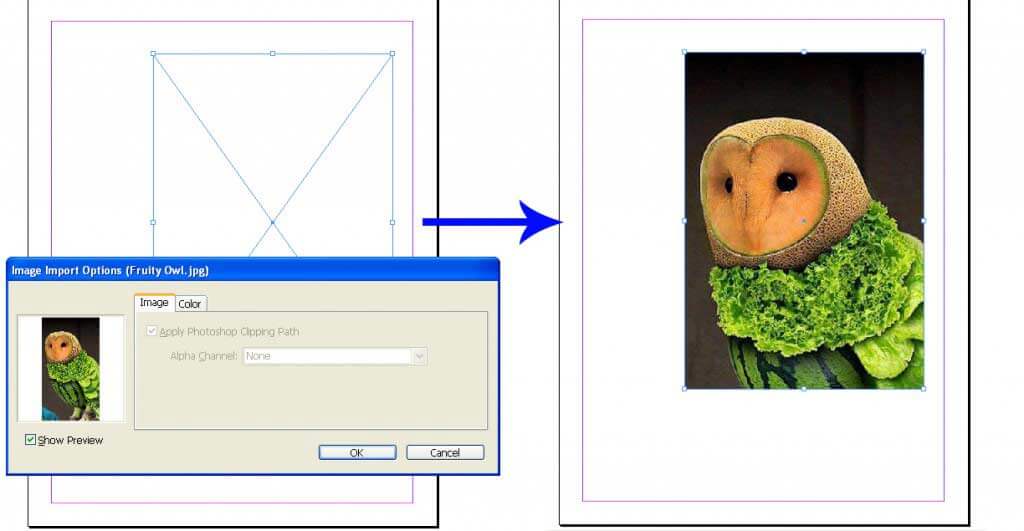
That’s all! Your image file is there in the existing frame. But the job is not yet finished unless your graphic is pre-visualized and your frame matches the image’s dimensions; your graphic will not be displayed clearly. You have to make little adjustments to get the right look you want.
Adjusting the image in the frame:
In most cases, InDesign crops the image and displays the part inside the frame. In case you want the entire image to be applied inside the frame, there are a few options you can choose from. But adjustments are not always successful because it depends on the dimensions of both frame and the image. To completely fit an image of a square shape into a rectangular shape frame is a tough job. However, InDesign has its set of suggestions that will help you to make a possible choice.
Check the image adjustments through the below method.
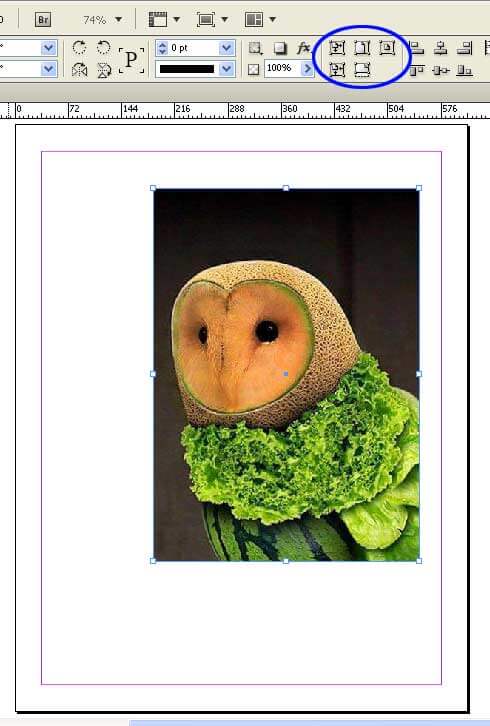
Window > Control
The control doc is visible now, where the options sit just above your InDesign document setup. InDesign provides five different options to use for the adjustment of images. You can choose the best possible solution you can have for it.
Adjust the Image inside the Frame:
Once you finished, adjust the frame and the image size. It is time to position the frame where you want to. Now, if you want to move the image inside the frame to attain the perfect frame on the page, you should only move the image without disturbing the frame. As the frame size and position are already set.
For this job, we will depend on the Direct selection tool. It helps us select the frame but allows us to work on the image inside it.
To know how to do it, please follow the guidelines below:
Press A or manually select the direct selection tool from the toolbox.

Click on the frame, and you will find a brown-colored frame that appears, which indicates the original size of the image, along with the portion of the image that is masked out of the frame. Hover around the brown box, and the cursor changes into a hand tool that helps you to easily move the image without affecting the size or position of the frame. Adjust the image until your intended look is achieved.
Step 3: Placing Multiple Images into your InDesign Document Setup
As we finish, how to place and adjust a single image. It is time to know how to place many images into the InDesign markup document and start working on it conveniently.
Once again, placing is the only way to bring images into the InDesign file correctly. Placing is the right method to follow in the case of multiple images.
To place images into the InDesign document setup, first, make sure no object is selected in your document.
Go to File > Place
Select every image which you want to place in the InDesign markup document.
You can see the cursor holding the thumbnails of the images you selected. You will also find the total number of images you told InDesign to place inside the document. If you selected five images, the cursor would display the number 5 beside it. Using the up and down arrow keys, you can check the images in thumbnail mode.
Click one after one to place the images on the artboard.
Step 4: Creating a Grid with Images
Arranging multiple images is a tough and tedious job to do. Most of the time, we want to use images of a similar size or in a grid. If anyone of these is your intention, InDesign has a quick fix.
Before placing the images on the artboard, hold the shift/ctrl keys together. The cursor immediately changes its shape and displays a grid. Continue to hold the shift + Ctrl key and drag the grid to the desired size. Do not release the mouse button so quickly; grids have more to gain. If you place more images than the grid shows by default, you should hold the mouse button and press the upper and lower arrow keys and side arrows to increase the number of rows and columns in the grid.
Hold the Ctrl key and use the arrow keys to control the space between the rows and columns. Release the mouse button, and InDesign has a perfect grid ready for you.
In case you selected more graphics, not all are displayed in the grid. Don’t worry; look at the cursor as it shows the remaining graphic images missing in the grid. InDesign reminds you that the grid cannot accommodate everything simultaneously as more images are selected. Now, you can start clicking individually or drawing your next grid.
When you follow the right method, inserting images is an easy and exciting job, as we just witnessed in this post.
Recommended Articles
This has been a guide to InDesign Document Setup. Here we have discussed the 4 best steps to insert an image in InDesign Document Setup, which is entirely different from your perception. These are the following external link related to the InDesign document setup –
