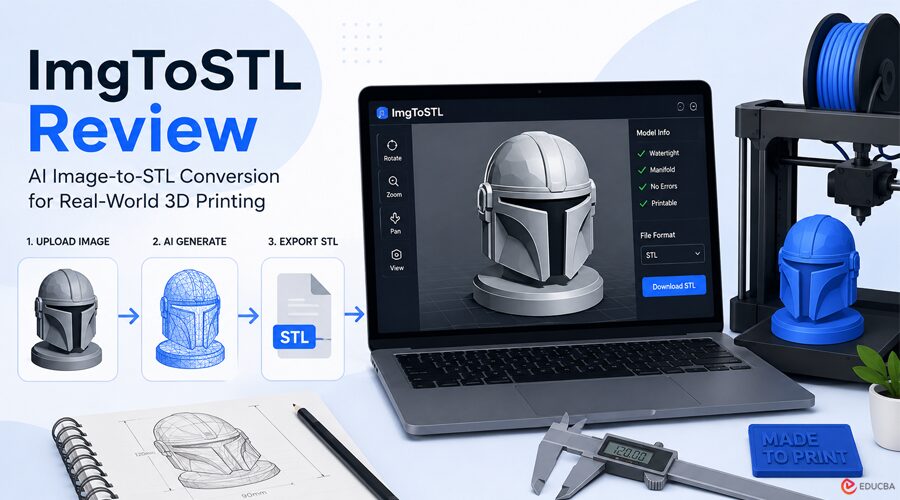
Turning a sketch, concept image, or product photo into a printable 3D model has traditionally required advanced CAD skills or the assistance of professional designers. The process often involved lengthy modeling sessions, expensive software, and outsourcing costs, which could delay production. The rise of AI-powered 3D generation tools promised to simplify this workflow. However, many early solutions produced visually impressive models that failed practical 3D printing requirements due to non-manifold geometry, thin walls, and other mesh issues. This ImgToSTL review explores whether modern AI image to stl conversion technology is finally ready for real-world 3D printing applications.
(Image Source: ImgToSTL)
A Different Approach: Designed for Printing, Not Just Visualization
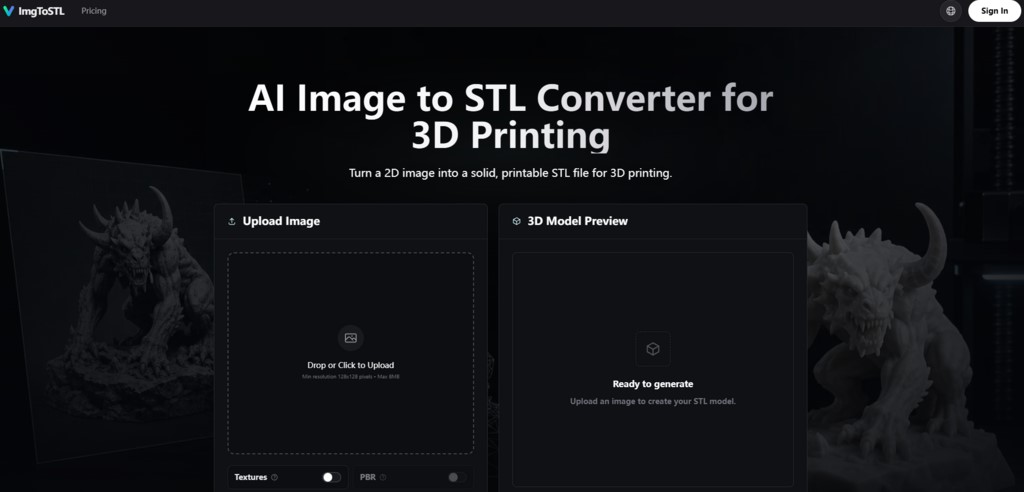
Many AI 3D generators prioritize visual presentation and animation-ready models. While these outputs may look appealing on screen, they often encounter problems when imported into slicers such as Cura or PrusaSlicer. ImgToSTL approaches the process differently, focusing on printable geometry from the outset. The AI analyzes uploaded images, identifies silhouettes, depth cues, contrast, and subject boundaries, and then generates a mesh specifically designed for 3D printing workflows.
One notable feature is the preview functionality. Users can inspect and rotate the generated model before exporting, making it easier to evaluate the geometry before spending credits or moving to the printing stage. The resulting models generally emphasize structural integrity and printable forms rather than visual embellishments. Product photos, concept designs, and character illustrations often retain recognizable proportions while avoiding many of the floating artifacts commonly seen in AI-generated 3D models.
How Does ImgToSTL Work?
The platform follows a straightforward three-stage workflow:
1. Image Analysis
The AI evaluates:
- Subject shape
- Silhouette
- Contrast levels
- Visible depth information
- Object boundaries
2. Mesh Generation
Based on the image analysis, the system generates printable 3D geometry. Unlike traditional heightmap-based converters that simply extrude image brightness, ImgToSTL attempts to interpret the object as a three-dimensional form.
3. STL Export
After generation, users can export the model as an STL file for use with:
- Cura
- PrusaSlicer
- Bambu Studio
- Blender
- Meshmixer
- Fusion 360
- Tinkercad
The workflow prioritizes creating usable printable meshes rather than producing purely visual renders.
ImgToSTL Review: Real-World Testing Scenarios
To evaluate practical performance, the platform was tested across several common 3D printing use cases.
1. Miniatures and Tabletop Props
A character concept illustration with a clear silhouette and simple background served as the first test. The AI successfully generated a model that captured the character’s overall proportions and pose. While additional refinement would improve final print quality, the generated mesh provided a strong starting point compared to building the model from scratch. For tabletop gaming enthusiasts and miniature creators, the workflow offers a practical shortcut from concept art to printable figurines.
2. Replacement Parts from Photos
The second test involved a photograph of a broken plastic bracket containing thin features and a more complex profile. The generated mesh accurately represented the overall shape, although some thinner elements benefited from manual reinforcement in Blender. For rapid prototyping and replacement-part development, the generated model significantly reduced the amount of manual modeling required.
3. Sketch-to-Model Conversion
A conceptual jewelry sketch was used to evaluate sketch interpretation capabilities. The resulting model accurately reflected the intended design and could serve as a prototype for further refinement in CAD software. This workflow may be especially useful for designers who need to move quickly from early sketches to physical models.
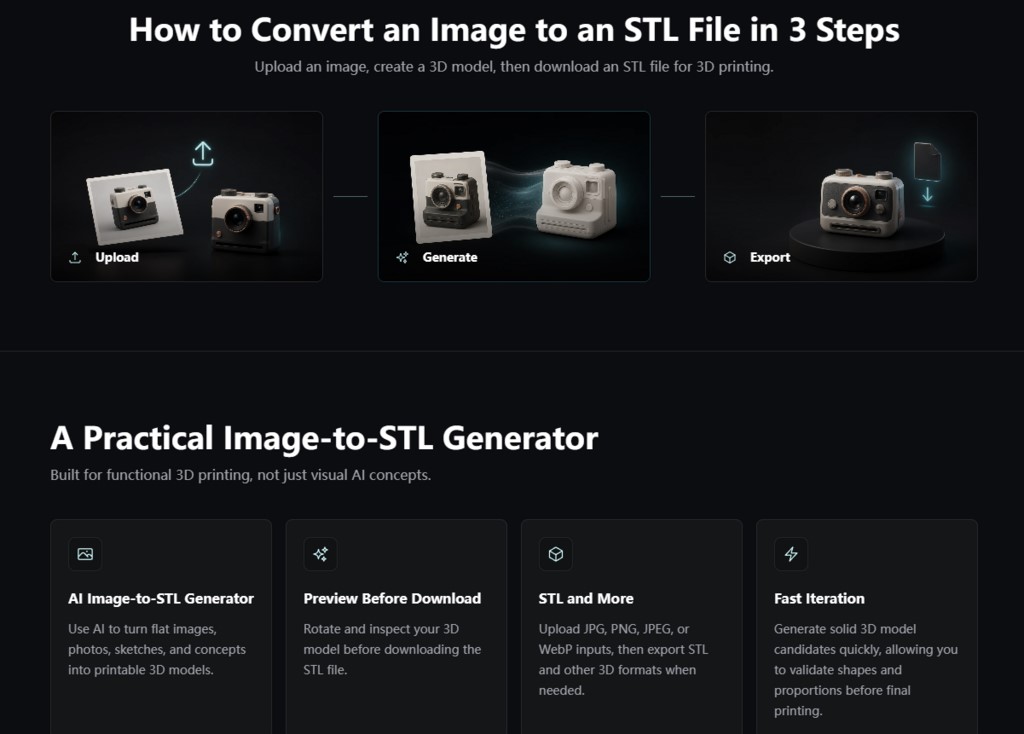
How Does the Conversion Process Actually Work in Practice?
The site outlines a three-step process, and in practice, it’s as straightforward as advertised.
(Image Source: ImgToSTL)
1. Upload: Getting the Image In
The upload step accepts JPG, PNG, JPEG, and WebP inputs. The minimum resolution is 128×128 pixels with a maximum file size of 8MB. In my testing, the best results came from images with a centered subject, strong lighting, visible edges, and a simple background. Product photos, toy references, character concepts, props, sketches, and simple part photos performed well. Thin wires, clear objects, shiny surfaces, low-contrast photos, and cluttered backgrounds gave weaker results, which matches the site’s guidance.
2. Generate: Creating the Mesh
The generation step is where the AI does its work. The tool creates a solid 3D model candidate based on the uploaded image. The processing time varies with image complexity, but the site is designed for rapid iteration, allowing you to validate shapes and proportions before final printing. In my experience, the generation produced usable results on the first attempt for clear, well-composed images. For more challenging inputs, the results required some adjustment or a second attempt with a better input image.
3. Export: Getting the STL File
The export step delivers the STL file for slicing and 3D printing. The converter is designed around STL-oriented export while keeping GLB, OBJ, and FBX options available where supported. After downloading the STL, the site recommends inspecting the mesh before printing. STL files store geometry only, so scale, wall thickness, orientation, supports, and material settings should be checked in your slicer or modeling tool. The recommended tools include Cura, PrusaSlicer, Bambu Studio, Blender, Meshmixer, Fusion 360, and Tinkercad.
ImgToSTL vs Other Modeling Approaches
To give a clearer picture of where this tool fits into a practical workflow, here is a comparison-based testing across different use cases:
| Aspect | ImgToSTL | Traditional Heightmap Converters | Full CAD Modeling |
| Learning Curve | Minimal—upload and generate | Minimal—upload and export | Steep—requires training and practice |
| Output Quality | Solid meshes, printable | Flat extrusions, limited geometry | High precision, fully controllable |
| Speed | Minutes per generation | Seconds per generation | Hours to days per model |
| Best Use Case | Rapid prototypes, concepts, props | Lithophanes, reliefs | Engineering, precision parts |
| Post-Processing Needed | Often minimal, sometimes cleanup | Usually significant | Varies by design intent |
| Cost Per Model | ~$0.87–$1.24 per generation | Often free or low-cost | Software licensing + labor |
The comparison highlights where ImgToSTL Review fits within the broader 3D design ecosystem. It occupies a middle ground between simple image extrusion tools and full professional CAD workflows.
Realistic Limitations to Keep in Mind
A balanced ImgToSTL review must also acknowledge the platform’s limitations. Not every image converts into a perfect printable STL file.
Results are generally strongest when images contain:
- Single subjects
- Good lighting
- Clear contrast
- Simple backgrounds
Additional cleanup may be required for:
- Thin structures
- Complex geometries
- Low-contrast images
- Crowded scenes
- Flat logos
Tools such as Blender, Meshmixer, and slicer repair utilities can help refine generated models before printing.
Who Should Use ImgToSTL?
ImgToSTL is particularly suitable for:
- Makers and Hobbyists: Users looking to quickly transform visual references into printable 3D models.
- Product Designers: Professionals seeking a faster path from sketches and concepts to physical prototypes.
- Cosplayers and Prop Builders: Creators who need printable parts based on artwork, reference images, or character concepts.
The platform is less suitable for:
- Precision engineering applications
- Highly detailed production miniatures
- Projects requiring exact dimensional tolerances
For these scenarios, traditional CAD software remains the preferred solution.
The Pricing Model and What You Get
ImgToSTL uses a credit-based pricing model.
Starter Pack
- 800 Credits
- $9.90
- Approximately 11 generations
Pro Pack
- 3,000 Credits
- $29.90
- Approximately 42 generations
- Priority support included
Max Value Pack
- 8,000 Credits
- $69.90
- Approximately 114 generations
- Priority support included
All paid plans include:
- Commercial usage rights
- Access to all AI models
- One-year credit validity
The commercial license allows generated models to be used for product development, physical sales, and commercial projects.
(Image Source: ImgToSTL)
Final Thoughts
This ImgToSTL review demonstrates that the platform focuses on a specific goal: transforming 2D images into printable 3D meshes with minimal effort. Rather than competing with professional CAD software, ImgToSTL serves as a practical bridge between visual concepts and physical prototypes. While the generated models may still require occasional cleanup, the platform consistently produces printable starting points that can dramatically reduce modeling time. For makers, hobbyists, product designers, and creators seeking a faster path from image to print, ImgToSTL offers a useful, focused solution that delivers significantly better results than many AI-generated 3D modeling tools currently available.
Recommended Articles
We hope this ImgToSTL review has provided clear insights into AI-powered image-to-STL conversion and its real-world 3D printing performance. Check out these recommended articles for more insights and strategies to enhance your 3D design and printing workflow.
